COMPUTER
AIDED
ARCHITECTURAL DESIGN
Workshop 8
Notes,
Week of October 27, 2014
BRDF MATERIALS
Bidirectional Reflective
Distribution Function (BRDF) defined material is a physically
based description that examines how incident light on a a surface is
can be either reflected, absorbed or transmitted. BRDF describes
how much light is transmitted when it makes contact with specific
materials (for a more complete description see An Introduction on UCLA's computer science web site )
This tutorial is developed after the treatment http://viscorbel.com/vray-materials-theory/ posted on viscorbal.com
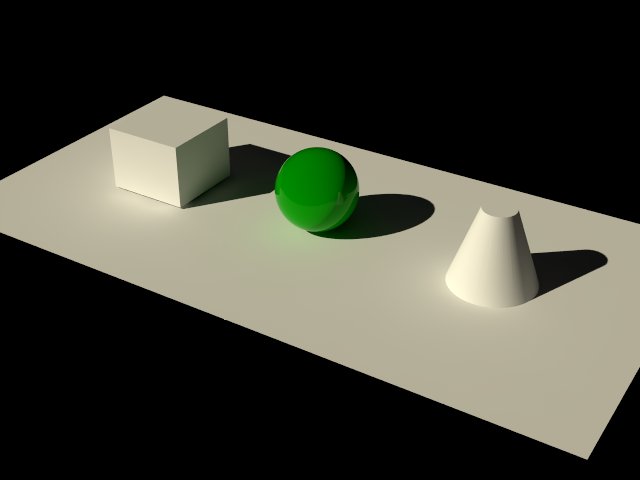
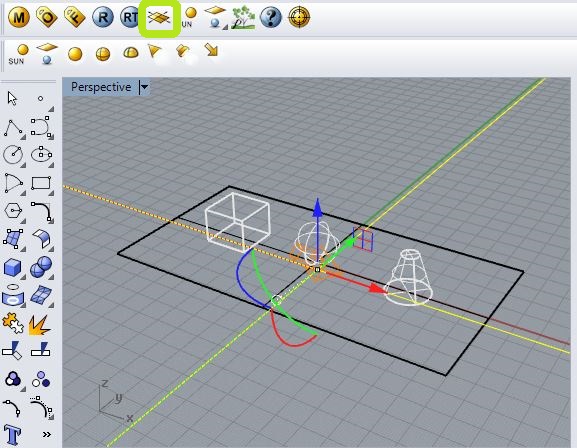
1.
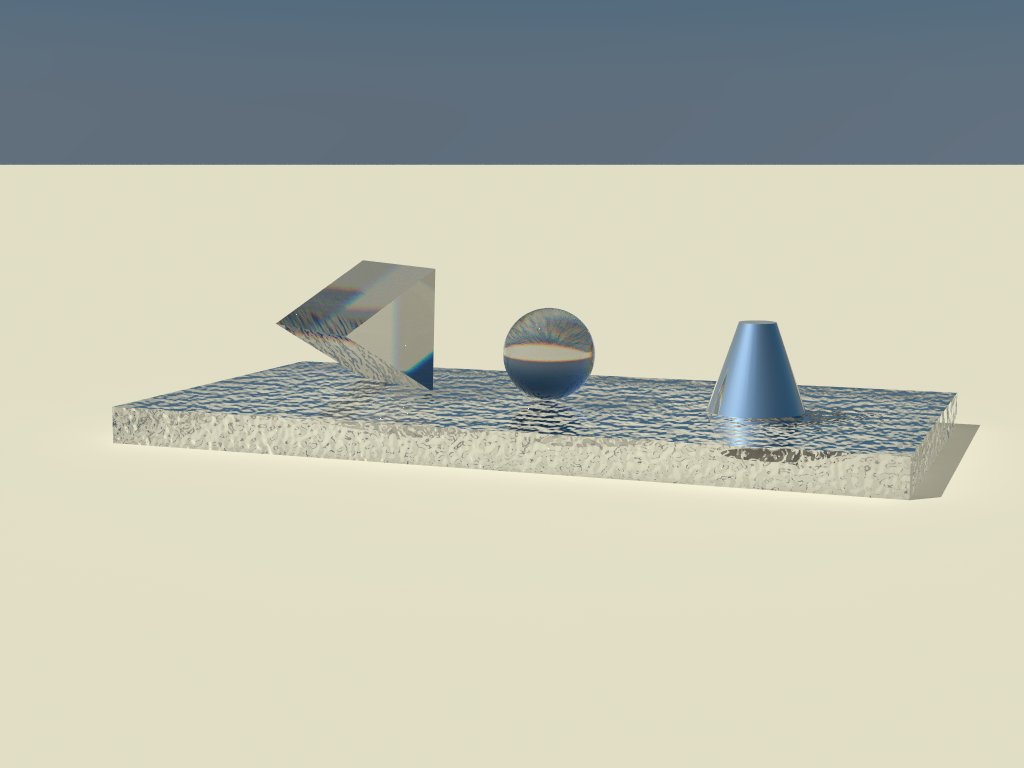
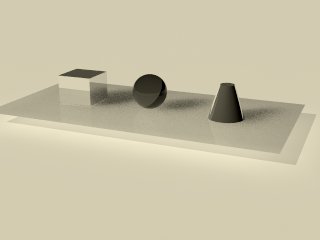
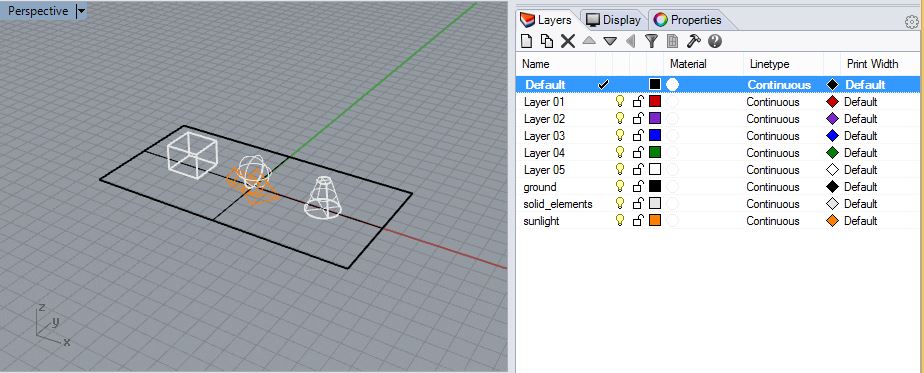
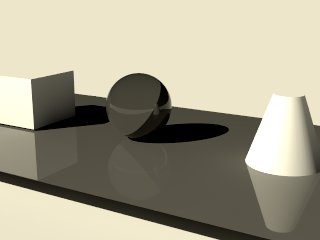
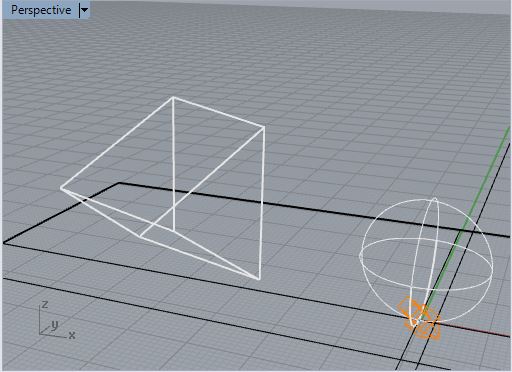
Create a Rhino File with a ground surface, box, sphere, truncated
cone and V-Ray sun light, and create the setup below using methods
covered in earlier tutorials. Create separate levels for a) the ground
surface, b) the box, sphere and truncated cone, and c)
V-Ray sunlight.
2. Within Rhino, go to the menu item "Render>Current Renderer>V-Ray for Rhino" to ensure that V-Ray is active.
3.
To activate the V-Ray material editor within Rhino, go the the menu
item "V-Ray>Material Editor", and in the dialog box that follows,
right click on the text "scene-materials" and create the a new type
material, a so-called "V-Ray material". Note that we will focus on "Basic
Parameters" and "BDRF", four of the six tabs included in the material
editor.
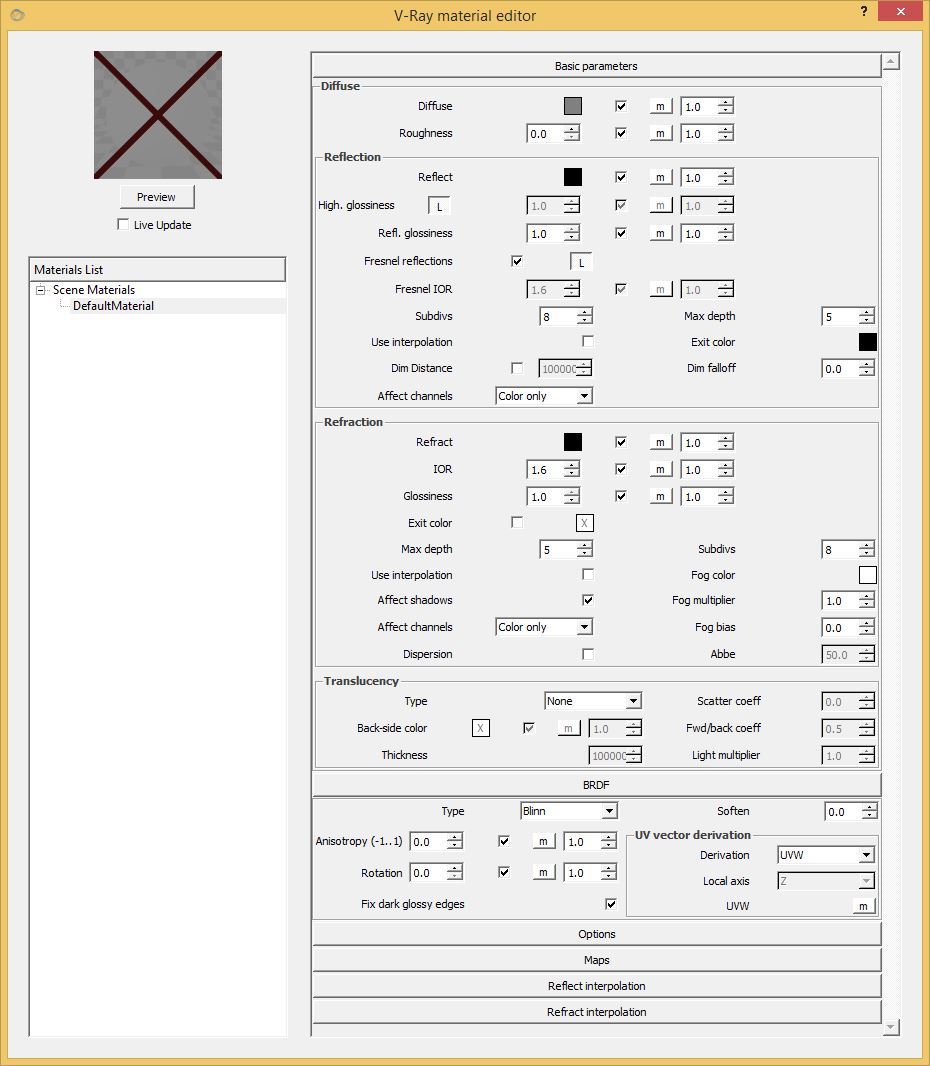
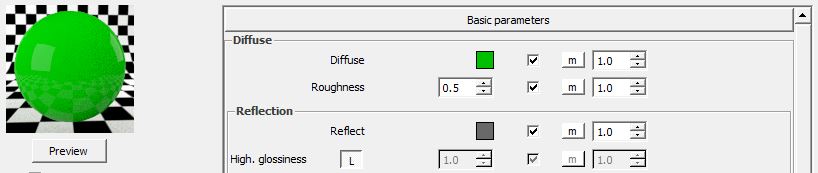
4. Right-click on the name "DefaultMaterial" and rename it "mySphere".
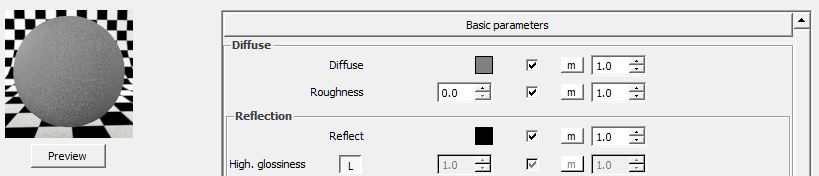
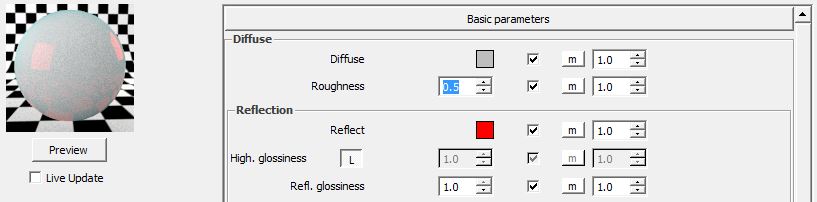
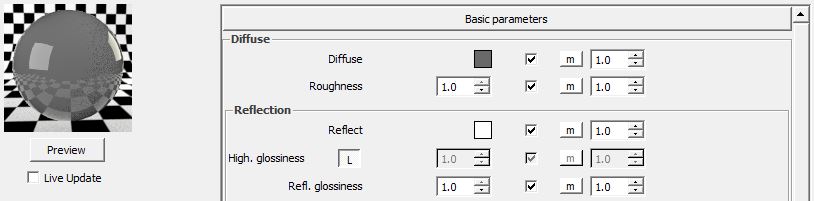
5.
Within "Basic Parameters", the Diffuse Color establishes the base color
of the material from the color selector and can also be specified in
terms of RGB and HSV format. The number associated with "Roughness"
controls the flatness of the material on a scale of 0 to 1. For
example, preview the material by selecting the preview button, then
make the color a light green, adjust the "Roughess" to 0.5, and preview it again.
Default settings:
Revised "Diffuse" setting:

Revised "Roughness"
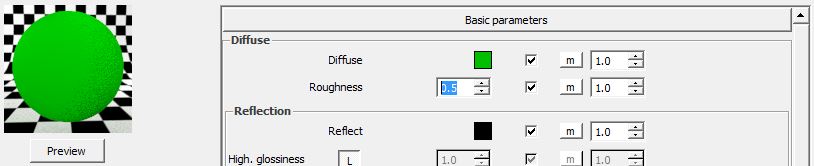
Note that adjusting the "Roughness" appears to soften and diffuse the highlight on the sphere making it look flatter.
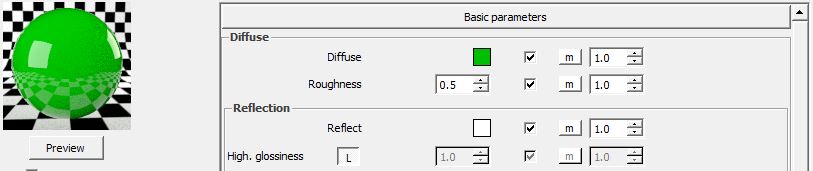
6. For the same material, adjust the "reflect" color to neutral gray and preview the result.
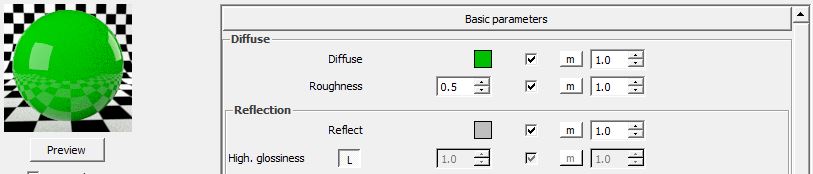
Note that a adjusting the reflective color towards white increases the apparent reflectivity of the sphere.
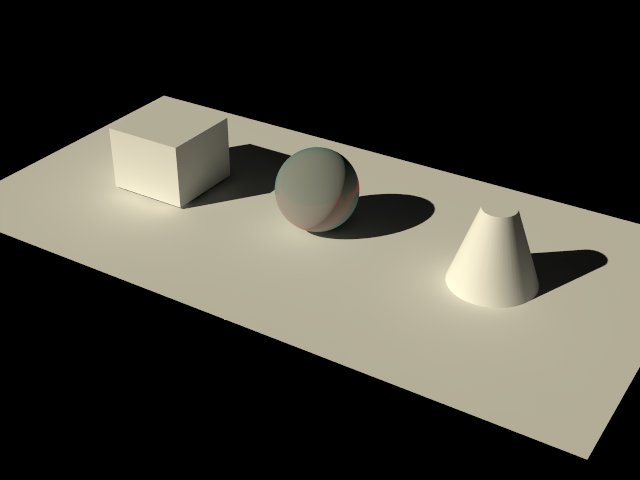
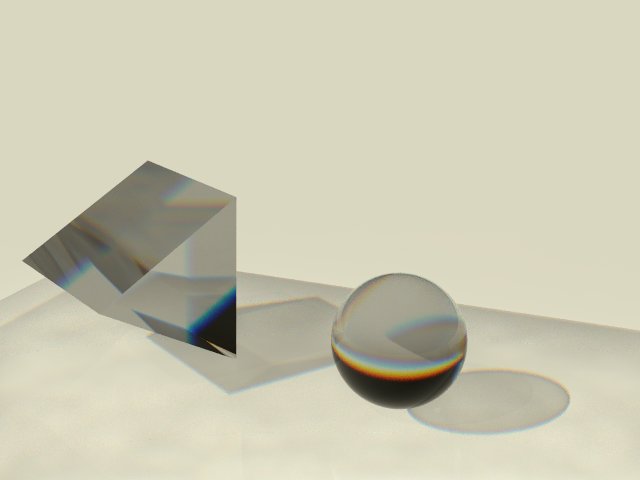
7. Apply the material "mySphere" to the sphere within Rhino and do a low resolution test rendering. Note
that at full white (the value is 255 on a grey scale range of 0 - 255),
there is very little remaining of the diffuse color in evidence as compared with the
second rendering of step 6 above.
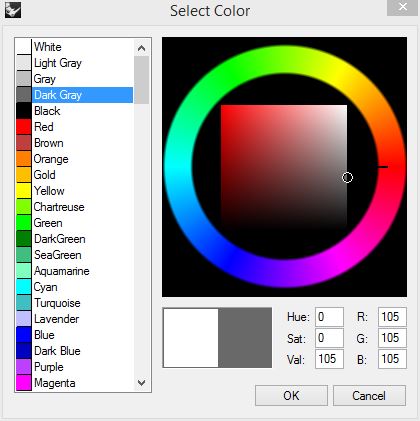
Changing the reflective color to "Dark
Gray" with the value 105 appears to restore more of the diffuse color
to the sphere.
This
is evident in the "Preview" sample of material editor as well as the revised
rendering. However, note that the appearance in the full rendering is
contextualized to the angle of the sunlight and the surrounding adjacent
colors and objects. V-Ray adheres to a conservation of energy rule that
requires that the sum of the reflective and diffuse light do not
exceed 100%. For example, if the reflective light is at a relative 70%
then the diffuse light is at a relative 30%.

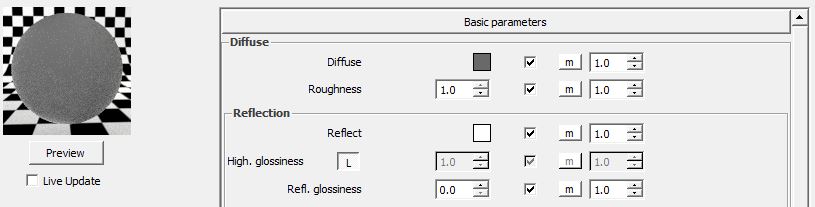
8.
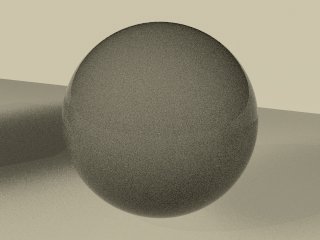
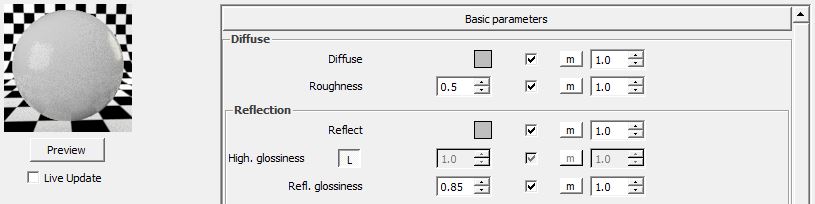
The "Reflection glossiness"property blurs the apparent reflectivity of the
sphere. Change the base color of the sphere to middle gray and preview the
sphere with "Reflection glossiness" at 1.0 (the default value).

Lower the "Reflection glossiness" to 0.85" and preview it again.
Restore
the "Reflective glossiness" to 1.0. Then note that by changing
the "Reflection" color to red, it is subtracted from the
color of sphere as a whole, leaving the balance of the surface a slight
tint of cyan. Cyan is the secondary color which results from combining the two
primary colors of blue and green.
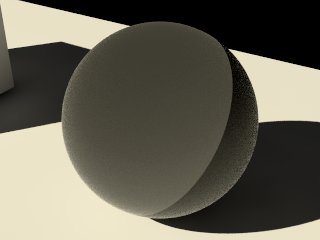
Within
the context of the full rendering, the reflective highlight appears
diminished and relocated to the bottom of the sphere. A light
cyan color appears over the upper half of the sphere as a whole.
Once again note that the conditions of the 3D model for the full rendering thus determine the degree to which the
pure "Preview" sample is represented.
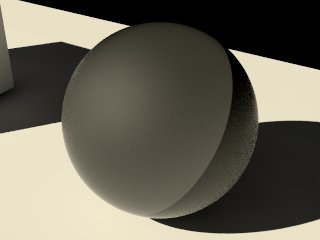
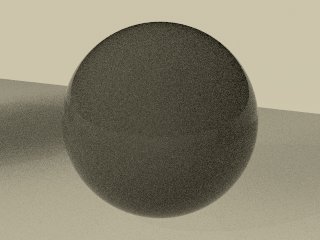
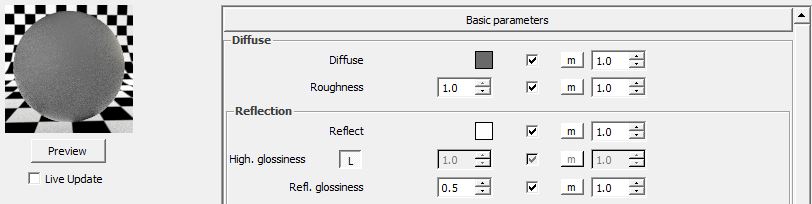
Restoring
the reflection glossiness to "white" in the following three adjustments
demonstrate the results of changing the value of "Reflective gloss"
0.0, 0.5, and 1.0 respectively:
Within the context of the Rhino model, we get in parallel three alternative renderings of the sphere:
Note
that the 3D modeling context of the rendering appears to establish more distinctly
the the preview renderings the differences between "Reflective glossiness" values of 0.0 and 0.5.
9.
The "Fresnel" parameter changes the strength for the reflection
depending upon viewing angle. For example, when viewing a lake a
relatively low angle, the reflectivity is relatively high. However,
when viewing it a greater angle, it decreases accordingly. That
is, the reflection is weaker as your viewing angle approaches the
surface normal (the direction perpendicular to the surface), and is
stronger as you approach an angle parallel to
the surface. The "Fresnel" IOR (index of refraction)
determines the level of the effect. That is, higher values indicate greater
effects at lower viewing angles.
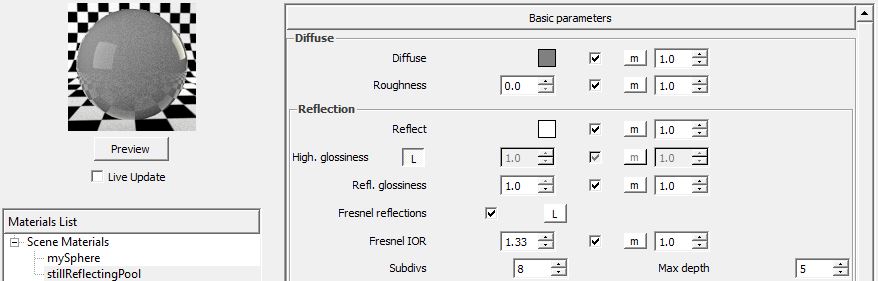
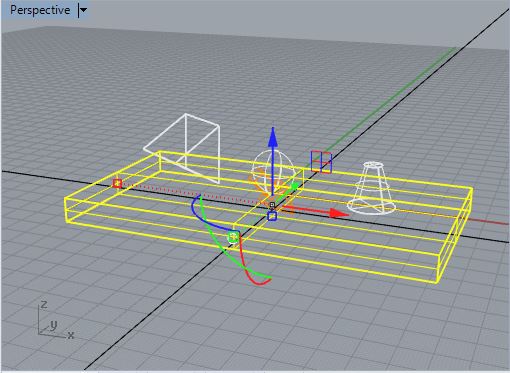
To explore this
directly, add a a "V Ray" infinite plane to the Rhino model , and
use the Gumball tool to place the plane slightly below the existing planar
surface.
Create
a new so-called type "V-Ray material", set "Reflect" color to white,
unlock the lock symbol "L" by clicking on it. The lock symbol "L" is adjacent to "Fresnel
reflections". Change its the value of "Fresnel IOR" to 1.33 which has been found to be a good setting for water.
Apply
the material to the original flat surface plane, and render it at a
high and then at a low low angle. Note the difference in reflection between the two angles in that the reflection is greater at the lower viewing angle:
 |  |
The "Fresnel IOR" values for some common materials (see http://viscorbel.com/vray-materials-theory/) are :
water 1.33
plastic 1.45
glass 1.5 - 1.8
diamond 2.5
compound materials like wood, stone and concrete 3 - 6
metals 20 - 100
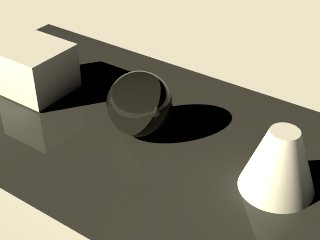
10.
Within the material editor, right click on the material
"stillReflectingPool" and select the option "Duplicate Material" . Change the material name to "metal1", change the"Fresnel IOR" to 20, and change the "Diffuse" color to light gray.
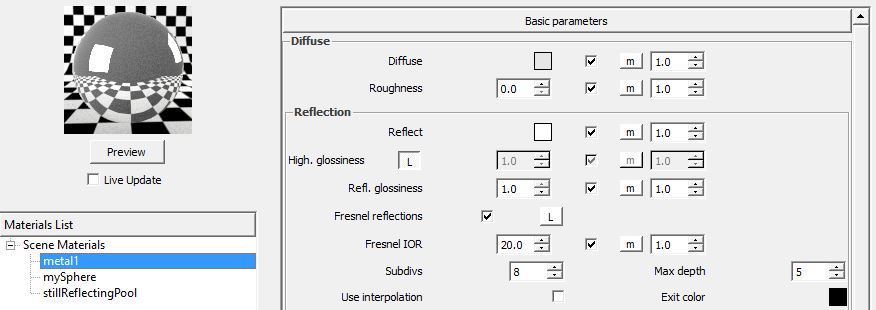
Apply
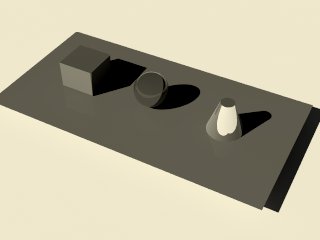
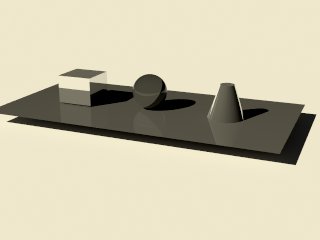
"metal1" to the box and the truncated cone within Rhino and
render it again at both a high and then at a low angle. Here the difference in angle of
view impacts both the context that is reflected by the planar surface as well as the strength
of the reflection.
| 
|
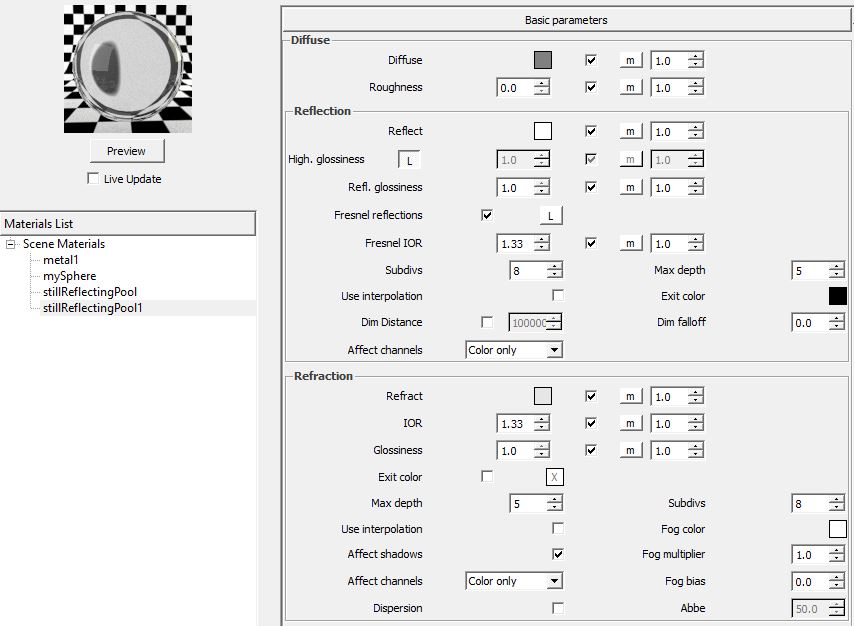
11.
Refractions also can be explored through an IOR number. Duplicate
"stillReflectingPool" to create a new material named
"stillReflectingPool1", change the "Refraction" color from black to
light gray to control transparency. Change also the refraction "IOR" to 1.33
and preview it:
Apply
the material to the original flat surface plane and render (see figure on left of the three below). Note that
decreasing the value of Refraction "Glossiness" from 1.0 to 0.5
and then to 0.0 correspondingly increases the apparent frostiness of the surface. However, it also does so
at increasingly much higher rendering times. Here are renderings for "Glossiness at
1.0 (left), 0.5 (center), and 0.0 (right) respectively.
12.
Apply the same material to the sphere. Decrease the value of
Refraction "Glossiness" for three separate renderings by
setting it to 1.0 , 0.5 and 0. The renderings for "Glossiness at
1.0 (left), 0.5 (center), and
0.0 (right) respectively are:
The following are IOR values from http://viscorbel.com/vray-materials-theory/:
Acetone 1.36
Actinolite 1.618
Agalmatoite 1.550
Agate 1.544
Agate, Moss 1.540
Air 1.0002926
Alcohol 1.329
Amber 1.546
Amethyst 1.544
Crystal 2.00
Diamond 2.417
Emerald 1.576
Ethanol 1.36
Ethyl Alcohol 1.36
Glass 1.51714
Glass, Albite 1.4890
Glass, Crown 1.520
Glass, Crown, Zinc 1.517
Glass, Flint, Dense 1.66
Glass, Flint, Heaviest 1.89
Glass, Flint, Heavy 1.65548
Glass, Flint, Lanthanum 1.80
Glass, Flint, Light 1.58038
Glass, Flint, Medium 1.62725
Gold 0.47
Ice 1.309
Ivory 1.540
Jade, Nephrite 1.610
Jadeite 1.665
Lead 2.01
Malachite 1.655
Methanol 1.329
Moonstone, Albite 1.535
Nylon 1.53
Onyx 1.486
Opal 1.450
Oxygen (gas) 1.000276
Oxygen (liq) 1.221
Pearl 1.530
Plastic 1.460
Plexiglas 1.50
Polystyrene 1.55
Quartz 1.544
Quartz, Fused 1.45843
Rock Salt 1.544
Rubber, Natural 1.5191
Ruby 1.760
Sapphire 1.760
Silicon 4.24
Steel 2.50
Tiger eye 1.544
Topaz 1.620
Tourmaline 1.624
Turpentine 1.472
Turquoise 1.610
Water (gas) 1.000261
Water 35′C (Room temp) 1.33157
Zirconia, Cubic 2.170
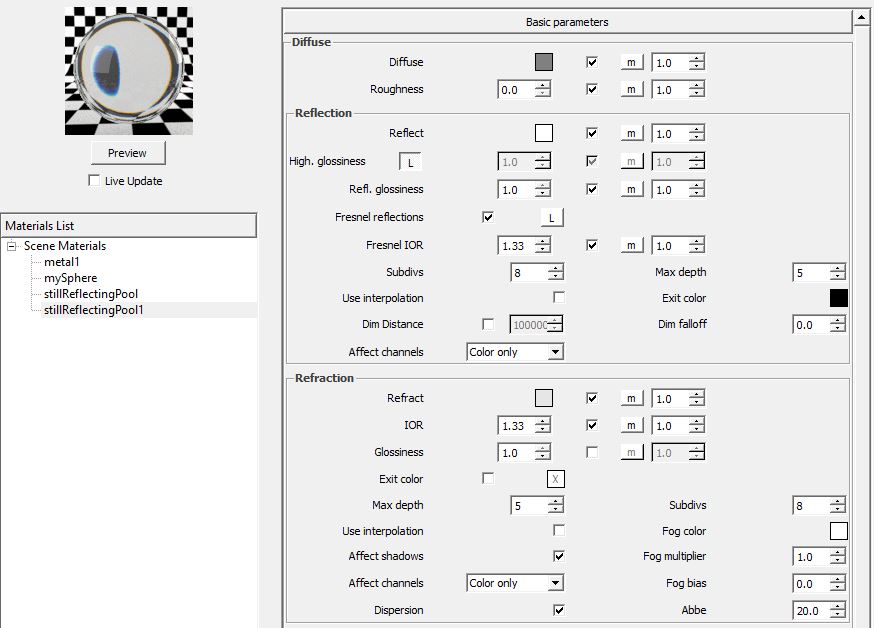
13.
Dispersion of light is effected by the switching on the
"Dispersion" option in the Refraction tab, and adjusting the strength of
the Abbe number, for different materials. Here, lower
numbers produce greater "Dispersion". For example, set the Abbe number
to "20" for the material "stillReflectingPool1".
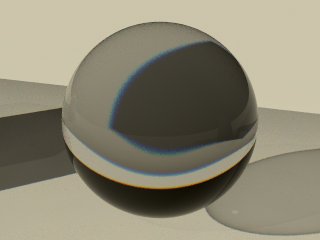
Rerendering
the same model shows greater coloration of the sphere and also
the changes the transmission of light through the sphere onto the flat rectangular surface below it.
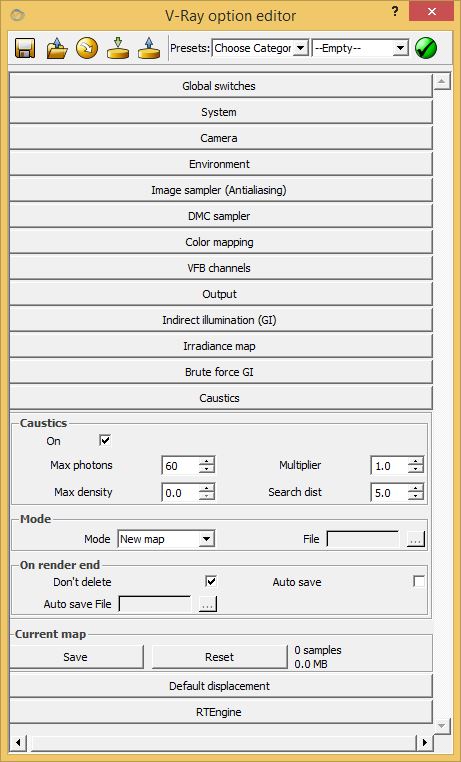
14. Now, go to the "Caustics" tab of the V-Ray options editor, and switch "Caustics" to on.
Create a prisim (extruded trianglar section), orient to the sun angle as shown in the image below.
Adjust
the Refraction " IOR: to 1.55, the Abbe number to 4, and apply the
"stillReflectingPool1" material to theprism. Rerendering the image creates
a prism with a few hues of color along with a concentrated area of light on the
rectangular surface below. The sphere also takes on the coloration of a prism. Rendnering times increase dramatically.
15. To
create water with some waveforms, extrude the flat rectangle in the
ground plane so as to create a rectangular box and remove the original plane surface. In this current example, the box will be represented as it were filled with
water.
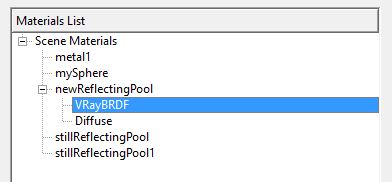
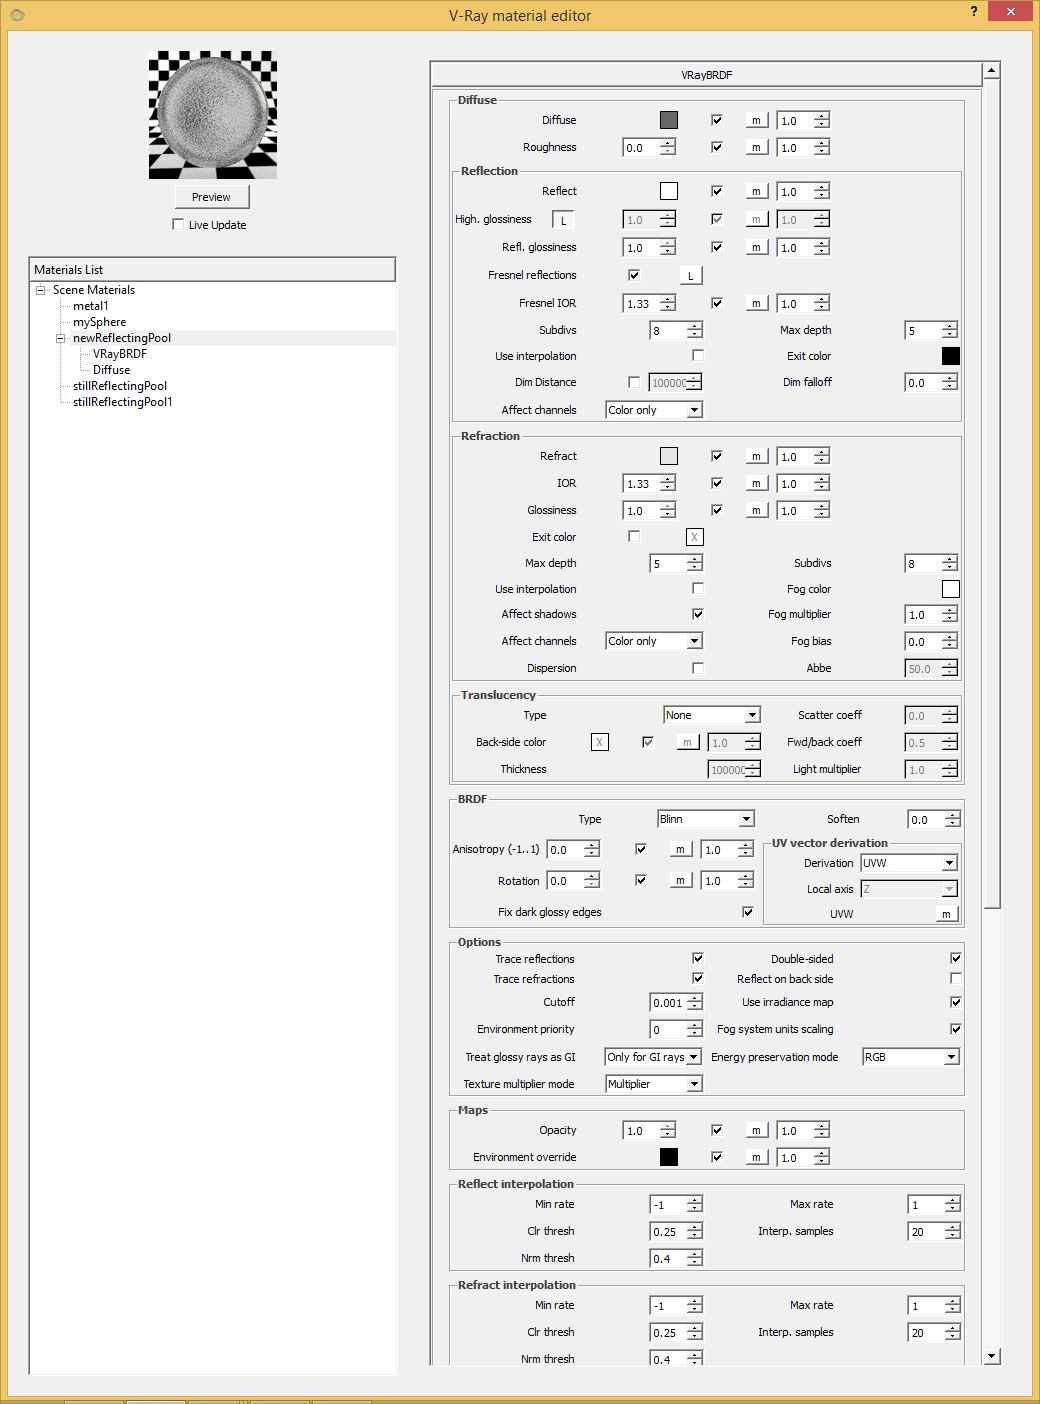
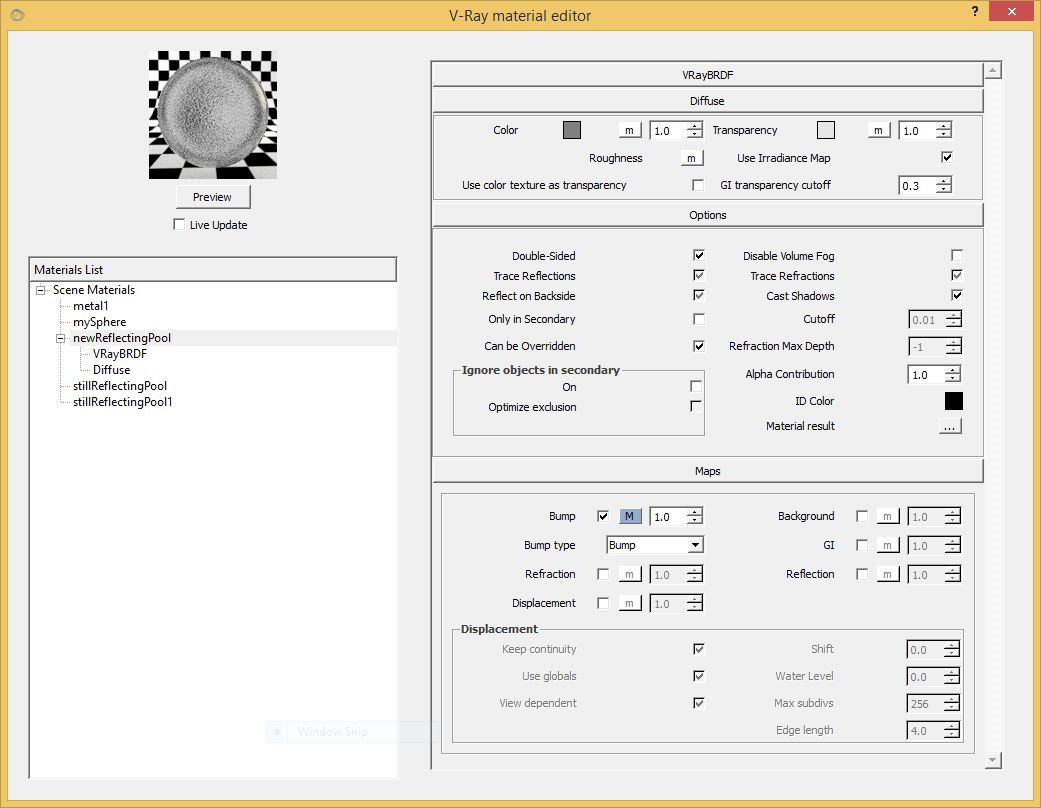
Create
a new"V-Ray" "Standard" material "newReflectingPool", rick-click on the
material in the V-Ray material editor and add a VrayBRDF layer. Hold
down the left mouse button and in the
Materials List area of the V-Ray material editor, select the
"VRay BRDF" layer and move to the the top of the layer list for
"newReflectingPool". That is, place it above the "Diffuse" layer.
Next, adjust the settings on the VRay BRDF layer
to equal those for "stillReflectingPool1" above. Except, do not
use the "Dispersion" option for the Refraction tab. That is, for the "VrayBRDF" layer, use the following settings:
15.1. Under Reflection:
"Reflect" color is set to white.
The "Fresnel reflections lock "L" is turned off.
The "Fresnel IOR" value is set to 1.33.
15.2 Under Refraction:
"Refract" color is set to light gray.
The "Refraction IOR" value is set to 1.33
15.3 Note under BRDF
Type
is set to "Blinn" by default. There are three types are "Phong", "Blinn" and "Ward"
which range in their impact producing sharp, middle and more diffuse
edges respectively.
Next, as
for the Diffuse layer, set the transparency color to light gray. In
addition, setup a Bump map. This bump map uses a "texNoise"
map with the Purlin noise option.
15.4 Under Diffuse
Set the "Transparency" color to light gray.
15.5 Maps
Create a bump map using "texNoise and using the "Perlin" option with the frequency set to 4.0.
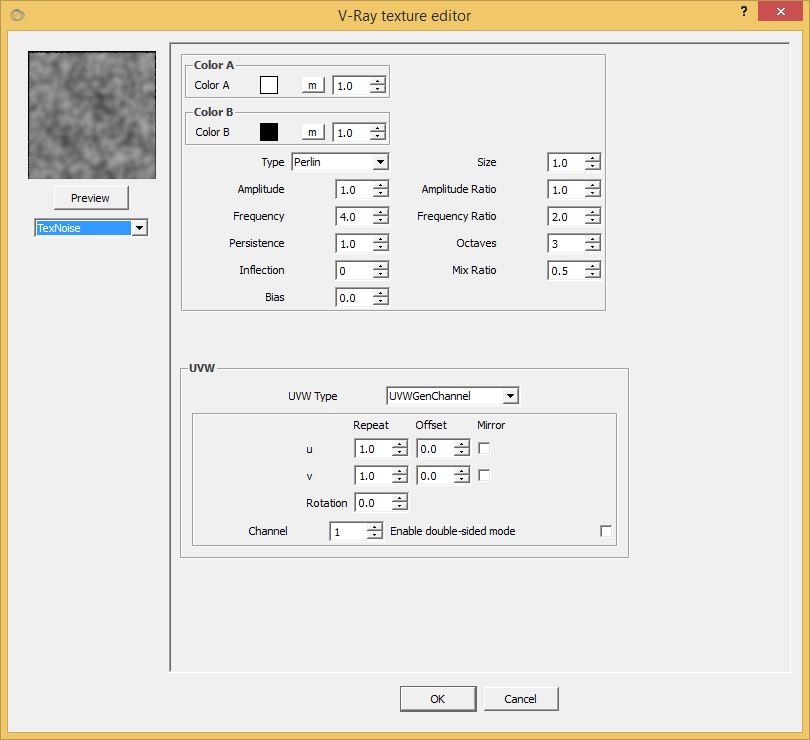
The "Diffuse" part of the material definition should then appear as follows.
Finally, apply
the "newReflectingPool" material to the extruded box in the
ground, add a "texSky" based upon the "V-Ray" sun as in the previous Workshop 6 R and re-render.