3D Animation: Keyframing

Keyframing is the simplest form of animating an object. Based on the notion that an object has a beginning state or condition and will be changing over time, in position, form, color, luminosity, or any other property, to some different final form. Keyframing takes the stance that we only need to show the "key" frames, or conditions, that desribe the transformation of this object, and that all other intermediate positions can be figured out from these.

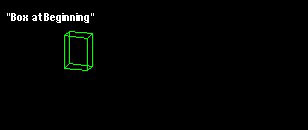
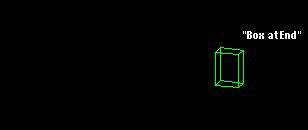
Take an object like the one shown at right - a simple box. The condition at the top is the starting position of motion. We might label this keyframe "Box at Beginning". The condition below that shows the final position of the box after it has been moved. This keyframe is "Box at End".

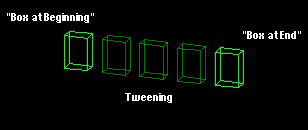
All of the intermediate stages of the box's motion from point A to point B can be calculated by breaking the distance traveled into the number of frames, 5 in thie case, that it takes to get there. Each intermediate frame then moves the box by that resultant distance. This process of figuring out the frames in between two keyframes is called "in-betweening" or simply "tweening". The frames played in succession yields a simple, though complete, keyframed animation.


Some (slightly) more robust examples of this might be a door opening and closing or a shock absorber conpressing and decompressing (click on the animations to run them).

The latter case also demonstrates that keyframing can effect more than simply an object's position in 3D space. Virtually any property of an object can be keyed at a given condition, and changed to a different condition (we'll look at some really interesting cases of these properties later in the semester), through keyframing. In the case of the shock absorber, the spring is changing scale in the Z direction, compressing and expanding itself.

Beyond scaling, we can also change the shape of an object over time, as the surface below demonstrates.

Three Animations - click on them to run them.


Animating in MicroStation
In MicroStation, there are two parts to creating this kind of animation. In the Animation Producer (under Utilities/Rendering menu), the Keyframes dialog allows you to create, or capture, keyframe conditions and name them. Any number of different keyframe conditions can be captured and recorded here, whether or not they will all be used, and the order that you capture them in does not matter. This Keyframes box acts as a library of sorts for you to store any animation conditions that you might be using.

The Keyframes box in itself does not serve to organize or to play back these conditions in any sequence. To create an animation out of these keyframes, we must write a Script that instructs which keyframe to occur, in what sequence, and at what frame in the animation. This script, which is forever editable, serves as the central and primary vehicle of control in describing the course of your animation. Playing or recording this script results in the full animation sequence.

Start MicroStation, turn on MicroStation Link, then try this out on your own with this MicroStation file.

When scripting a keyframe in MicroStation, you are given the option to select the rate of motion that the object will take coming into the current scripted frame. An object does not have to move at a ragular constant rate at all times because of this. If it did, many things would look unrealistic. Objects, through this property, can accelerate, decelerate, or combinations thereof. You will have to try these out for yourself to get a good feel for how they work, but the animation below shows the relationship between the various options.

Next Step: Actors and Motion Hierarchies