ALAR 6712 Studio Workshop Spring 2011
Workshop 16 Notes, April 28, 2011
Hinges, Springs and Hair
PART I: Hinges and Springs
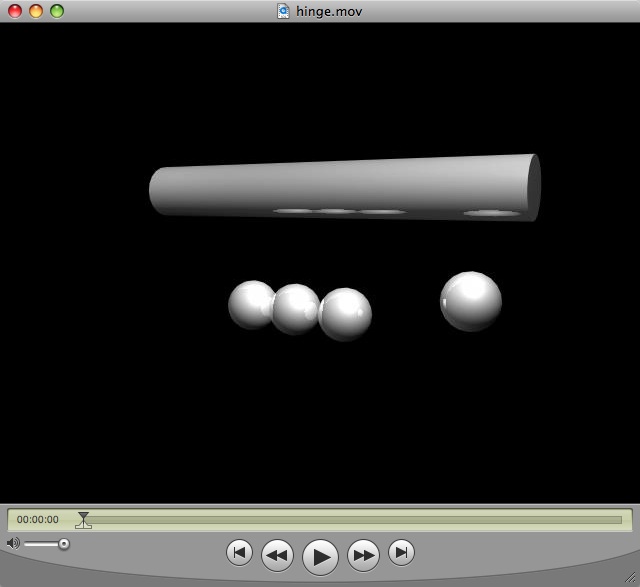
1. Hinges (see completed example hinges.mb)
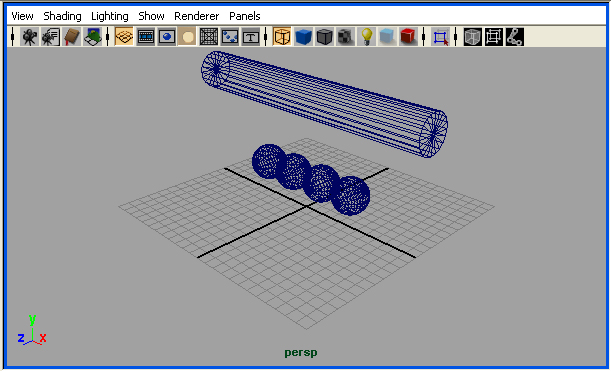
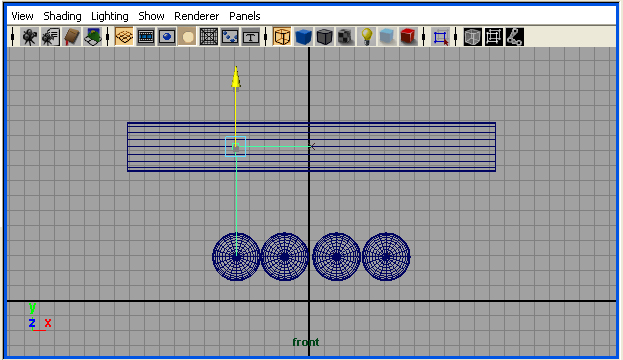
Create a horizontal cylinder polygon hovering above four equidistant sphere polygons as follows.
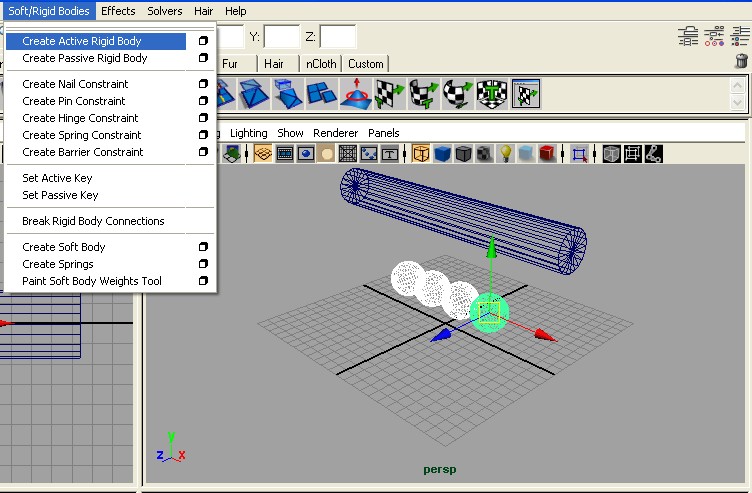
In the Dynamics module, under the "Soft/Rigid Bodies" menu, select all of the spheres and "Create Active Rigid Body"
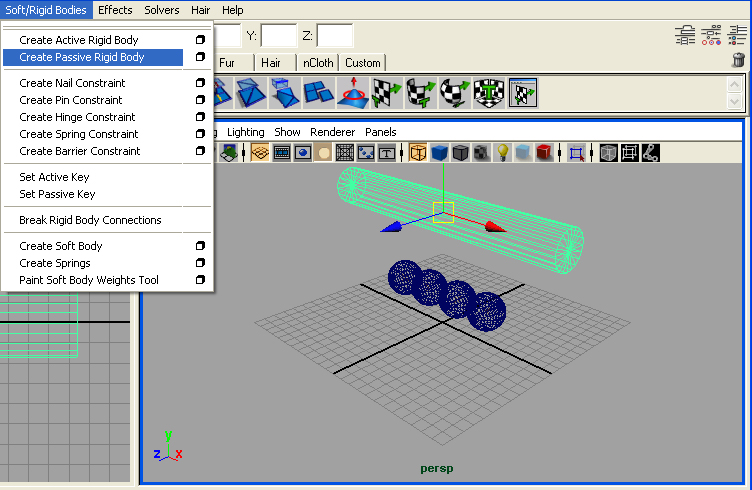
In the Dynamics module, under the "Soft/Rigid Bodies" menu, select the cylinder and "Create Passive Rigid Body"
Select a sphere and then the cylinder, and under the "Soft/Rigid Bodies" menu select the "Create Hinge Constraint" option.
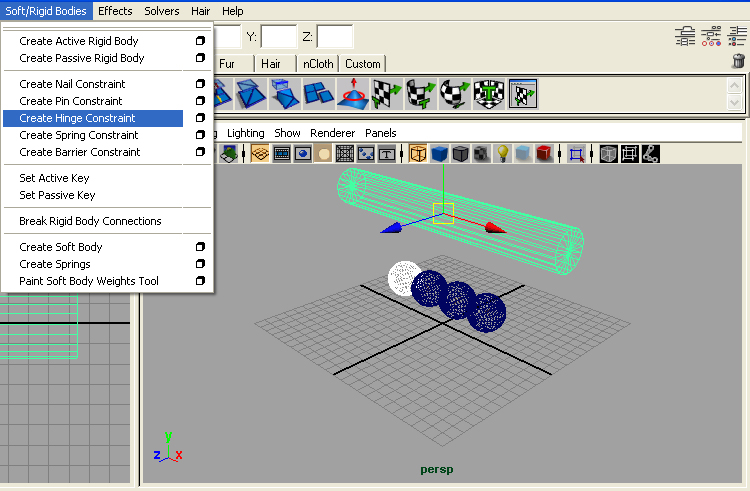
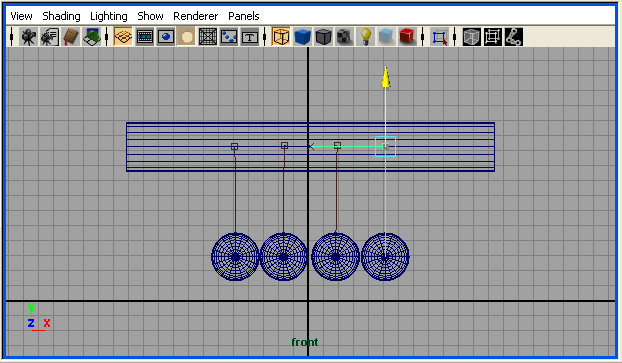
From the front view window, move the hinge symbol so that it is on the center axis of the cylinder and sitting directly above the sphere.
Do the same operation to create hinges for all the remaining spheres.
Select all the spheres and under the "Fields" menu apply a "Gravity" field.
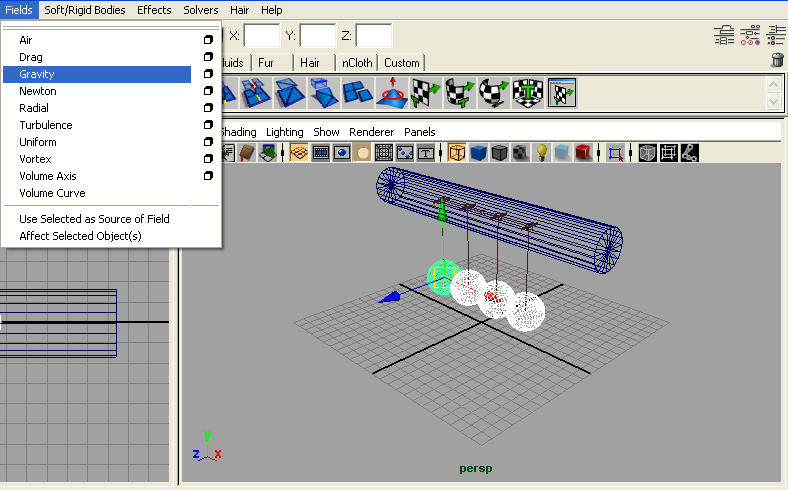
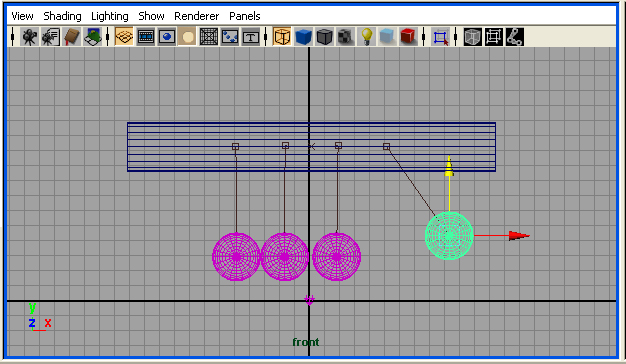
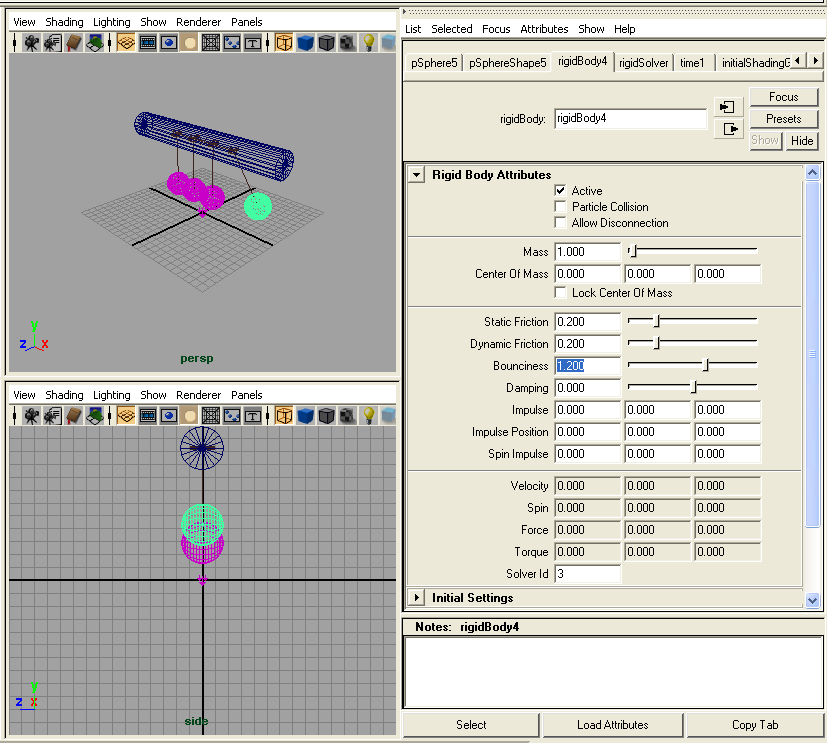
Assign reflective polished steel-like materials to the cylinder and spheres. Play the resulting animation.
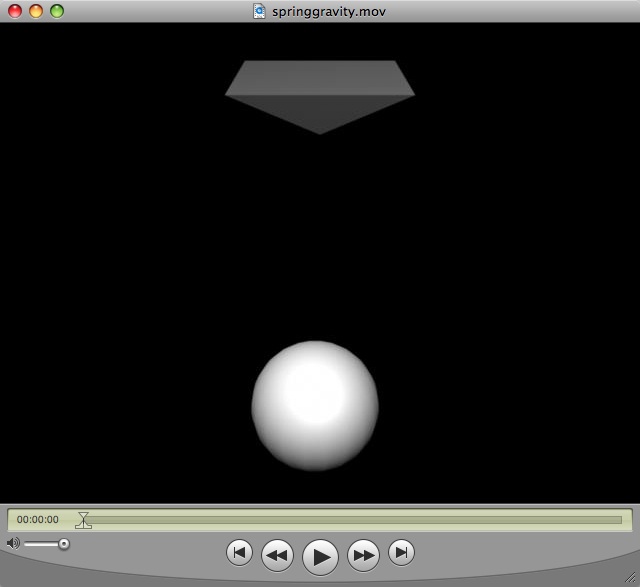
II. Springs (see completed example spring.mb)
Create an upside down polygon pyramid sitting above the ground and a sphere sitting below it in a new scene file.
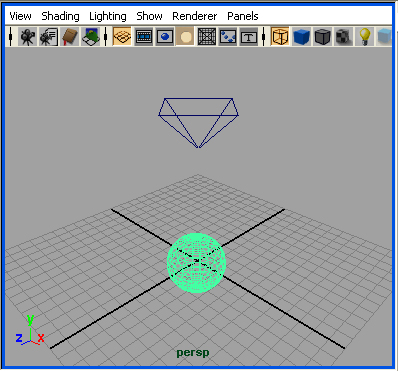
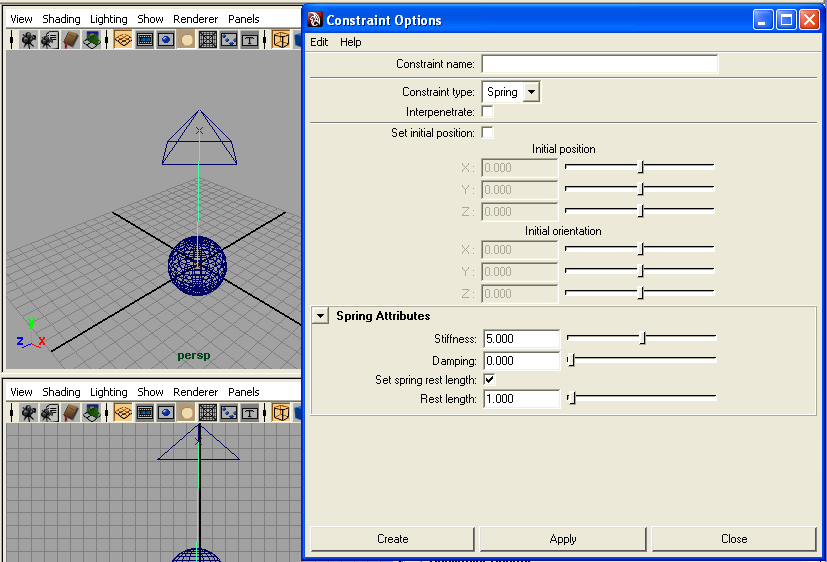

Select all the sphere and under the "Fields" menu apply a "Gravity" field. Change the "Stiffness" attribute of the spring to 2.0. Play the animation again and see the result.
PART
III: HAIR
1. SIMPLE CASE. (Techniques
developed after those described in The
Secrets of the Pros, By Kundert-Gibbs and Dariush Drakhshani, Sybex
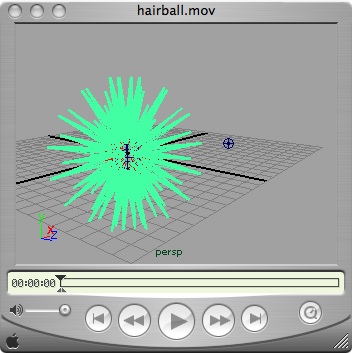
Inc. 2005) The resulting animation is contained in the scene file hairball.mb.
 |
 |
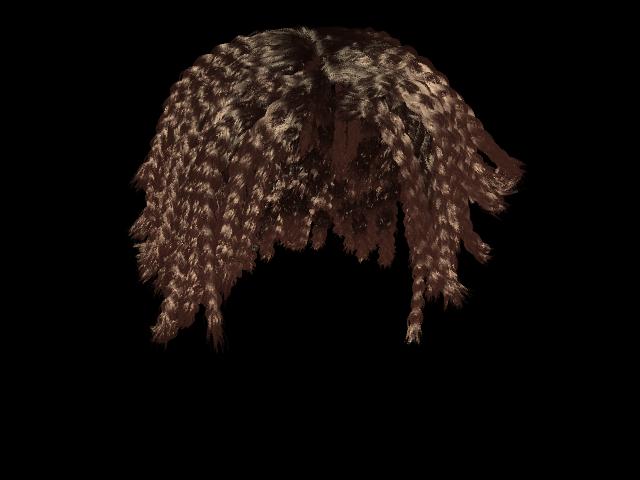
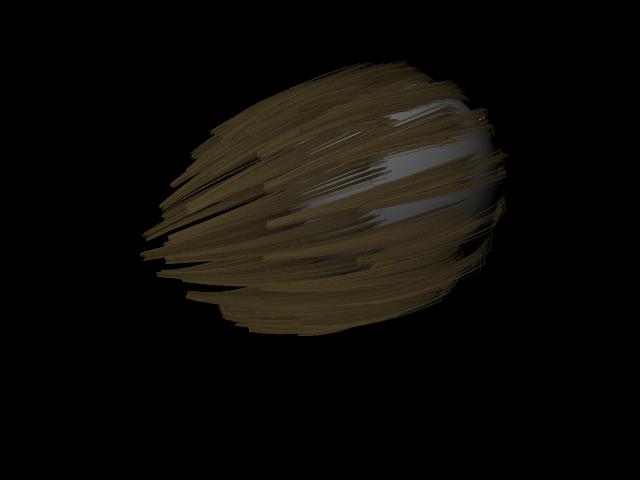
1. Create a NURBS sphere.
2. With the sphere still selected, choose Hair > Create Hair.
3. In the dynamics menu, select Solvers > Interactive PLayback.
4. Create 100 frames
5. Now give some movement to the sphere, keyframing it in two locations
at fame 0 and frame 30, and observe the hair performance.
6. Add keyframed scaling to the sphere surface. Keyframe it at a
different scale at frame 60, and observe the hair performance.
7. Add keyframe rotation to the sphere surface. Keyframe it at a
different rotation at frame 90, and observe the hair performance.
8. Select the hair and enter the attributes editor for HairSystemShape
node (e.g., HairSystemShape1).
* In Clump and Hair Shape, change hairs per clump to 20. (increases
strands of hair).
* In dynamics, under Solve, change Stiffness to 0.05 and replay the
animation. (lowering the number increases flex in hair).
* In dynamics, under Solve, increase iterations to 6 and replay the
animation (increases the iterations per time-step increasing accuracy
and render time).
* In dynamics, under Forces, increase drag to 0.1 (indicates drag on
hair relative to folicle. simulates friction with air - similar to
water). Play the result.
* Under multi-streaks, change multi-streaks to 3 and render the result.
WE WILL SKIP THE REST OF THESE EXAMPLES BELOW IIN THE WORKSHOP UNLESS THERE IS UNEXPECTED TIME
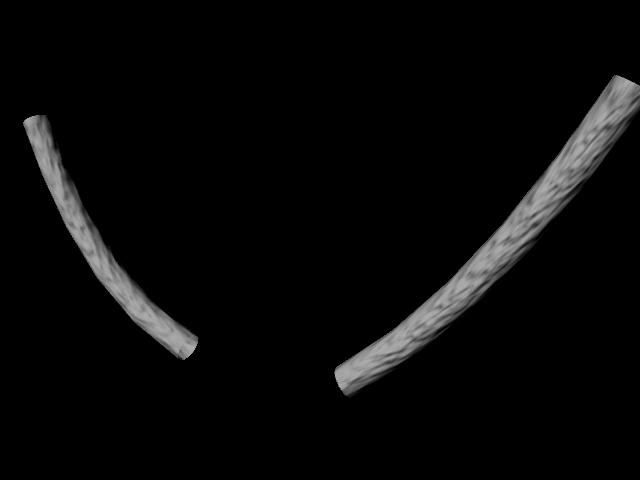
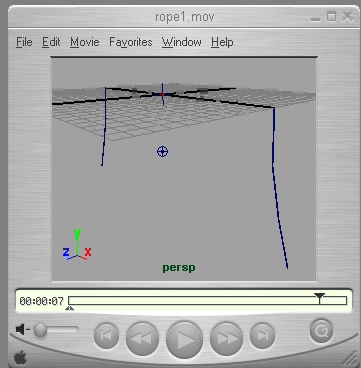
2. ROPE 1 (Techniques developed after those described in The Secrets of the Pros). The resulting animation is contained in the scene file rope1.mb.
 |
 |
1. Draw an ep curve along the negative x-axis, placing points at -12
units, -8 units, -4 units and the origin.
2. Repeat this for the positive x-axis beginning at the origin. Select
this second curve, and go to Edit Curves/Reserve Curve Direction. (Or,
begin this curve in the reverse direction starting at 12 units, 8
units, 4 units and the origin).
3. Select both curves, and in the Dynamics module, select Hair >
Make Selected Curves dynamic.
4. Both hairs are now dynamic under a single hair system.
5. In outliner, select hairSystem1Folices, select the plus sign, open
the attribute editor for follicleShape1, set the point lock system to
Base in the channels box.
6. Repeat step five for follicleShape2.
7. Playback animation for 60 frames, and the center of the rope should
appear to drop below the origin.
8. Goto frame 60, and under Hair select Display> Current
Position
(this depicts the active dynamic position of the hair.)
9. To visualize the rope, create a small nurbs circle in the x-y axis
from the side view window.
10. Ensure that the History option is on. Select the circle and the
first hairSystem1OutbputCurve (curve3), and under Sufaces>Extrude, set style to "Tube",
result
position to "At path", Pivot to "Component", Orientation to "Profile
Normal", and Output to Nurbs, and Apply the tool.
11. Repeat this for the second hairSystem1OutbputCurve curve (curve4).
12. Within the Outliner, select hairSystem1, and then, in the Attribute
editor, select the tab for hairSystemShape1.Continuing
in
the Attribute editor, select the Dynamics tab, and then
the
Solve sub-tab, and change "Stiffness" to 0.003. Also in the Dynamics
tab, under the Forces section, change gravity to 5.
13. In components mode, select the CVs at the origin from the two
curves, and goto Hair>CreateConstraint>Hair to Hair.
14. Play 100 frames.
15. From the Hair menu, set Start Position to From Current.
16. In outliner, select hairConstraint1, go to frame 149, and
right-clicking on the text, in the Channel box, set the key frame Glue
Strength to 1.
17. Now go to frame 150, and right-clicking on the text, set the key
frame for Glue Strength to 0.
18. Playback the animation and the rope breaks at frame 150.
19. Select hairSystem1 in the outliner, and in the attribute editor
under hairSystemShape1, in Turbulance change Intensity to 0.2