ALAR
6712 Studio Workshop
Spring 2011
Workshop 6 Notes,
February 10, 2011
Exporting File From Adobe Illustrator to Adobe Photoshop for Graphical Diagramming and Analysis
(Compiled from Meghan Welford's Notes)
IIllustrator
- File > Open > .dwg file
- Select “Scale by”
- Change the units from points to inches
- Type “100 (Units) = 1 (Inch)” for 1:100 scale
- Select “OK”
- Adjust Lineweights and Fills as instructed in lecture on Feb. 9, 2010.
- In the Layers Panel, select any unnecessary layers and delete.
- File > Export
- Adjust file type to “.psd”
- In cases that the file is too large to export as a PSD, turn on one layer at a time and save as a PDF to “Place” in Photoshop
Photoshop
- File > Open > PSD File Created in Illustrator (may take a minute to load)
- Window > Workspace > Essentials
- In Layers Panel:
- Right Click on Group > Select “Convert to Smart Object”
- Right Click on Smart Object > Rasterize Layer
- Repeat for all layer groups
- To remove the transparency background and create grid
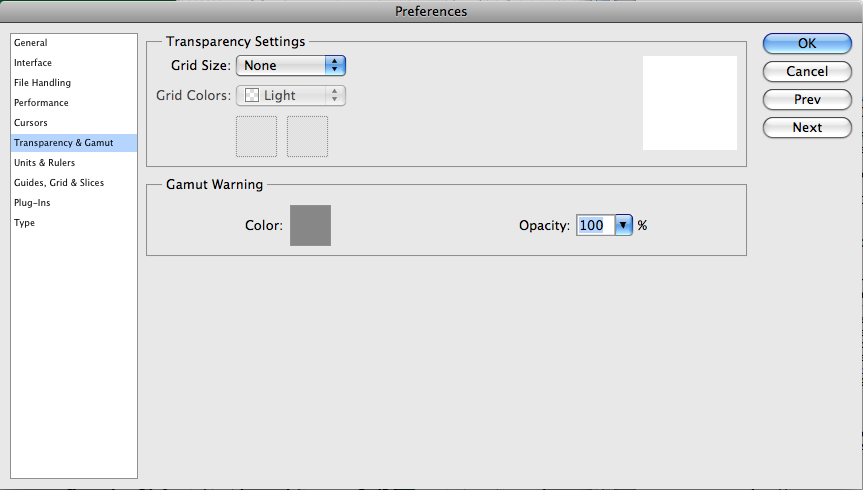
- Edit > Preferences > Transparency & Gamut (on Mac: Photoshop > Preferences)
- Grid Size: None
- Edit > Preferences > Grid
- Adjust size and color to preferred.
- View > Show > Grid
- Right Click on Ruler
- Select Inches
- To create Guides
- Click on the vertical ruler and slide to the right for vertical guidelines
- Click on the horizontal ruler and slide down for horizontal guidelines
Photoshop | General Tools
- Eyedropper Tool
- Choose a specific color based on a pixel that you select in the view window
- Will select regardless of layer and will combine layers and transparencies to select the apparent pixel color
- Paintbrush/Pencil Tools

- Use the mouse to specify areas of color
- Can adjust “Master Diameter” and “Hardness” (amount of fading around edges)
- To Load Additional Brushes
- Select the arrow in the upper right hand corner of the toolbox
- Select “load brushes” or a brush set in the bottom of the menu
- Brushes may be found online by searching “Photoshop Brushes”
- Clone/Pattern Stamp Tools
- Clone Stamp Tool: Selects a reference point for correcting or repeating images
- Specific to layer – to select, ALT + Select your starting point
- Adjust the brush size and paint the repeated texture
- Pattern Stamp Tool: Paints a pattern in the specified area as a paintbrush

- To select a pattern, select the drop down arrow next to the pattern on the right
- To load other patterns, click on the upper right hand arrow and select “Load Patterns”
- To create your own pattern, see below.
- History/Art History Brush: Will restore recently erased portions of an image on the same layer.
- Eraser/Background Eraser/Magic Eraser Tools
- Eraser tool: Erases with a brush format
- Background Eraser: Erases all background
- Magic Eraser: Erases in the same fashion as the magic wand.
- Gradient/Paint Bucket Tools
- Gradient Tool: Will fill the window or specified area with a gradient that may be adjusted and specified in the toolbar
- Paint Bucket Tool: Fills the specified area or window with a solid fill or pattern
Photoshop | Selection Options
- Marquee Tool > Click and Hold for Rectangle, Circle, etc.
- Magic Wand > Used to Select a color or color range
- To adjust to select more or less, adjust tolerance
- Lower Value = more limited selection
- Larger Value = more range in color
- Select > Color Range
- Use the eye dropper to adjust the color range
*Default is to select only objects on the current layer – select the layer in the layer panel
In the top tool bar, select “Sample All Layers” to select more on just one layer
- To save a selection for later use:
- Select > Save Selection
- To recall selection
Select > Load Selection
Select > Inverse: Selects the inverse of the selection
Photoshop | Layers
- Layers Panel should appear on right side (if not, Window > Layers)
- Separates images and allows you to overlap images and text without having to delete information
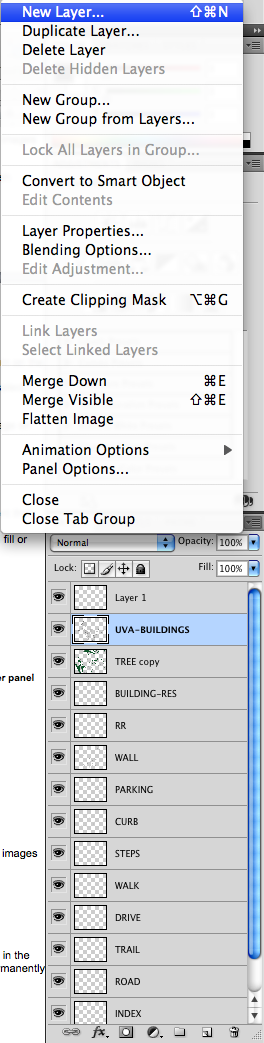
- The Layer Menu and Upper Right Arrow in Panel offer options such as New, Duplicate, Delete, Etc.
- To move layers, simply click and drag them to their new order
- Grouping Layers allows you to turn off and adjust a group of layers simultaneously
- Shift + Select Layers you wish to Group
- Choose the menu in the upper right hand corner of the layer panel
- Choose “New Group” or “New Group From Layers”
- By selecting the group, all new layers will be created inside this group
- To move layers to this group, click and drag on the selected layer and place it on top of the group label
- Merge – Reduces selected layers to one layer
- Flatten – Reduces ALL layers to one layer (loses the majority of editing capability
- Reduces file size, but makes nearly impossible to edit
- Layer Properties – Color Codes and Names Layers
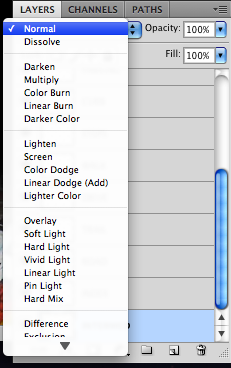
- Blending Options – Adds graphic styles to layer (see below)
Photoshop | Layer Properties
- Allows for adjustments of an image as an overlay
- Also can adjust fill opacity and layer opacity
- Layer opacity adjusts opacity of all blending options AND layer contents
- Fill opacity adjusts only the fill color
Photoshop | Adjust Page Size and Canvas Size
- Image > Page Size or Canvas Size
- Page Size: Scales the image appropriately according to specifications
- Canvas Size: Adjusts the size of the page while maintaining the current images
Photoshop | Transform Object
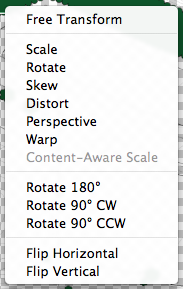
-
Gives the option to adjust the selected area (select the area or Select All)
- Ctrl + T (ð + T on Mac) or Edit > Transform
- Scale, Rotate, Skew, Distort, Perspective, Warp, Flip
Photoshop | Creating Patterns
Note: On computers with CAD software, there are often tileable texture images in the system files. BE SURE to COPY these files so that you do not adjust them permanently.
Example: C:/Program Data/Autodesk/ACA 2010/enu/Textures
- Open a COPY of a texture file in Photoshop
- Press Ctrl + A (ð + A on Mac) to Select All
- Edit > Define Pattern
- If you do NOT see this option, select Window > Workspace > Essentials
As long as your version of Photoshop is open, this pattern will become usable in any window
- Attempt to use the pattern in the area you wish. If the scale is off, adjust the image size in Photoshop or resize it and create the pattern again,.
Photoshop | Blending Options
- Right Click on Layer > Blending Options
- Drop/Inner Shadow – Adds a shadow to the outside of all objects on a layer
Outer/Inner Glow – Adds a gradient color around the edges
Bevel & Emboss – Creates a more 3D look
Satin – Adds a ‘shiny’ gradient around edges
Color Overlay – changes the color of all objects
Gradient Overlay
Pattern Overlay
Stroke – Adds a solid edge of x number of pixels surrounding the object
- To copy blending option style, Right Click > Copy Layer Style
Photoshop | Filters

- Filters > Filter Gallery All based on preference. Some to think about using for architecture:
- Sketch > Graphic Pen
- Adds texture to solid fill to appear as grass
- Artistic > Smudge Stick
- Similar to Graphic Pen, less white
- Artistic > Underpainting
- Stylize > Glowing Edges
- After doing this process, select Image > Adjustments > Desaturate for black and white
- Filters > Render > Lighting Effects
- Can add a light source to add depth to a layer to enhance plans and sections
Photoshop | Adjustments

- Curves and Levels can be helpful in adjusting scans that came out poorly.