COMPUTER
AIDED
ARCHITECTURAL DESIGN
Workshop 14 Notes,
Week of November 10, 2022
NOTE: This set of workshop notes provides a more streamlined V-Ray sunlight study through Grasshopper that handles rendering more directly in Rhino without having to reference geometry inside of Grasshopper. It includes methods to animate sunlight movement. In addition, as referenced below in step 12 with either sunlight movement, you can also animate any objects that you selectively reference inside the Grasshopper environment.
This set of workshop notes describes a V-Ray Grasshopper based animation of the sun. It uses a built-in Rhino tool for sun position based upon Latitude, Longitude and Time. The Grasshopper part of the procedure can be applied to any Rhino file setup for V-Ray without importing geometry into the Grasshopper environment. However, it can also be modified to bring geometry into the Grasshopper environment for additional advantages such as with respect to the animation of moveable objects. At the end of these notes is a technique to generate 30 rendered frames to create a 30 second animation at 1 frame per second and one at 30 frames per second.
Here we examine some relatively straightforward cases of sunlight animation with tools that allow you to render for a specific sunlight time frame, latitude and longitude. The intent is not to cover the full underlying technology of this example directly, but to provide a predetemined Grasshopper file with a minimal explanation needed to quickly facilitate the animation.
There are four parts to the notes below:
Part I describes how to open the example file.
Part II provides an overview of how the Grasshopper canvas window is organized.
Part III describes detailed settings needed to generate animation rendering.
Part IV describes how to use OpenShot video editing software to compile the rendered frames into a single movie file.
The complete Grasshopper script and a demonstration Rhino file are posted in the CLASSES folder for ARCH 2710 under "examples" in the sub-folder named "sunStudyInProject". They are also posted to the class Collab site in the resources folder under a sub-folder named "sunStudyInProject".
1. Open the Rhino file sunStudy.3dm and then open the perspective view.

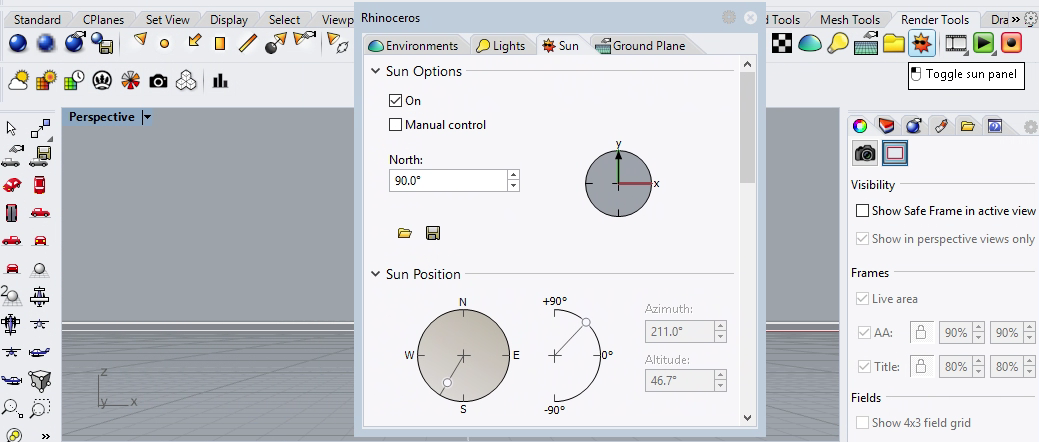
2. Next, open up the Rhino Sun tool and ensure that it is turned on as shown in the image below.
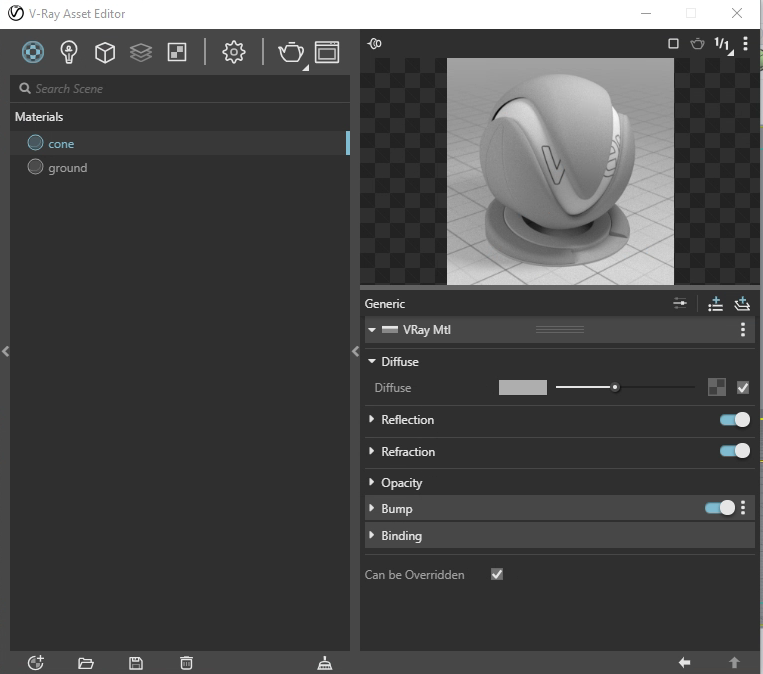
3. Next, open the V-Ray Asset Editor window and note the V-Ray materials that have been pre-assigned to the objects in the Rhino file. This includes a cone material and ground material. Both materials are simple V-Ray generic materials.
PART II. V-Ray Grasshopper Plugin
We begin with the components already included in the Grasshopper file. Here, as already indicated in part I, download the Grasshopper file from the subfolder "sunStudyInProject".
1. Launch the Grasshopper plugin to Rhino and load the "sunStudyRenderInProj.gh" file that is located in the "sunStudyInProject" folder. We will begin with customizing the settings for just a few of the components in the Grasshopper canvas window. Select the image below to see all the components at a higher resolution.
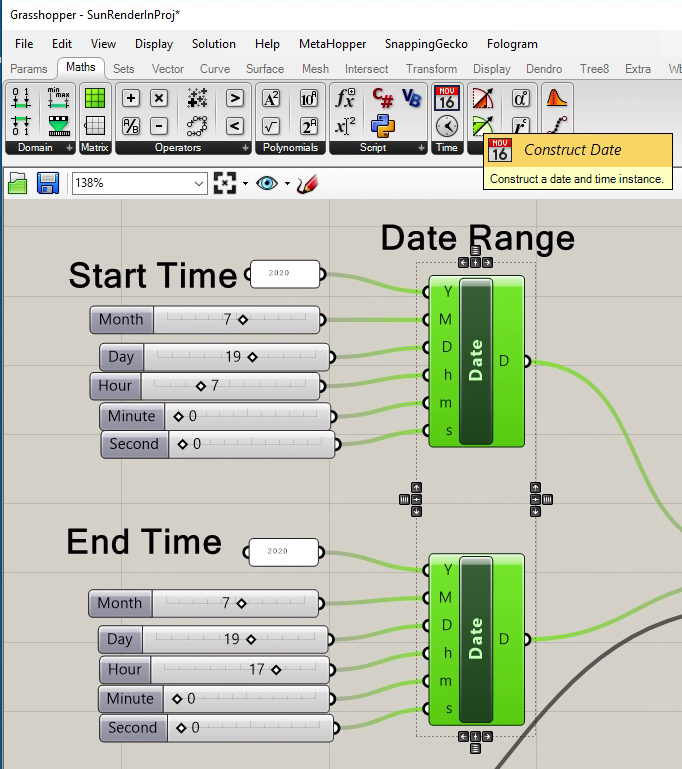
2. Pre-positioned within the Grasshopper file on the upper left-hand side of the canvas window are two construct dates components. One of the components provides a start time and the other component provides end time for the sun movement. The two components establish a timefrme is from 7 am to 5 pm on July 19, 2020.
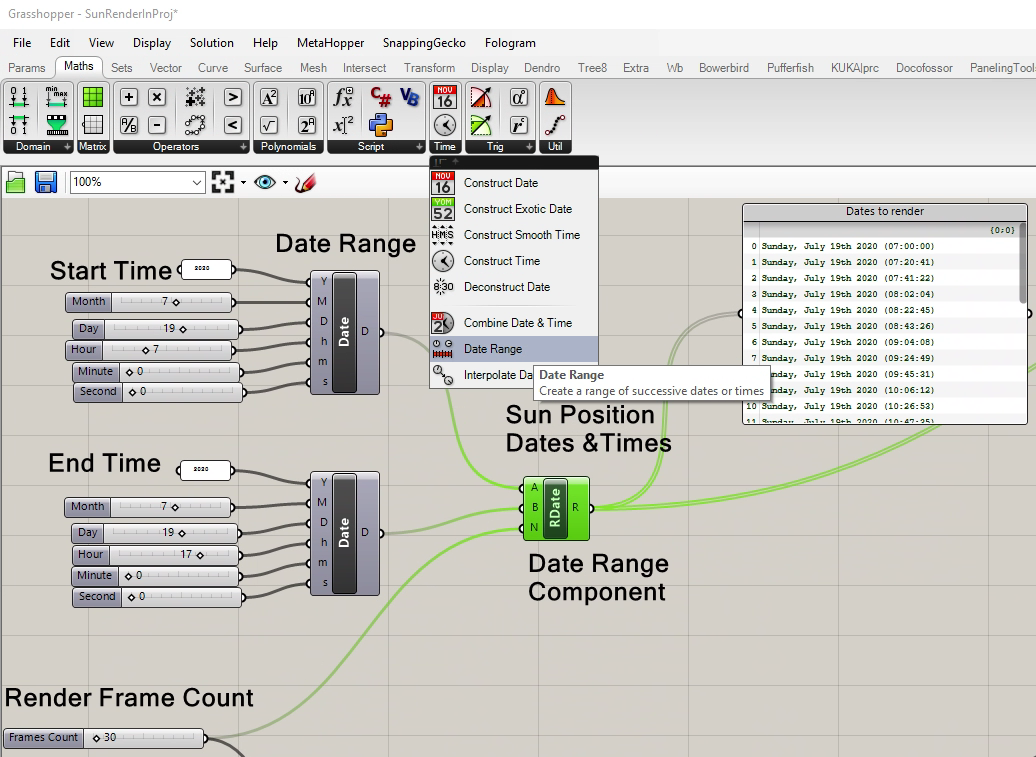
3. On the lower-left side of the Grasshopper canvas window, change the frames count slider to 30. The frames count slider thereby determines 30 total frames in the animation as input to the "V-Ray Timeline" Grasshopper component. It also determines 30 sun postion times to be generated in the Grasshopper Date Range component labelled "Sun Position Dates & Times" in the image below.
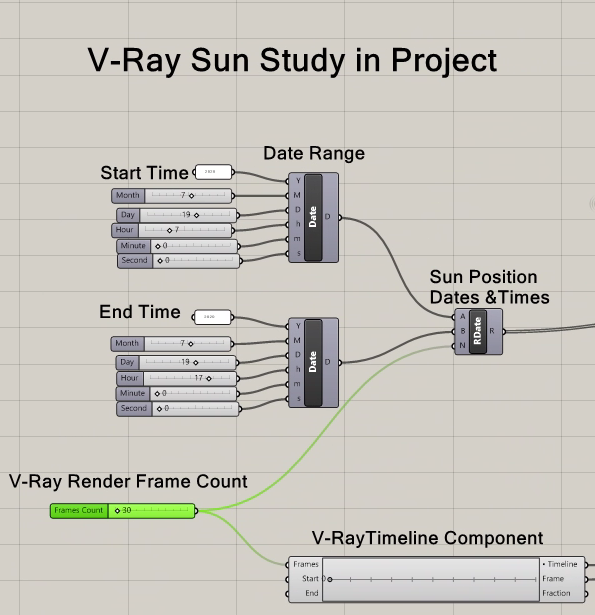
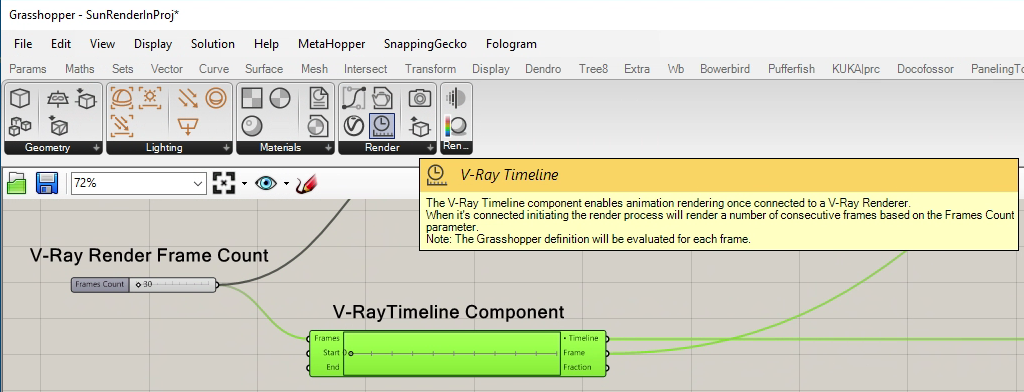
4. The V-Ray Timeline component drives the animation sequence.
5. The Grasshopper Date Range component generates a list of a specified "N" number of times to be rendered. In this example N = 30 total specific times of day that the sun is to be simulated for the animation. For an initial trial run of this script, it may be best to start with an even smaller number of frames, such as 5 frames, until you've adjusted the light levels in the V-Ray Frame Buffer, and then work with a higher number of frames for rendering the final animation. In this illustration we begin directly with 30 frames.
6. Next within the Grasshopper canvas window sequence shown in the image below, a Python script reads times of the day to be rendered and converts them to Sun Azimuth and Sun Alititude settings. That is, it accepts the list of 30 "DT" (dates and times) and generates each of the 30 related sun positions. The latitude, longitude and Greenwich Meantime Offset of -5 are also used as input. This data is for Charlottesville, Virginia. The boolean operator labelled in the image below as "sunPath" is set to "True" to generate the sun positions. The "DST" boolean operator may be set to true to activate daylight savings time. The north angle input to the script can be used to reset the position of north relative to the x-axis if needed. The default angle for north is 90 degrees counter-clockwise from the X-axis in plan.
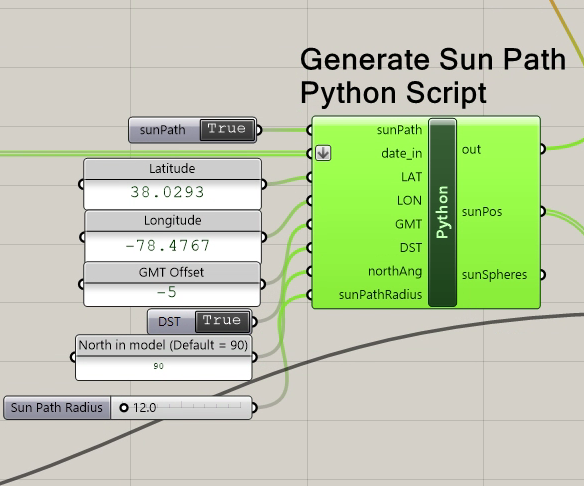
The "Sun Path Radius" number slider determines the radial distance of the symbolic representation of the sun positions in the 3D model from the origin (the point 0, 0, 0) of Rhino's primary coordinate system. Note that these sun positions are used to indicate relative angle to the origin (the point 0,0,0). Their angle relative to the origin but not their distance relative the origin is relevant to calculating the sun angle. The input variable labelled "Sun Path Radius" allows you to adjust the distance from the origin as needed to make it more visible.
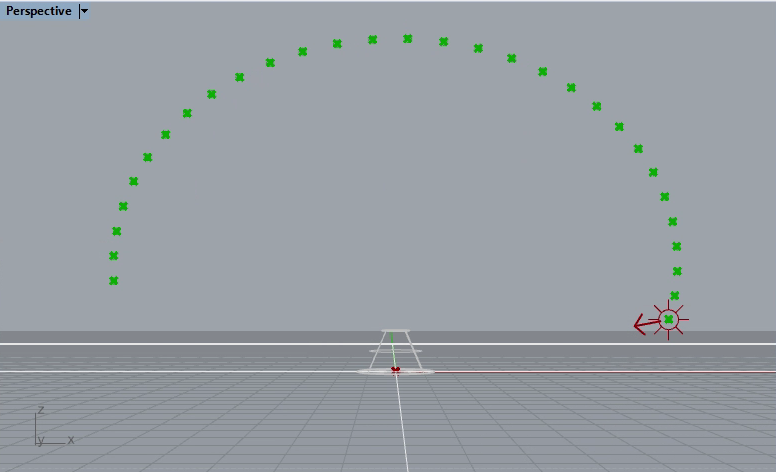
Credit: The Python Script adapted, modified and expanded an original script that was written by Holo at holodesign.no, see https://discourse.mcneel.com/t/rentur-sun-study/98402.
7. Moving to the right in the Grasshopper canvas window, in the image below the "sunPos" output port from the Pthon script provides a listing of sun 3D point locations in the Rhino model that cover the time period of analysis .
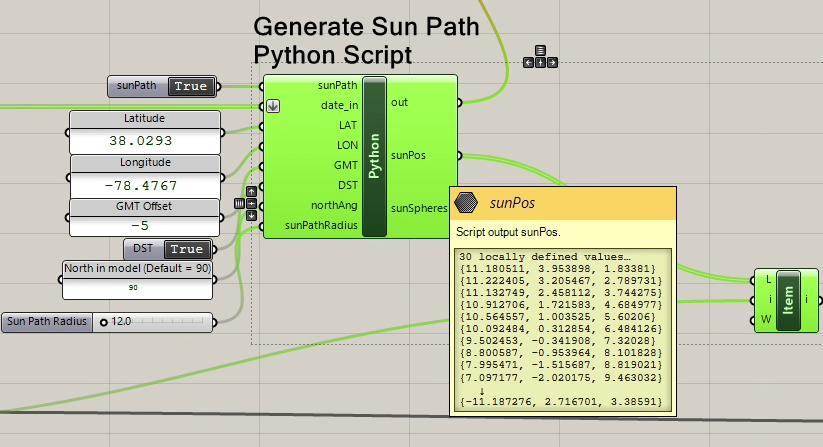
8. Moving further to the right in the Grasshopper canvas window, note that each sun position is passed one a time in turn to the "Sun Position'" input port of the "V-Ray Light Rig Sun" system. In the illustration below a "Sun Intensity" number slider is set to a scalar value of 70.0 to control the brightness of the sun in the V-Ray Rendering.
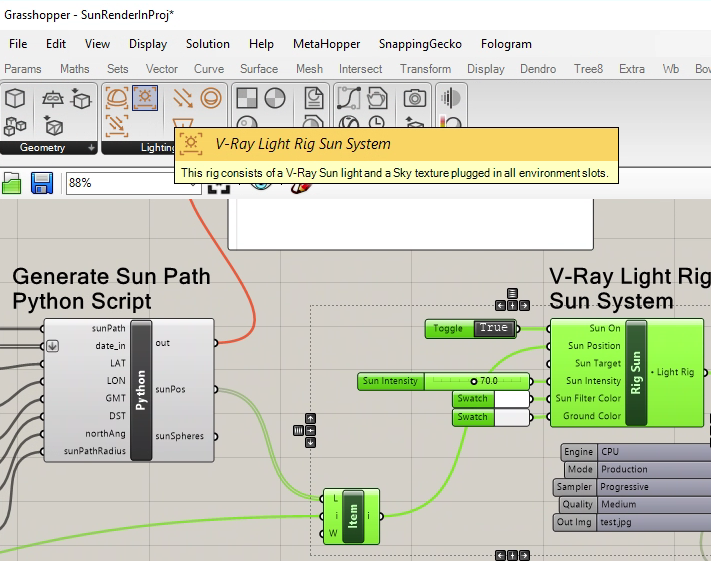
Taking a larger view of the Grasshopper canvas window, the step by step specific Frame number output from the "V-VRay Timeline" indexes into the list of SunPositions one at a time as the animation is run. This synchronizes each sun position with a correspondng frame in the animation sequence. Select the image below for an expanded view.
9. The sun positions in turn are then passed one at a time from the "V-Ray Light Rig Sun System" to the "V-Ray Render" Component. Here the other inputs to the V-Ray Render Component are similar to how they were set for prior workshops:
"Engine" is set to CPU
"Mode" is set to Production
"Sample" is set to Progressive
"Quality" is set to Medium
"Out Img" is set to a file named "test.jpg"
(see illustration below)
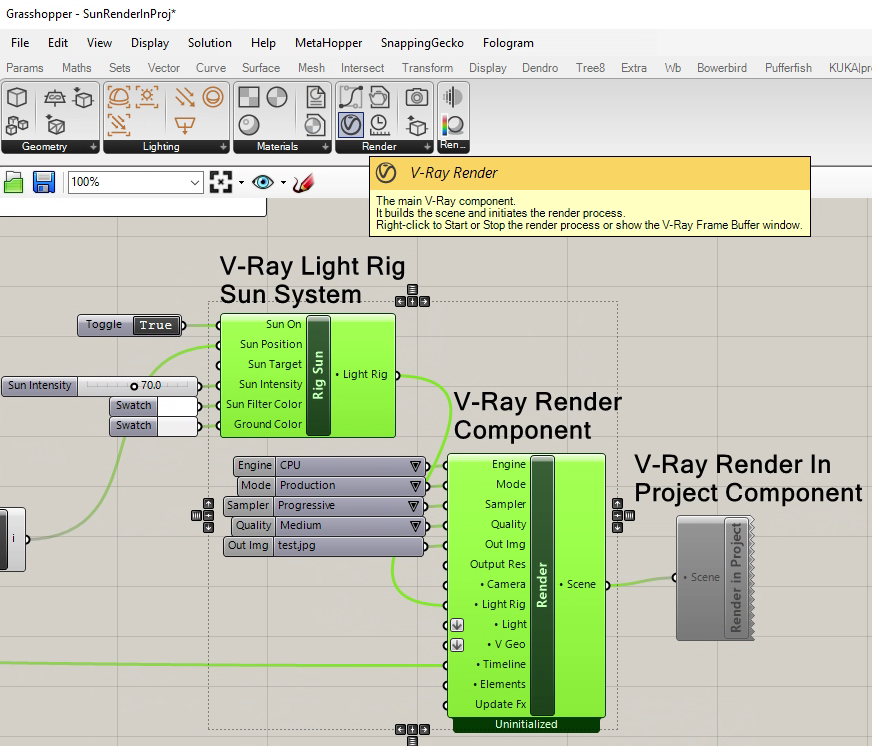
The "Out Img" (out image) is setup in the jpg image format and saved to a folder named "frames" on the desktop. Double-click with the left-mouse-button on the "Out Img" to initiate the "Save As" dialog.
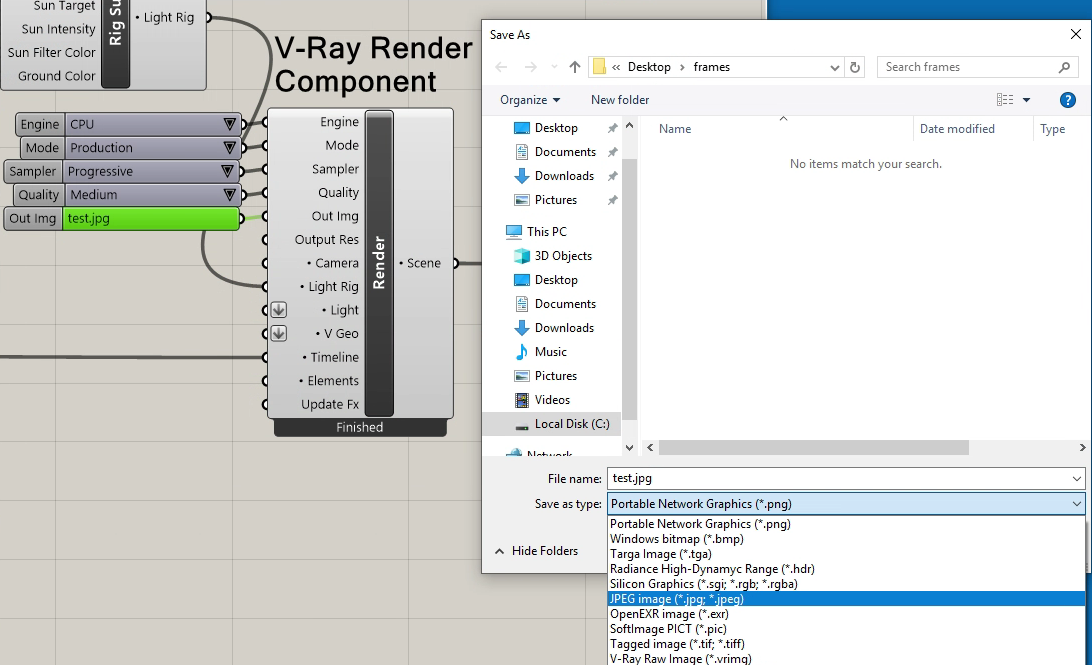
10. Note again that the "V-Ray TImeline" output port named "Timeline" is connected across the larger canvas window to the "Timeline" input port of the V-Ray Render Component. In other words, the "V-Ray Timeline" componen tis the lead driver for passing data through the full script and activates the rendering. Int step 8 above it is used to grab each sun position and here in step 10 it facitilates the rendering of each frame one by one in the "V-Ray Render" component shown below. Select the image below for a larger view.
11. The rightmost component in the Canvas window is the "V-Ray Render in Project" component. This component exports the rendering task to Rhino and eliminates the need to reference geometry directly in Grasshopper. More details about this component will be examined in Part III below. It means that the Grasshopper script can be quickly adapted to any Rhino file without adding new Grasshopper components.
12. Note that although unnecessary, it is still possible to reference geometry in Rhino by adding new components to Grasshopper. In the screen captures below the specific Grasshopper components that have already been used in previous workshops are shown as if they could have been added in this example. This includes two "Geo" components for the cone and ground plane in Rhino, two "V-Ray Material from File" components corresponding to the two "Geo" components, and in turn two "V Geo" components for passing this information to the "V-Ray Render" component. See the the previous workshop notes for a previous sun study that has a more detailed description of this method. Select the image below for an expanded view.
However, these geometrical elements are already accounted for in the "Render in Project" approach, and if included here they would be redundant with geometry also rendered as a part of the Rhino model. If there was a reason to reference them in the Grasshopper canvas window, such as to animate their movement, then the corresponding geometry directly in Rhino would likely need to placed in non-visible location. Therefore, if you import then, geometry into Grasshopper, then you have two choices: 1_ use the VRay render component to render the animation as we have done in previous workshops, or 2 _ turn off layers holding the geometry in Rhino if you elect to use the "Render in Project" component described in part III.
With all of the Grasshopper components now accounted for, Part III indicates how to go oward with some additional steps needed to render the model. For part III, in this streamlined example the "Geo". "V-Ray Material from File", and "V Geo"components were not used.
1. Right mouse-button click on the V-Ray Render component and select the "Render" option to render the sun position at frame 0. This will iniitialize the "V-Ray Render" component.
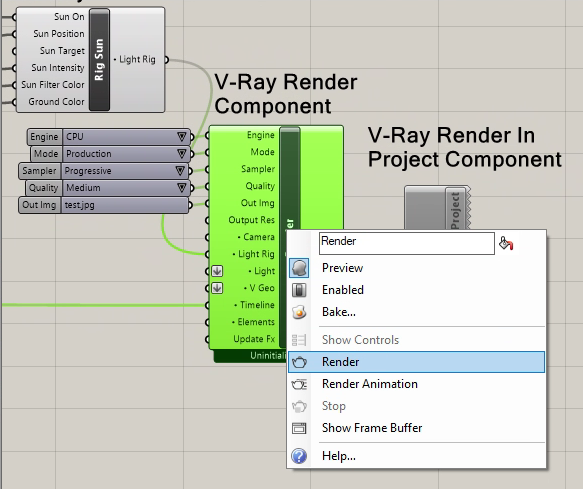
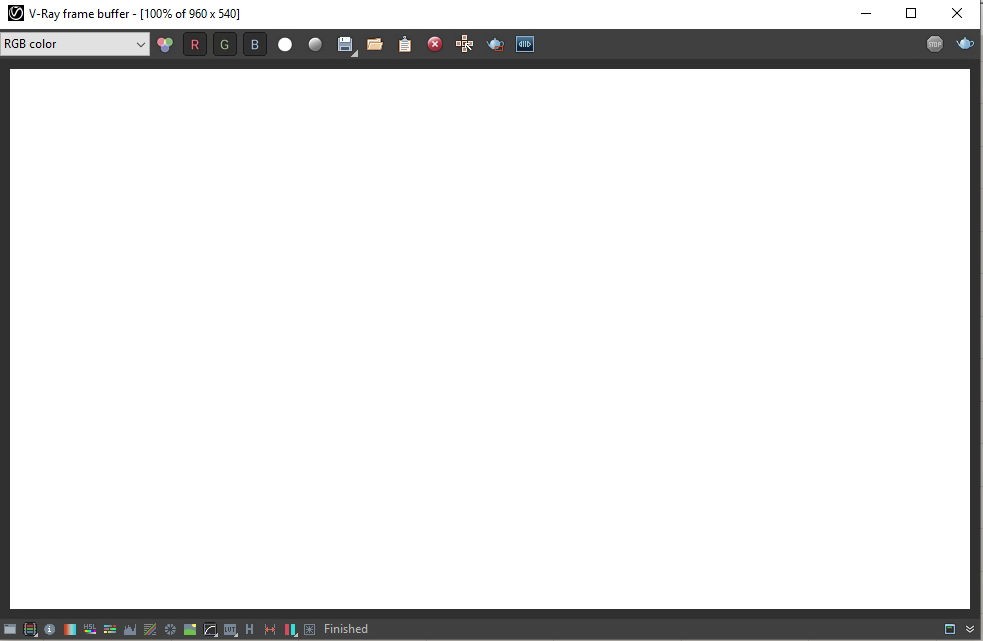
This step will simply result in a blank white screen in the "V-Ray Frame Buffer." This is because the light levels have not been adjusted. The blank screen also happens because there are no Rhino geometry objects incoporated directly in the Grasshopper canvas. Still, this step is necessary to intialize the V-Ray Render Component even if a useful image is not created.
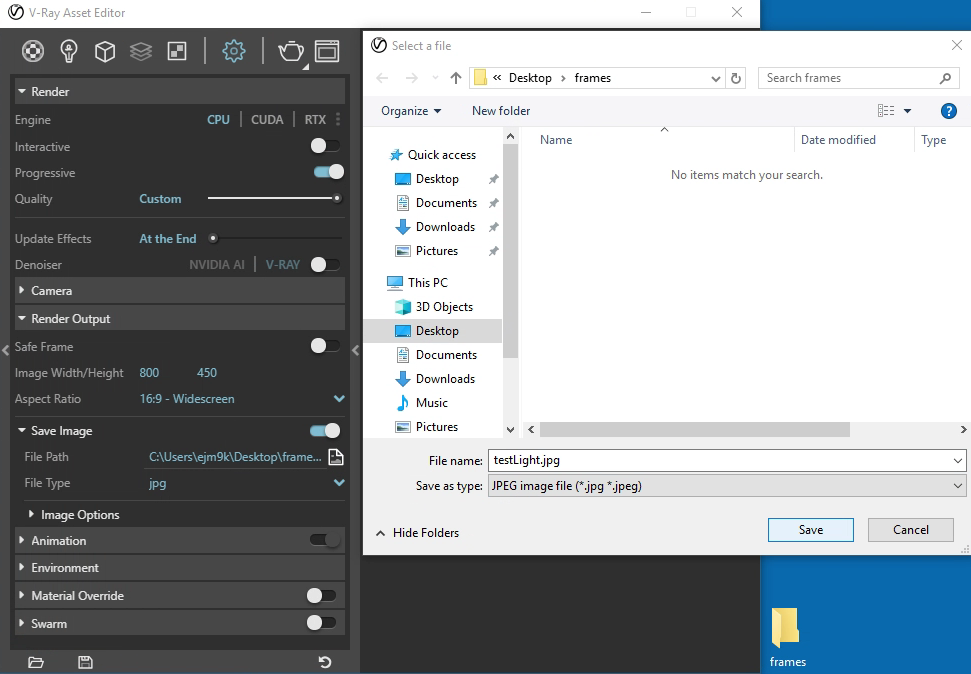
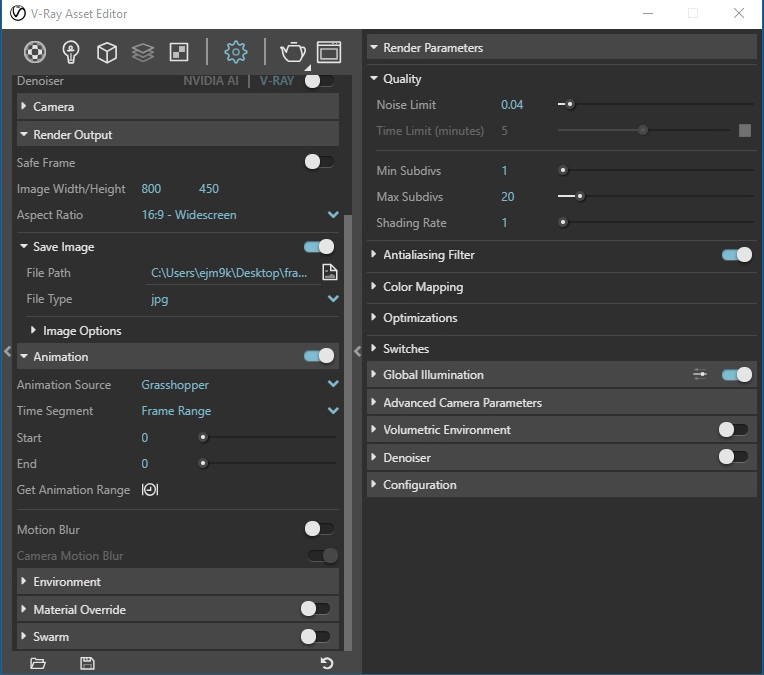
2. Next, create a folder such as one named "frames" for storing the rendered animation frames on the desktop. Open up the "V-Ray Asset Editor" and make sure that the "Interactive" render option is turned off as shown in the image below. Also within the "V-Ray Asset Editor", open up "Render Output" tab and switch on the "Save Image" button. Next, select the icon for the "File Path" and ensure that the file type is "jpg".
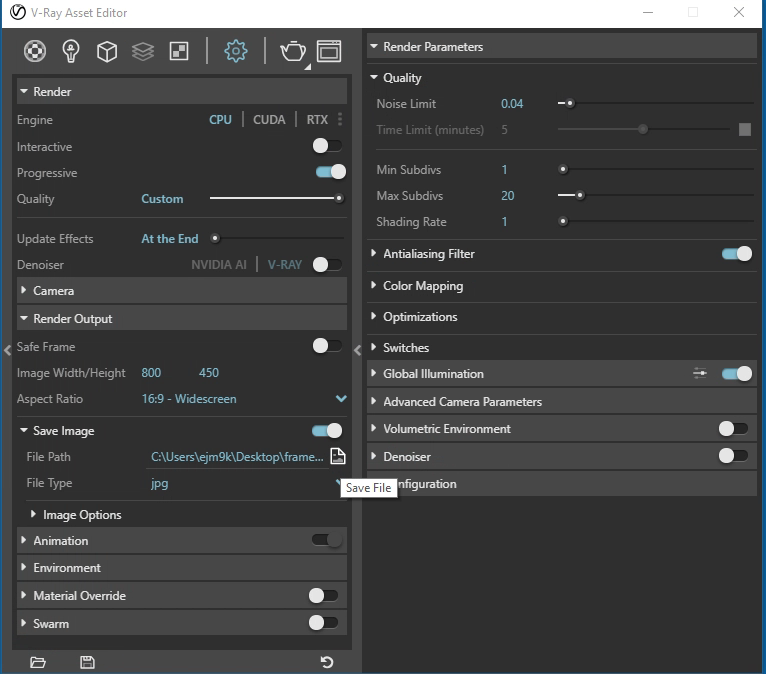
3. In the save file path dialog that follows, name the file and save it to the jpg format in the new folder named "frames" in this example.
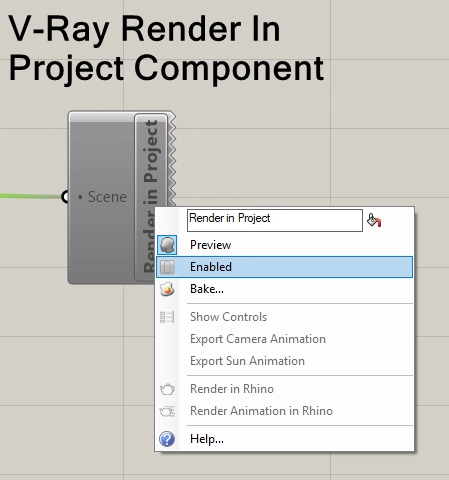
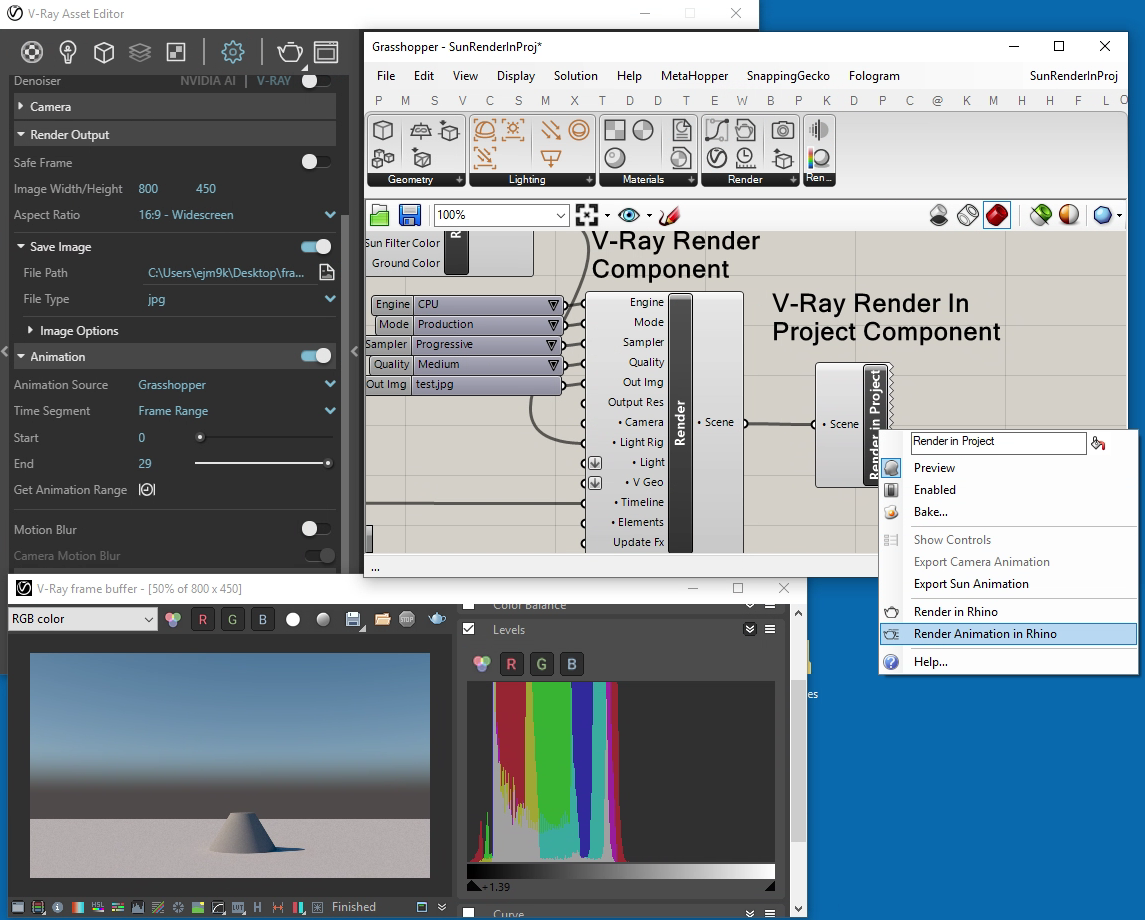
4. Go back to the Grasshopper Canvas window and right-mouse-button click on the right-hand side of the "V-Ray Render in Project" component. Select the "enabled" option to make it active.
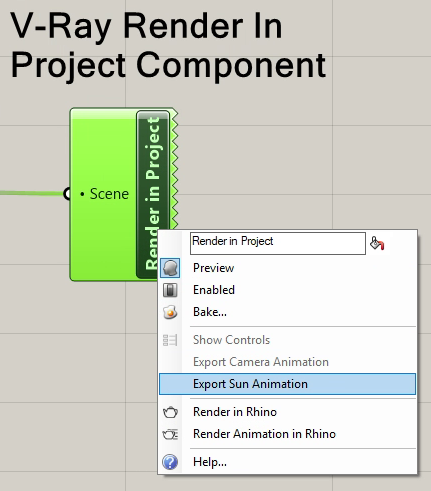
5.Next, right-mouse-button click again on the right-hand side of the "V-Ray Render in Project" component and select the "Export Sun Animation" option to pass the sun position data into Rhino.
The "Export Sun Animation" tool also activates the "Animation" tab button on the lower left-hand side of the "V-Ray Asset Editor" as shown below.
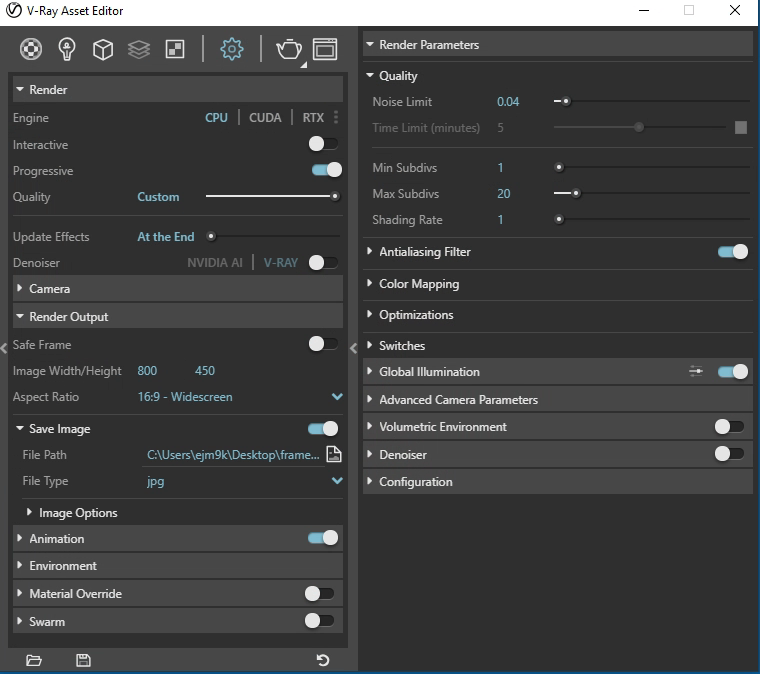
6. Open up the "Animation" tab for the "V-Ray Asset Editor", set the "Animation Source" to "Grasshopper", set the "Time Segment" to "Frame Range", left-button-mouse click on the "Get Animation Range" clock icon and it will read in the 30 frames associated with the 30 sun positions. Since there are 30 frames, the frames are numbered 0 to 29 below in this example. For an initial test rendering, if you had setup for smaller number of frames, such as 5 frames, then the frame range would have been 0 to 4.
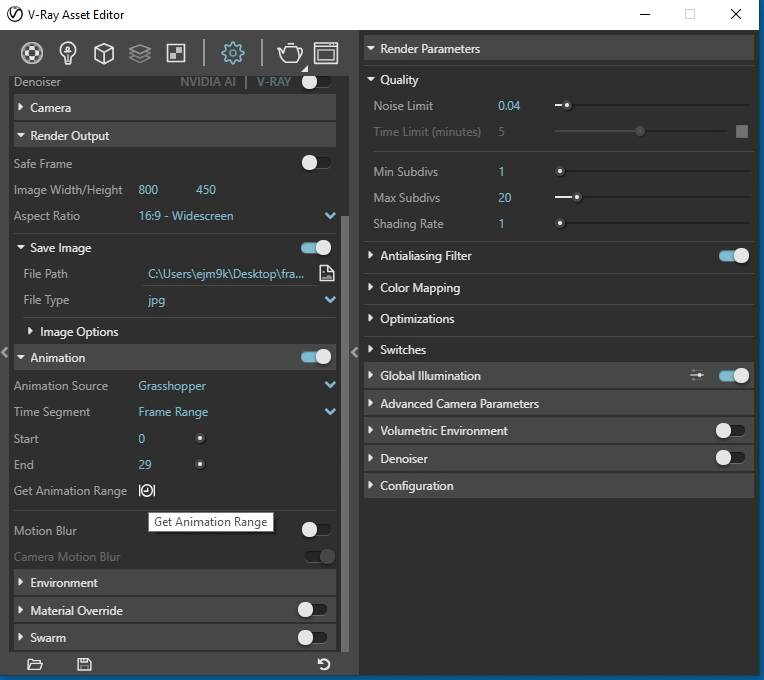
7. Continuing with the asset editor, set both "Start" frame and "End" frame to 15 for midday. In this example the Start and End frame at 15 are halfway throught the sunrise to sunset period.
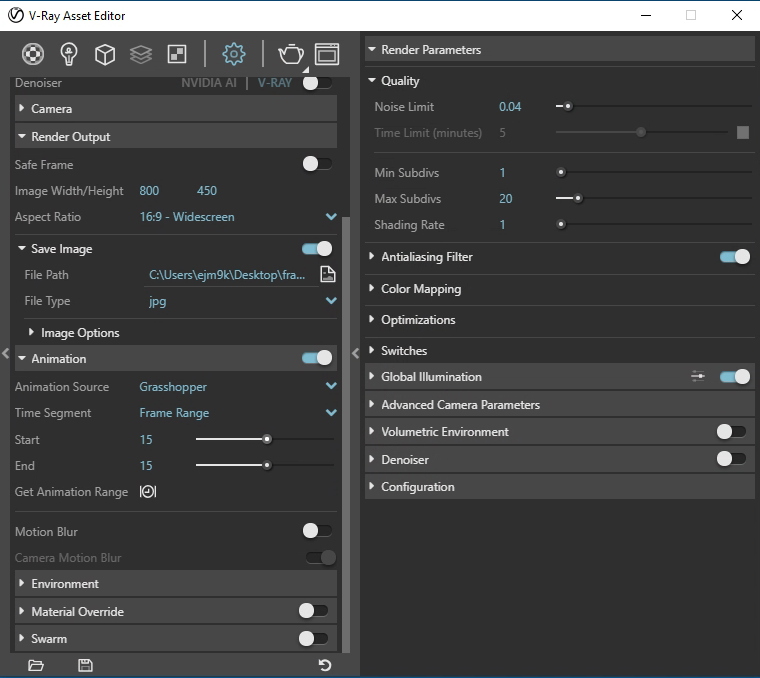
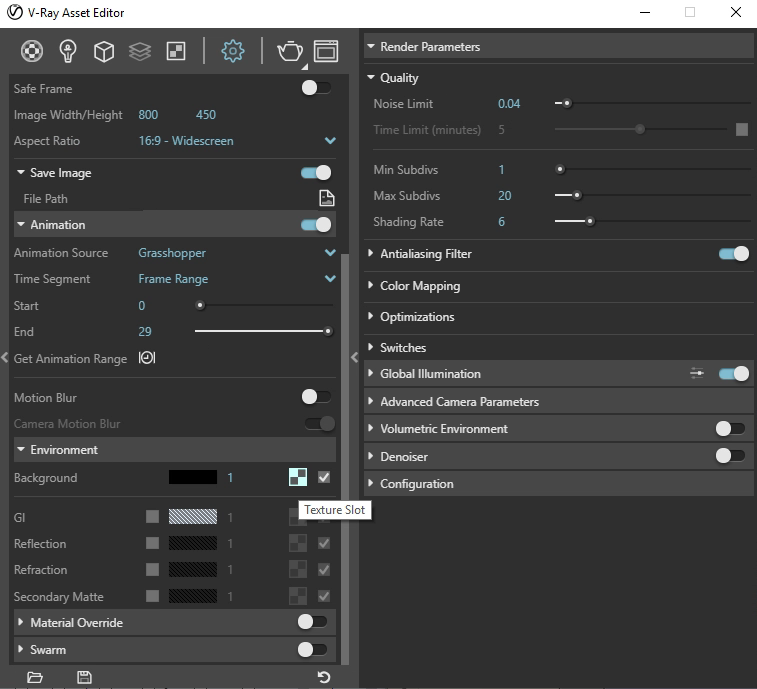
8. Next, use the environment settings to setup a background sky texture map.
Begin with selecting the Texture Slot as indicated in the screen capture below.
Next, slelect the "Bitmap" icon on the right-hand side of the V-Ray Asset Editor and choose the "Replace with New Texture" option as shown in the screen capture below.
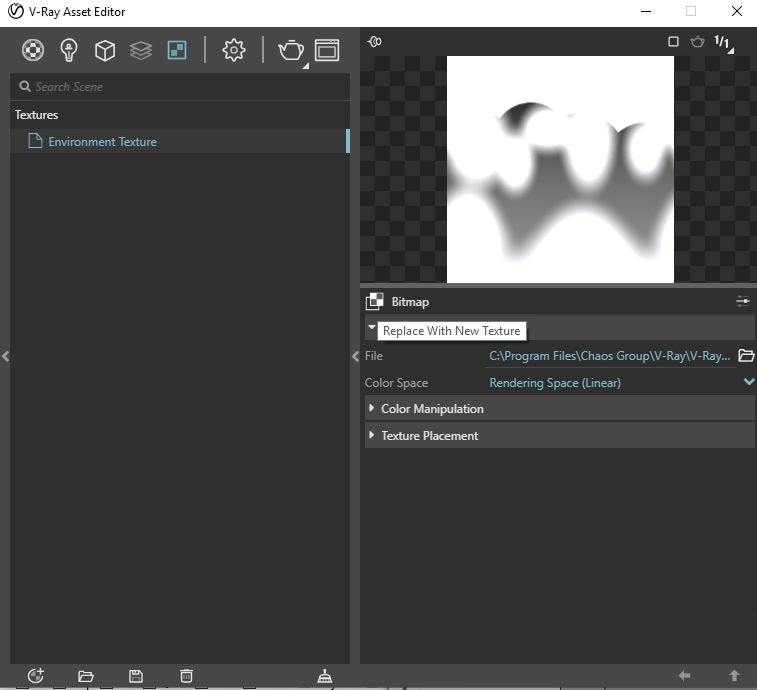
To complete this step select the V-Ray Sky texture map.
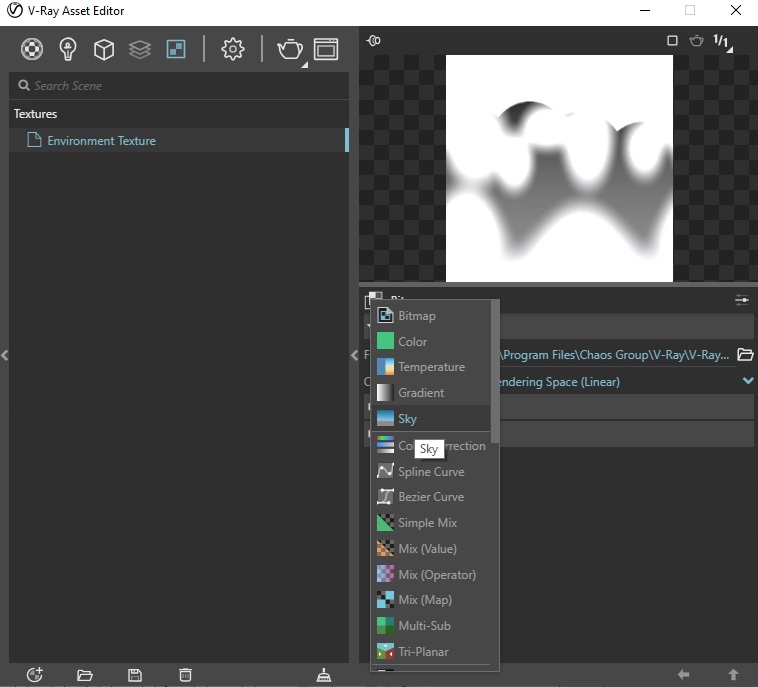
This last step will ensure that a V-Ray Sky goes hand-in-hand with the "V-Ray Render in Project" component.
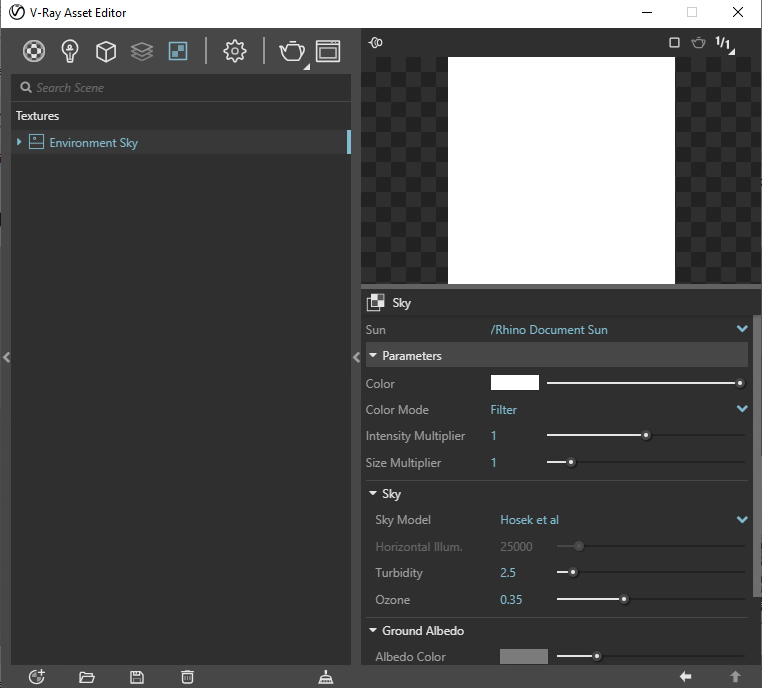
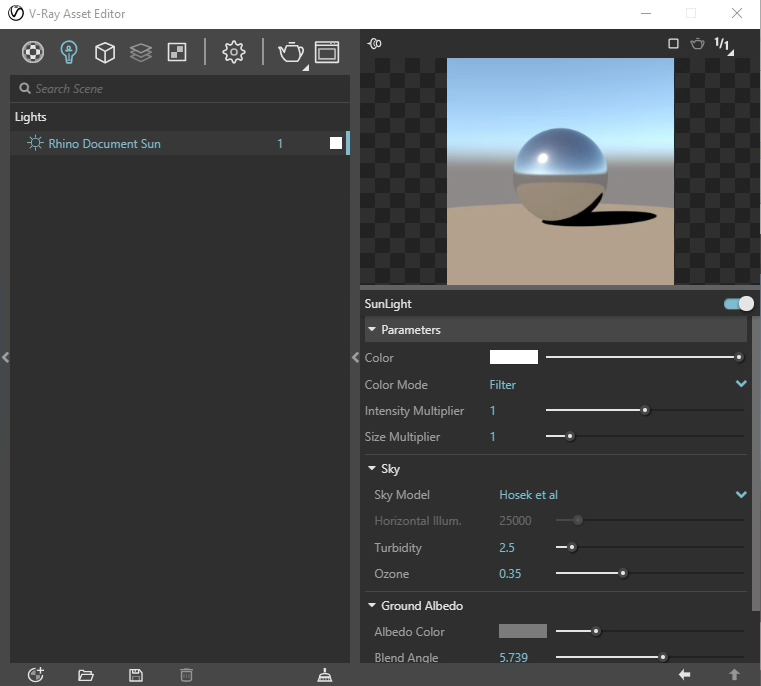
Note: it will also be associated with the Rhino Render Sun, but will not show up in Rhino Render.
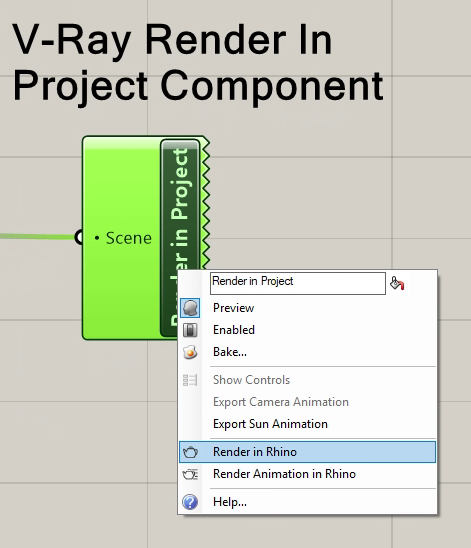
9. Once the asset editor has been setup, return to the Grasshopper canvas window, right-mouse-button click on the "V-Ray Render in Project" component and select the "Render in Rhino" option to render a single frame.
9 .Open up the light "Levels" panel in the "V-Ray Frame Buffer" window and adjust the dark and light range settings as done in previous workshops. Note that a midday sun may be set to be a little over exposed so that an early morning sunlight condition may be more visible. It's important to set the light level once for the entire animation so the the intensity of the light coherently rises from morning to mid-day and then discreases coherently towards the end of the end.
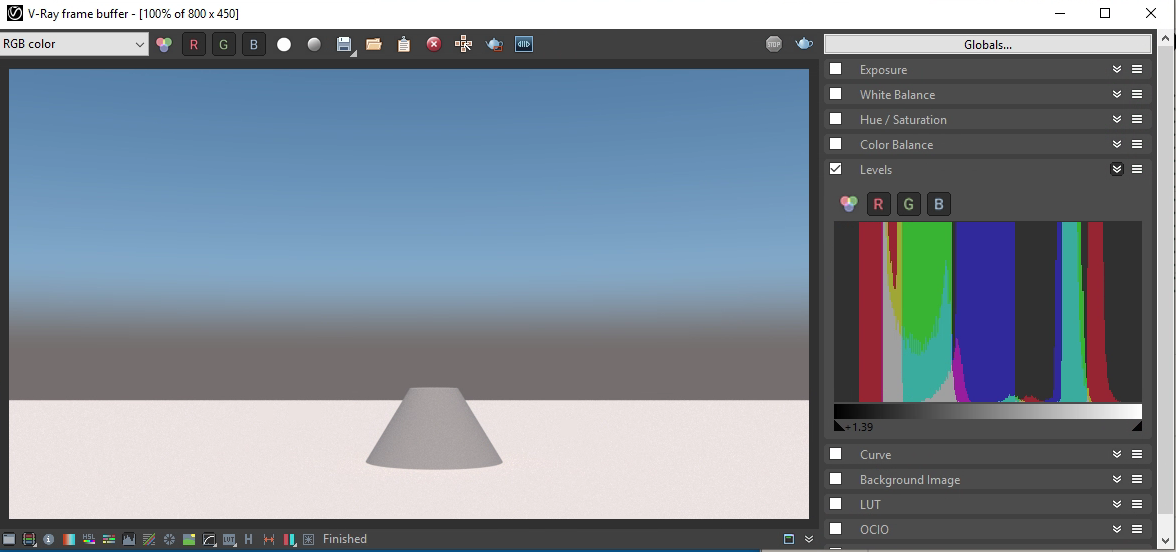
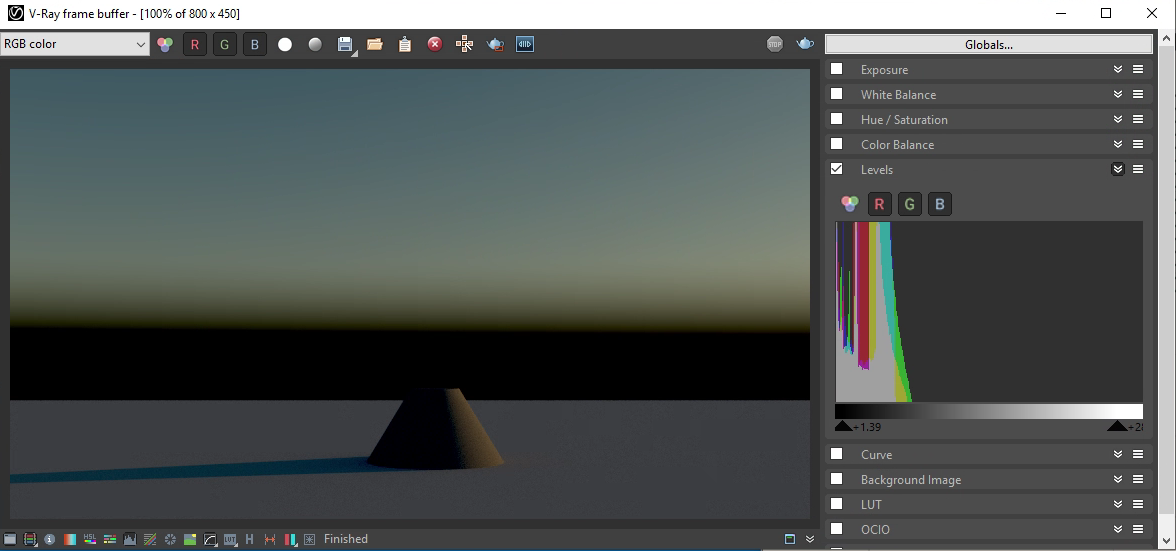
10. Similarly repeat steps 7 through 9 for a morning frame to see if the light levels are adequate. Here, the frame range is set from 0 to 0 for early morning.
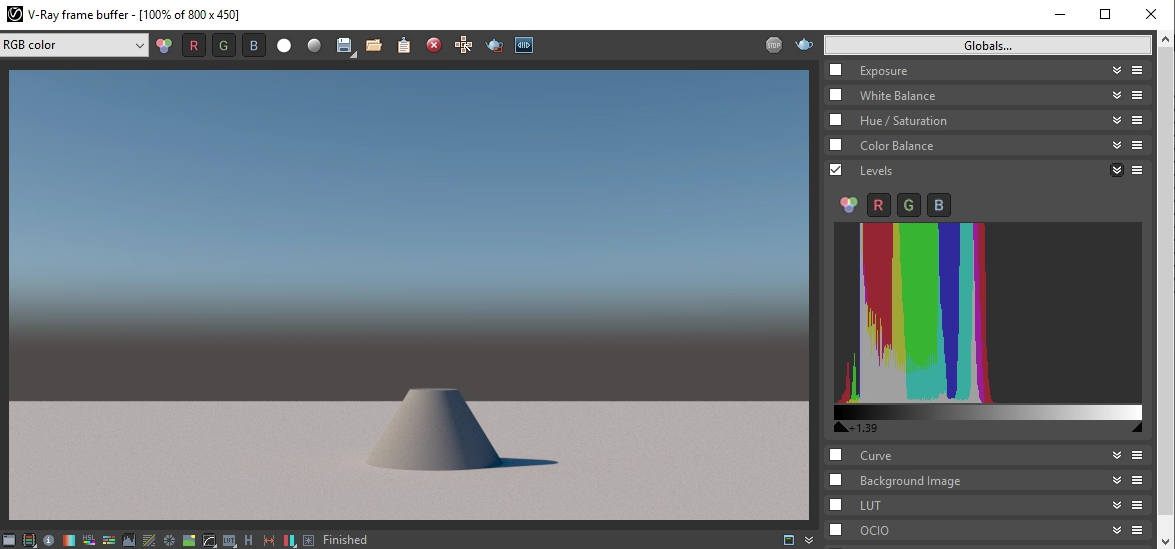
A test for mid afternoon (frame range 25 to 25 in this illustration) may also be helpful so as to check on shadow quality.
When the single frame testing is complete and the light levels adjusted, return to the "V-Ray Asset Editor" and restore the frame range back to 0 to 29 or to whatever the maximum range is desired for the full animation.
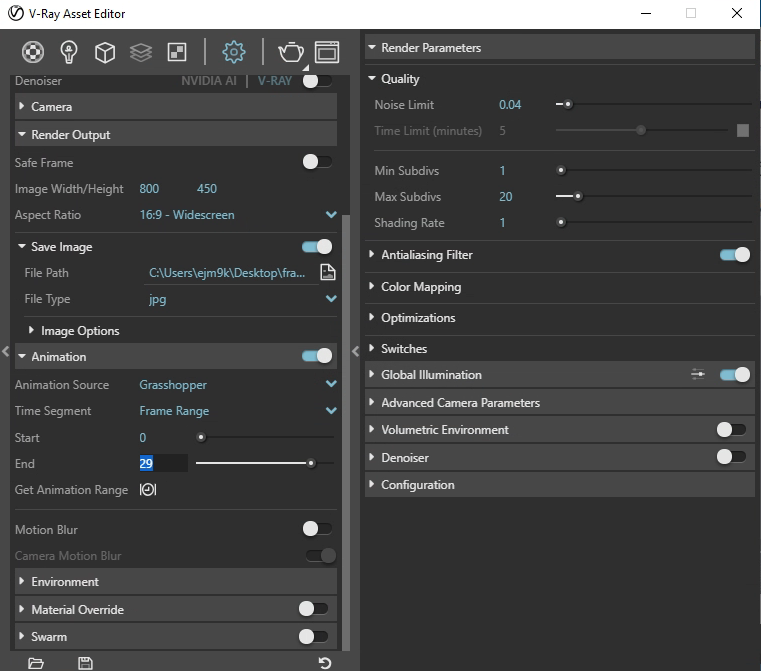
3. A few final steps are needed in the Grasshopper window with the "V-Ray Render in Project " component. Right-mouse-button click on the right hand side of the "V-Ray Render in Project" component and then choose the "Render Animation in Rhino" option. This will render all the animation frames.
We will compile the rendered frames in Part IV.
OpenShot can be used to compile the animation frames into a single movie file and also control the playback rate.
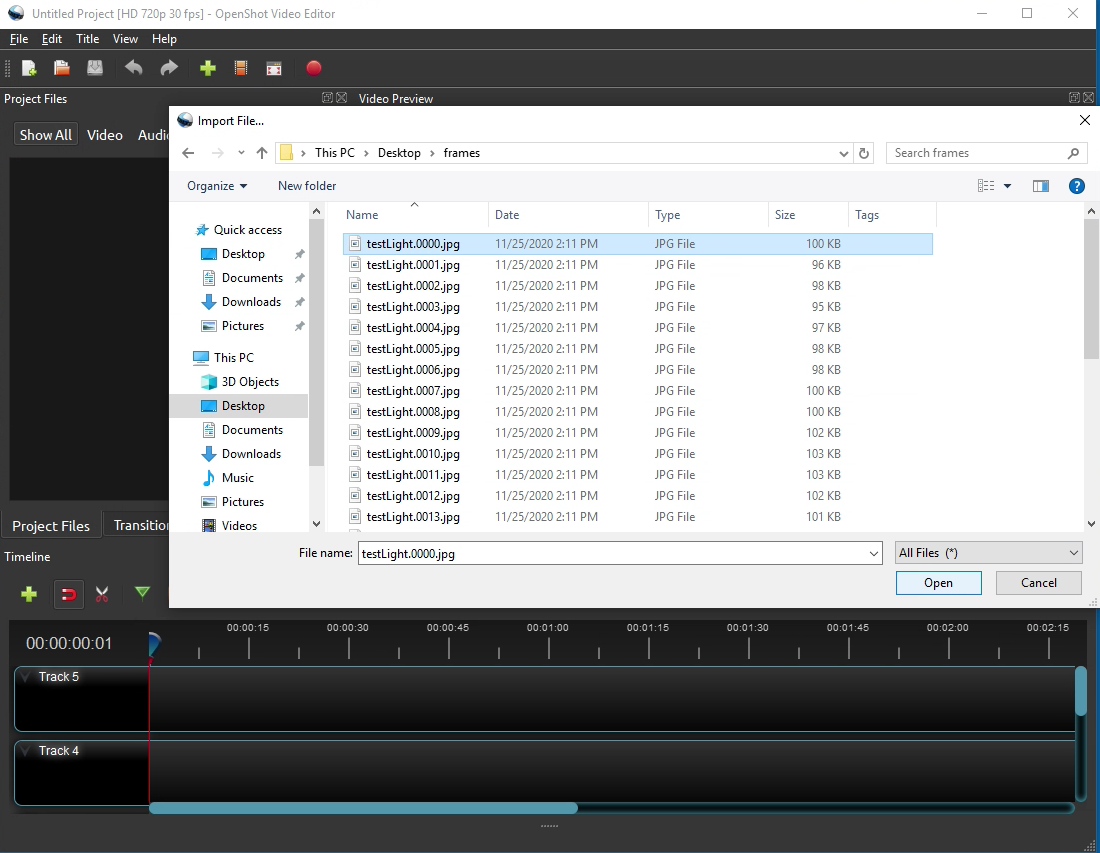
1. Launch OpenShot and use the import tool (green cross sympol) to import the animation frames. This has been described previously in earlier workshop notes.
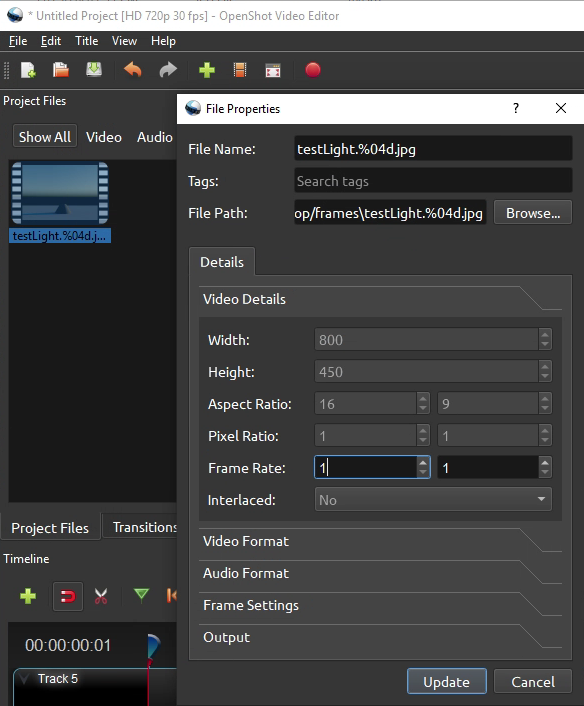
2. Right-mouse-button click on the media image in the "Project Files" area of the OpenShot editor and select "File Properties" to be able to change the frame rate.
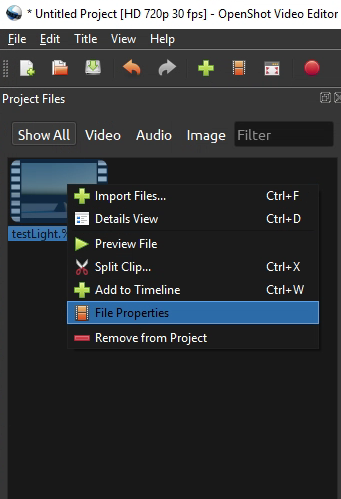
3. In the "File Properties" dialog box select the "Video Details" panel and change the "Frame Rate" to 1. Next, select the "Update Button" to confirm this setting.
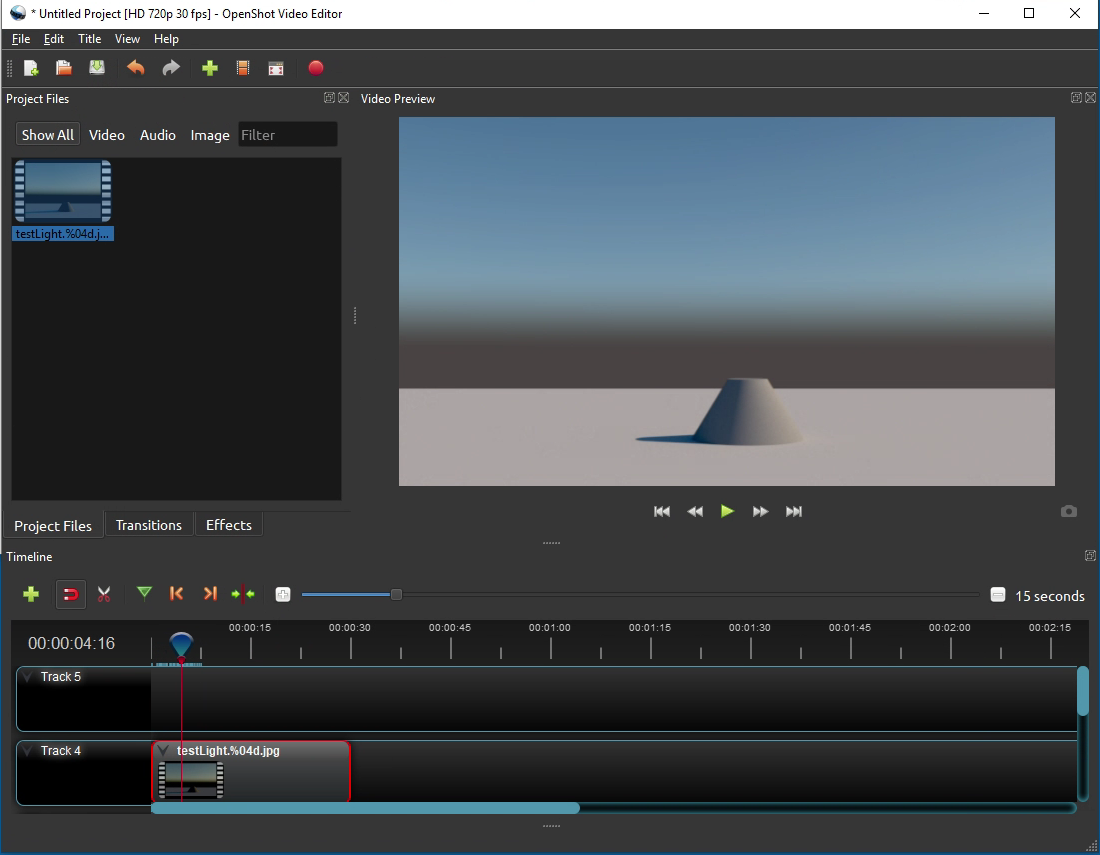
4. Place the updated media on Track 4 in the video editing timeline.
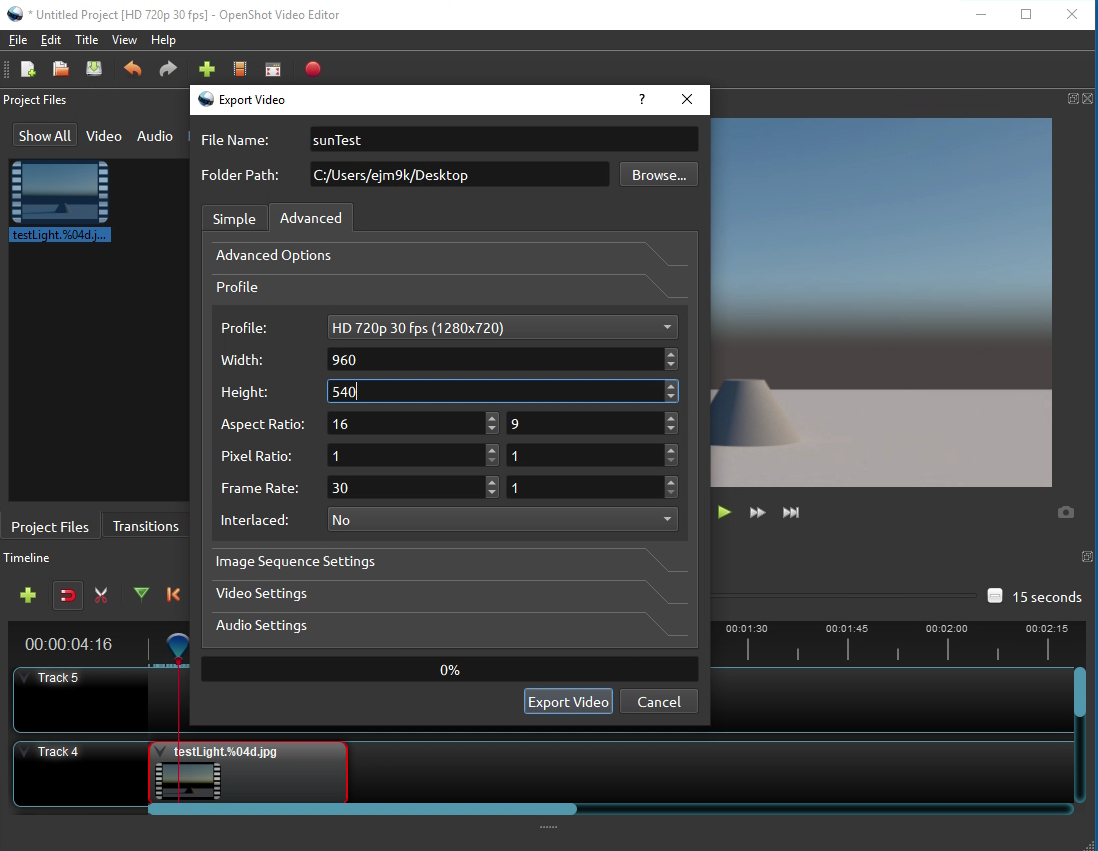
5. Setup the file record options as in earlier workshop notes. In this case we set into place the folder location for the exported mp4 movie file to be the the folder named "Frames" on the desktop . We set the image resolution in the "Advanced" tab and "Profile" sub-tab to be at 960 x 540 pixels. As you may recall from earlier workshops 960 x 540 pixels is the default original resolution of the "V-Ray Render" component.
The first animation below results from the sunlight moving at 1 frame per second for a total of 30 frames = 30 seconds.
The second animation results from the sunlight moving at 30 frames per second for a total of 900 frames = 30 seconds. The shadow and light movement is more continuous; however, it takes about 30 times longer to render!