1. Keyframing
Keyframing is a technique of interpolating the transformation of an object between two separate frames in an animation. In this example, you place an object at a given scale, rotation, and location at one frame within an animation sequence and then reposition at another scale, rotation and/or location at a separate frame. The software interpolates the transformation of the object between the two separate frames. Keyframing can also be used to alter other properties of objects, such as color, transparency, etc.. Note that this tutorial is based upon Bongo 1.0, which has restricted access to some Rhino commands. The "Gumball" tools do not work with transforming objects for Bongo 1.0.
The end result of this first tutorial will be the following animation:
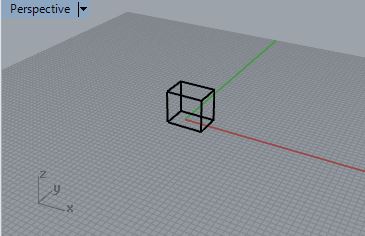
Start a drawing in Rhino, and place a simple box at the origin.
Go to the "Bongo" menu, and select the "Timeline" menu item, and note that a frame sequence is placed at the bottom of the Rhino window.
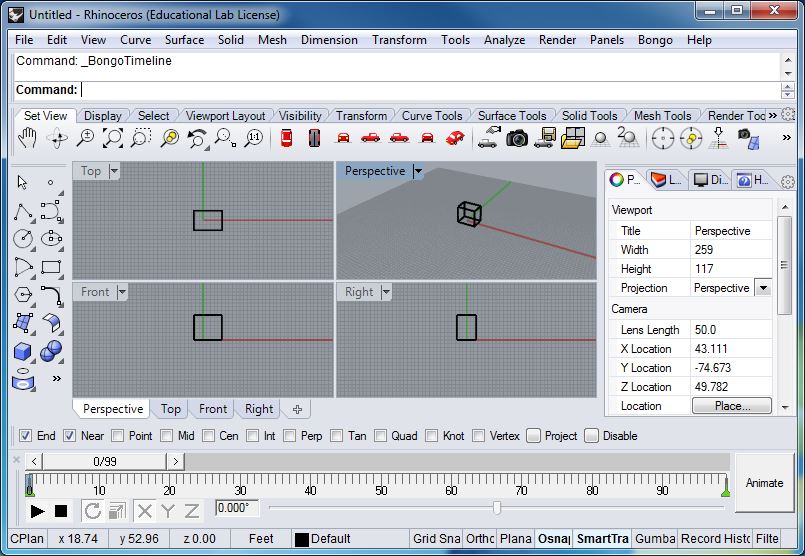
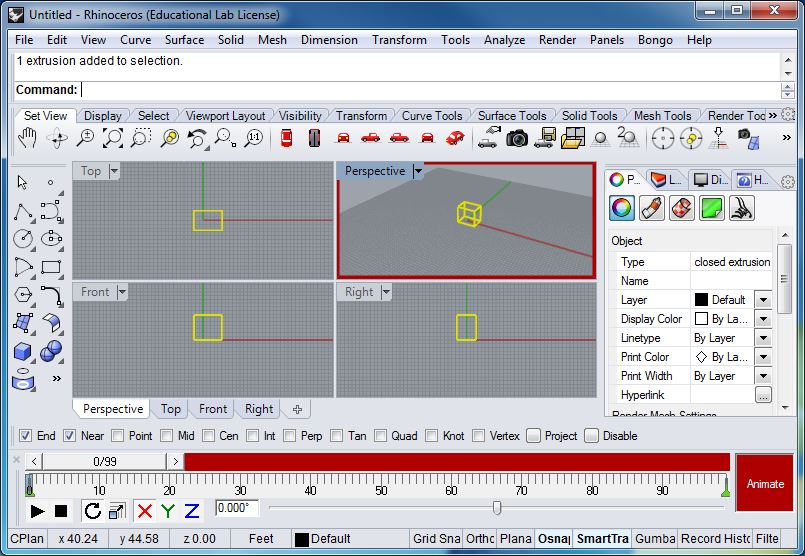
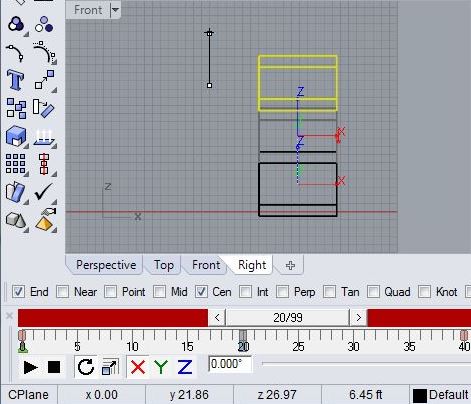
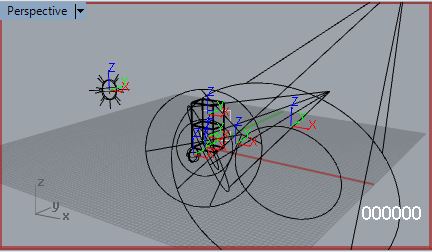
Click on the right-hand side of the timeline to activate it and then select the box inside the perspective view window. This establishes the first keyframe for the box at frame "0" in the timelime as depicted in the image below..
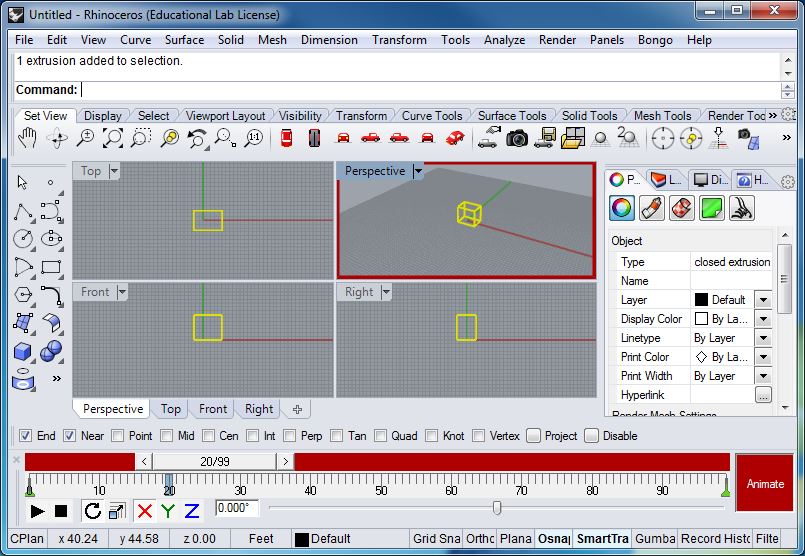
Next, place the mouse in the frame counter/slider (labelled 0/99 in the image above), and drag it to frame 20/90 as indicated below.
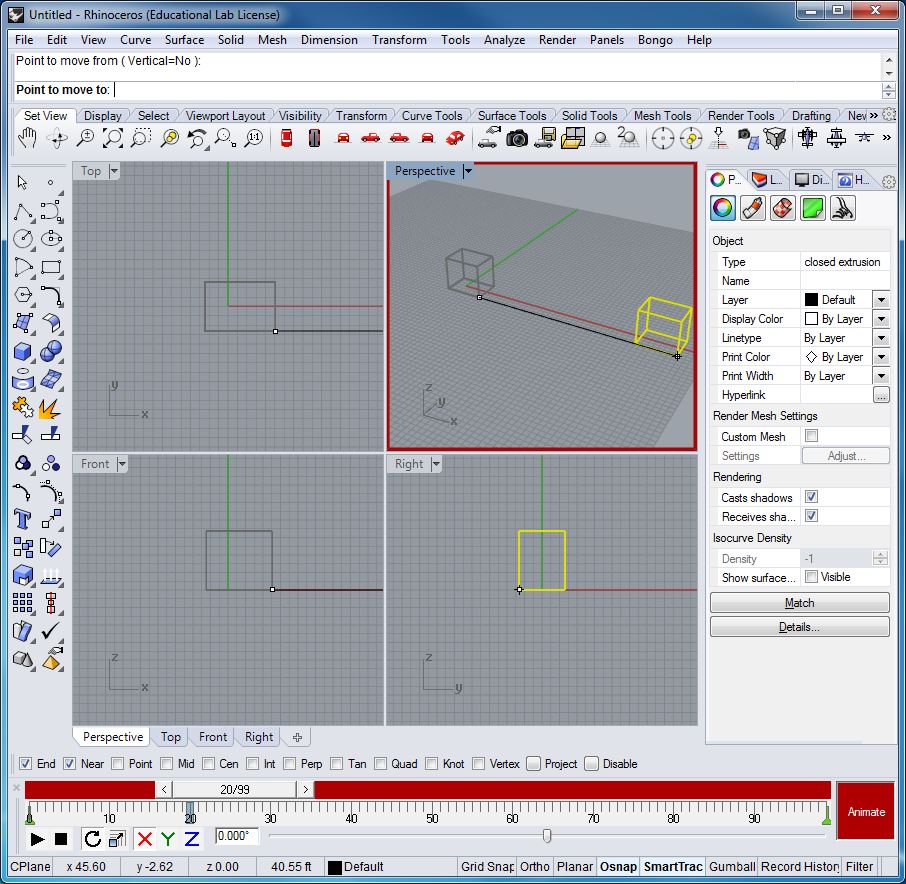
Now, move the box
some arbitrary distance along the positive x-axis..
Click off the "Animate" button at the right end of the timeline to turn off the keyframing mode. Playback the box with the triangle symbol below the left-end of the timelime and see it animated from frame 0 to 20.
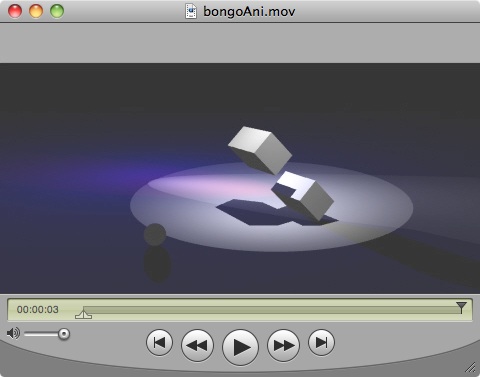
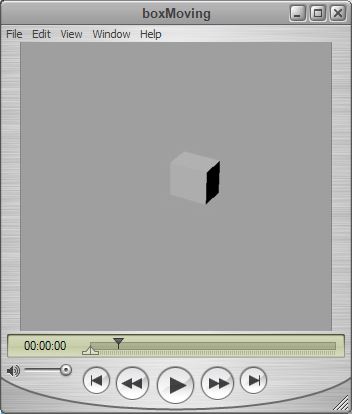
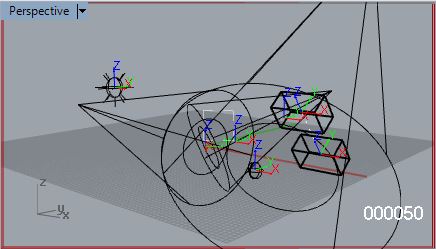
As we will see later on, when rendered the animation would appear as
follows (select the image below to see the animation):
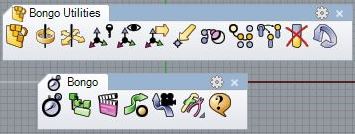
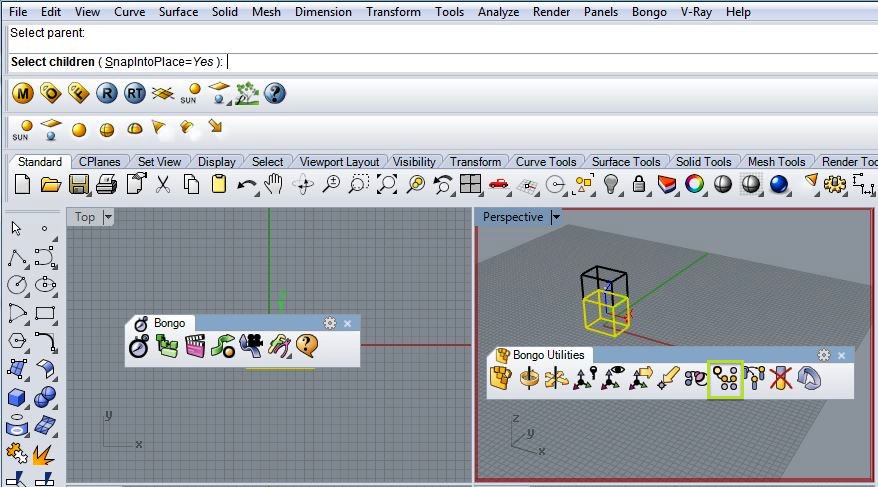
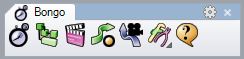
Go to to "Tools/Toolbar" menu. In the "Files" list in the upper right hand corner select"Bongo". In the "Toolbars" list in the lower right corner check on the optios to display "Bongo" and "Bongo Utilities"s
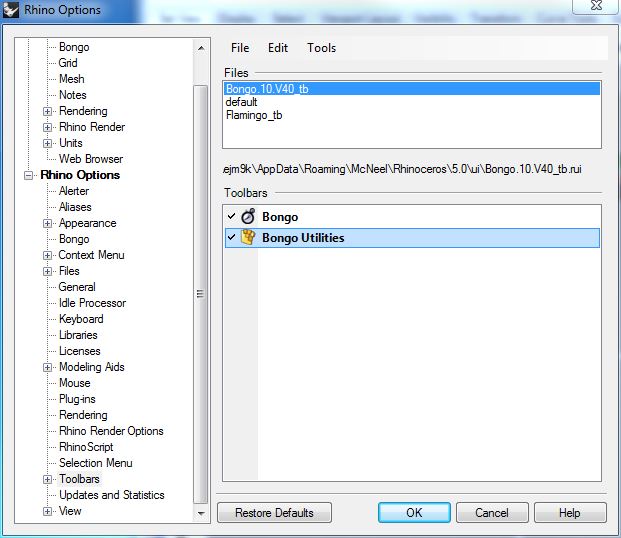
The new toolbars "Bongo Utilities" are "Bongo" now displayed on the computer screen:
Now go back to the timeline and turn on the "Animate" button. Drag the current frame slider to frame 40. In the "Bongo Utilities" menu, select the adjust scale option, select the box inside the Perspective window, press the enter key, and at the command prompt for Axis-X Scale enter the number "1.5" to increase the box 150 % relative to its center pivot point.
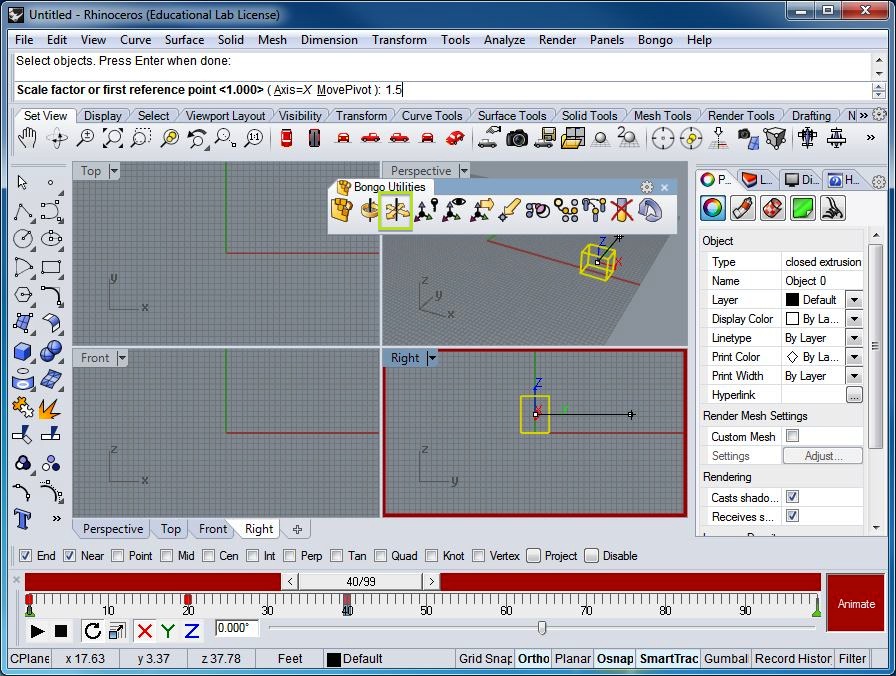
Press the "enter" button again. Select off the "Animate" button in the timeline and play back the result. Note that the box remains constant in size from frames 0 to 20, but then increases in scale from frames 20 to 40.
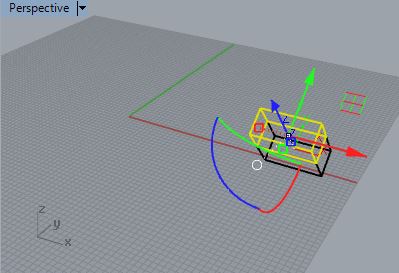
Once again, turn back on the "Animate" button, and drag the frame slider to frame 60/99. Now, within the Bongo Utilities menu, select the rotate tool, select the box, and in the command prompt for rotation about the x-axis, set the value to 45 (degrees) and then turn off the "animate" button.
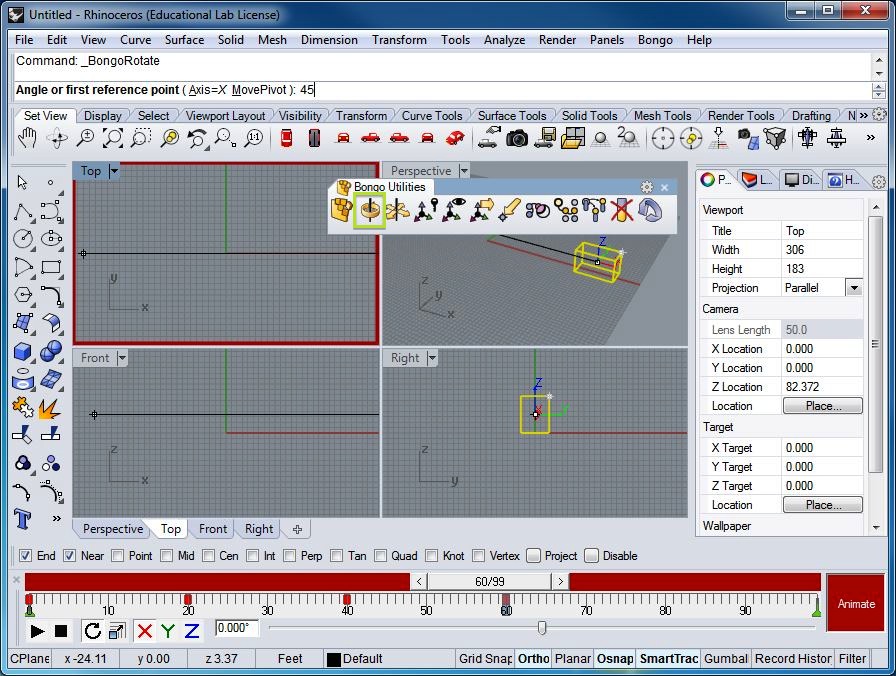
Play back the
animation and note that the box rotates from frame 40 to 60.
2. Parent-Child Hierarchy
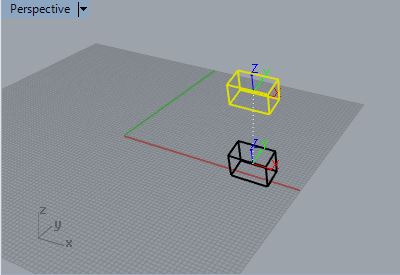
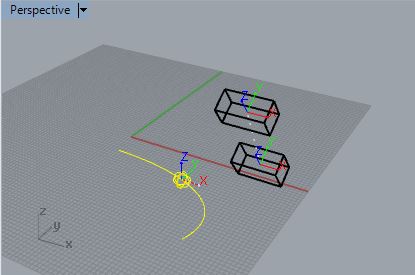
Place a second box on top of the first box in the perspective view window. In the Bongo Utilities palette pick the "Select Object's Children" icon, select the first box as the "parent", select the second box as "the children", and press the enter key.
Go the the menu item "Bongo/Animation Manager" which opens the "Animation Manager" window. Note the hierarchical relationship between the parent "object 1" (the first box) and the child "object 2" (the second box).
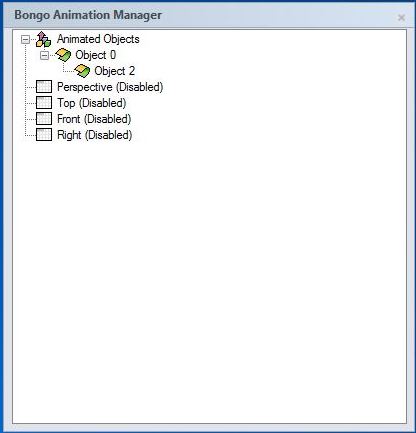
Playback the animation and note that the second box inherits the animation properties (e.g., translation, rotatation and scale) of its parent.
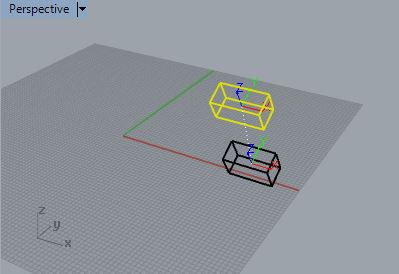
However, go back to the first frame of the animation, turn on the"Animate" button, and then select the second box. Drag the frame/slider to frame twenty, and in the "front" window use the move tool to move the second box some distance above the first box.
Playback the animation and note that the box follows the rotation, scale, and translation of the first box, and, in addition, it moves vertically from frames 0 to 20.
 |
 |
3. Path animation.
Create a curve and place a sphere at the end of the curve. Next, in the "Bongo" palette, select the "object constraints" icon.
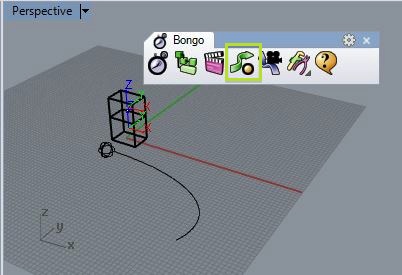
Now select the sphere, and in the dialog box that follow, select "add".
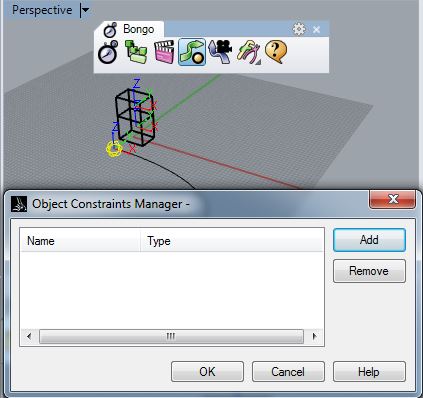
Next, in the Object Constraints Manager select the option "to Path" and then select the curve.
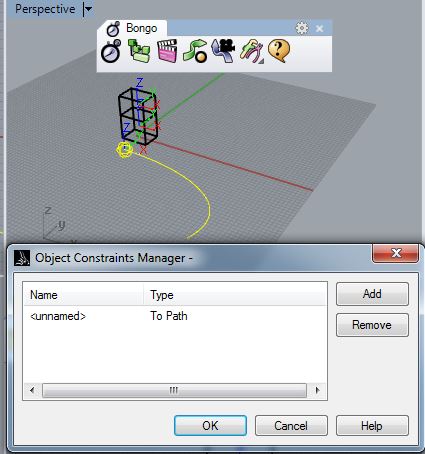
Playback the animation and see the sphere follow the pathway of the curve. Place the curve on a hidden layer, playback the animation, and the sphere remains animated.
 |
 |
4. Light Animation
Use the Rhino render tab and pick the continuous ground plane icon.
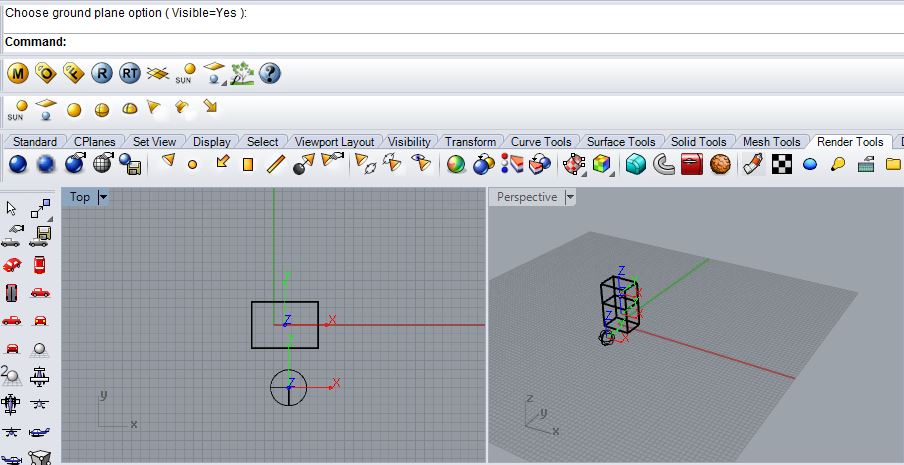
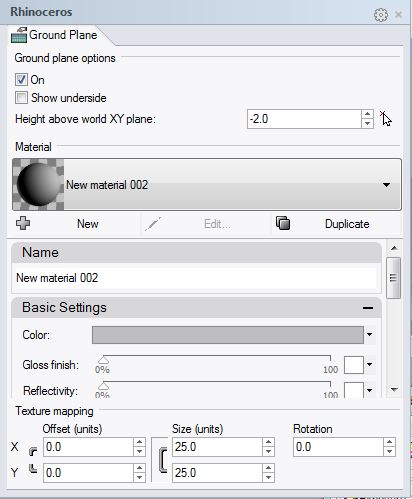
The ground plane icon launches a dialog box in which you can turn a check-box to on the ground plane and set its properties such a height, extents, and material. In this case the check-box is selected "on", the "Height above world XY plane is set to -2.0 (2 units below the x-y plane), and the color is set to gray:
Create a three-point lighting setup consisting to two spot lights and one point light similar to prior tutorials. Adjust the intensities of back spot light and point light to 50% and reduce their shadow intensities to 0%.
In the plan view, select the front spot light. Within the "Bongo Utilities" palette, select the "Move Object Pivot" tool to move the pivot point of the spot-light to the origin.
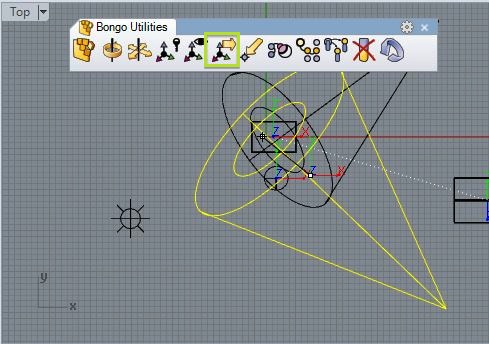
Go to the first frame and turn on the "Animate" button. Move the frame slider to frame 100 and within the "Bongo Utilities" palette use the rotate tool. Set the rotation axis to the "Z-axis" at the command prompt and within the plan window rotate the front spot light to the left.

Turn the "Animate" button to off. Playback the animation and note the rotation of the spot light.
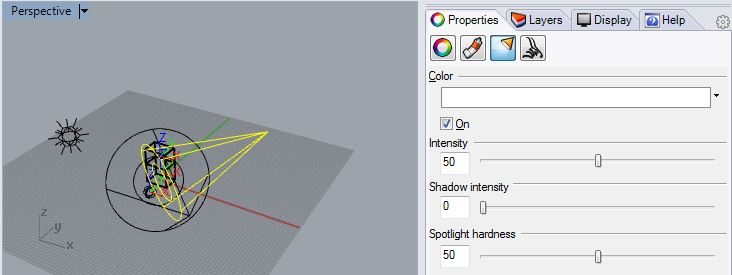
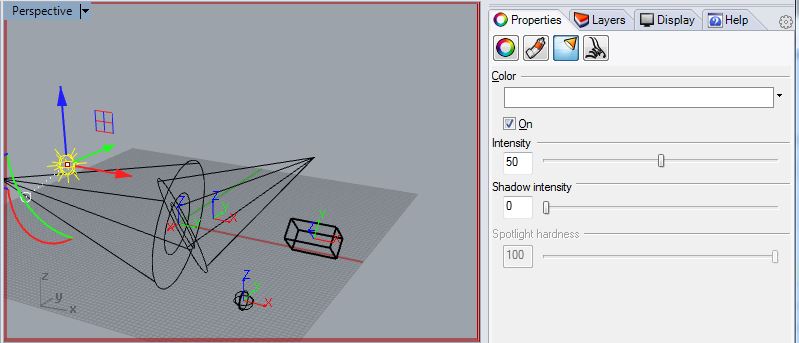
Turn the "Animate" button to on. Go to frame 0 and select the back spot light. Go to its properties tab, and note that the color is white and that the shadow intensity to intensity is a 0%.
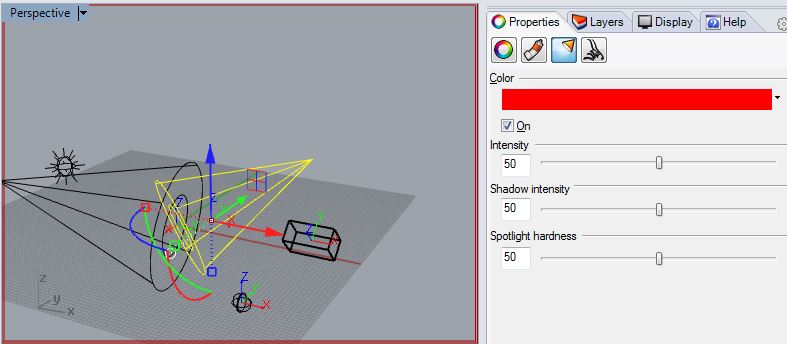
Go to frame 100 and change the color is red and the shadow intensity to intensity is a 50%.
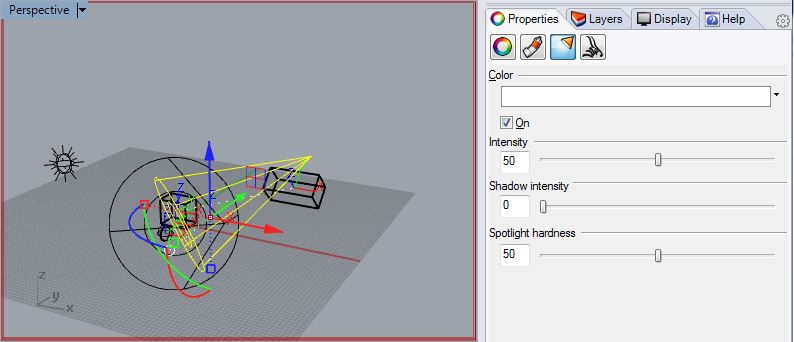
Turn off the "Animate" button, go to frame 0, select the point light, and then turn back on the "animate" button. Note the properties of the light with the color set to white and
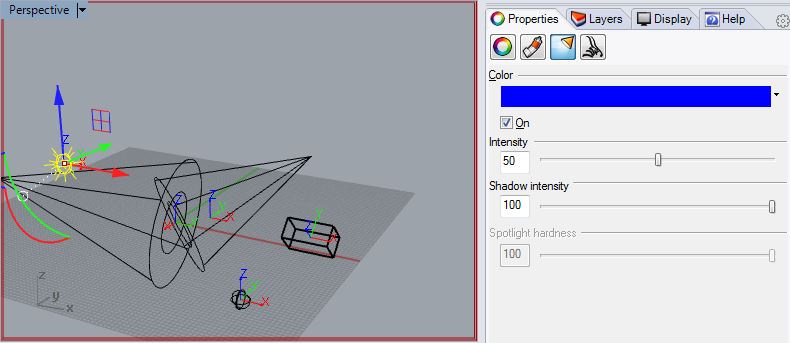
Go to the properties tab, change the color the light to blue, and the shadow intensity to 100%
Turn the "Animate" button to off. Playback the animation and note the change in properties of the point light.
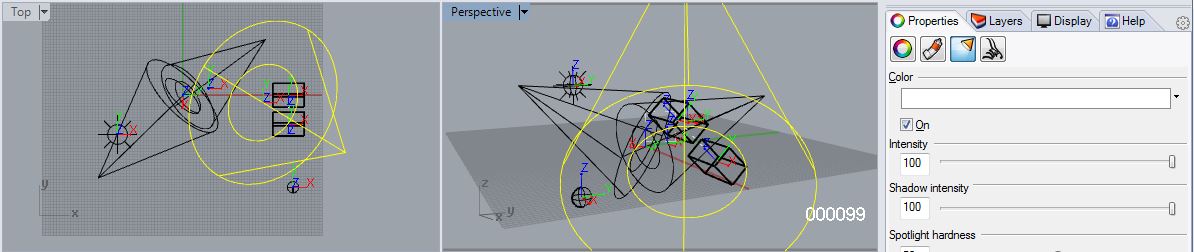
Finally, target a spot light to where the original box travels to in the final frame, and set its intensity 100% and its shadow intensity to 100%.Turn on the "Animate" button, and keyframe the light so that it is checked off from frames 1 to 49, and checked-on from frames 50 to 99.
Turn the "Animate" button to off. Playback the animation and note the change in properties of the point light.
5. Simple camera animation.
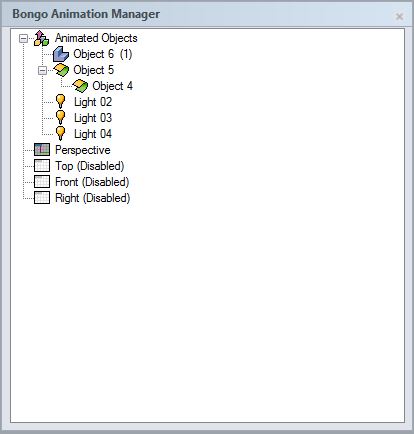
Go to the "Bongo Animation Manager" window, right click on the icon adjacent to the word "perspective" and select the option "animation enabled".
Go to frame "0", turn on the "Animate" button, and select the perspective view.
Drag the frame slider to frame 50 and change the view.
Drag the frame slider to frame 100 and change the view.

Turn off the "Animate" button. Playback the animation and see the camera movements.
6. Rendering.
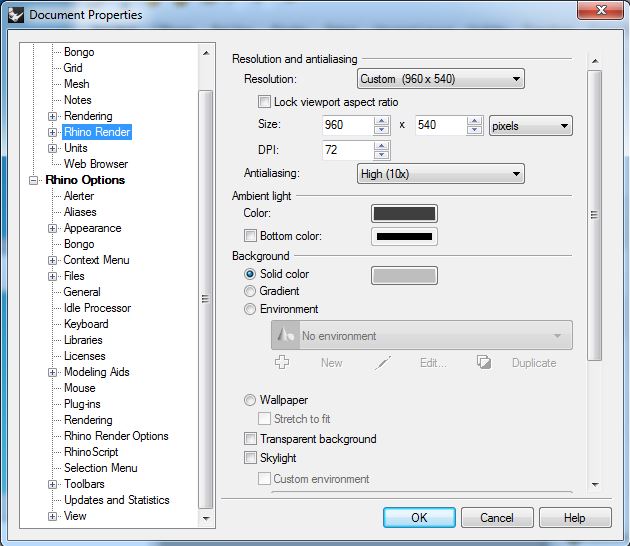
Due to some instability issues, you should render animations in Rhino Render rather than VRay on Bongo 1.0 (the current version loaded on School of Architecture Computers. If you purchase Bongo 2.0 release a few few weeks ago, VRay appears to be working more consistently. Go to the Rhino menu "File/Properties", select "Rhino Render" and choose the quality and resolution you want. Here, the resolution is set to 960 x 540, antialiasing is set to High (10x), the ambient light color is set to dark gray to pick up the general level of illumination slighlty, and the background is set to a middle shade of gray
Within the "Bongo Animation" palette, select the "Render Animation" tool.
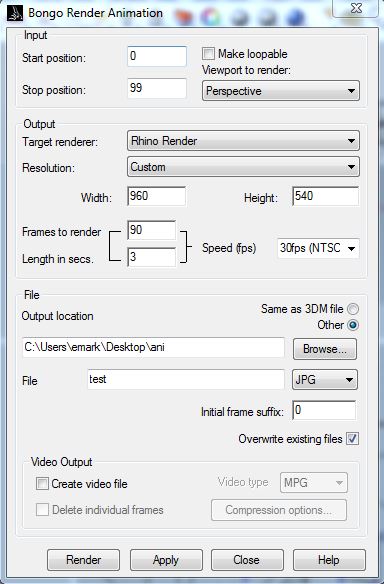
Or, go to the main menu item "Bongo/Render Animation". This tool launches the "Bongo Render Animation" dialog box. In the dialog box, choose the following settings:
Start position: 0 (the first frame)
Stop position: 99 (the last frame)
Viewport to render: Perspective
Target renderer: "Rhino Rnder" (or viewport display)
Resolution: "Custom"
Width: 960 (half the full HD resolution)
Height: 540 (half the full HD resolution)
To expedite rendering during the workshop, we'll use:
Width: 480 (one quarter the full HD resolution)
Height: 270 (one quarter the full HD resolution)
(Note: for full 1080HD resolution, you use 1920 x 1280, for 720 HD resolution use 1240 x 780, for older NTSC resolution use 1024 x 768 or 640 x 480.)
Frames to render: 99
Speed: 30fps (NTSC).
Output location: c:\users\yourID\Desktop\ani (or choose any folder on your computer, but not on a server or a folder over the network)
File: "test"
Type: "jpg"
Initial frame suffix: 0
Check-on create video file if you want to directly produce an "MPG" compiled movie file (not recommended)
To save the current settings select the "Apply" button.
To render select the "Render" button" and then the "Close button.
Rendering may take a few minutes to several hours depending upon the number of frames desired, resolution, the quality rendering selected, the number of lights, materials and their properties. The test here should take approximately five minutes.
7. Compiling the movie in Quicktime Pro.
7.1 Open Quicktime pro.
- Within Quicktime Pro open the file/open image sequence
- Go to images folder and select first image.
- Set the frame rate to 30 frames per second and hit the OK button.
- Save the movie to the Quicktime movie (".mov" format.
- When saving the movie make certain you use the "self-contained" option.
- Delete the animation frames if no longer needed.
7.2 Add a second sequence in Quicktime Pro {for adding a second compiled movie file to the first one - we may cover this in the next workshop.
- Create a different animation sequence at the same resolution
- Render
- Compile the renderings in Quicktime Pro
- Open two Quicktime Pro editing Windows, one for each "mov" file.
- Use Quicktime Pro's editing tools to cut and past from from edit window to another.
- Save the result as a self-contained movie.
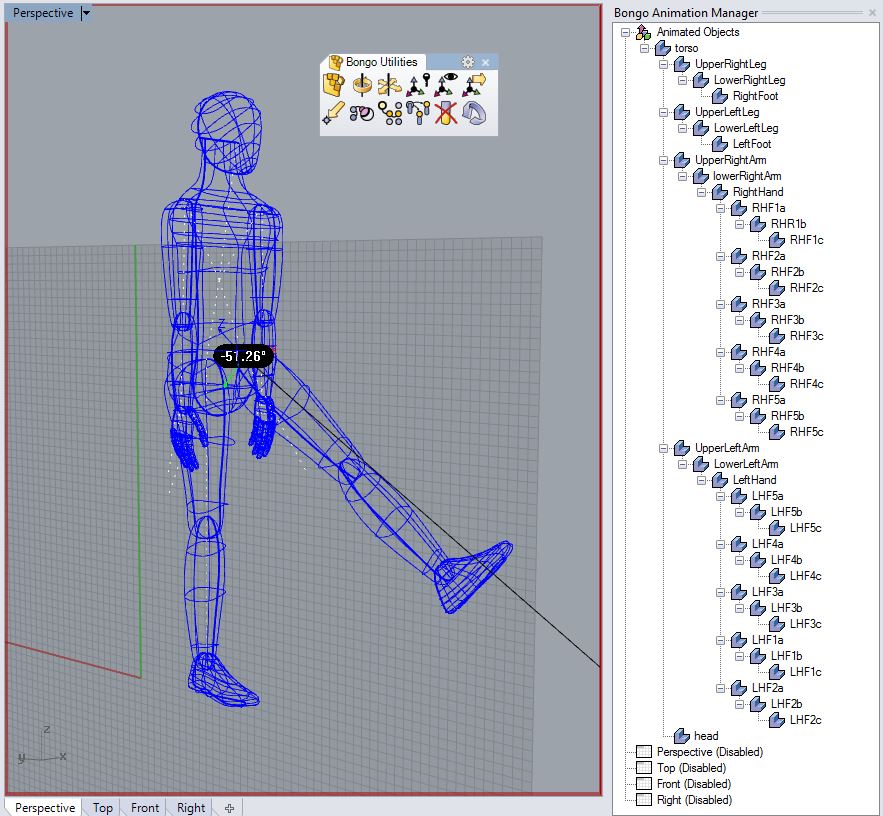
8. Simple character animation.
Open the file CLASSES/ARCH2710-610-Mark-FAL2013/examples/ergoman/ergomanBongo.3dm, make the front construction plane active, an animate the figure tumbling by a combination of using the Bongo Utilities rotate tool and the Rhino move tool.