COMPUTER
AIDED
ARCHITECTURAL DESIGN
Workshop 10
Notes,
Week of October 19, 2015
RHINO RENDER ANIMATION AND QUICKTIME EDITING
This set of workshop notes introduces animation techniques with Rhino Rendering and also introduces Quicktime 7 Pro for editing together animation sequences.
I. Setup
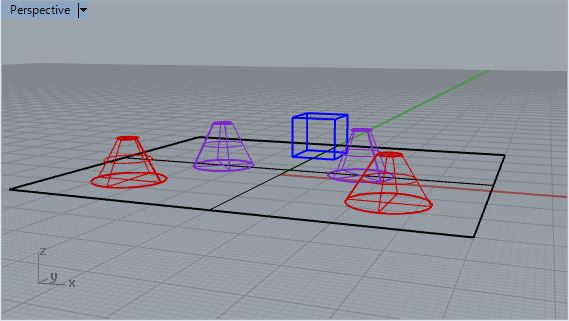
1. Create a Rhino file in large units feet on the desktop, and add some objects to include in three types of animations - animation of the sun, animation of the camera moving along a path, and a simple 360 "turntable" type animation.
 2.
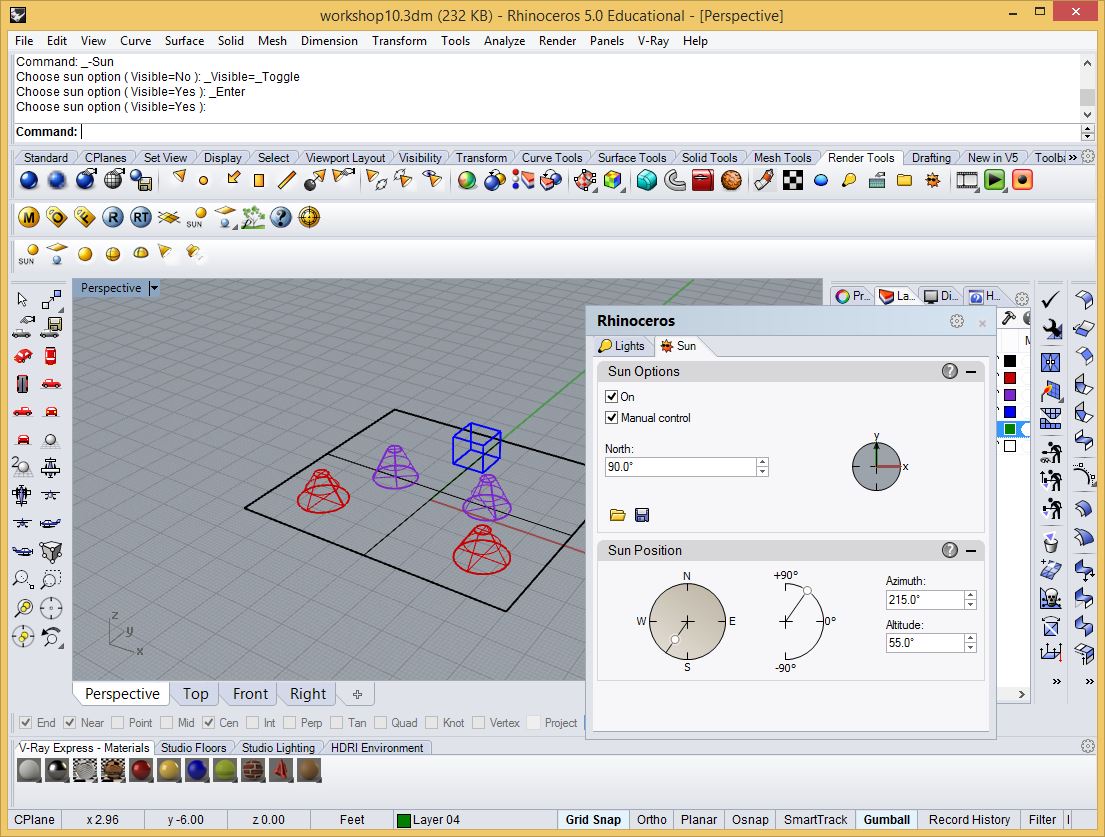
Add a Rhino render sun by going to the "render" tab, selecting the
"sun" symbol and then using the manual method to locate the sun at
roughly
2.
Add a Rhino render sun by going to the "render" tab, selecting the
"sun" symbol and then using the manual method to locate the sun at
roughly
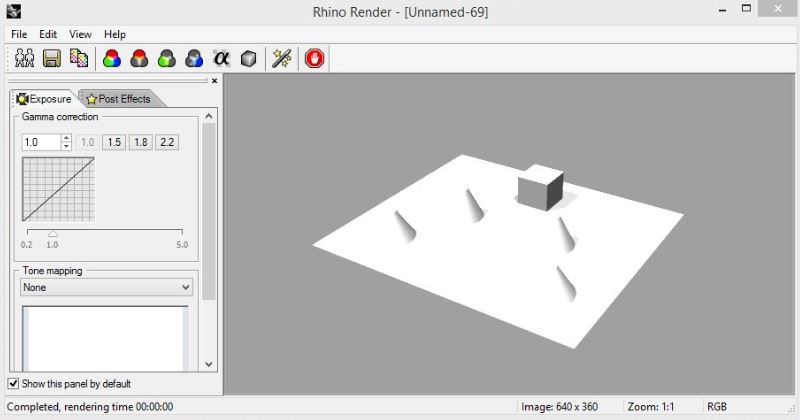
3. Turn on Rhino Render by going to the menu item "Render/Current Renderer/Render".
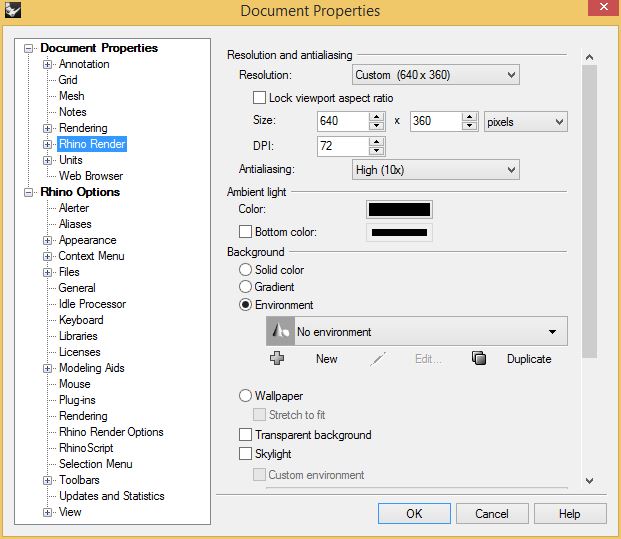
4. Go to the men item "File/Document Properties", select the "Rhino Render" properties, change test resolution to Custom size "640 x 360" and Antialiasing to High (10x).
5. Choose a perspective view angle and render.

II. Solar Rendering
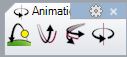
1. Continuing within the Render Tab, hold down the right-mouse button in the lower right hand corner of the culluloid icon of the animation palette , and open the sub-palette of animation options:
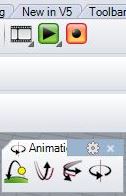
3. Hold down the right-mouse button in the lower right hand corner of green arrow of the animation palette , and open the sub-palette of animation preview options:
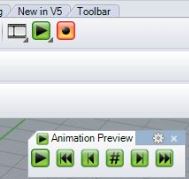
Select the Green arrow to preview the solar animation.
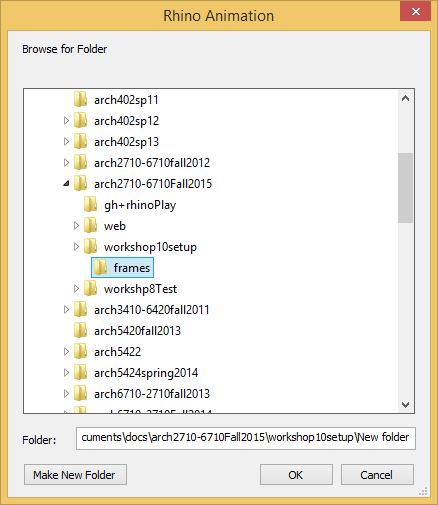
4. Now, use the third orange icon of the animation menu to record the animation, and at the command prompt set up the "TargetFolder" location as well as turn on the option by setting it to yes ( "RunAnimation=Yes" )and then select the "return" key.

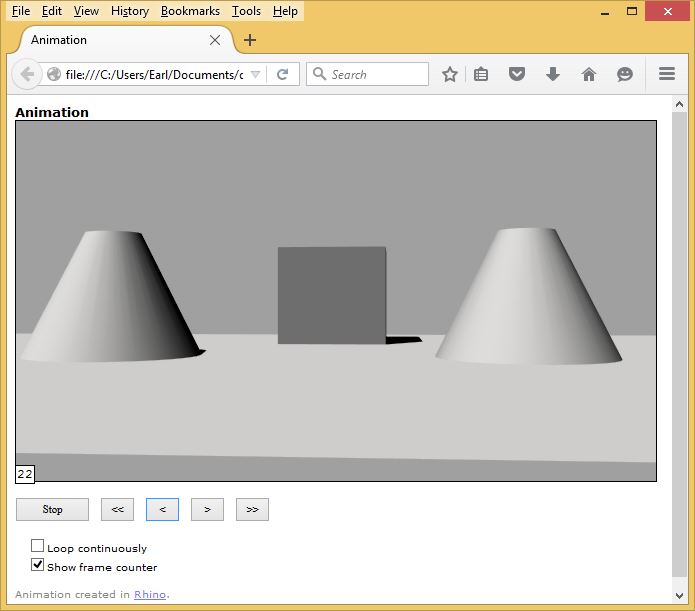
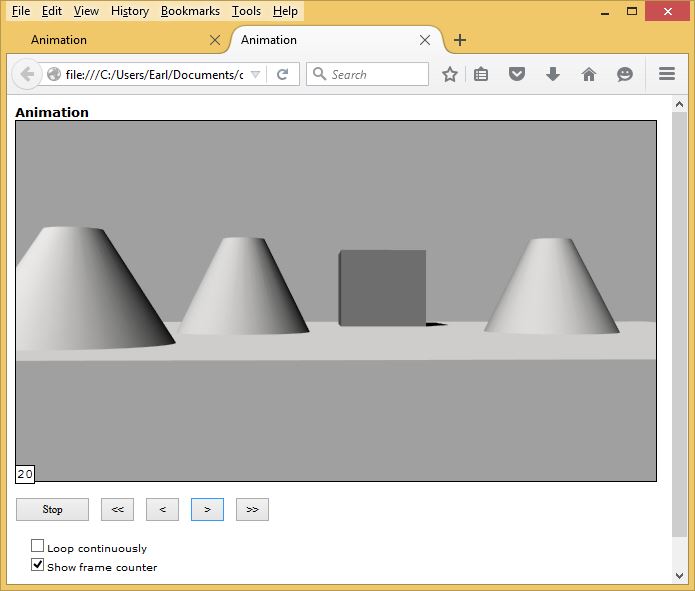
5. After completing step four, individual frames of the animation will be displayed to the screen one at a time.
The individual frames will be placed in a folder designated in step 4.
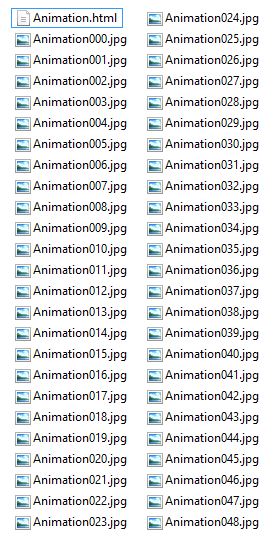
6. To play the frames select and run the "Animation.html" file within a windows browser. Later we will cover how to compile the frames into a Quicktime movie.

III. Fly Through Animation
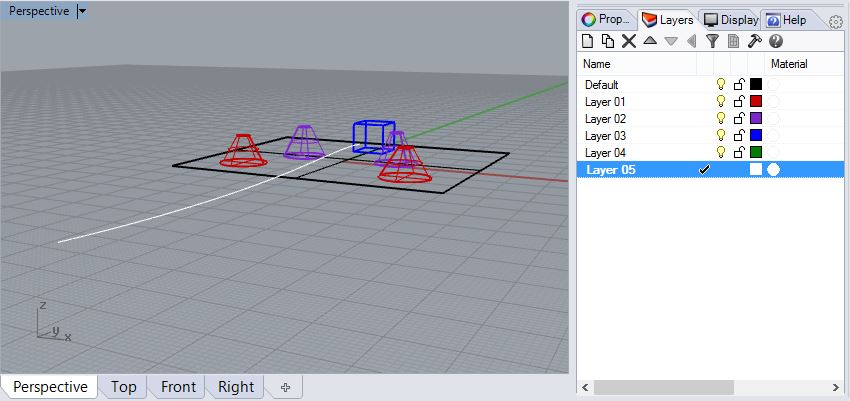
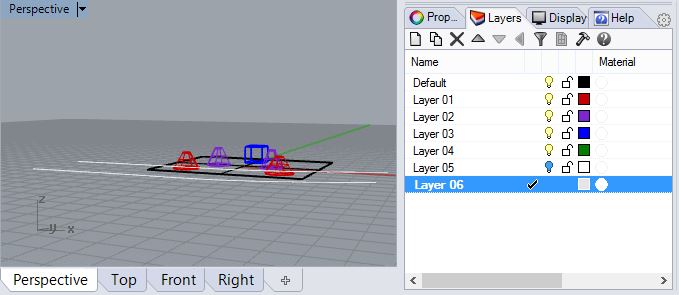
1. Go to a new layer, and place a control point curve in the perspective window slightly above the ground plane that determines the pathway for a moving camera.
2. Left mouse-button click on the second icon to set up a path animation.
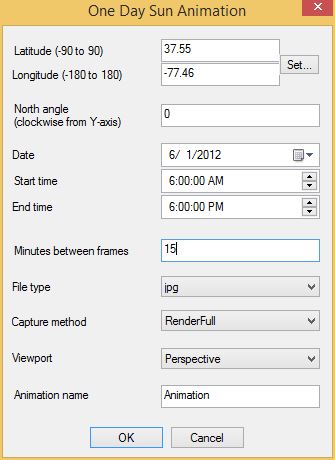
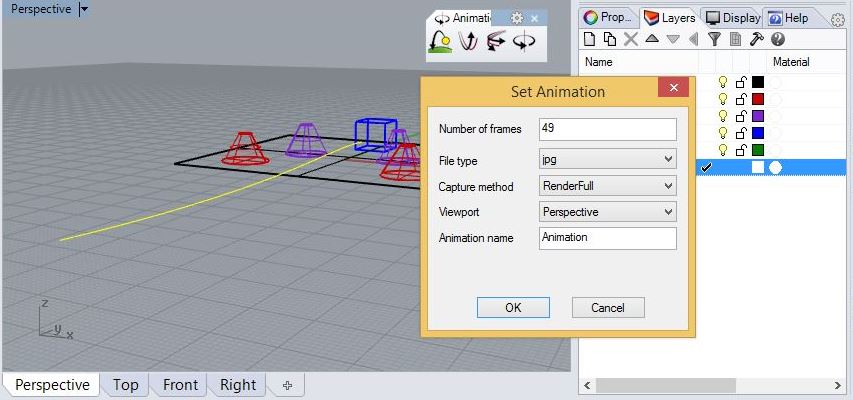
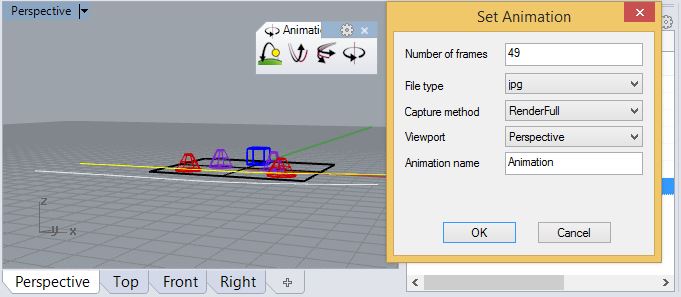
3. Setup the parameters as follows, select the start of curve where the animation begins, and hit the OK button. For a smoother animation use a greater number of of frames to cover the same path distance.
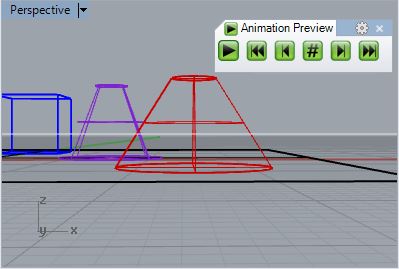
4. Use the animation preview play button to preview the animation in the perspective view window similar to part II step 3 above.
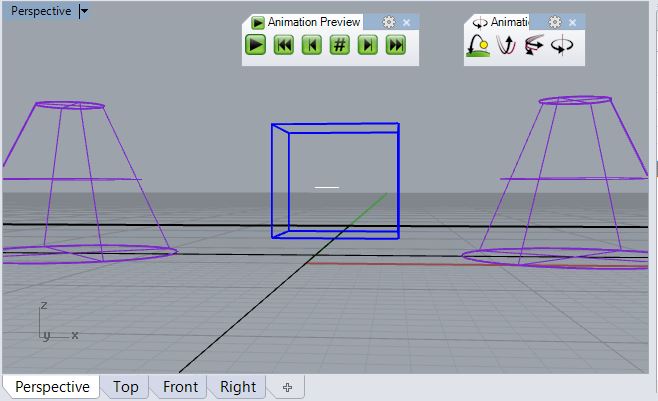
Note that selection the "#" button allows you to preview a single frame from the animation, such as frame number 35.
5. Turn off the layer with the pathcurve on it, and then select third orange icon of the animation menu to record the animation, and at the command prompt set up the "TargetFolder" location as well as turn on the option by setting it to yes ( "RunAnimation=Yes" )and then select the "return" key.

6. Now at the command prompt set up the "TargetFolder" location as well as turn on the record option by setting it to yes ( "RunAnimation=Yes" ) and then select the "return" key.
Here you may wish to change the TargetFolder to a sub-folder, such as one named "frames", to separate out the individual frames from the Rhino file to simplify isolating the frames of the animation sequence.
7. Once the animation recording is completed, use the "Animation.html" file in the "frames" folder to view the animation as in step 6 of part II.
III. Fly Through Animation WIth Target
1. Go to a new layer, and place a control point curve in the perspective window slightly above the ground plane that determines the pathway for a moving camera, and a second control point curve that determines the target of the camera view.
2. Left mouse-button click on the third icon to set up a path animation with the parallel target.
3. Setup the parameters as in part II above. That is, select the start of two path animation curves where the animation begins, fill in the paramters in the "Set Animation" dialog box as illustrated below, and hit the OK button.
4. Use the animation preview play button to preview the animation in the perspective view window similar to part II step 3 above.
5. Turn off the layer with the two pathcurves on it, and then select third orange icon of the animation menu to record the animation.
6. Now at the command prompt set up the "TargetFolder" location as well as turn on the record option by setting it to yes ( "RunAnimation=Yes" ) and then select the "return" key. Hereonce again you may wish to change the TargetFolder to a sub-folder, such as one named "frames2", to separate out the individual frames from frames recorded previously.

7. Once the animation recording is completed, use the "Animation.html" file in the "frames" folder to view the animation as in step 6 of part II.
IV. Turntable Animation
1. Choose an arbitrary perspective view centered on the origin of the 3d modeling space.
2. Left mouse-button click on the fourth icon to set up a path animation.
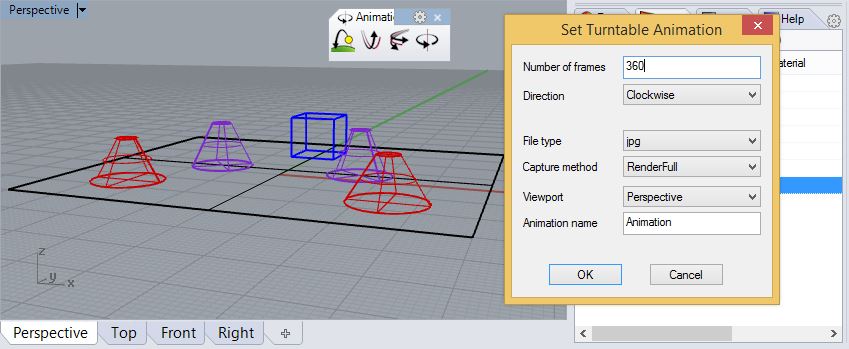
3. Setup the parameters as in part II above. That is,fill in the paramters in the "Set Animation" dialog box as illustrated below. Use 360 frames this time to record 1 frame for each degree of revolution and hit the OK button.
4. Record the animation as in the previous parts in a new sub-folder named "frames3" and use the Animation.html file to view the results..

V. Complie in QuickTime Pro
1. Open quicktime Pro.
2. Add a second sequence in Quicktime Pro (for adding a second compiled movie file to the first one).