These notes introduce the use of function definitions inside of Python components within Grasshopper.
1. Analysis of A Simple Graphics ProgramWithin the previous workshop notes we created a Python script to draw a rectangle. The script begins with two corner points linked to a Python component within Grasshopper.
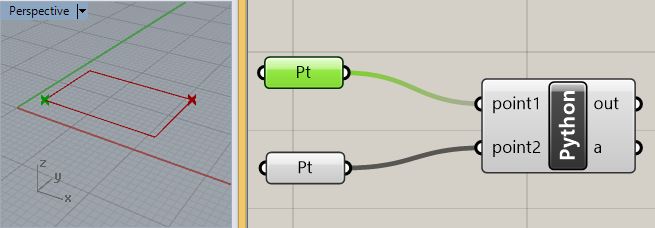
The Python procedure builds four corner points, determines a polyline and then returns it through the vaiable "a".
The structure of the script consists of the following expessions within an ordered sequence of steps:
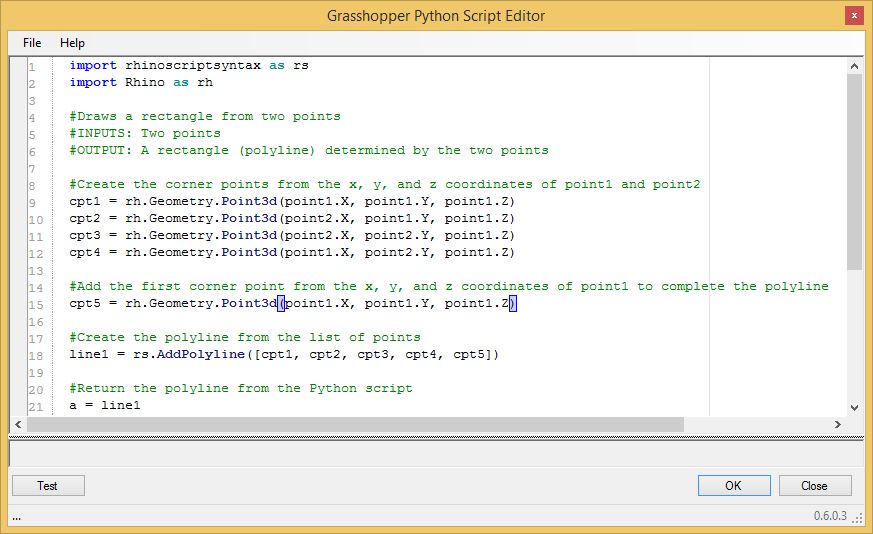
- Statements such as "import rhinoscriptsysntax as rs" are used to import function libraries and abbeviate them ("rs")
- Comment lines beginning with a "#" document the purpose of the procedure, its input and output, and to explain individual lines of the program.
- The principal steps of the program consist of assigning values to 3D point variables such as "cpt1 = rh.Geometry.Point3d(point1.X, point1.Y, point1.Z)" and using variables to create a line such as with the statement "line1 = rs.AddPolyline([cpt1, cpt2, cpt3, cpt4])".
- An
output variable "a" is use to export the line to Rhino such as with the
statement "a = line1".
The order is important to the implementation of the procedure and its step by step logic. In summary, we have established a process not unlike that of following a recipe. Some of the highlights in this process are that we set into place values for the first end point of the line with the expression ""cpt1 = rh.Geometry.Point3d(point1.X, point1.Y, point1.Z)", we set into place values for the second endpoint of the line with the expression "cpt2 = rh.Geometry.Point3d(point2.X, point1.Y, point1.Z)", and we determine the line itself with statement
"line1
= rs.AddPolyline([cpt1, cpt2, cpt3, cpt4])"
As illustrated below, for greater organizational clarity and efficiency, it is also possible in Python to isolate some parts of the program with a function statement where
- The expression "def functionName () : " is the first line within the function.
- The symbol ":" sets off the main body of the function.
- The function returns an geometrical element, a number, or some other variable.
import rhinoscriptsyntax as rs
import Rhino as rh
#Draws a rectangle from two points
#INPUTS: Two points
#OUTPUT: A rectangle (polyline) determined by the two points
def rect(point1, point2):
#draw a rectangle from two corner points
#Create the corner points from the x, y, and z coordinates of point1 and point2
cpt1 = rh.Geometry.Point3d(point1.X, point1.Y, point1.Z)
cpt2 = rh.Geometry.Point3d(point2.X, point1.Y, point1.Z)
cpt3 = rh.Geometry.Point3d(point2.X, point2.Y, point1.Z)
cpt4 = rh.Geometry.Point3d(point1.X, point2.Y, point1.Z)
#Add the first corner point from the x, y, and z coordinates of point1 to complete the polyline
cpt5 = rh.Geometry.Point3d(point1.X, point1.Y, point1.Z)
#Create the polyline from the list of points
line1 = rs.AddPolyline([cpt1, cpt2, cpt3, cpt4, cpt5])
return line1
#Call the function and return the polyline from the Python script
a = rect(point1, point2)
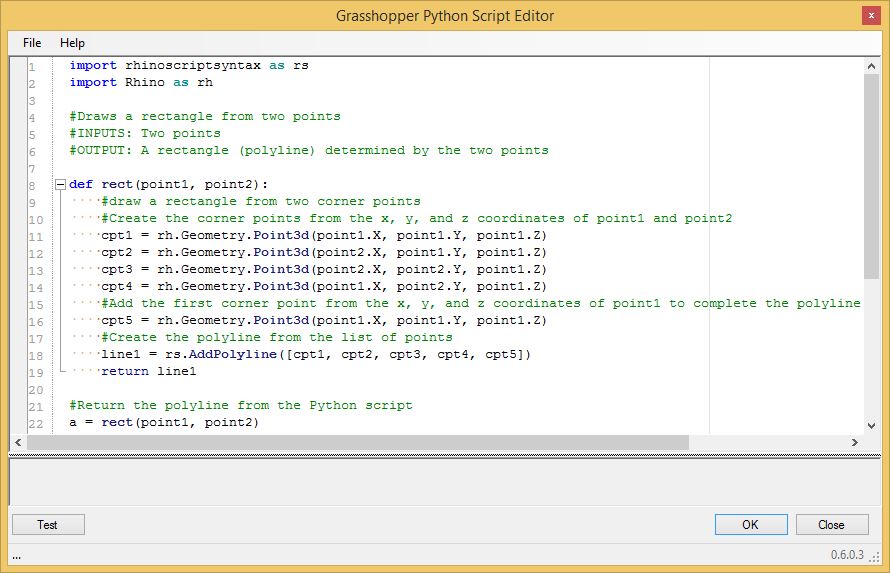
The "rect" function now allows a somewhat more concisely organized approach especially when making more than one rectangle, such as in the case of two rectangles below. The following lines are added to the script to generate the two rectangles:
#Return the polyline
from the function
rect1 = rect(point1, point2)
rect2 = rect(point3, point4)
#Create a rectangle list
rectList = ([rect1, rect2])
#Return the rectangle list from
the function script
a = rectList

Serlio's Description of Euclidean Geometry
Within Serlio's First Book On Geometry, he lays out a fundamental set of geometric elements that serve to provide a foundation such that "the architect should be, if not learned in geometry, at least sufficiently knowledgeable so as to have some sort of understanding of it, particularly the general principles and also some of the more detailed matter. An abridged listing of these elements is excerpted into the table below. Rather than provide a comprehensive introduction to Euclidean geometry, it was Serlio's intention to pick the "flowers" from Euclid that might provide an architect adequate knowledge to give a good account of whatever is built. [The Book of Architecture, translation by Hart & Hicks].
| The righ-hand column in the table below contains a hypertext link to Grasshopper file with a Python script. If you import the script into Grasshopper (e.g., right_triangle) then the figure will be generated in the active Rhino drawing.For each example in the table below, the result will be comparable to the image at the far right. Each image at right also corresponds to a drawing in Serlio's The Book of Architecture. |
You may see the simple graphics program by selecting the program link within the table below. Review these programs for their overall order of steps and internal logic. They each rely upon the predefined data type Point3D as was discussed in the previous workshop. They are simple but not necessarily efficient. Each scipt contains more steps than really necessary to do the job at hand. They do not take advantage of certain techniques which we will explore later on. They serve to introduce some simple graphics programs and library functions. The quotes in the Description column are from a contemporary translation of Serlio (see Hart and Hicks, Sebastiano Serlio on Architecture, Volume 1 Books I-V of "Tutte l`opere d`architettura et prospetiva", Yale University Press, 1996). Serlio's descriptions are similar to the scripts in that they are a procedurally based description of the geometry in each case.
| Procedure | Serlio's Description | Python script | Image |
| Point | "First. a point is an indivisible thing, which has in itself no dimension." | Python |  |
| Line | "A line is a straight and continuous representation from one point to another, having length without width." | Python |  |
| Parallel Lines | "Parallels are two lines which continue at an equal distance." | Python | 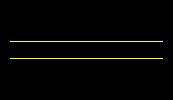 |
| Plane | "A plane is made up of two equidistant lines closed off at the sides, that is a thing which has length and breadth without depth. It is also possible for planes to have different, unequal sides." | Python | 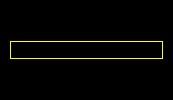 |
| Equilateral Triangle | "An equilateral triangle, that is of three equal sides, occurs when three lines equal in length are joined together. This figure will make three acute angles." | Python | 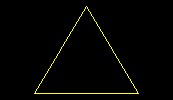 |
| Right Triangle | "A triangle of two equal sides occurs with two lines equal in length, that is one horizontal and the other perpendicular, and another longer line which forms the triangle. This will make one right angle and two acute angles." | Python | 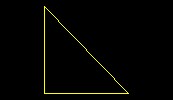 |
| Triangle of Three Unequal Sides | "A triangle of three unequal sides occurs when three lines of unequal length are joined together. This figure will have three acute angles." | Python | 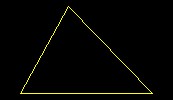 |
| Rectangle of Three Unequal Sides | "A rectangle of unequal sides occurs with four lines of unequal length. This figure will have two obtuse angles. It could sometimes also have a right angle." | Python | 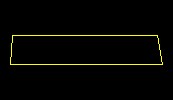 |
| Curvilinear bi-angular planes | "Curvilinear bi-angular planes are made up of two curved, that is circular, lines. This shape will serve for many things in this book, and from it you can derive the correct normal, that is, the set square. The shape of the modern arches, which are called segmental arches, is taken from this form; and these arches can be seen upon many buildings on arched doorways and windows." | Python | 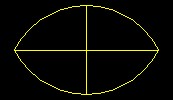 |
| Circle | "The perfect circle has its centre, its circumference and its diameter." | Python | 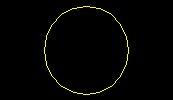 |
| Semi-circle | "Semi-circle in which there is a plumb line falling upon the diameter. A right angle results from this, and it makes the half diameter." | Python |  |
| Square | "The perfect square occurs when four lines of equal length are joined together at right angles." | Python | 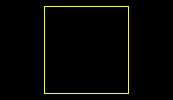 |
Serlio, having developed these basic geometric constructions, uses them as building blocks more advanced geometrical constructions. Similarly, we will embed these basic geometric steps into more advanced geometrical constructions in this and later workshops. For now, it is important to take note of the direct correspondence between a graphic figure and the description of a process in the Python script used to generate it. We are indebted to the early mathematicians, especially the Pythagorean, for seeing the correspondence between these parallel worlds. This link is important to computer aided design. As demonstrated in later workshops, can also add vector algebrat expressions.
2.
Script That Uses Iteration to Express Recurring Relationship
To draw a series of inwardly rotating polylines in the Grasshopper file
makeInwardlyTurningRectangle.gh
starts with an outer rectangle. It continues with each new rectangle in
the series stepping upward in elevation. In this example we repeat a
similar
operation (i.e., rotating and elevating a new rectangle) a specified
number of times. Note that here we see the
script without the user defined functions. In the next example, we will
revisit the same code rewritten with such internal functions.

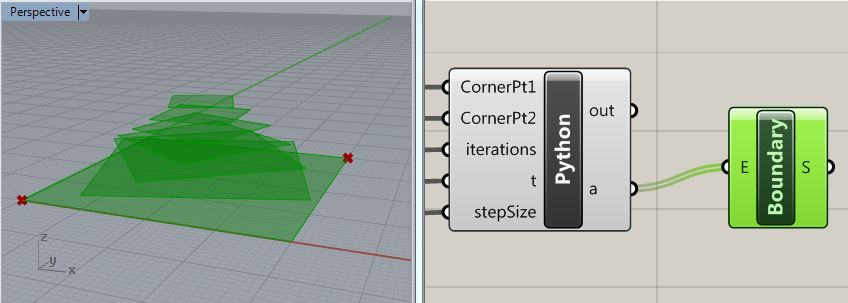
Note that in the figure above, each inner polyline is calculated from point that is 40% along along each of the four sides of the next outer polyline. In the Python script used to generate this figure, a technique referred to as iteration is used to repeat the same process a given number of times. A number of such iterative techniques exist within the Python scripting language. Within the current example, we use a "while" expression that loops continuously through a series of indented expressions during the time that some integer " i" increments in value from 1 to the number times we we want to repeat loop. In "pseudo-code" (not Python actual code, but more general words), the "while" statement has the following format :
while
(i <=
iterations) :
....Create a new polyline from the four points
.... Add the polyline to a list of polylines
....Calculate four points of each new polyline
Note that the "while" statement only includes the indented statements which follow it.
First, lets begin by adding to new parameters to the Grasshopper Script from Part 3. Go to the "Params" tab and in the "Input" area add two numerical sliders to the Grasshopper view window.
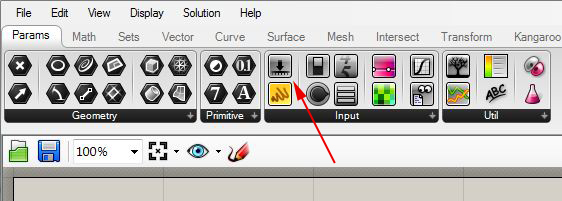
Double-click on the word "slider" and rename the numerical sliders iterations, param Dist, and stepSize. Adjust the iterations slider so that it ranges in value from 0 to 20, and adjust the type to"N" (integer numbers).The paramDist slider by default ranges in value from 0.0 to 1.0, which we can use to represent 0% to 100% of the distance along any side of the last outer polygon. Similarly, the stepSize slider by default ranges in value from 0.0 to 1.0, which we can use to represent the elevation change of each inner rectangle above the outer rectangle that preceded it..
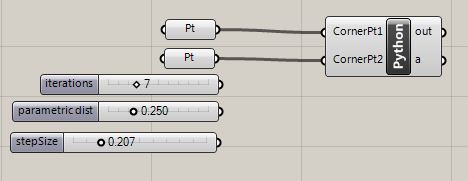
Zoom up on the Python script symbol until "+" symbols appear below the input variables "point1" and "point2".
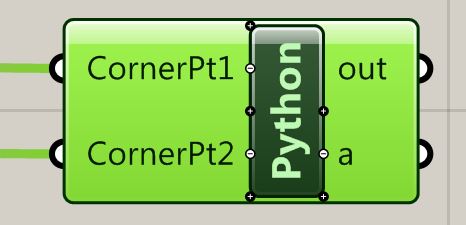
Select the "+" symbol below "point2" to add a variable "paramDist". Change the default name of "x" to "paramDist" and change the Type hint option to "Double". Similarly, select the "+" symbol below "paramDist". Change the default name of "x" to "numTimes" and change the Type hint option to "Integer".
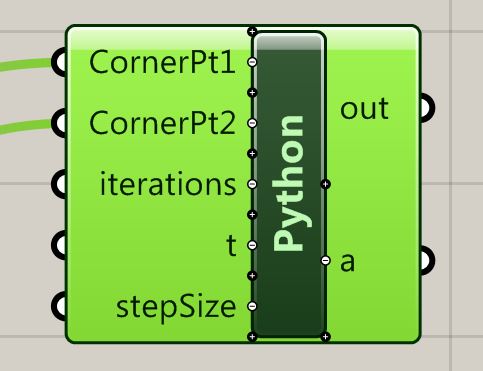
Next, connect the output ports of the two numerical sliders to the new
input variables of the Python script.

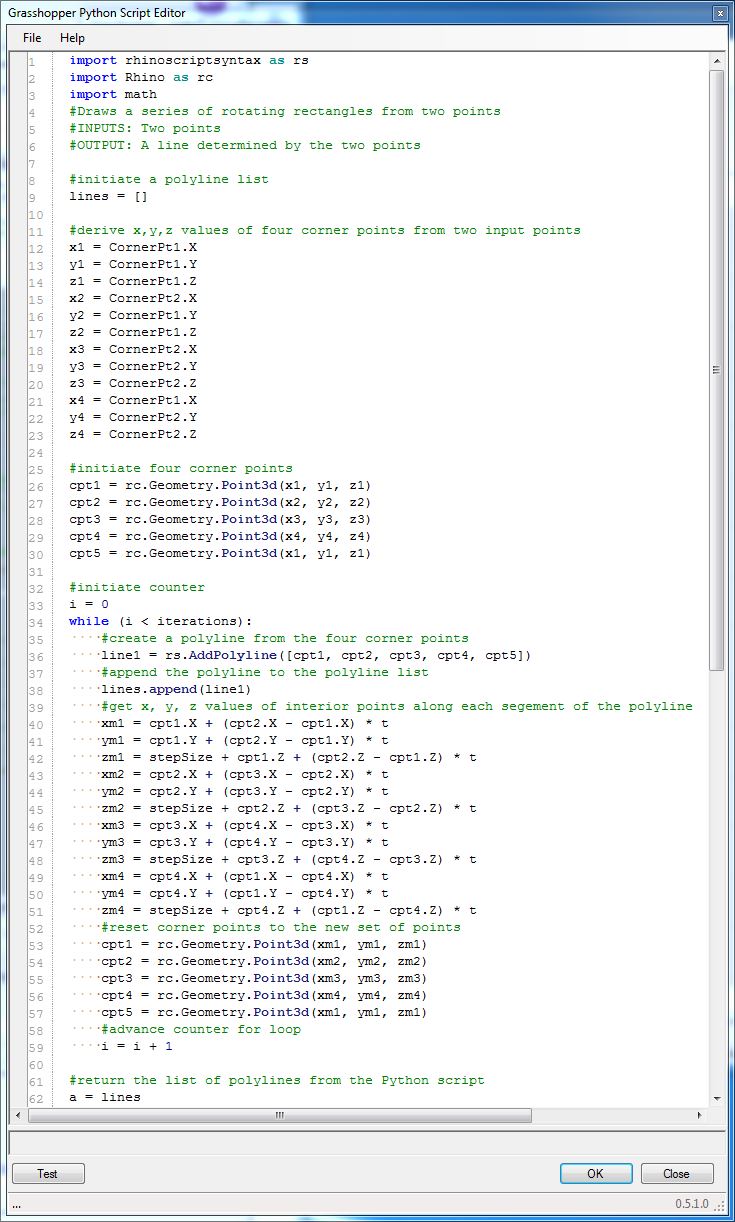
Now, to create the series of rectangles we edit the Python script to incorporate the following text. Comment lines preceded by a # describe what each step of the Python script does.
import
rhinoscriptsyntax as rs
import
Rhino as rc
import
math
#Draws
a series of rotating
rectangles from two points
#INPUTS:
Two points
#OUTPUT:
A line determined by
the two points
#initiate
a polyline list
lines
= [ ]
#derive
x,y,z values of four
corner points from two input points
x1
= CornerPt1.X
y1
= CornerPt1.Y
z1
= CornerPt1.Z
x2
= CornerPt2.X
y2
= CornerPt1.Y
z2
= CornerPt1.Z
x3
= CornerPt2.X
y3
= CornerPt2.Y
z3
= CornerPt2.Z
x4
= CornerPt1.X
y4
= CornerPt2.Y
z4
= CornerPt2.Z
#initiate
four corner points
cpt1
=
rc.Geometry.Point3d(x1, y1, z1)
cpt2
=
rc.Geometry.Point3d(x2, y2, z2)
cpt3
=
rc.Geometry.Point3d(x3, y3, z3)
cpt4
=
rc.Geometry.Point3d(x4, y4, z4)
cpt5
=
rc.Geometry.Point3d(x1, y1, z1)
#initiate
counter
i
= 0
while (i < iterations):
....#create a
polyline from the four corner points
....
line1 =
rs.AddPolyline([cpt1, cpt2, cpt3, cpt4, cpt5])
....
.... #append the
polyline to the polyline list
....lines.append(line1)
....
....#get x, y, z
values of interior points along each segement of the polyline
....xm1 =
cpt1.X + (cpt2.X - cpt1.X) * t
....ym1 =
cpt1.Y + (cpt2.Y - cpt1.Y) * t
....zm1 =
stepSize + cpt1.Z + (cpt2.Z - cpt1.Z) * t
....
m2 =
cpt2.X + (cpt3.X - cpt2.X) * t
....ym2 =
cpt2.Y + (cpt3.Y - cpt2.Y) * t
....zm2 =
stepSize + cpt2.Z + (cpt3.Z - cpt2.Z) * t
....xm3 =
cpt3.X + (cpt4.X - cpt3.X) * t
....ym3 =
cpt3.Y + (cpt4.Y - cpt3.Y) * t
....zm3 =
stepSize + cpt3.Z + (cpt4.Z - cpt3.Z) * t
....xm4 =
cpt4.X + (cpt1.X - cpt4.X) * t
....ym4 =
cpt4.Y + (cpt1.Y - cpt4.Y) * t
....zm4 =
stepSize + cpt4.Z + (cpt1.Z - cpt4.Z) * t
....
....#reset corner
points to the new set of points
....cpt1 =
rc.Geometry.Point3d(xm1, ym1, zm1)
....cpt2 =
rc.Geometry.Point3d(xm2, ym2, zm2)
....cpt3 =
rc.Geometry.Point3d(xm3, ym3, zm3)
....cpt4 =
rc.Geometry.Point3d(xm4, ym4, zm4)
....cpt5 =
rc.Geometry.Point3d(xm1, ym1, zm1)
....
....#advance
counter for loop
....i = i + 1
#return the list
of
polylines from the Python script
a = lines
The Script Editor now appears as follows.
The set of polylines output of the Python script can be input onto a surfaces component in order to convert the series of rotating rectangles into a seres of rotating surfaces. Go to the "Surface" tab in grasshopper, and select the "Boundary Surfaces" component.
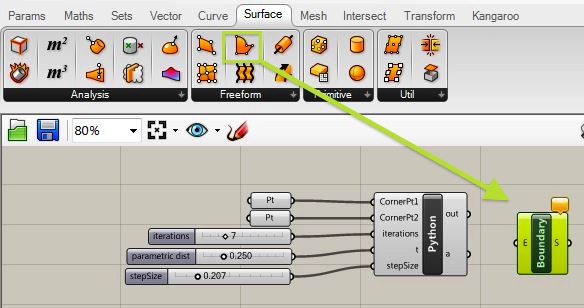
Connect the output port "a" to the input port "b" of the bounary surface conmponent to generate the series of rotating surfaces.
3. Rotating Rectangle Script Redeveloped with Functions
The grasshopper file makeTurningRectangleWithFunctions.gh revisits the turning rectangle script, but incorporates function definitions to improve modularity and clarity of organzation.