COMPUTER
AIDED
ARCHITECTURAL DESIGN
Workshop 14 Notes,
Week of November 14 , 2016
Animation
Within this set of workshop notes are several examples of animation in Grasshopper. Rhino's plugin Bongo
provides more tools for settting object keyframing in combination with
Parent - Child object top down hierarchies. For these additional methods in Bongo see the getting started tutorials on the rhino3d web site:
These
notes reflect the first part of the workshop which was done with
Grasshopper. For the second part of the workshop, the animation
techniques in Rhino Render, the tutorial notes available online by McNeel are comprehensive.
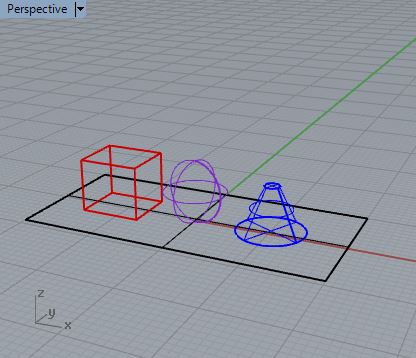
1.Create objects in Rhino:
1.1 Create "Rectangular Plane: corner to corner surface" from the
"Surface Creation" palette (second row, first icon) on the default
layer, and then on layers 1, 2, and 3, add a box, sphere and truncated
cone as in previous tutorials.
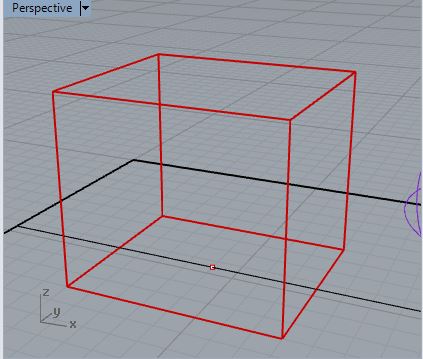
1.2 Add a point at the center of the base of the box on layer 1.
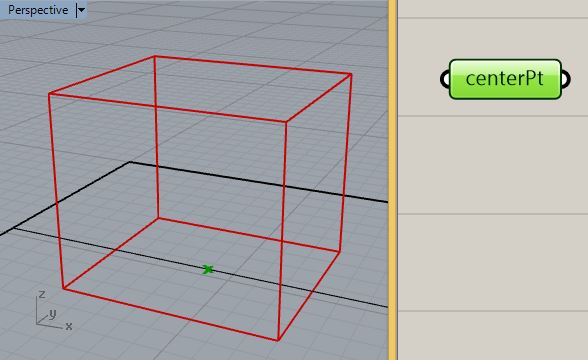
2. Create an animation in Grasshopper:
2.1
Open grasshopper, and from the Parameters tab add a pt component
to the convass window, rename it "centerPt" , and link it to point at
the the center of the box.
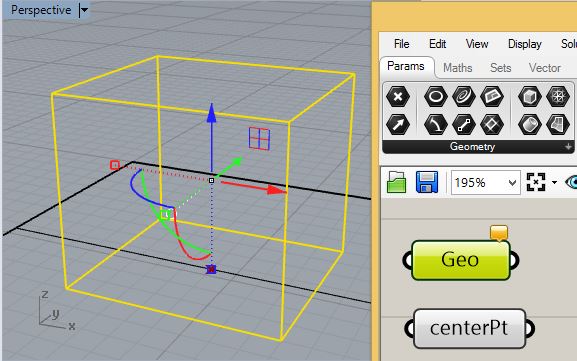
2.1
Select the "tab" for "Geometry" and then under the table
select the generic "Geometry" component and link it to the cube in
Rhino.
2.2
SImilarly select a second "Geometry" component and link it to both
the sphere and cone using the "Set Multiple Geometries" option.

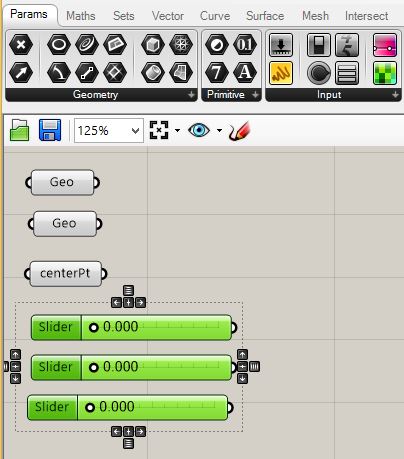
2.3
Go to the upper left hand corner of the "Input" area, and add
three floating point numerical sliders within Grasshopper that range in
value from 0.0 to 720 and set the value of each to 0.0.
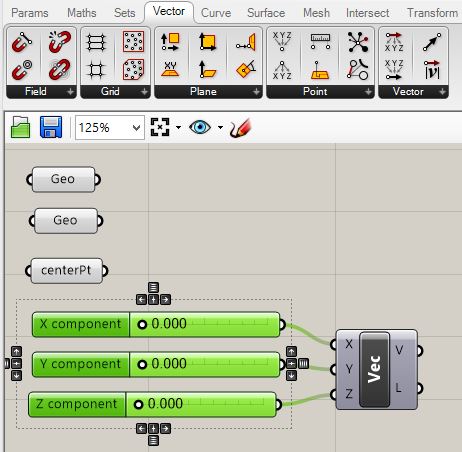
2.4
Go to the "Vector" tab, add a "Vector XYZ" component fomr the
lower left hand corner of the "Vector" area, and connect the sliders to
the input ports.
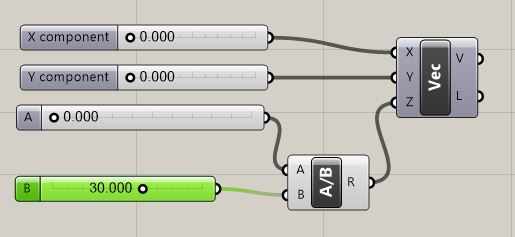
2.5
In the "Params" tab, Add a number slider with the value of "30", and
then to "Math" tab, add a divide "A/B" component,
divide the "Z component by 30, and direct it's output to replace the
"Vec" (vector) "Z" input port.
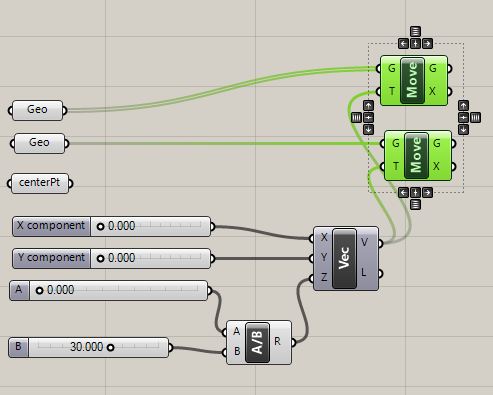
2.6.
Go to the "Transform" tab, and from the "Euclidian" area, add a two
"Move" components, one for each of the two Geo components. Take the "V"
output port of the "Vec" comonent and link it to both of the "T" input
ports of the move components.
2.7 Adjust the value of the numerical slider "A" to move the objects in the air.
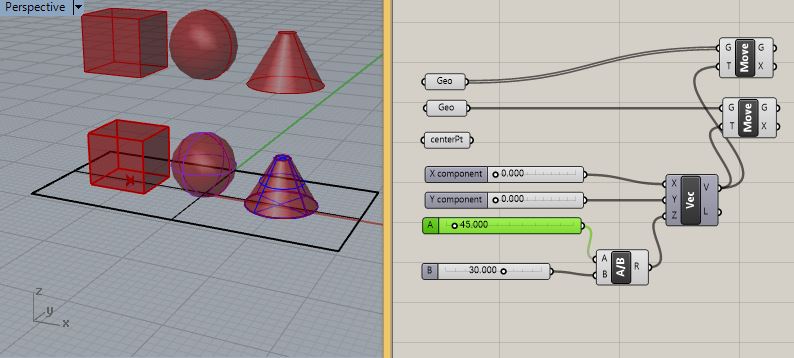
2.8
Right-click on the word "Move" for the "Move" component for the box,
and turn off the "Preview"option such that the transformed cube isn't
visible.

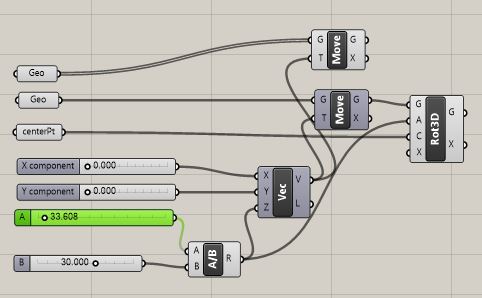
2.9
Go to the "Transform" tab and "Euclidian" area and add a "Rotate3D"
component to the right of the "Move" component for the cube.

2.10
Connect the output port "G" to the input port "G" of the Rot3D
component. Connect the output port of the "centerPt" component to the
input port "C" of the "Rot3D" componnent, Connet the output port of the
division component "A/B" to the input port "A" of the "Rot3D"
component. Change the value of the numerical slider "A" and note how
the cube rotates about the axis created by the "centerPt" point as it
also moves up and down along the z-axis.

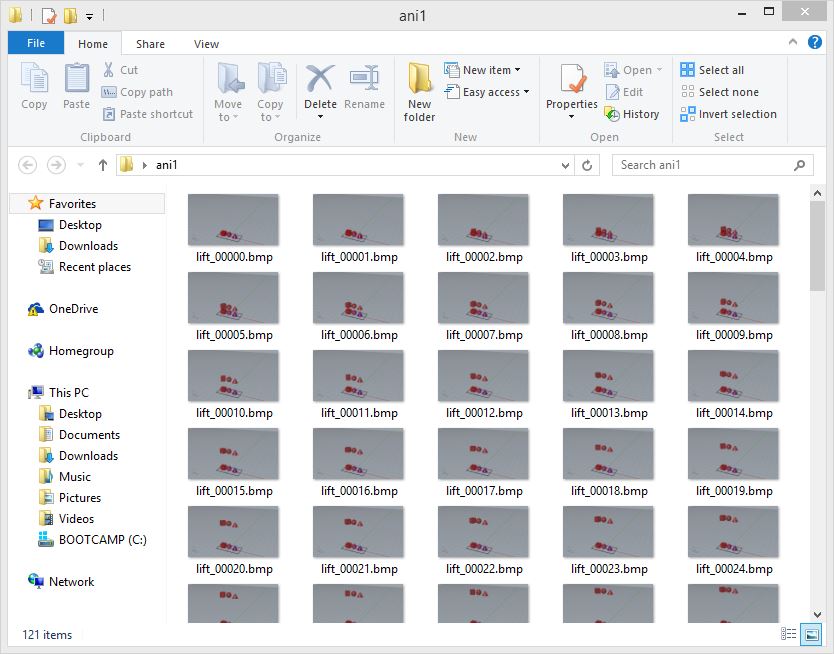
2.11 Create a folder named "ani1" on the desktop. Right click on the numerical slider "A" and select the option "Animate".
2.12
In the "Animation Contorls" dialog box that follows, browse to and
select the "Ani1" folder on the desktop, set the file name prefix to
"lift" (e.g.," lift_{0:00000}.bmp", set the resolution to 640 x 360
pixels, and set the frame count to 120. Zoom out so that most of the
animation is visible in the preview window.

2.13
Select the "OK" button, and not the two text fields in the Rhino
command prompt area. In the first text field select the "ani1" folder
on the computer's desktop. In the second text field set the of run
animatio to yes, and then select the "enter" or "return" key on the
computer's keyboard. The individual frames witin the animation
are place in the "ani1" folder:
2.14
Open Apple's Quicktime Pro, go to "File" open image sequence, select
the first frame, set the frame rate at 30 frames per secton, and click
"OK". Note that Quicktime Pro is presented loaded on all computers
within the School of Architecture. However, other video editing
programs (e.g., iMovieHD, Final Cut Pro, and Adobe Premiere) can also
be used to compile the frames of the animation into a completed movie
file.
2.15
Within Quicktime Pro, play back the animation
using the right pointing play arrow. To save the file, go to the
"file/save" menu, use the "Self-contained" option, and save
the file to a Quicktime movie file format "test.mov". Note that
Quicktime is also applicable to compiling frames completed animation techniques possible through
Rhino Render.