COMPUTER
AIDED
ARCHITECTURAL DESIGN
Workshop 17 Notes,
Week of November 28 , 2016
RENDERING FILE OPTIMIZATION AND CRASH RECOVERY TECHNIQUES
The primary focus of
this workshop notes rendering optimization through
blocks,
techniques in V-Ray crash recovery, and to introduce the V-Ray render
server.
PART 1. V Ray and
Blocks.
- Create a file, place
it on the desktop and name it "test1".
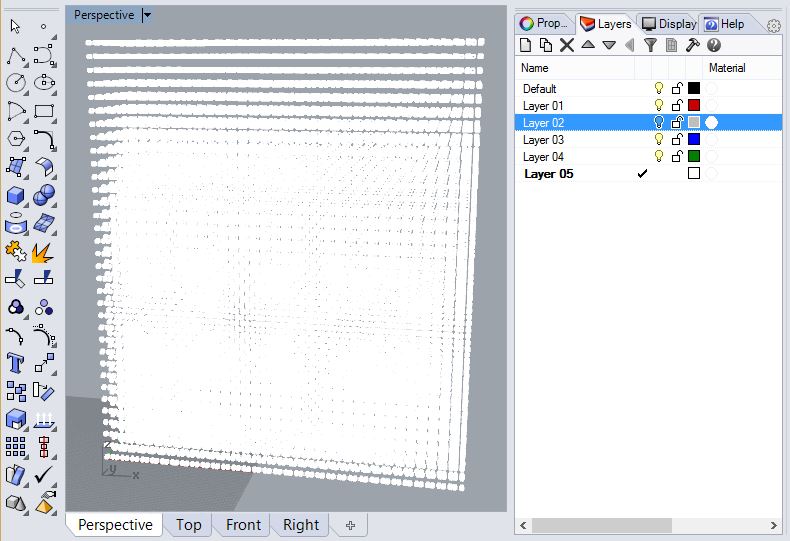
- Rhino "blocks" store
geometry in a parent block definition. Instances of Blocks contained a
reduced amount of geometry. Thus, a number of instances can reduce file
sizes as compared to modeling the equivalen geometry without
blocks.
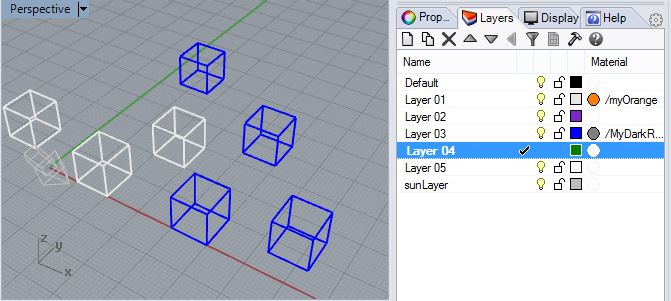
- Create a new layer
"1" and set it's color to "light grey".
- In side the V-Ray
material editor, right click on "Scene Materials". Create a
"standard" material and then select its diffuse color box and change it
to orange.
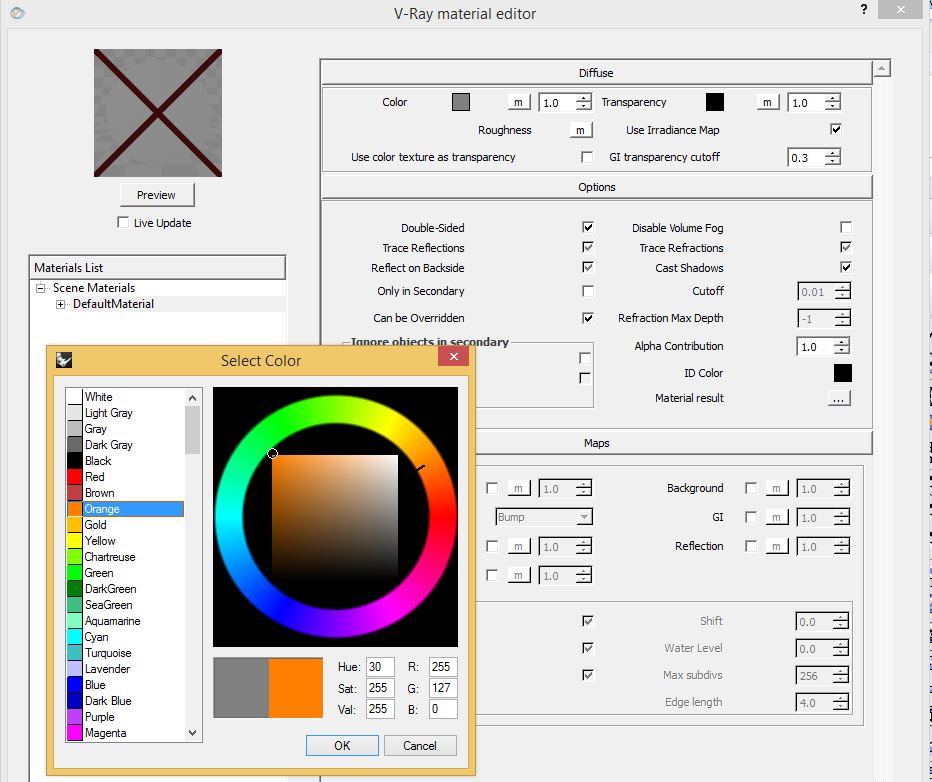
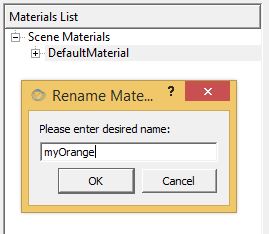
- Right-click on the
"DefaultMaterial" text, and rename the material "myOrange".
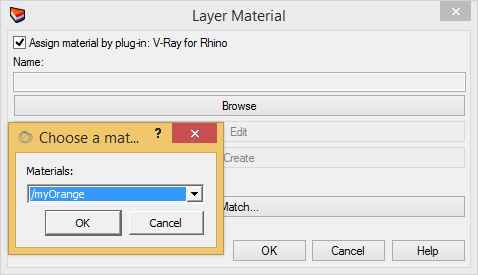
- Left-mouseclick on
the material column for the layer in the properties dialog box.
- Change the material
propoerty to "V-Ray plugin, turn on the check-box for "Assign material
by plug-in V-Ray, and select the color "myOrange"
- Create a 1' x 1' x 1' solid box on the new
layer.

- Add a new layer "sunLayer" and a
V-Ray sun to that layer at roughly 210 degrees azimuth and 60 degrees
altitude.
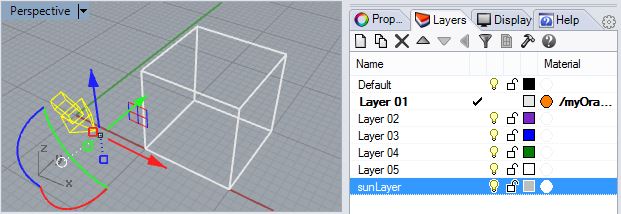
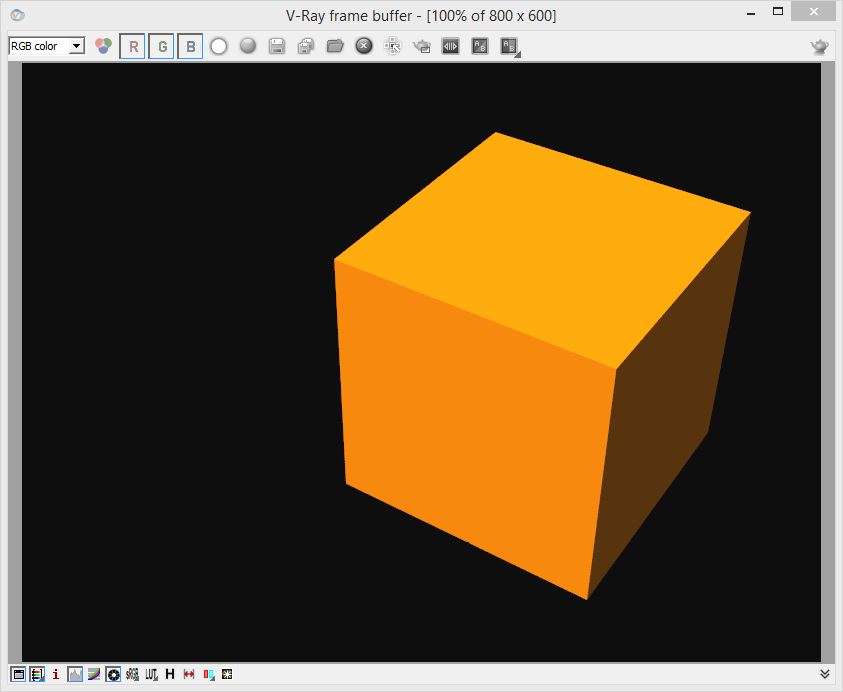
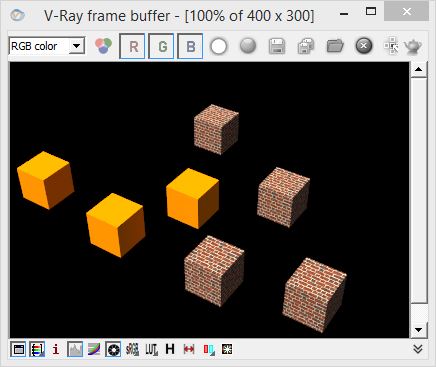
- Render the view in
V-Ray and note the the box inherits the "myOrange" material from the
layer.
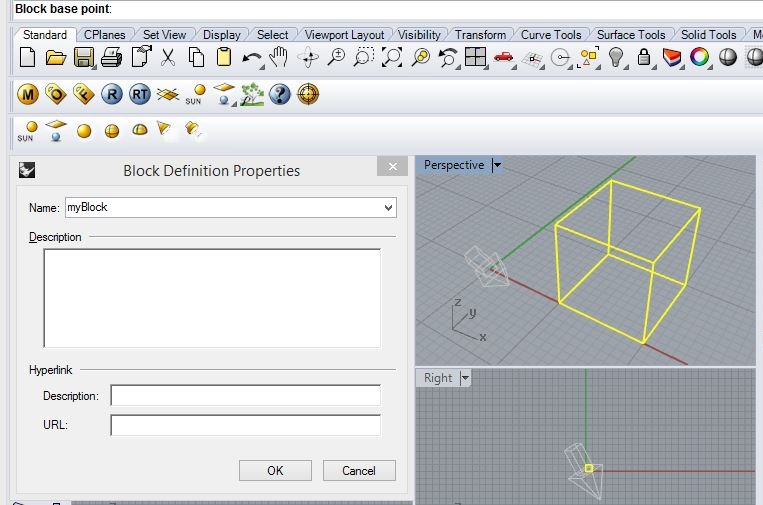
- Type "Block" at the
command prompt, select the block, hit the enter key, and then select
its lower left hand point as Block Base Point and name it "myBlock".
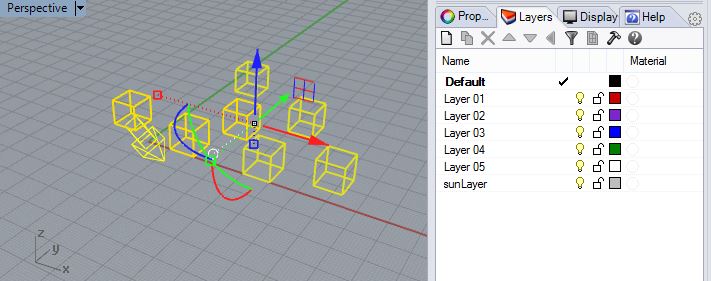
- Go to layer
"2" and create an instances of "mBlock" on it.
- Render V-Ray and
note that the instrance retains the material propoerty of the
V-Ray material "myBlock".

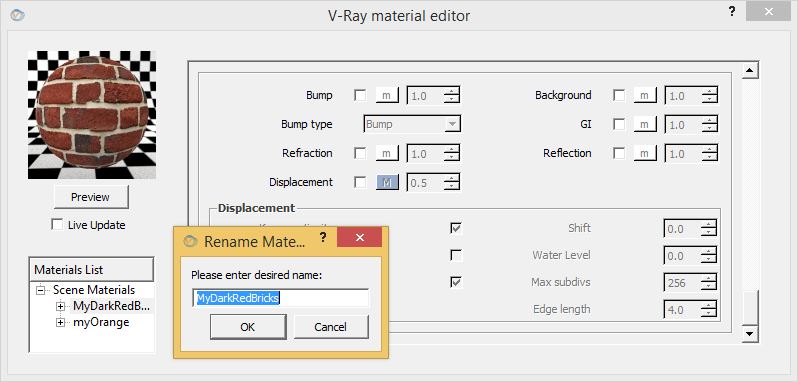
- Go to the V-Ray
express tab, open the masonry sub-palette, and double-click on the
material "Dark Red Brick . Note that it is added to the V-Ray material
editor.
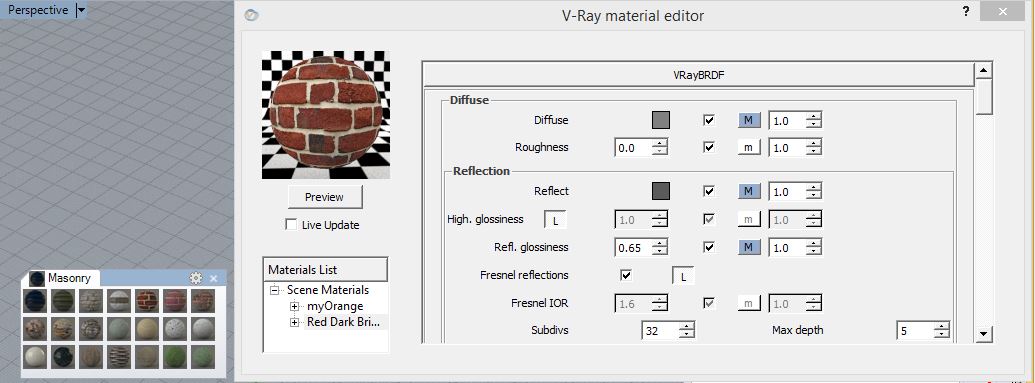
- Change the name of
the material to "myDarkRedBrick" and go to its map tab and turn off the
check-box for the displacement map.
- Create a new layer
"3" and make make "MyDarkRedBrick" the layer material.
- Add a new 1' x 1' x
1' solid box to layer 3.
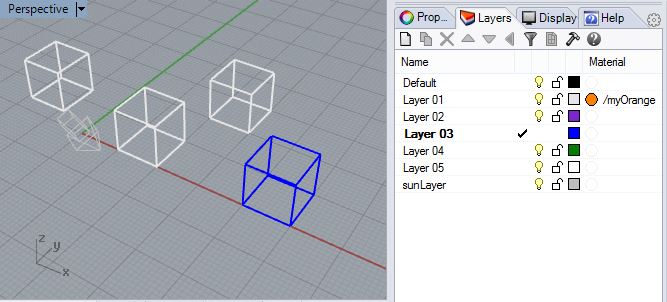
- Set "MyDarkRedBricks" as the layer material.
- Go to the properties
tab for the box select the box texture map
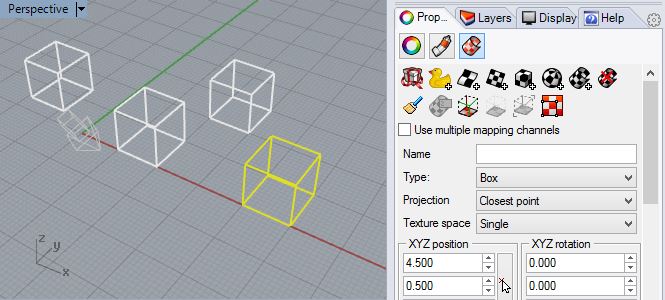
- Assign the box
texture map to the box, select the command prompt, and then use the
capped "Yes" option.
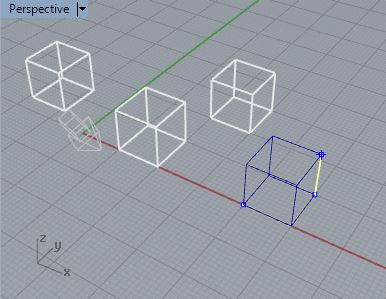
- Make an block of the
solid box and name it "myBricks".
- Go to layer
"4" and add instances of "myBricks" to it.
- Render V-Ray and not
that the brick texture map appears on the instances on layer 4.
- Save the file "test1"
on to the desk top.
PART 2. How to handle a
potentially corrupt file.
- Create a folder "myData" on the desk top.
- Add a "textSky" to
the V-Ray Environment Tab under "Reflection/refraction (background)"
similar to earlier workshops.
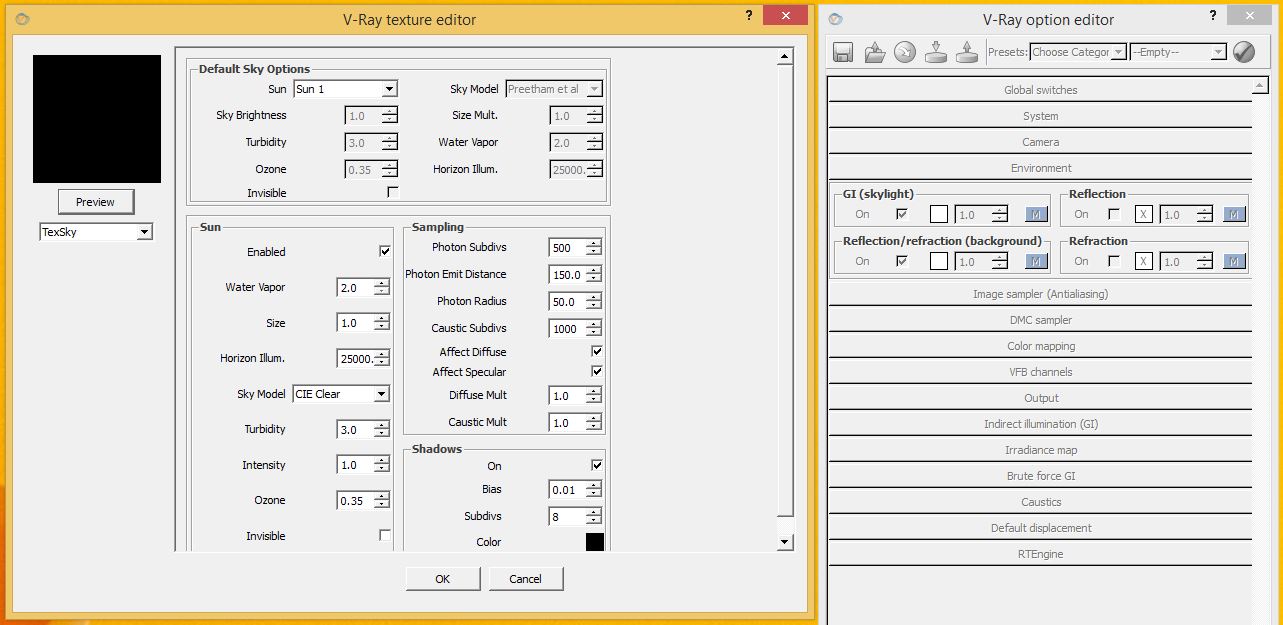
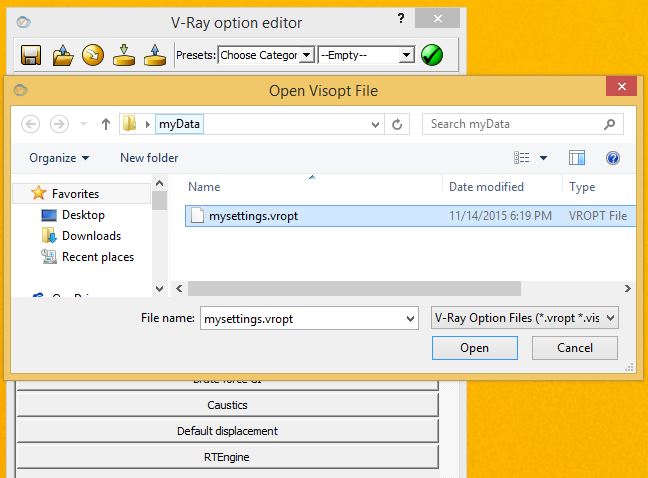
- Go to the V-Ray
Options Menu, and save the options settings to the folder
"myData" by selecting the "Save" icon in the upper left hand
corner.

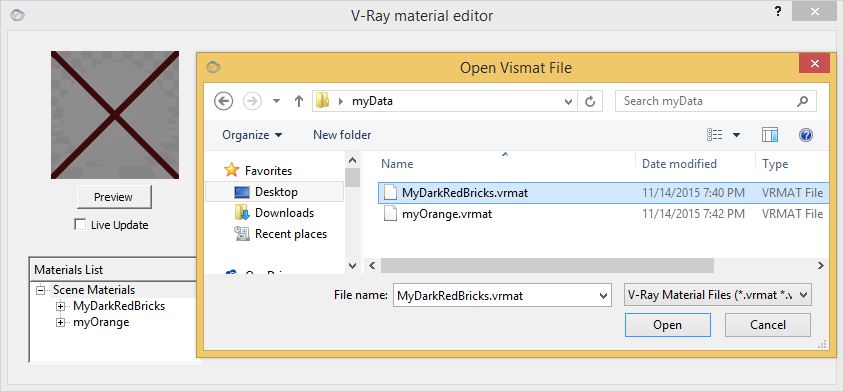
- Go to the the V-Ray
Materials editor, right-click on the each material, select the "pack
materials" option and create a zip file for the material inside the
"myData" folder.
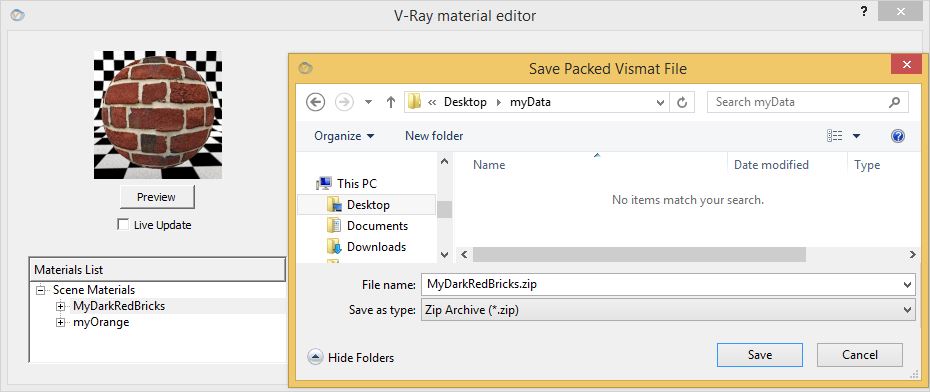
- Similarly save "myOrange" and any other materials to "myData" folder on the desktop.
- Unzip the the
two materials in the files "myOrange" and "myDarkRedBrick".
- Save the Rhino file itself.
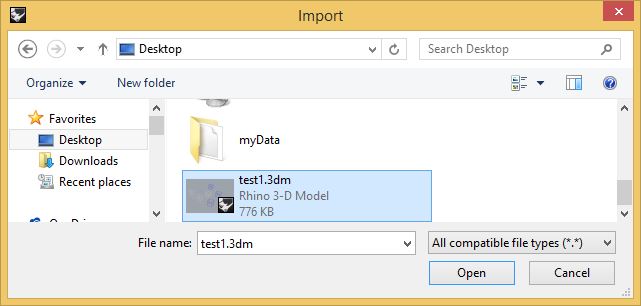
- Create a new file in
Rhino, and use the menu sequence "File/Import" theto import file "test1".
- If the above step
doesn't restore the materials files, then within the V-Ray Materials
editor, extract the materials from the zip files into the "myData
folder, and within the "materials editor" right-click on "scene
materials" and "load" the ".vrmat" file for each missing material.
- If the above step
doesnt' restore the settings to V-Ray, then within the V-Ray Options Editor, select the "import file" icon second
from the upper left-hand conrer, and import the .vsopt file from the
"myData" folder.
- Note
that steps 3, 4, and 5 should be done as a an early precaution
before problems occur such that it isn't too late if they do occur.
These steps can also be used to transfer materials and V-Ray
options to new files independently of the crash recovery scenario
envisioned here.
PART 3. Render Farm
- The
school maintains a cluster of computer nodes within a machine room that
can be used from within the School to prospectively increase the
performance for rendering an image provided that Rhino stays open.
There are a few caveats:
- If more than 8 users are using the render server at a time, the performance benefits may be minimal.
- For
small Rhino files, the data transfer times may outweight the
performance benefits of rendering the file just on a personal computer.
- Specific instructions for the render server in Campbell Hall can be downloaded from a setup.pdf file.
PART 4. Reducing Geometry in File Edited for Rendering
- Another
technique for reducing rendering time is to simply save a supplemental
version of a file with geometry reduced for rendering.
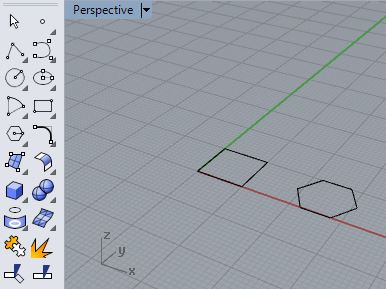
- Using the" rectangle" corner-to-corner" tool, reate a rectangle on the ground plane.
- Similarly, using the "polygon: center, radius" too, create a hexagon on the ground plane.
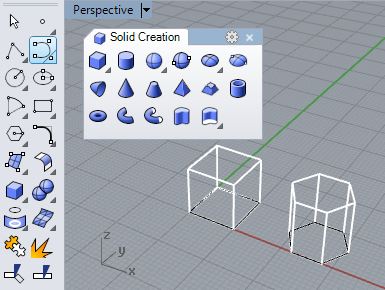
- Using the solid "Extrude closed planar curve" tool, extrude both the rectangle and the polygon.
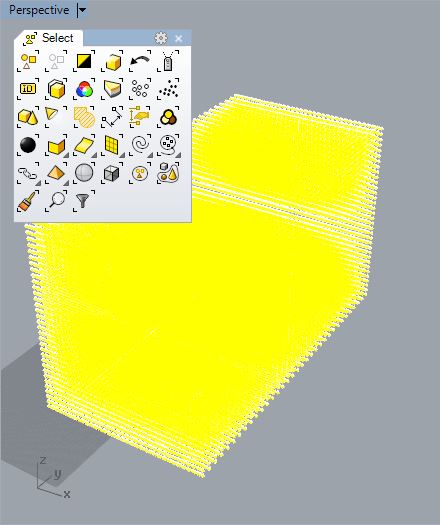
- Create
a selection window with the left mouse button in the view window
to select the rectangle, polygon and the solids at the same time.
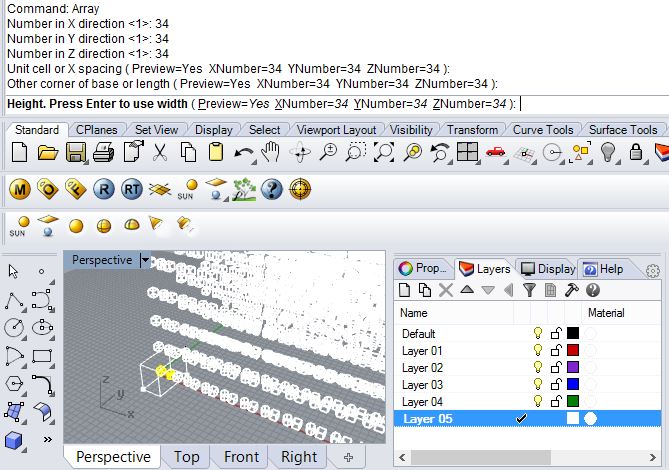
- Use the array tool to generate a 34 x 34 x, 34 3D array with elements separate from each other in all three dimensions.
- Save the file and name it "bigFile".
- Save the file again and name it "littleFile".
- Open up the selection filter palette. Use the select filter for curves and use ctrl-X to remove them from the file.
- Save
the file again and compare the sizes. Note that the smaller file size
(roughly 30 to 50% reduction is likely to require less memory for
sorting data and should render more quickly.
- Another technique is to parse geometry not need for a particular view and to turn off these layers.
- Go
to the plan view and a new or unused layer. Select the objects to be
hidden and also a layer to transfer them to. Right-click on the layer
and in the pop-up dialog that follows choose the "change object Layer"
option, and then turn off that layer.

- Go to the perspective view in which the objects would ordinarily be not visible, and render.