These notes continue with the use of function definitions inside of Python components within Grasshopper.
1. Python Libraries Continued
Rhino graphic libraries used in the examples are:
Rhino Common Libary
- library functions for Rhino Python, most of which are
also available to the Python scripting component within Grasshopper. This
library is referred to as "Rhino"
in the examples we will cover in the workshop notes. The Rhino Common function library documentation most useful to these workshops is located in the Geometry link.
Rhino Script Syntax
Library - library
functions
for Rhino Python, most of which are also availble to the Python
scripting component within Grasshopper. This library is referred to
as "rhinoscriptsyntax"
in the examples we will cover in the workshop notes.
2. Grid Array
This example is based upon a function that arrays a panel of rectangular surfaces relative to a given startPt.
1. Begin by placing a point along the X-Axis at 0,0,0
2. Open Grasshopper and creae a point parameter to correspond to the point in Rhino.
3. Next, create the following float and integer variables with the numerical ranges indicated.
| Slider Name | Type Number | Range | Current Value |
| width | float | 0.001 to 20.0 | 2.0 |
| height | float | 0.001 to 20.0 | 2.0 |
| offset | float | 0.0 to 20 | 0.2 |
| numRows | int | 1 to 100 | 4 |
| numCols | int | 1 to 100 | 4 |
4. Next, go to the Math tab in Grasshopper, add a Python Scripting component, and create input variables for the originPt as type "Point3d", the width, height and offset as type "float", and numRows and numCols as type "int", and add a second output variable "b".
5. Next, open the Python Scripting component, add the rhinoscriptsyntax library, and create a function "def makePanel". that creaes a planar surface from four corner points.
1. Python Libraries
Continued
Here, the panel function begins with stripping out the x, y, and z components ofthe origin pt in lines 7, 8 and 9. It then generates the four corner points pt1, pt1, pt3, and pt4 in counter-clockwise order beginning in the lower lelf-hand and lower right corner pts, and then the upper-rightt and upper-leftt corner points in lines 11 though 14. Finally, in line 16 it generates polyline with the rs.AddPolyline( [pt1, pt2, pt3, pt4, pt1]) function where the argument "[p1, p2, p3, p4, p5]" is the list of the fourt points with one duplicated to from a closed boundaray. Then, line 17 conversts the polyline into a planar surface through the use of the" rs.AddPlanarSrf "function..
6. Next, create a function "arrayObject" that includes "for" loops to place the panels in rows and columns.
This function relies upon a double"for" loop. The outer "for" loop goes
from row to row within the pattern and is setup in line 23 above that
begins at row 0 and goes up until but not including the value for
"numRows". Similarly,for each row, the inner loop goes fro column to
column within the pattern and is setup in line 24 above. For
each rectangle within the pattern, it's lower left-hand corner is
determined by lines 25 through 28 where the x, y, and z components are
caculated based upon index variables "i" ("numRow") and "ii" ("numCol"
)and the specifications of "width" and "height" of each panel plus the
"offset" dimension. The function rs.AddPoint in line 29 creates the
"curPoint" at the location of x, y, z. Line 30 creates a translation
vector to the current point "curPoint" from origin, and line 29 moves
the panel from the o
"originPt" to the "curPoint" location.
Finally, the single panel made by the "makePanel" function is assigned to the variable "panel" in line 35. The panel is then passed as an argument into the function "arrayObj" where it is arrayed and stored a list assigned the the list named "panels". The output of "arrayObject" is in turn assigned to the output variable "a" and we see the result inside Rhino.
3. Grid Array with Parametric Points On Each Panel
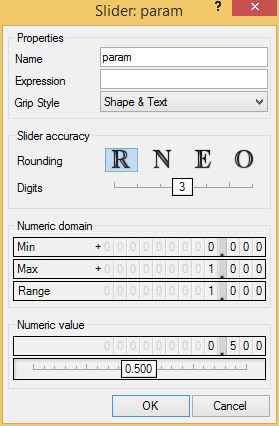
Lets begin by adding a number slider for a new variable named "param" and add it as type "float" variable to the Python script.
Lets Set the value range for "param" to go from 0.0 to 1.0.

Add the function def "paramPt" that takes two points ptA and ptB and a parametric distance "param" between them that is in the range 0 to 1, The function determines the parametric point in lines 6 through 12 below. In addition, add the call to the function "paramPt" inside the function "makePanel" in lines 26 to 30 below. Thus the new points are parametrically along edges between the old corner points of the panel and will determine a newer panel shape in line 31 below.
Assign the result of the function"arrayObject" to the output variable "a" and we see the result inside Rhino.
4. Draw the panels on alternating Row and Columns
Below we do a logical check on row number and column number before drawing. The function "oddNum" determines if a number "n" is odd, and the function "evenNum" determines if a number is even in lines 34 through 44 below.
The key to the alternating rows and columns is the expression "if(evenNum(i) and oddNum(ii) or oddNum(i) and evenNum(ii)):" in line 52 below. This expression is intrepreted in a particular precendece order where the operator "or" divides the expression into a left-half " evenNum(i) and oddNum(ii)" and a right-half "oddNum(i) and evenNum(ii))"/ The left- half will draw the polygon on even number rows and odd number columns beginning with row = 0. The right- half will draw the polygon on odd number rows and even number columns beginning with col = 0.Assign the result of the function"arrayObject" to the output variable "a" and we see the result inside Rhino.