
COMPUTER
AIDED
ARCHITECTURAL DESIGN
Animation Extracurricular Notes,
Week of December 10, 2018
OBJECT PATH ANIMATION IN VRAY OR RHINO RENDER
These are quickly assembled notes regarding a Pyhon Script running directly in Rhino (not via Grasshopper) that facilitiates V-Ray rendering of object movement and strickly extracurricular for those wishing to try an alternative approach to the animation part of the final exercise.
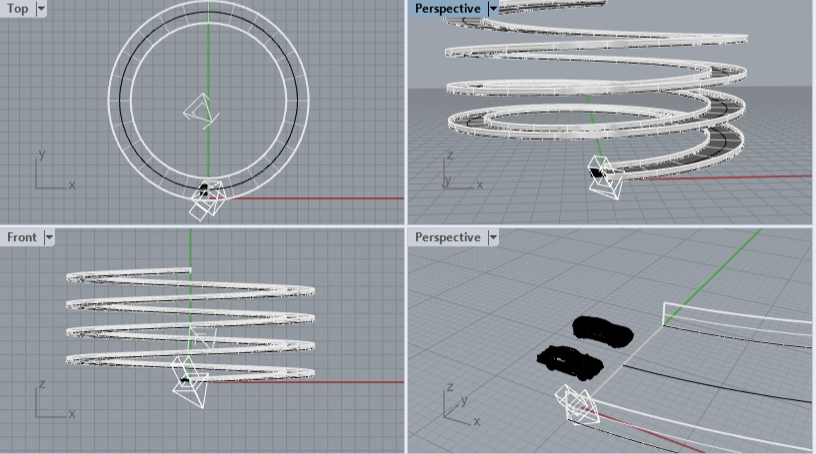
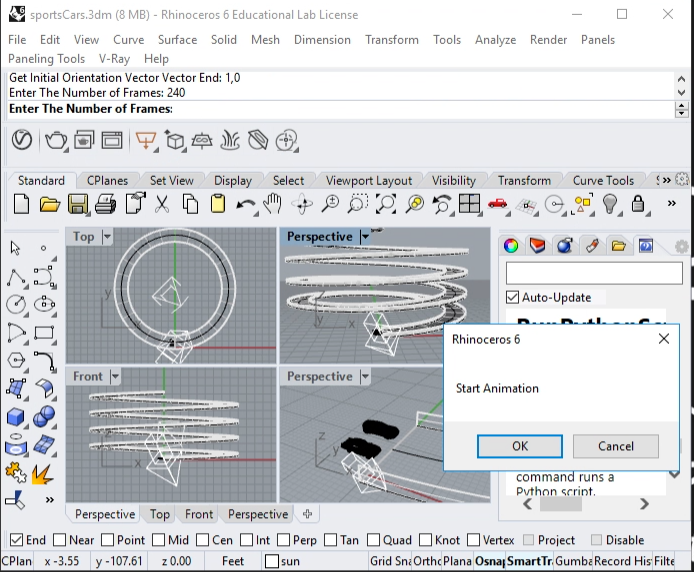
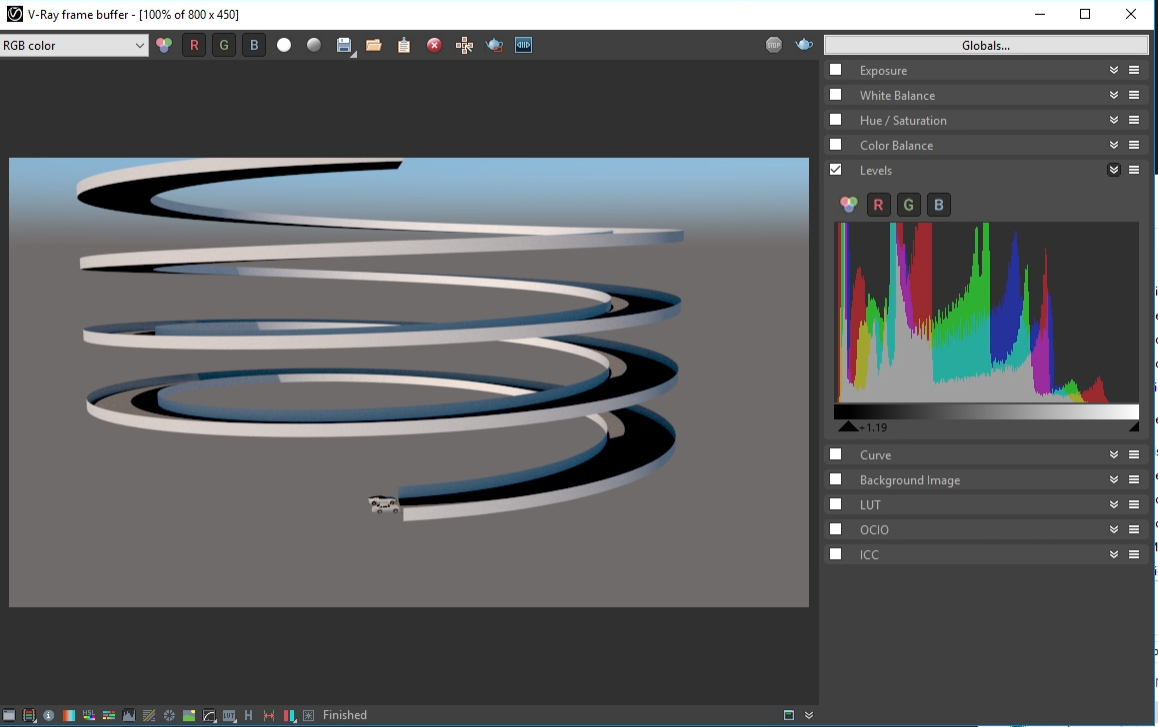
1. Create a Rhino fille with one or more objects and a pathway. In the case below, two cars (obtained from 3D Sketchup Wharehouse) and juxtaposed with helicial curve at the base of a helical ramp. The renderings of individual frames can be done with Rhino Render or V-Ray. In this case the V-Ray rendering option is turned on. The python scrip file "moveMultObjsOptTangent.py" used has been placed in the classes folder under the subfolder named "animationScript" along with the Rhino file used below.
2. Display at least two perspective views within the Rhino application window so that you can use one to select geometry (e.g., lower right) and the other to establish the viewpoint to be rendered (upper right).
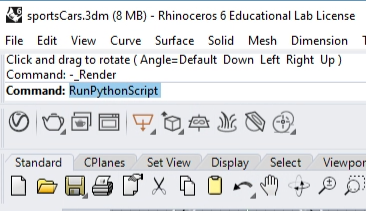
3. Place the python script named "moveMultObjsOpTangent.py" in the same folder as the Rhino file and at the Rhino Command prompt, enter the command "RunPythonScript".
4. Next, follow the series of prompts to enter the requested information.
4a. Select Objects
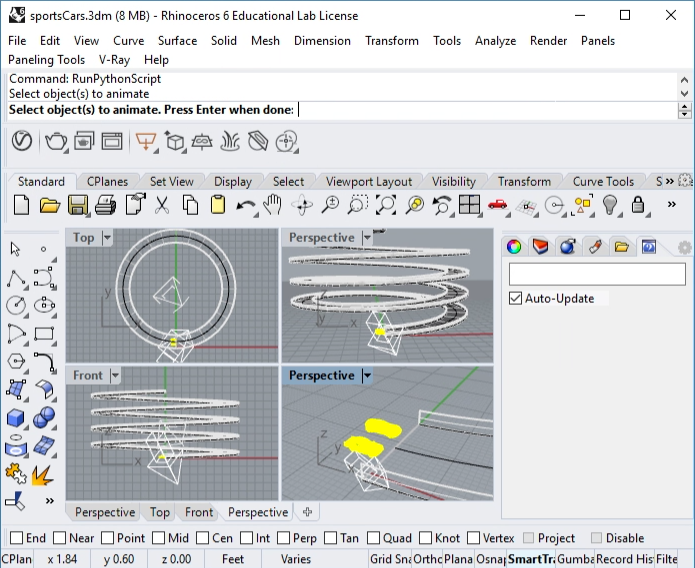
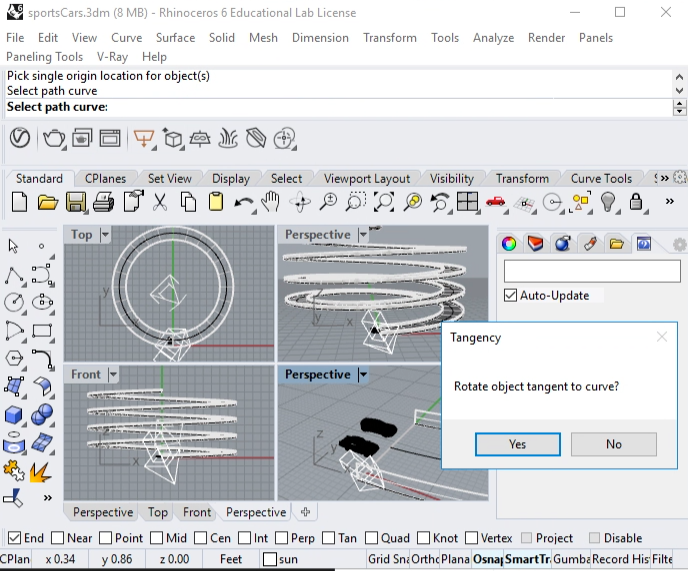
4b. Place single origin location for objects. This will serve as the center point of the objects that travel the path. This is done with end snap tool in the lower right perspective view in the illustration below.

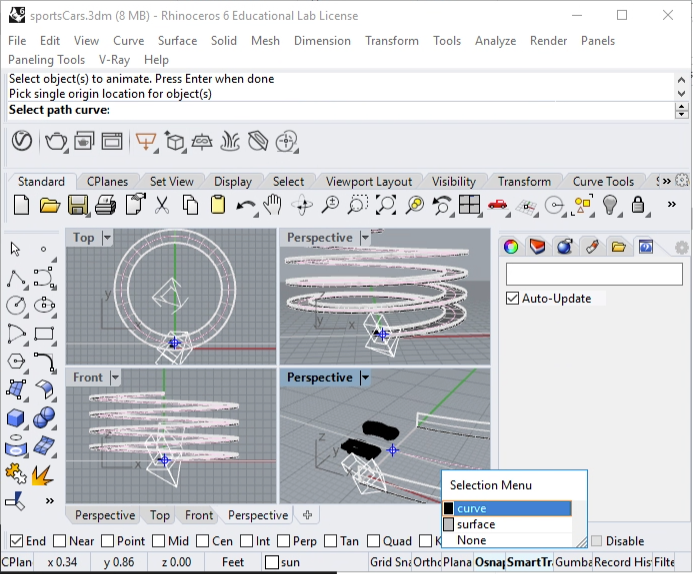
4c. Select the path curve. In the case below the helical curve is selected that runs up the center of the ramp.
4d. Select option to rotate objects tangent to path (if desired). Here you choose whether or not to have the objects automatically rotate so that they align with the path curve.
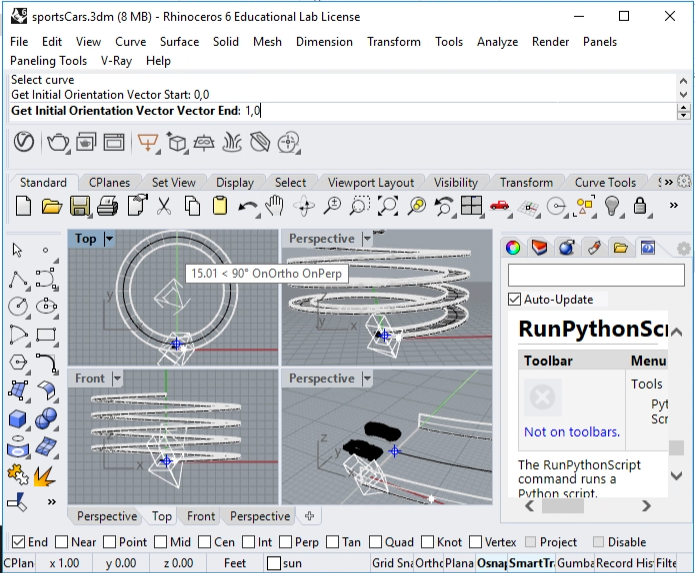
4e. If 4d is selected, then enter two points to detemrine the reference tangent vector. This is desired vector direction for the objects as they are situated before the animation beging and that will be used as reference vector to be rotated to be tangent to the path. In the example below, two points are entered at the command prompt, the point 0,0 and the point 1,0 to indicate the beginning and end of the base vector. Any two points can also be selected more directly with the mouse in the view window.
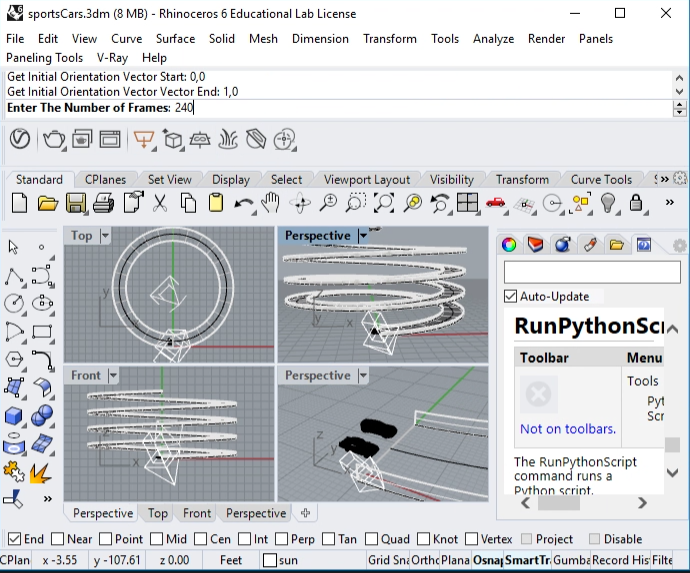
4g. Next, make sure you preselect the view window to be rendered (e.g, the "Perspective" window is highlighted in blue below) and then enter the number of frames desired. This is the last moment possible to determine which view window will be rendered. You can then enter the number of "Frames" to be rendered as shown in the figure below.
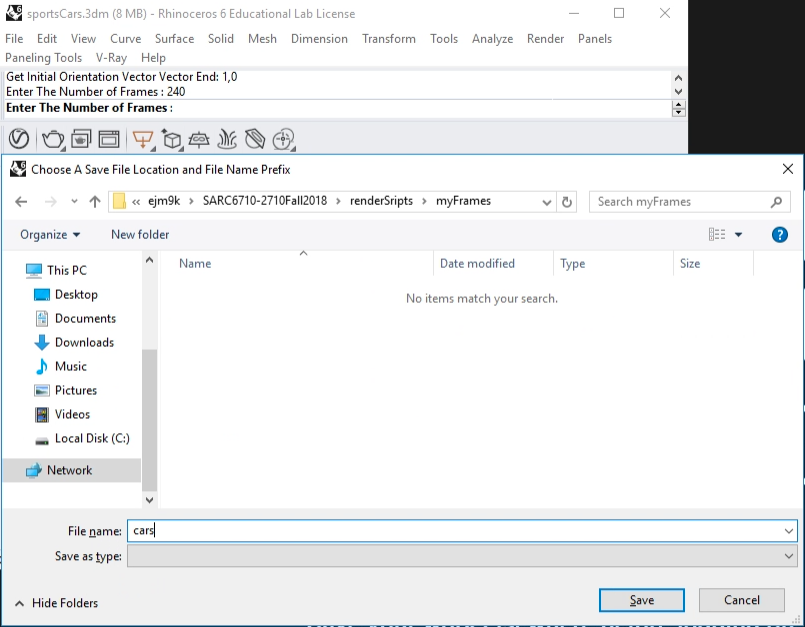
4g. Create a file name prefix (e.g., "cars") for the frames and also select frames folder location (e.g., myFrames) where the rendered frames will be saved.
4h. Select "OK" to start the animation, or select "Cancel" to stop the script from going forward.
5. The V-Ray Frame Buffer will the render the series of frames at whatever resolution is setup previously in the V-Ray Asset editor.
6. The frames can then be compiled into a single movie file sequence using the Photoshop method illustrated in previous workshop notes or through the use of an alternative movie file editor.