COMPUTER
AIDED
ARCHITECTURAL DESIGN
Workshop 12 Notes,
Week of October 31, 2020 (Revised *)
* NOTE: This supplants and modifies an earlier version of this example published on October 28, 2020.
This set of workshop notes describes a V-Ray Grasshopper based animation of the Sun. It uses a built in Rhino tool for Sun position based upon Latitude, Longitude and Time. The Grasshopper part of the procedure can be applied to any Rhino file setup for V-Ray. It requies that geometry be referenced in the the Grasshopper environment. A separate method will be illustrated in later workshop notes that doen't require importing geometry into the Grasshopper enviroment. However, both methods can be adapted to bring geometry into Grasshopper for additional advantages such as with respect to the animation of a moveable sun shading devices such as a louver system.
Note that an earllier version of this method used the Ladybug (download web site) plugin the Grasshopper published for the class in 2019. Ladybug a companion to the Honeybee (download web site) ; however, for the present just the V-Raysoftware is needed. Here, we are examining some relatively straightforward cases of sunlight animation with tools that allow you to determine a specific time interval, latitude and longitude. The intent is not to cover the full setup and scope of this example directly, but to provide a predetemined Grasshopper File into which you you can more easily add geometry and quickly launch the simulation.
Due to the nature of the components used, a partial explanation in Part I to gives some sense of how they are staged and operated. The complete Grasshopper script and a demonstration file are published in the CLASSES folder under examples in the sub-folder named "sunlightStudy"
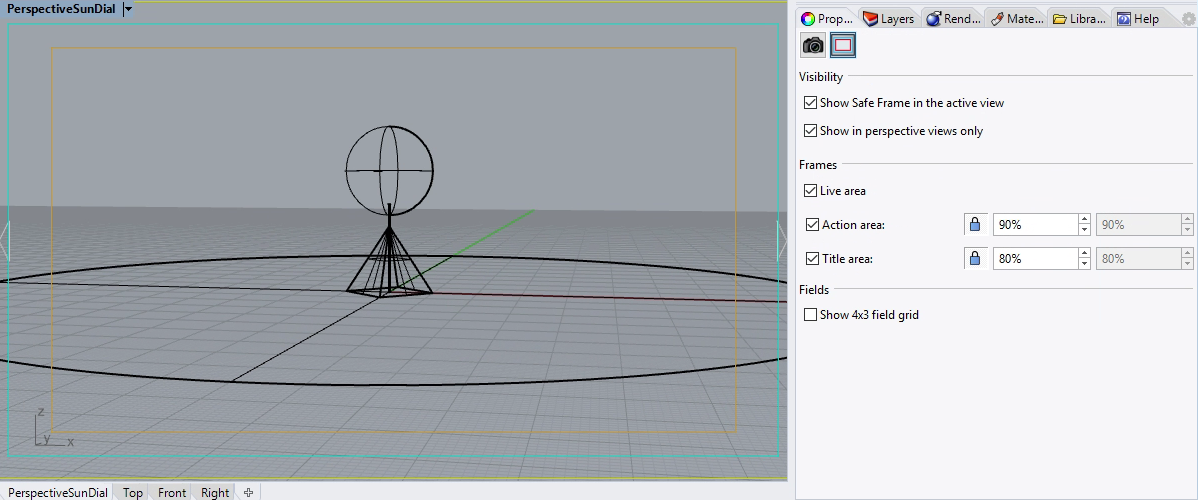
1. Open a Rhino file sunDial.3dm, and open the saved view "Perspective Sun Dial". Note that the "Show Safe Frame in active view" Option is on which indicates the likely boundary of the rendered view.

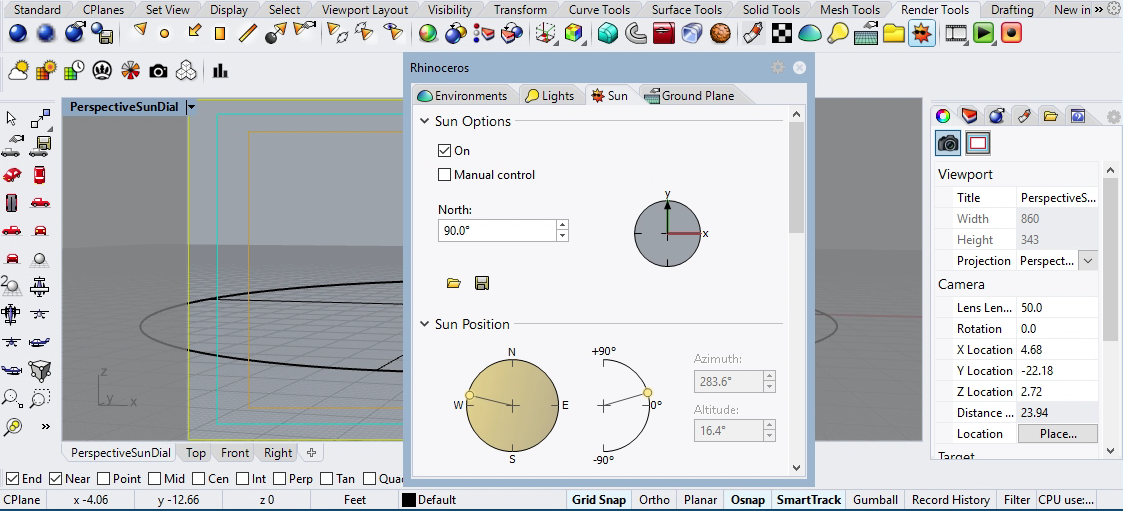
2. Next, open up the Rhino Sun tool and ensure that it is turned on.
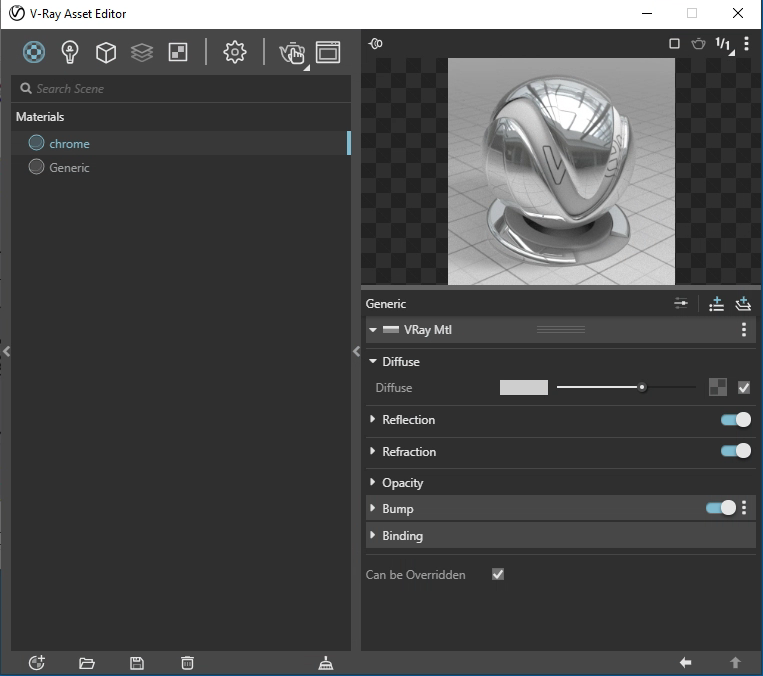
3. Next, open the V-Ray Asset Manager Window and note the V-Ray materials pre-assigned to the objects in the file. This includes a Chrome material and a simpler matt light gray generic material.
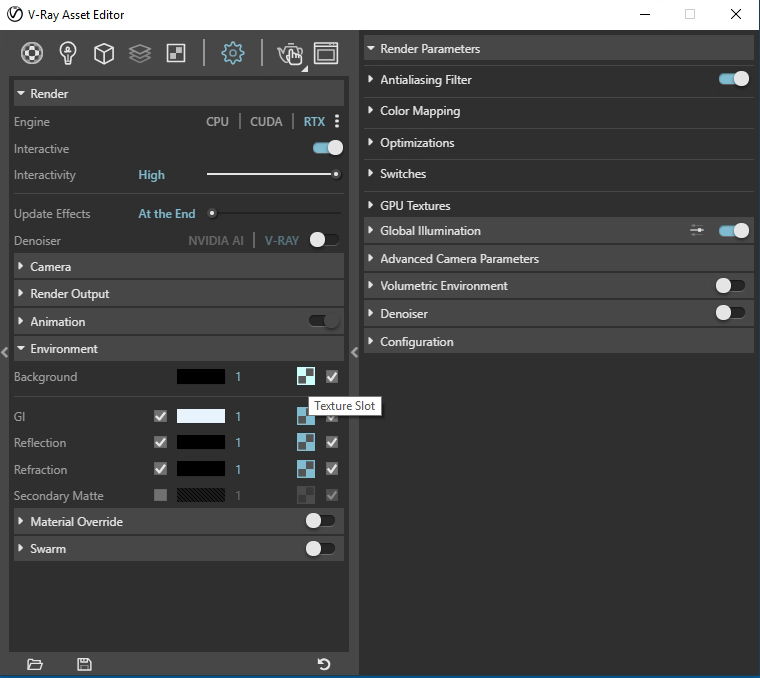
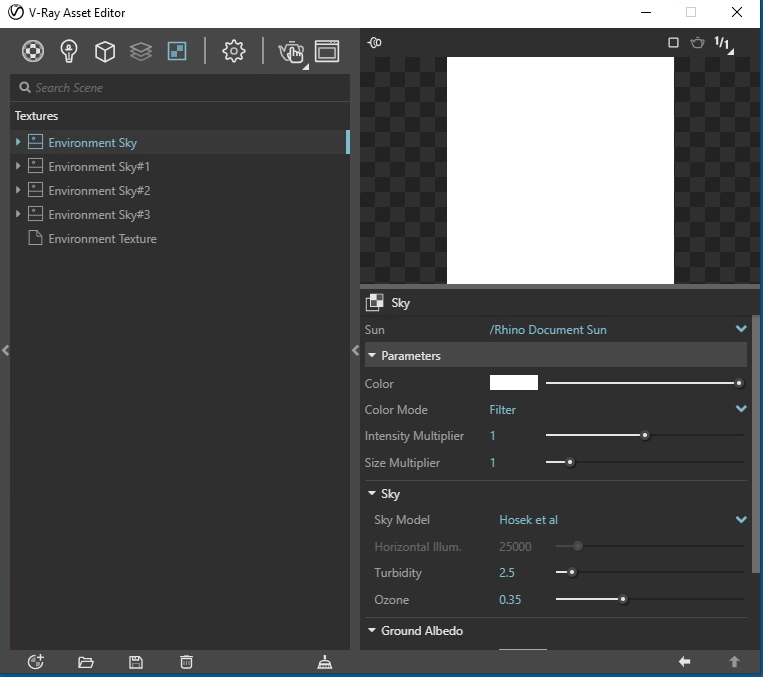
3. In addition, the Environmental settings include a V-Ray sky assigned to the Background, GI, Reflection, and Refraction texture slots. Note that the Sun is this case is the Rhino Document Sun and V-Ray Sun that we've used in previous workshop notes.
 |
 |
PART II. V-Ray Grasshopper Plugin
We begin with a pre-set setup of Grasshopper Components. Here, download the setup file "sunPositionPath.gh" from the "Classes" class server under the subfolder "examples/sunStudies" and place it on your computer.
1. Launch the Grasshopper plugin to Rhino and load the "sunlightStudy.gh" file. While there are a number of components here that have been predetermined, we will begin with modifications to just a few of these (double-click on the image below to see all the conponents at high resolution)
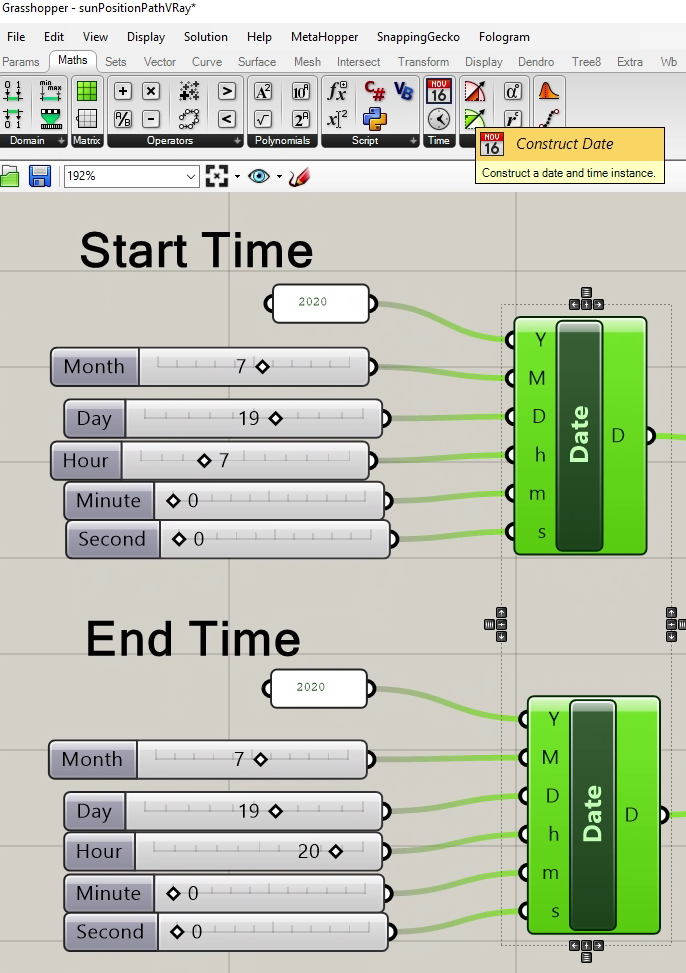
2. Prepositioned within the Grasshopper file on the upper left-hand side of of the Grasshopper canvas window are two construct datescomponents providing a start and end period for the sun movement and going from 7 am to 8 pm on July 19, 2020.
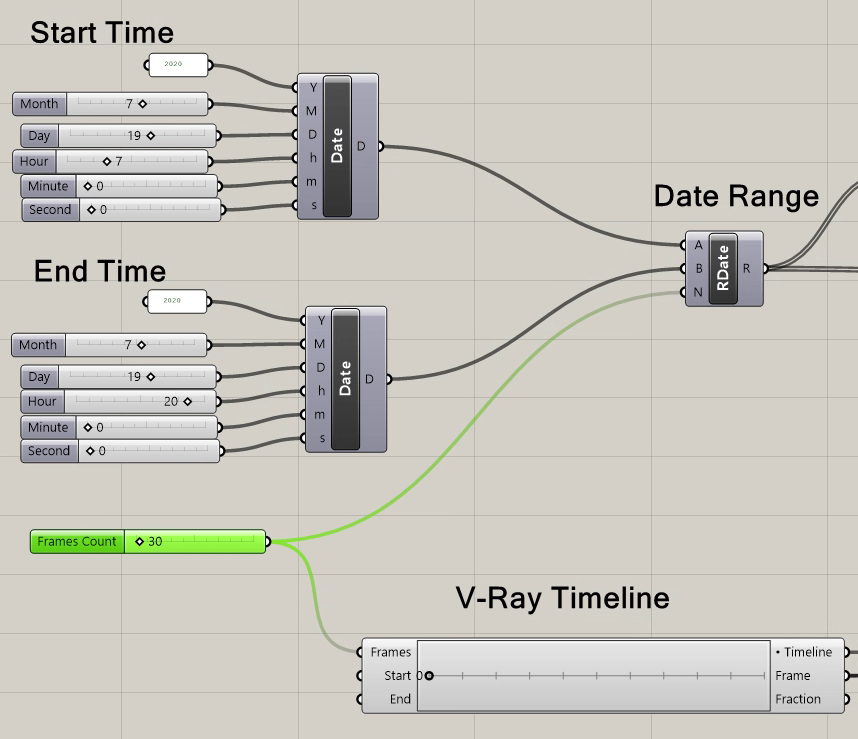
3. On lower-left side of the Grasshopper canvas window, change the frames count slider to 30. The frames count slider determines 30 frames in the animaiton in the V-Ray Timeline Grasshopper component and also determines30 times to in the Grasshopper Date Range component.
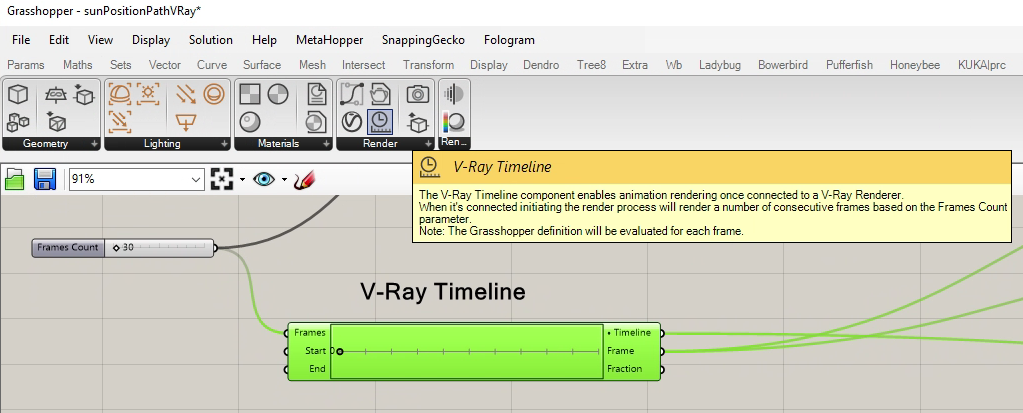
4. The V-Ray Timeline component drives the animation sequence.
5. The Grasshopper Range component determines a list of a specificed "N" number of times.
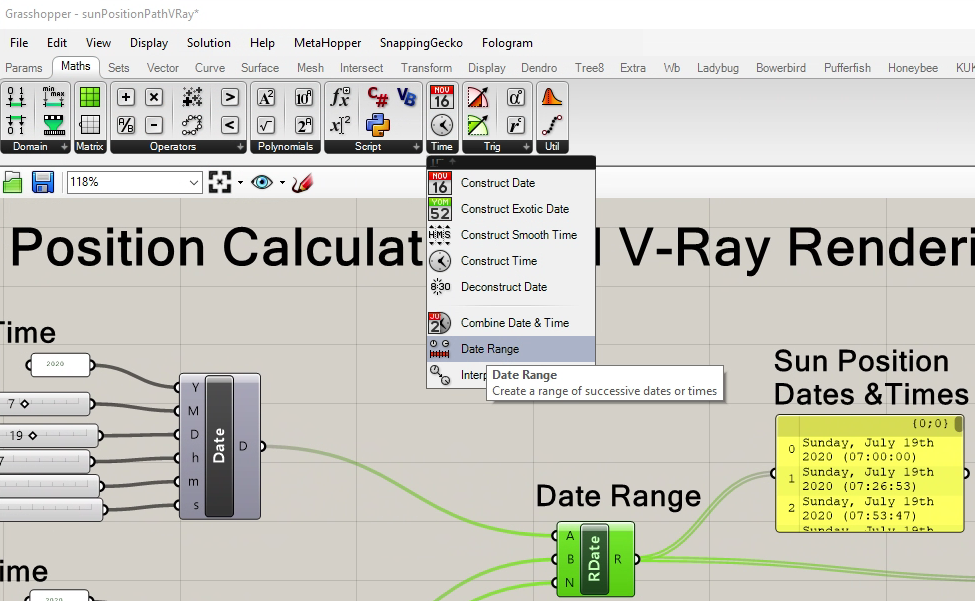
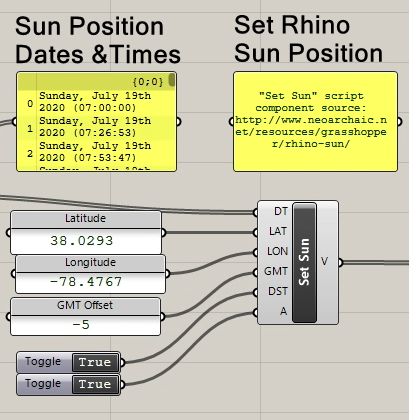
6. Next within the Grasshopper sequence, a Set Sun component written by neoarchaic (www.neoarchiaic.net) reads standard Rhino Sun utility Azimuth and Alititude settings. See the Rhino Sun utility in Part I above. In particular, the Set Sun component accepts the list of 30 "DT" dates and times, and calculates 30 vectors from the origin of Rhino's coordinate system to each of the 30 related sun positions. The latitude and longitude and Greenwich Meantime Offset of -5 also used as input is for Charlottesville, Virginia.
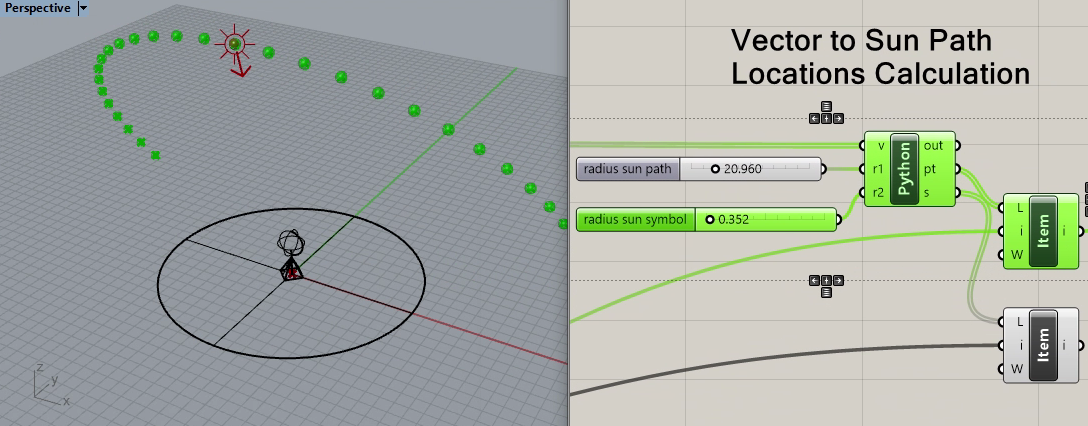
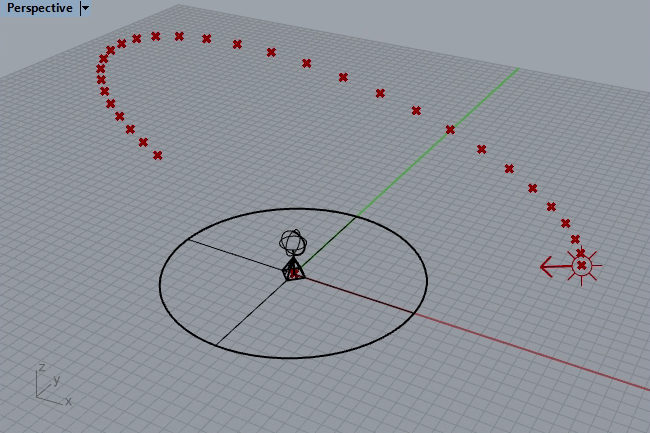
7. Moving to the right in the Grasshopper directed graph, I've added a Python script that converts the Vectors from the sun Script to 30 sun position points. Increasing the "radius sun symbol" slider will reveal a sphere at at each Sun position. Increasing the "radius sun path" slider will expand the radius of the sun postions relative to the origin of Rhino's coordinate system. In the image below the single sun potion position is highlighted at mid-day. These sun positions are in turn to be passed along to the V-Ray Sun rig in a future step below.
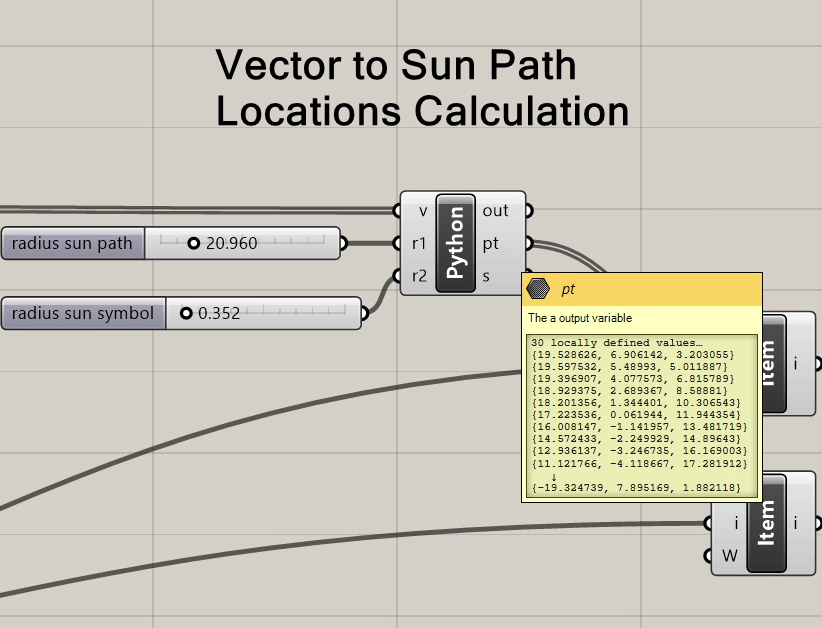
The sun postions " pt" output port from the Pthon script provides a listing of sun 3D point locations in the Rhino model that cover the period of analysis
8. Note that you can set the radius of sun symbols to a nominal number of 0.01 and in the perspective view window the 30 sun path positions are designated with a single point rather than a sphere. This can be useful to simplify the visual representation if the number of sun positions becomes so too many that the spherical representations would become too crowded for the view window.. The first early morning sun postion in the first frame is also highlighted in ths example with an arrow pointing to the origin of the Rhino coordinate system.
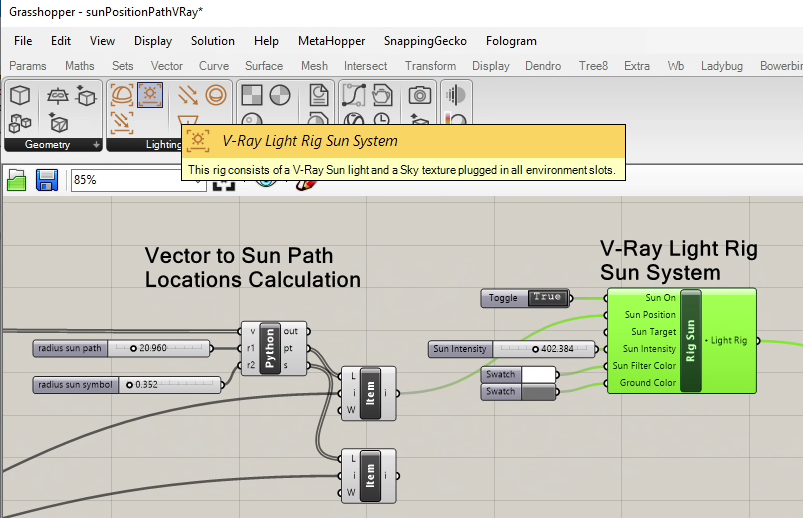
9. Moving to the right in the Grasshopper directed graph, note that each sun position items is passed one a time in turn to the "Sun Position'"rig. Here the sun intensity is set to a scalar value to control the brightness of the sun in the V-Ray Rendering.
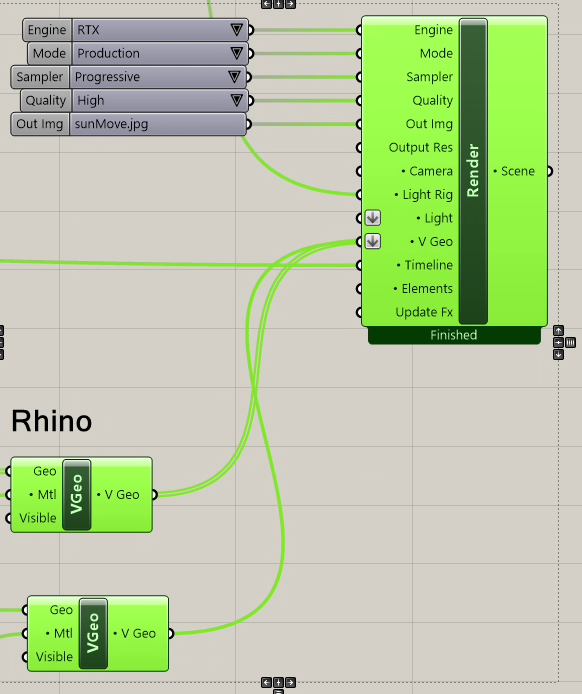
10. The sun positions are then passed one at a time form the V-Ray Light Rig Sun System to the V-Ray Render Component. Here the inputs are similar to how they are set for prior workshops with V-Ray.
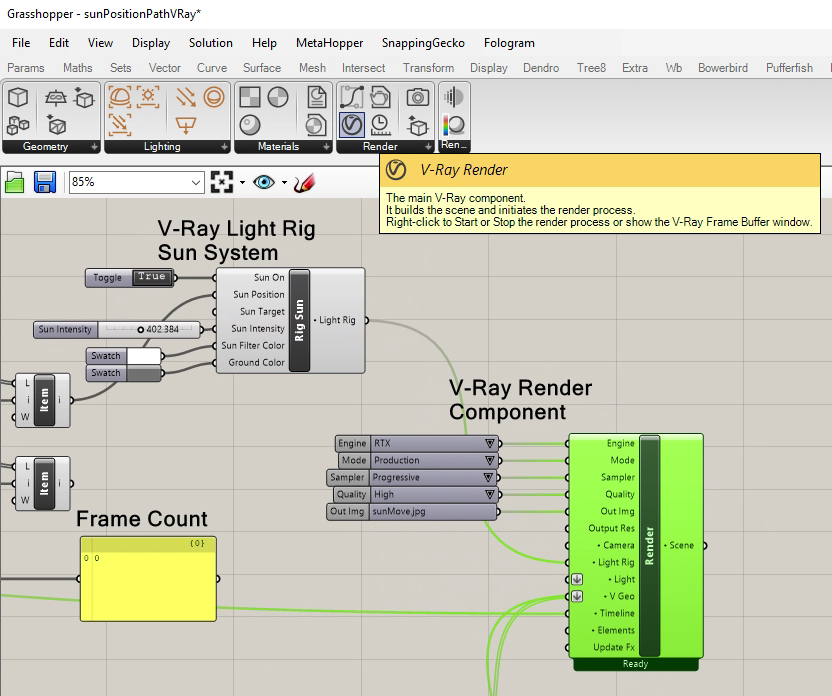
11. Note that the TImeline is connected accross the canvass window to the "Timeline" input port of the V-Ray Render Component and to other components throughout the Grasshopper directed graph sequence. It is the lead driver of the passing data throught the full script. This includes a text box to capture the Frame Count about 2/3rds across the canvas window in the screen capture below. Select the image below for a larger view.
12. The final part of the setup references the geometry in Rhino with components that were inside Grasshopper. In the screen captures below the specific Grasshopper components that have already been used are identified.
First creates two "geo" componenets from the Params menu.
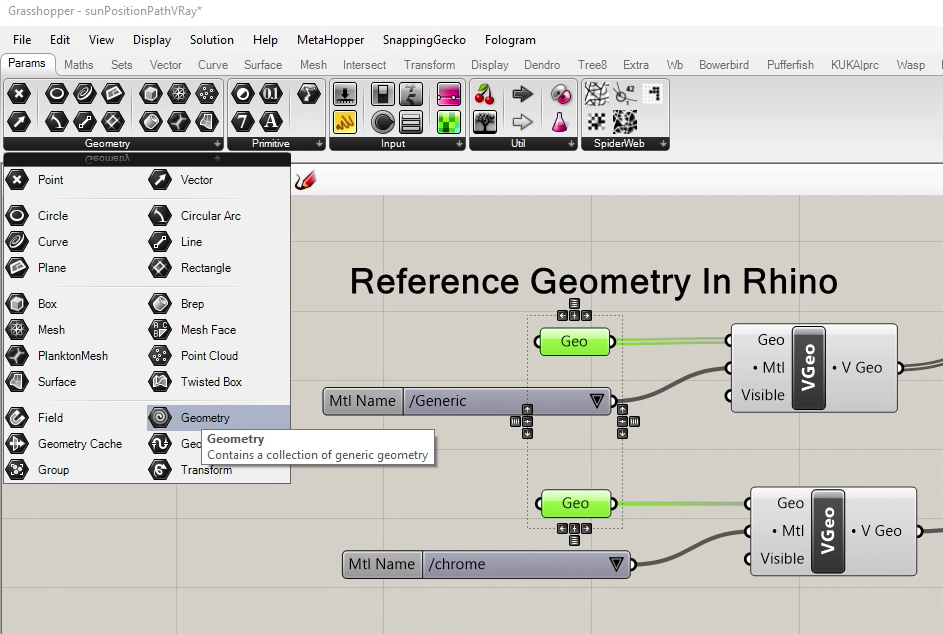
Next, associate one "Geo" component with the ground circular surface and the pyramid base shapes.

Associate the other "Geo" component with sphere shape.

Next, add a corresponding V-Ray Geo component for each of these two shapes and connect them together as indicated.
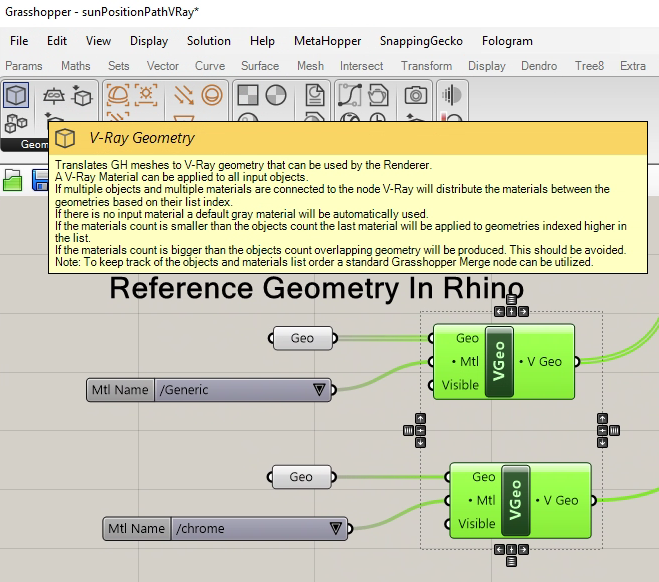
Next, add a V-Ray Material from File component for each of the V Geo components
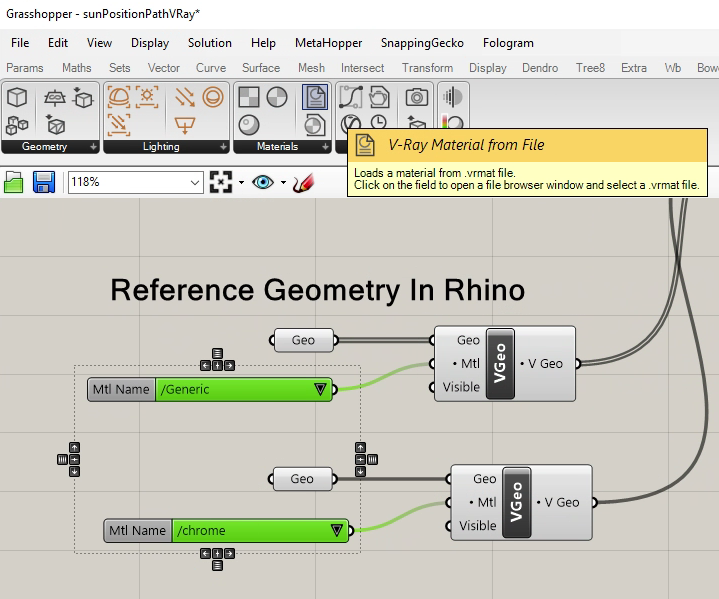
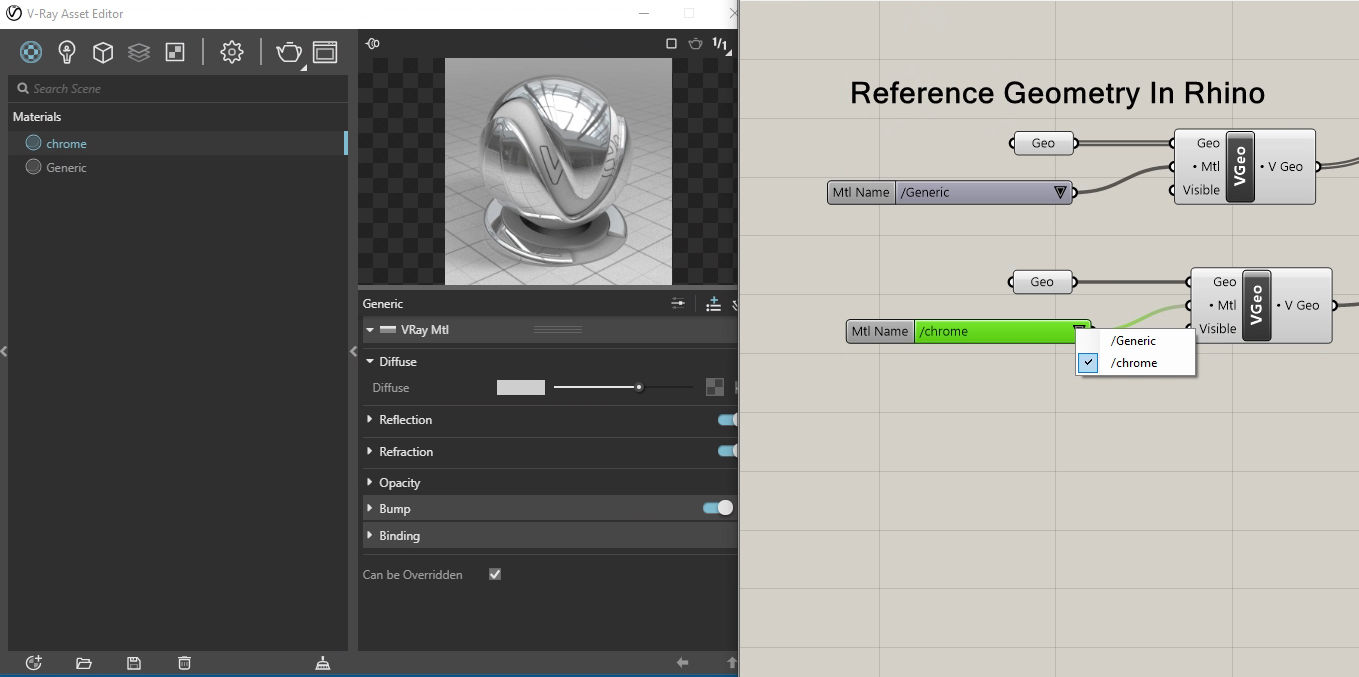
The downward pointing select arrow for each of the V-Ray Material from File components can be use to pick a V-Ray material created previously with the V-Ray Asset manager.
Finally, the V Geo components are connected to the V-Ray Render component. By this method all the desired geometry in Rhino to be included in the sun animation should be added to the Grasshopper window.
Alternatively, for a more abstract appraoch, it's also possible to use one Geo parameter, one VGeo parameter, one generic material and assign it to all the objects.
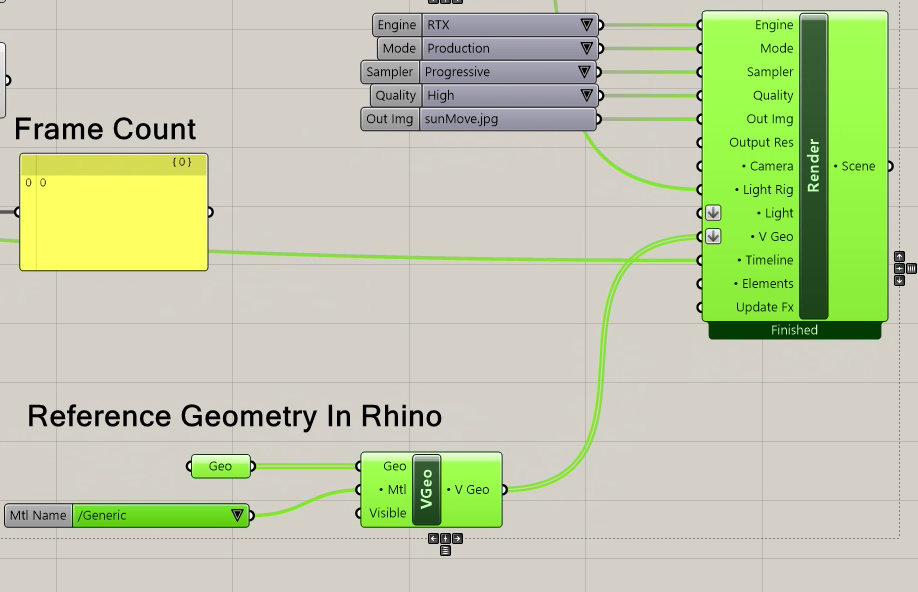
The additional components in the Grasshopper file will be examined in Part III. below.
1. Right mouse-button click on the V-Ray Render component and select the "Render" option to render the sun position at frame 0. This will initiate the Render Component.
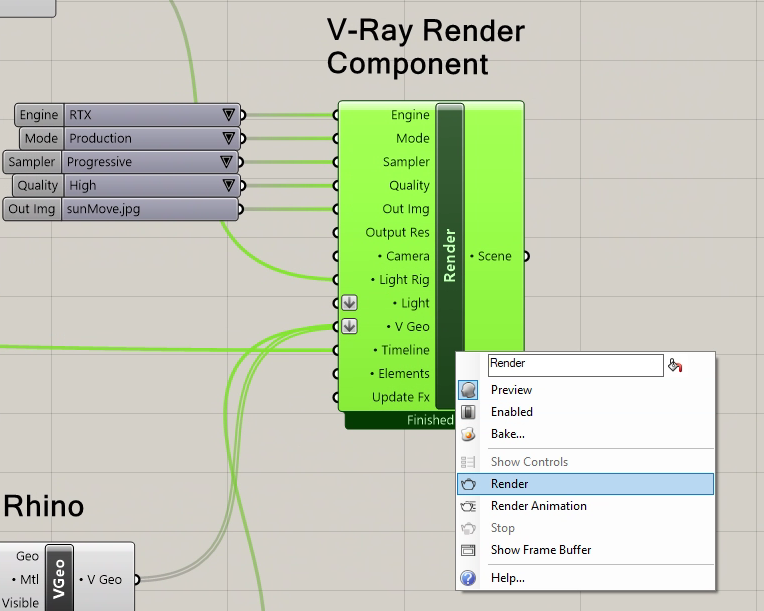
This step will initially result in a white screen in the "V-Ray Frame Buffer. This is because the light levels we begin with have not been adjusted for the in the V-Ray Frame Buffer.
2. Open up the Light Levels panel and just the dark and light cut off settings as done in previous work shops. Note that an early morning ligt should be relatively set to a darker level so that a mid-day sun will be brighter and seem to be at a relatively brighter exposure level.
Optionally, change the Boolean toggle to "False" to the "A" activate input port the Set Sun component. Next, hange the frame number to be midway (frame 180) in the V-Ray Timelime. Deactiviting the "A" activate input port allows the Set Sun calcuations to be suspended which speeds up this step.
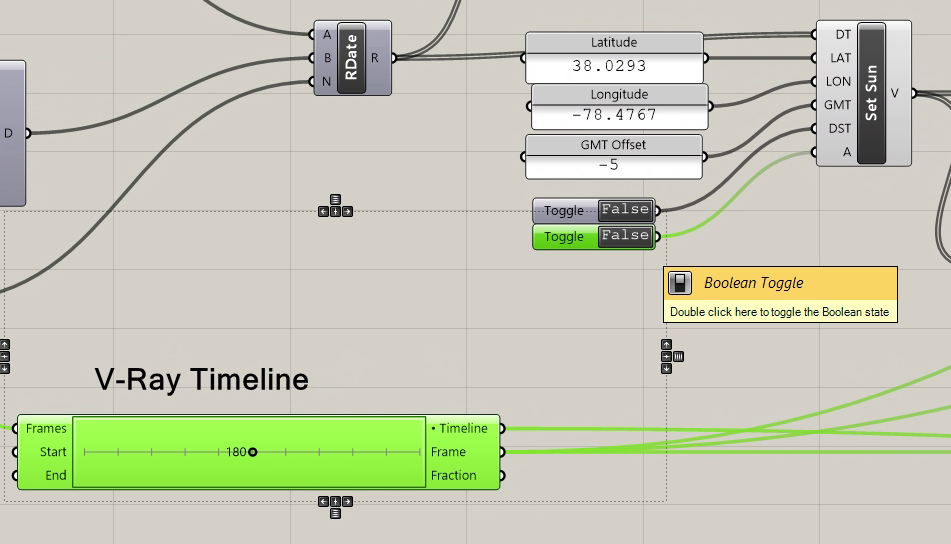
Change the Boolean toggle back to "True" for the "A" activate input port of the Set Sun component, and initiate a new Render through the V-Ray Render Component. Adjust the "Levels" as needed, but be mindful that lowering or brightening the intensity of the exposure wil impact the early morning light level as well, That is , be care careful not to make it less bright at mid-day if the same setting makes it too dark in the morning at frame 0. Only one setting should be used for the entire rendered sequence.
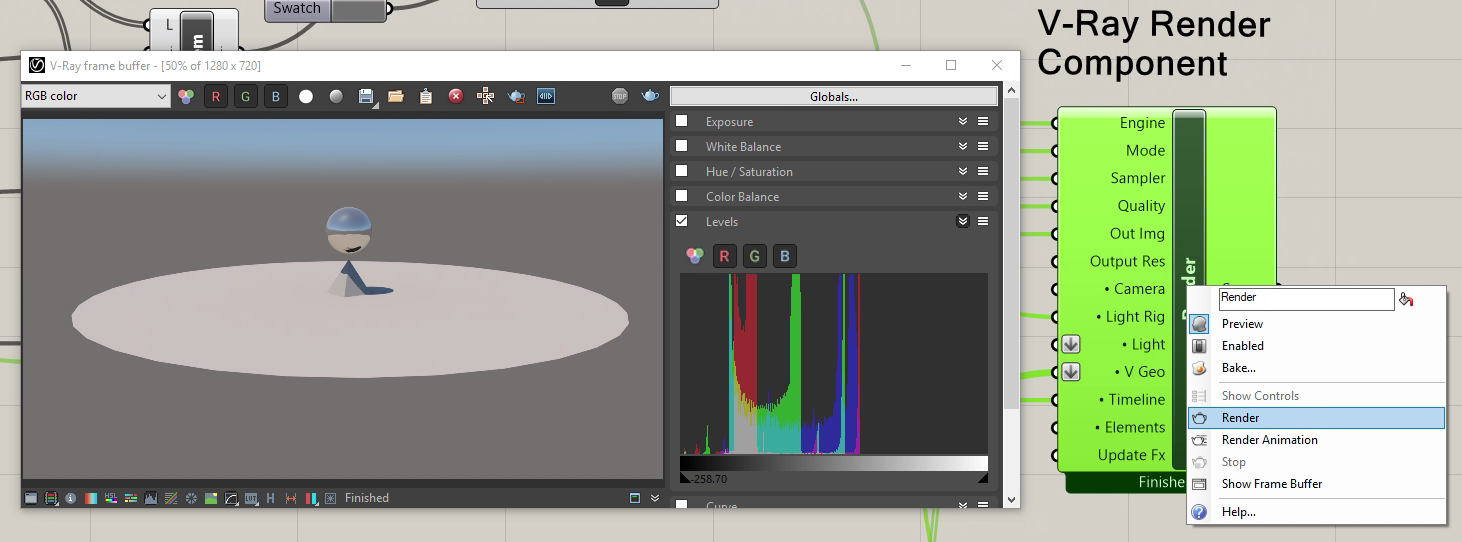
3. A few additional steps are needed in the V-Ray Asset Editor to enable to complete the recording of animation frames.
Activate the "Render Output" tab and then select a folder location, a file resolution, prefix name and choose a jpg type file for the sequence of frames. (Select image below for a more detailed view.)
4. Setup a desired perspective view in Rhino. Right mouse-button click on the V-Ray Render component and select the "Render Animation in Rhino " option to render the animaiton sequence.
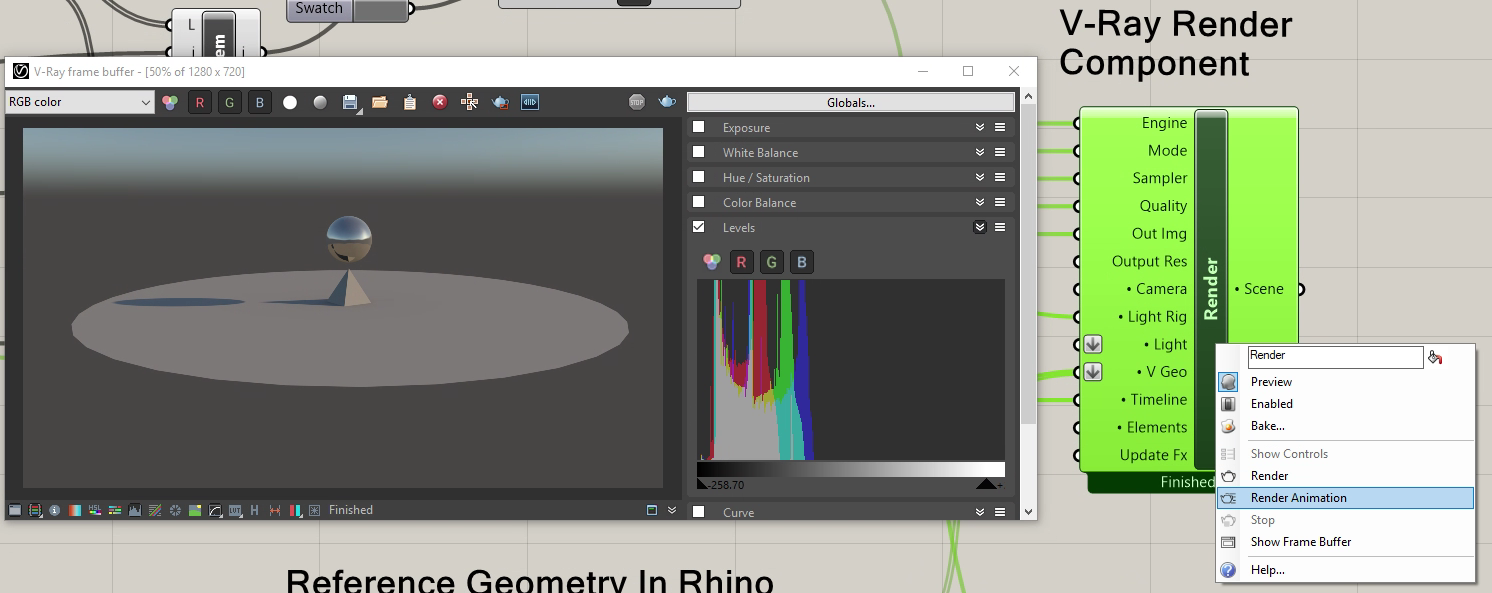
5. Once compiled with a video editing program such as OpenShot, the animation results in the sunlight moving and shadows changing accordingly.
In the following example, Rhino elements were animated inside of Grasshopper using methods similar to the path animation example in workshop notes 11. A rotation value for louvres was depending upon the frame number of the animation sequences.
The first animation results from the sunlight moving and the louvers remaining still.
The second animation results from the sunlight remaining still and the louvers in rotation.