COMPUTER
AIDED
ARCHITECTURAL DESIGN
Workshop 14 Notes,
Week of November 1, 2020
These notes describe use of an Grasshopper technique to effect a Rhino turntable-like throught V-Ray. This examples is posted to the Classes examples and Rhino resources folder under the name "Turntable.
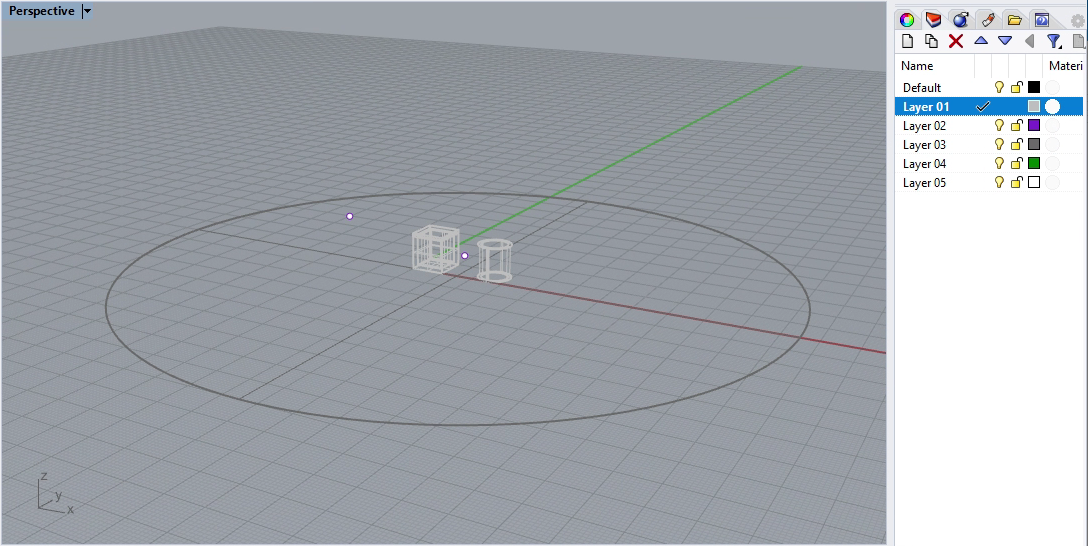
1. Launch Rhino, create a few objects near the origin of the primary coordinate system including a ground surface and then open the Grasshopper script "turnTableExample.gh". Alternatively, open the Rhino file "turnTable.3dm" provided in the examples folder and then load the Grasshopper Script "turnTableExample.gh". The Rhino file provided has a solid objects on layer 1, a camera location point and its target location point on layer 2, and a ground surface on layer 3.
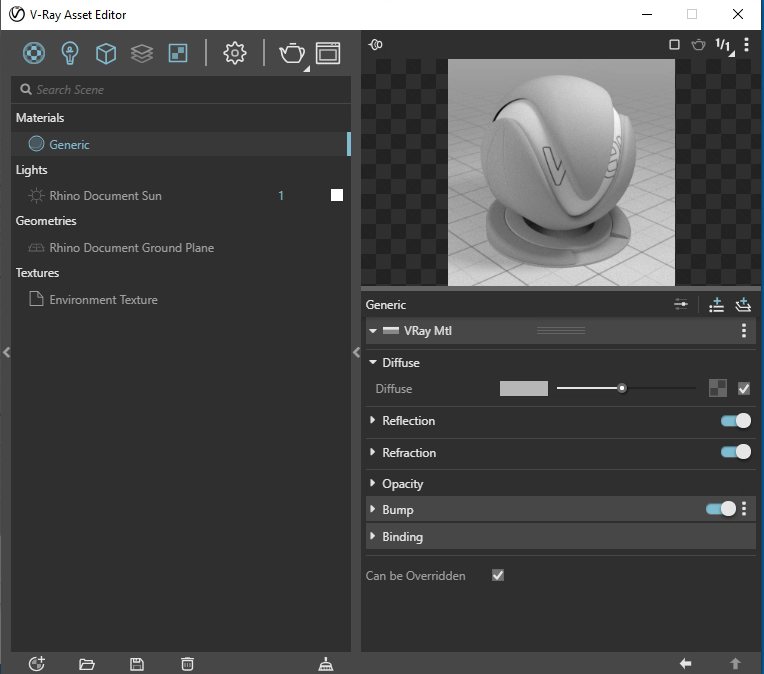
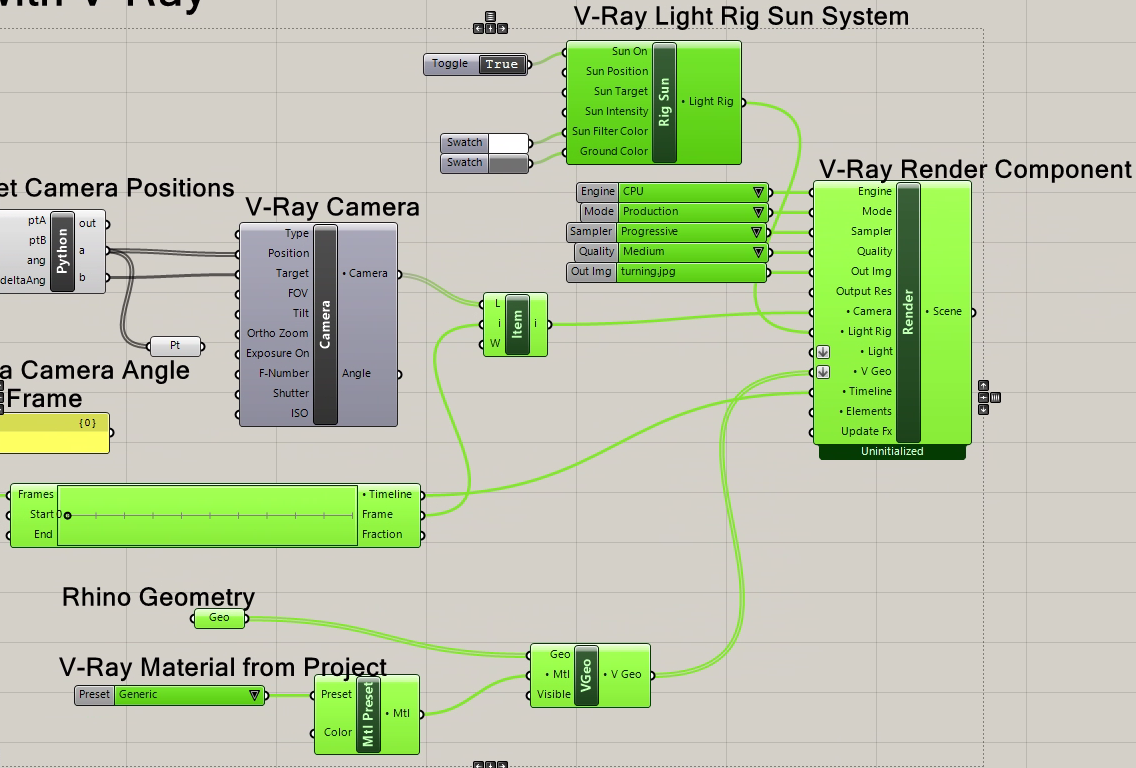
2. In this example for simplicity sake a single generic light grey V-Ray materials has been created in the V-Ray asset manager and assigned to the objects created inside the Rhino file.
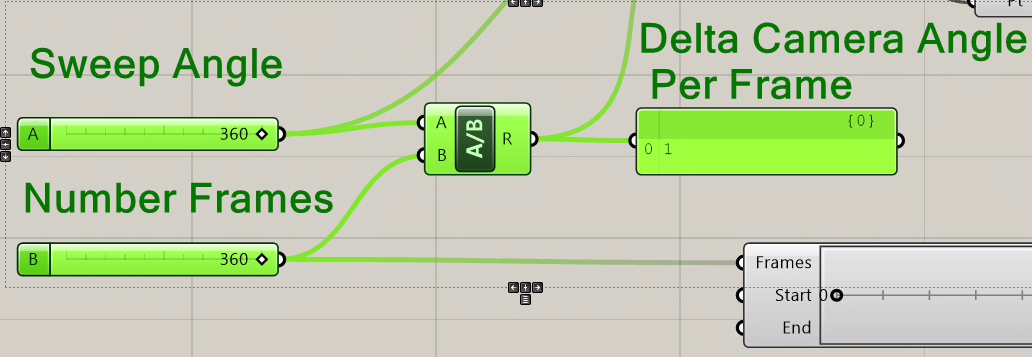
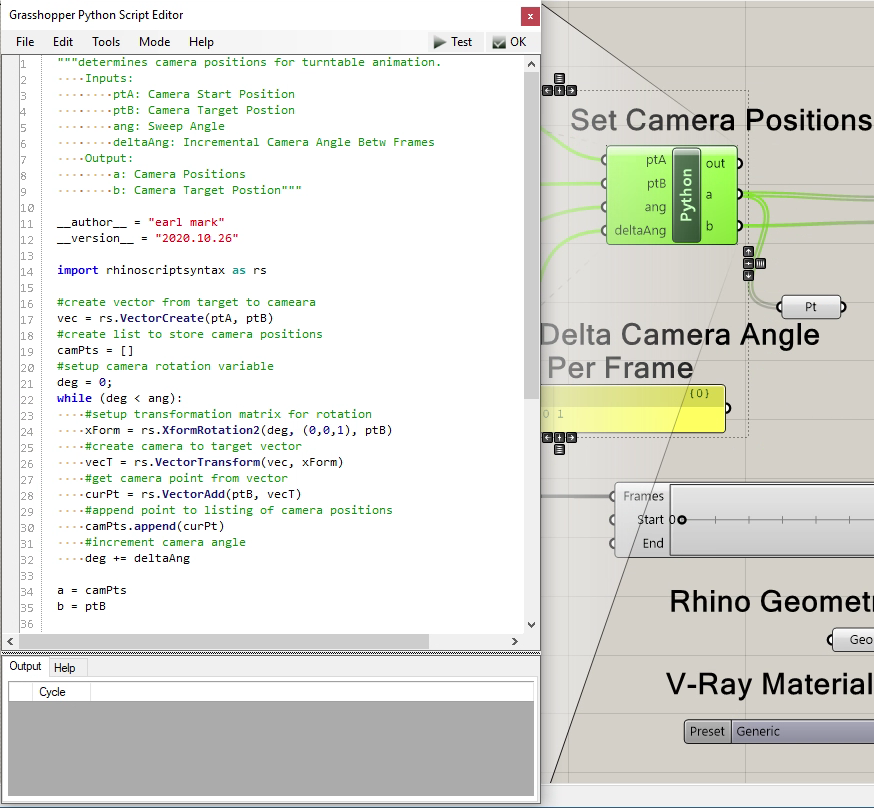
3. The Grasshopper Script as a whole is similar in many ways to the Sun Study example of the previous workshop notes. This overview focuses on the added components show in green below (select the image for a larger view).

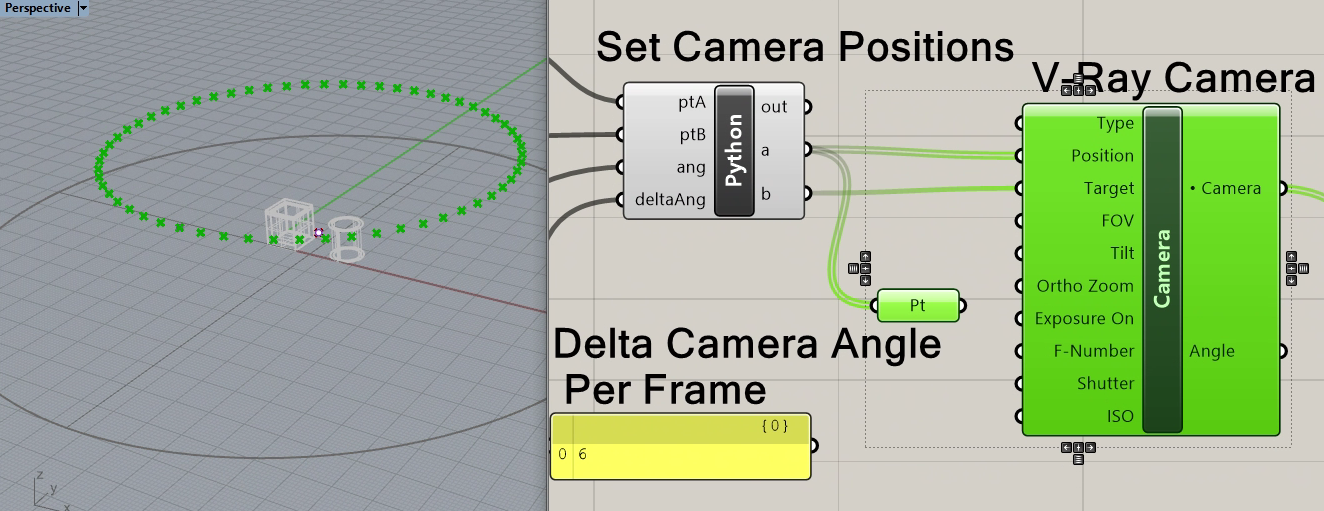
4. If you divide the sweep angle of 360 degrees by the number of animation frames, you get the change in camera angle per frame. Thus, if you divide 360 degrees by 180 frames you get a 2 degree change in camera angle per frame. In the examle shown, we divide 360 degrees by 360 frames you get a 1 degree change in camera angle per frame. Note in the screen capture below that the number of frames is used to as an input to setup the scope of the V-Ray Timeline component.
5. The number for camera angle per frame (e.g., 1) is input into the data port "deltaAng" for the Python script component used to set the camera positions. In addition the Camera Position point, Camera Target point and the Sweep Angle of 360 degrees are also input into the Python script.
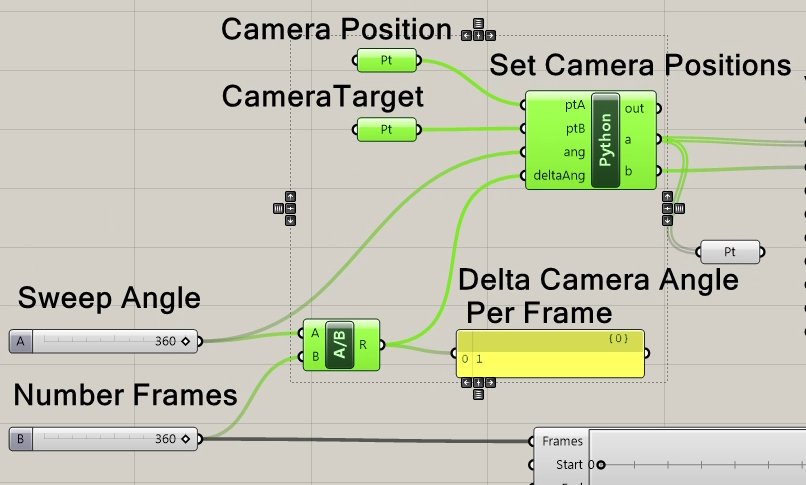
6. The code within the the Python script converts the input data to a set of camera positions forming a circular pattern surrounding the the target. This list of camear positions is exported from the script through output variable "b" a. The single camera target position is exported throught output variable "b".
I used a transformation matrix and a minor amount of vector algebra within loop. Double-click with the left-mouse button on the word "Python"to see the script. The details, which are beyond the scope of this set of notes, are shown here for any student with more Python background.
7. The set of camera positions and target is in turn input in the V-Ray Camera component. Here, for illustrative purposes, the number of frames in the animation input into the V-Ray Timeline was reduced to 60 frames such that delta angle is 6 degrees.
8. The balance of the script is what has been illustrated in previous workshop notes.
9. For the final step
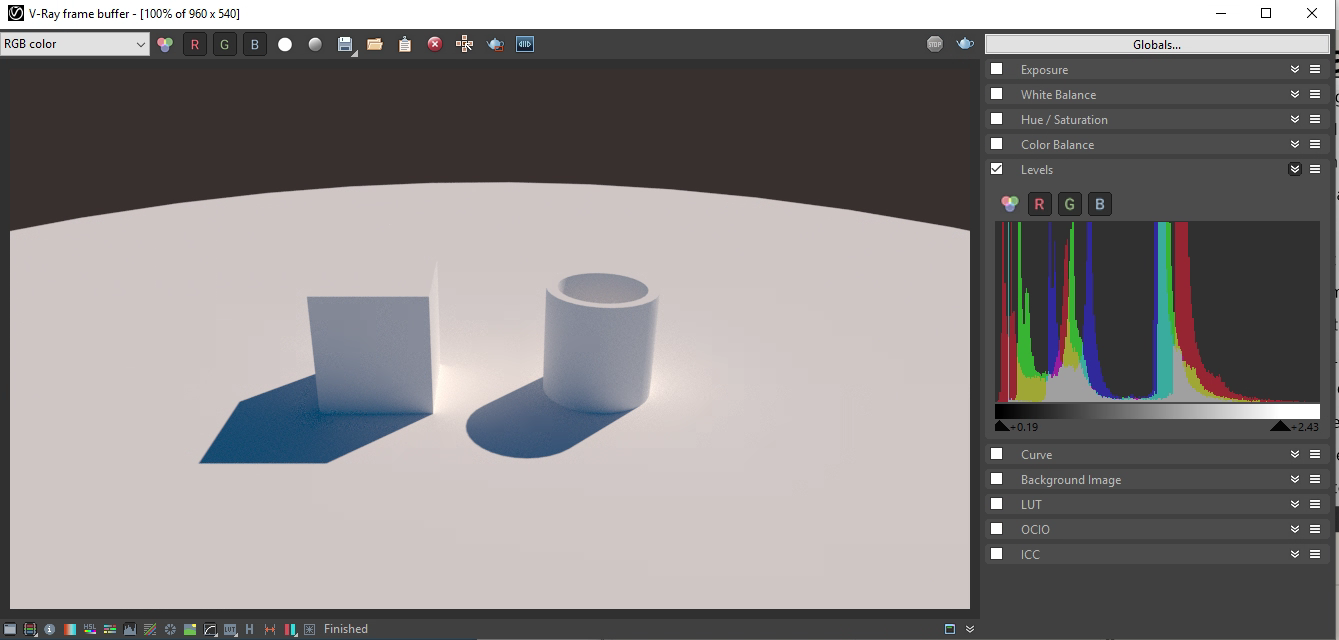
When the rendering frames are compiled into an animatino file, such as through the use of OpenShot video editing software, the resulting animation will appear as follows.