COMPUTER
AIDED
ARCHITECTURAL DESIGN
Workshop 18 Notes,
Week of November 28, 2022 (Preview Draft)
SIMPLER RENDER IN RHINO ANIMATION SCRIPS AND MORE ADVANCED RHINO ANIMATION SCRIPTS INDEXED
These notes provide an index into less complex (A, B and C below) to more complex (D and E) Grasshopper Scripts Using VRay to generate an animation. They refer to examples A through E contained in the Classes Examples folder for ARCH2710 and located under the subfolder named "minVRayAnimation". The first three scripts have very minimal Grasshopper components and yet work to produce animation. These examples will be iniitally run during the workshops with the assistance of an SIA and course instructor. They generally follow the same method detailed in workshop notes 14 which is the example of the D_sunPath example below.
Select any of the images below to view them at higher resolution.
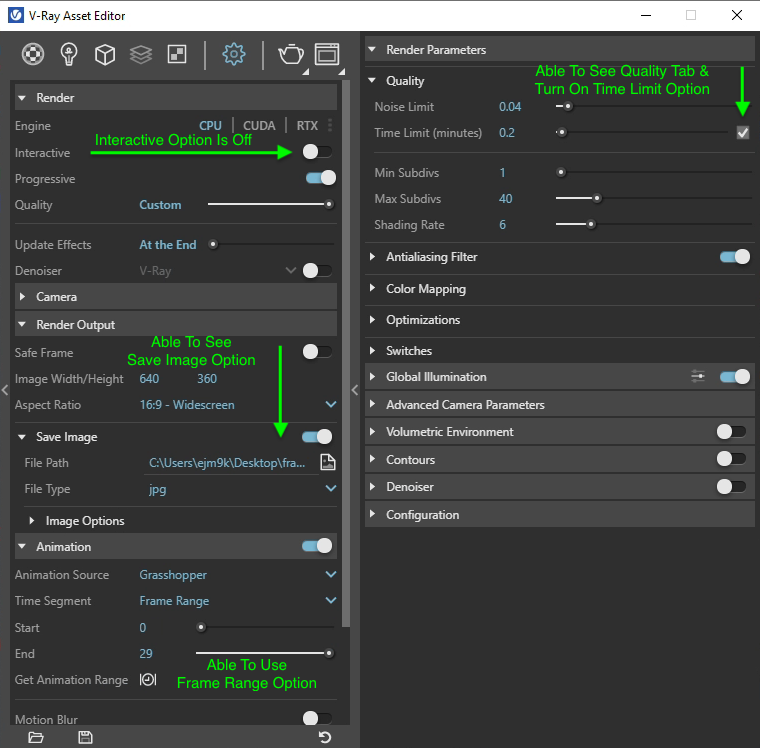
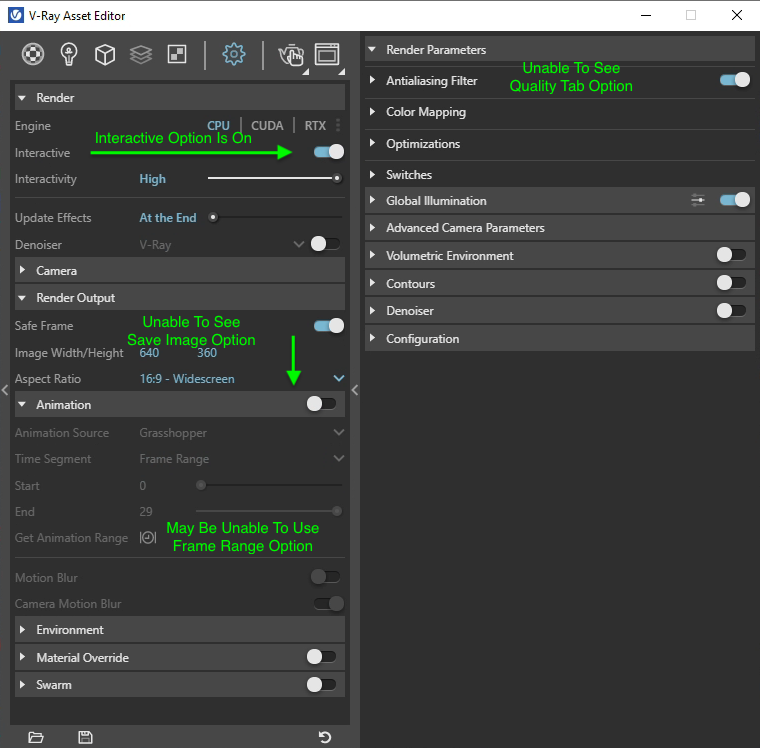
Set Interactive Option Off
Notes from workshop 14 : "V-Ray Grasshopper Animation of Sunlight Within Project Render Method" addresses the step by step process for doing the kinds of animation indexed below. It's essential reading prior to exploring one of the examples below.
However, there is one common oversight when using the V-Ray Asset Editor to setup these animations. That is, make sure that the V-Ray Asset Editor / Settings / Interactive option, as indicated in the left image below, is set to be off. This will allow you to:
| Do This: | Not This: |
|
|
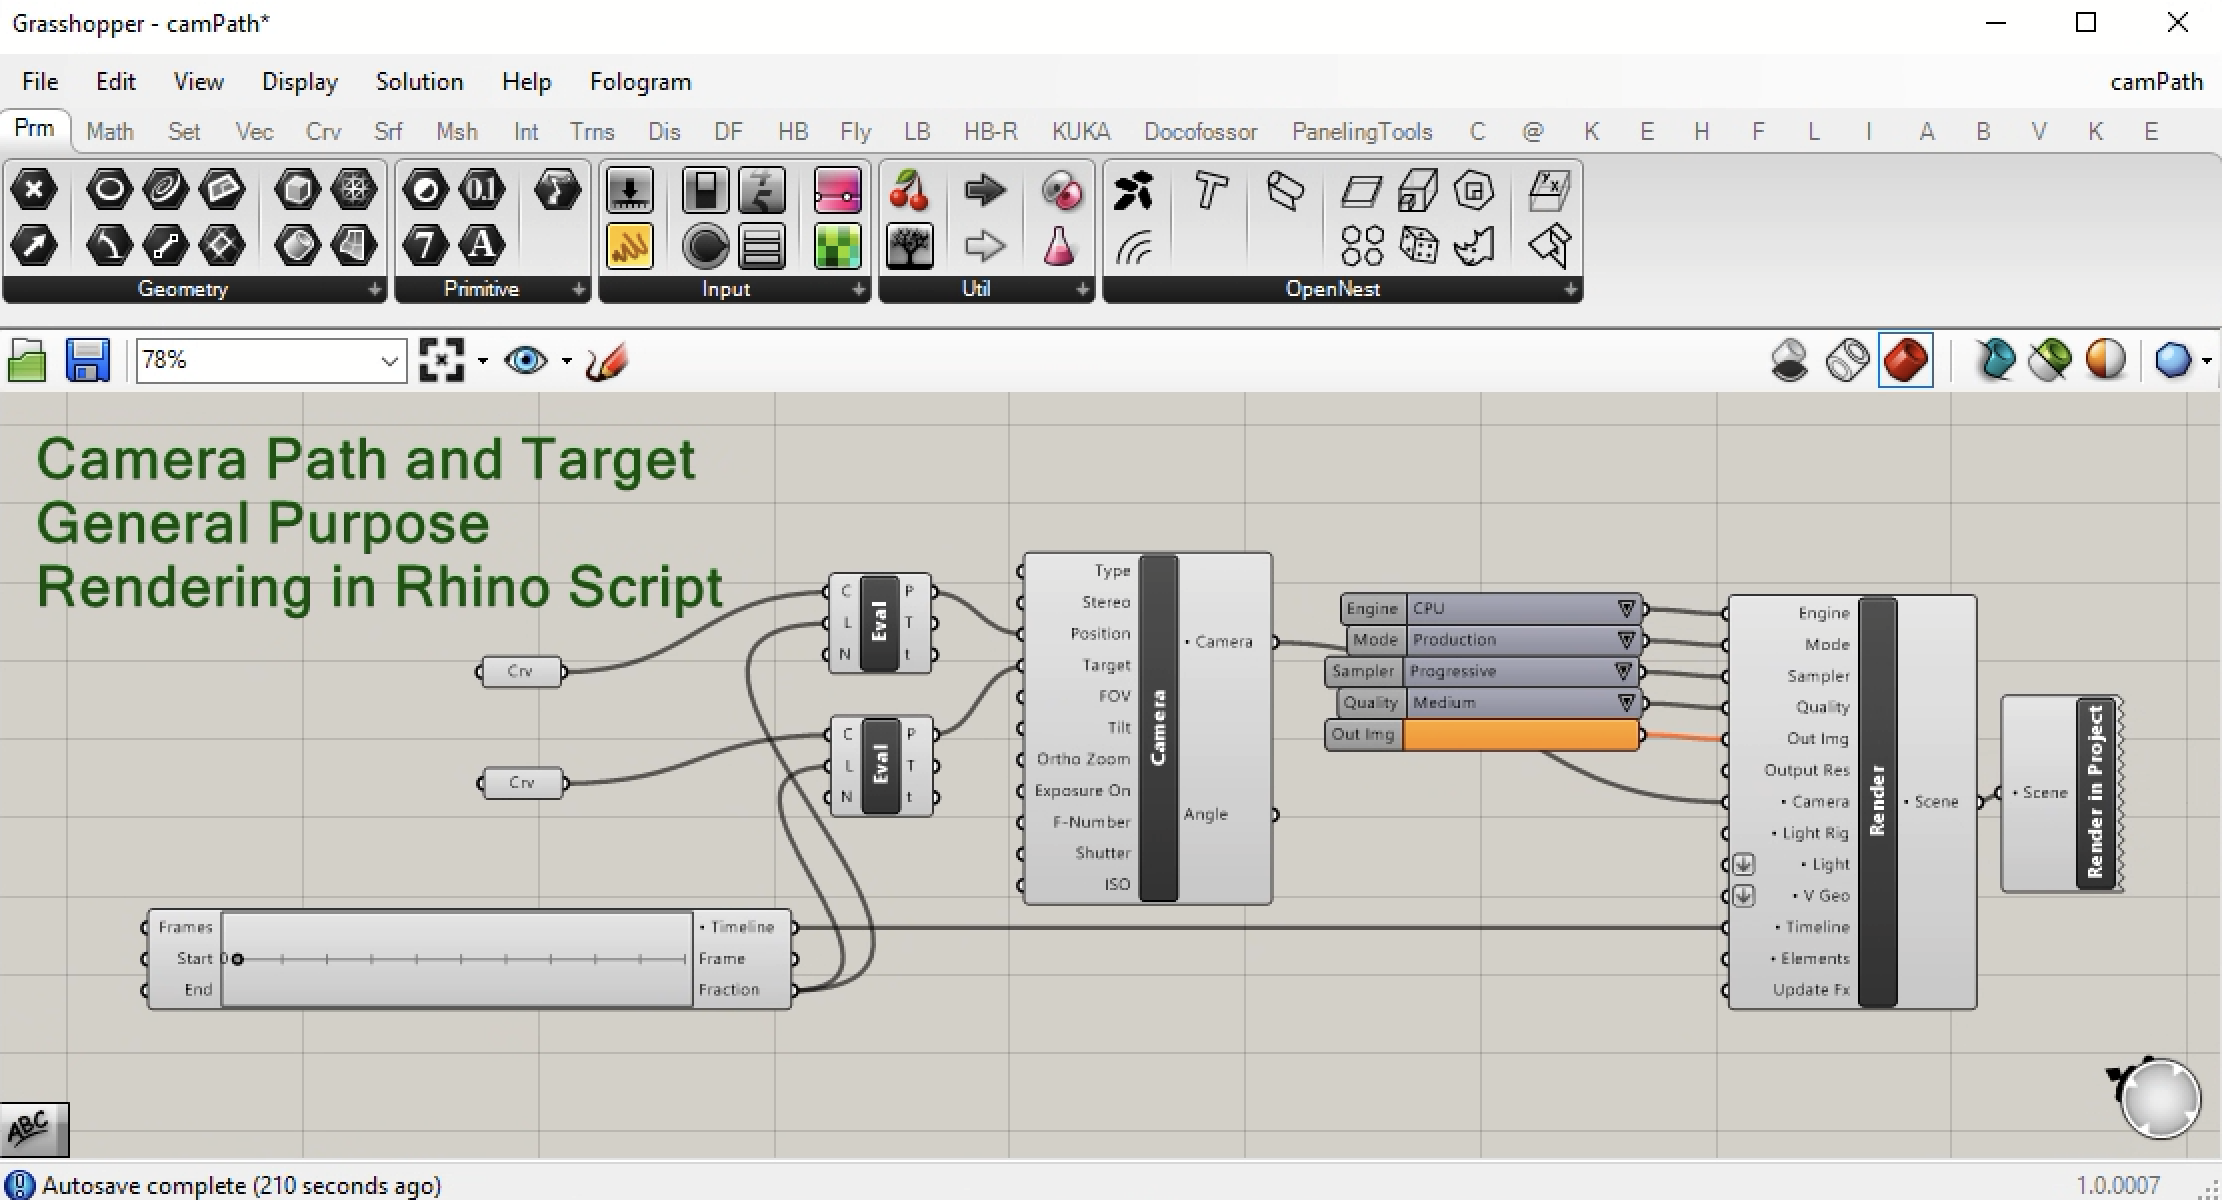
A_justCamPath
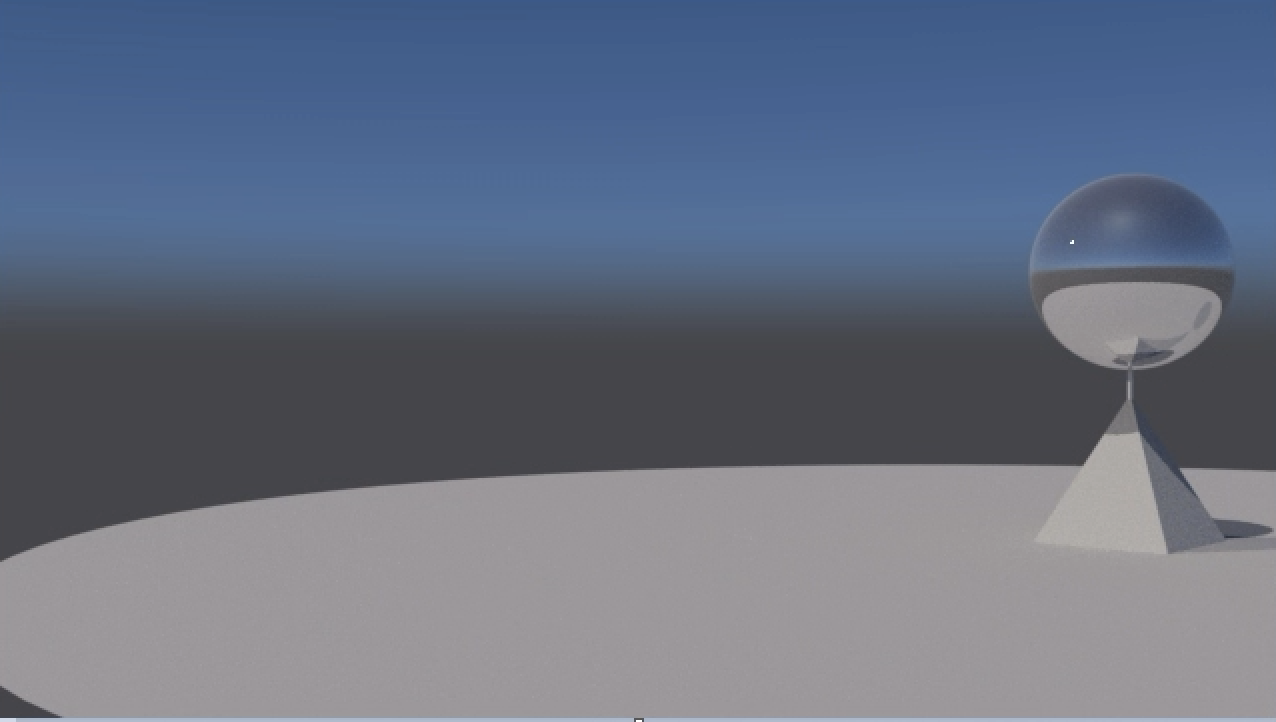
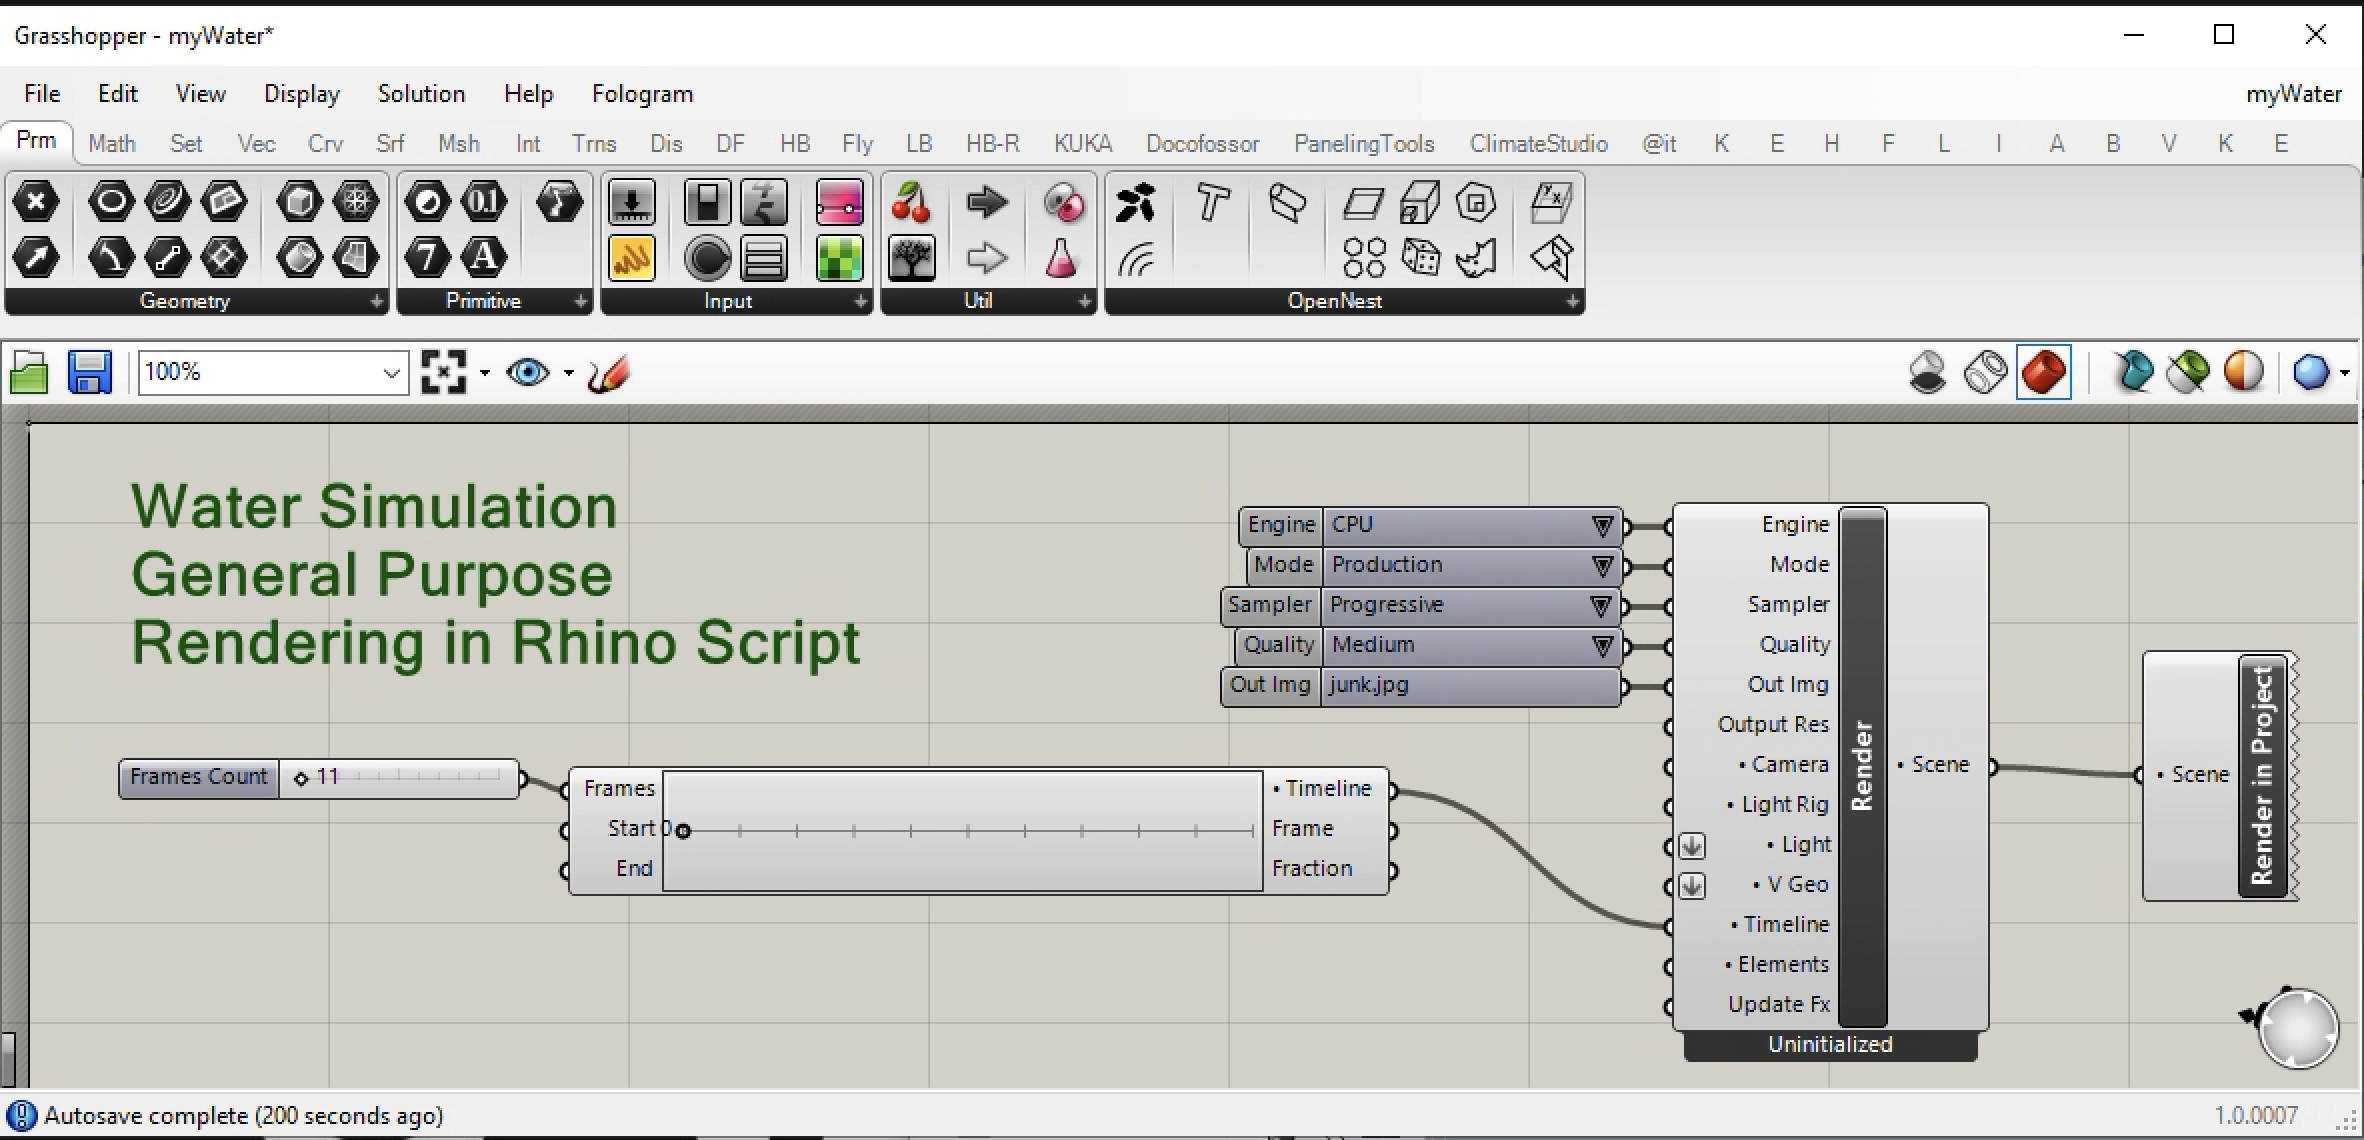
B_animatedWaterWaves
The methods to create water texture maps are introduced at the end of workshop notes 7. The grasshopper script within this example is based upon the algorithmic texture map which animates water when the Grasshopper Timeline is used in combination with the Render in Project component on the far right hand side of the canvas window as show in the script below. Note that the settings available within the V-Ray Water Texture map determine the density, height, rate and direction of movment and the intensity and direction of the wind. For example, the Wind Direction show below at 50 is based upon an angular direction from 0 to 360 degrees. The Wind Direction in turn determines the movement direction of the water. The "Movement Rate" controls the speed of movement. In this example it is set to 1.1. However, it is recommended that you explore varied settings of this number to see what level of water movement seems detectable and relatively appropriate. Additional illustrated examples of controlling water properties is published on the Chaos docs web site at https://docs.chaos.com/display/VRHINO/Water.
| V-Ray Water Texture Map | Selected Values |
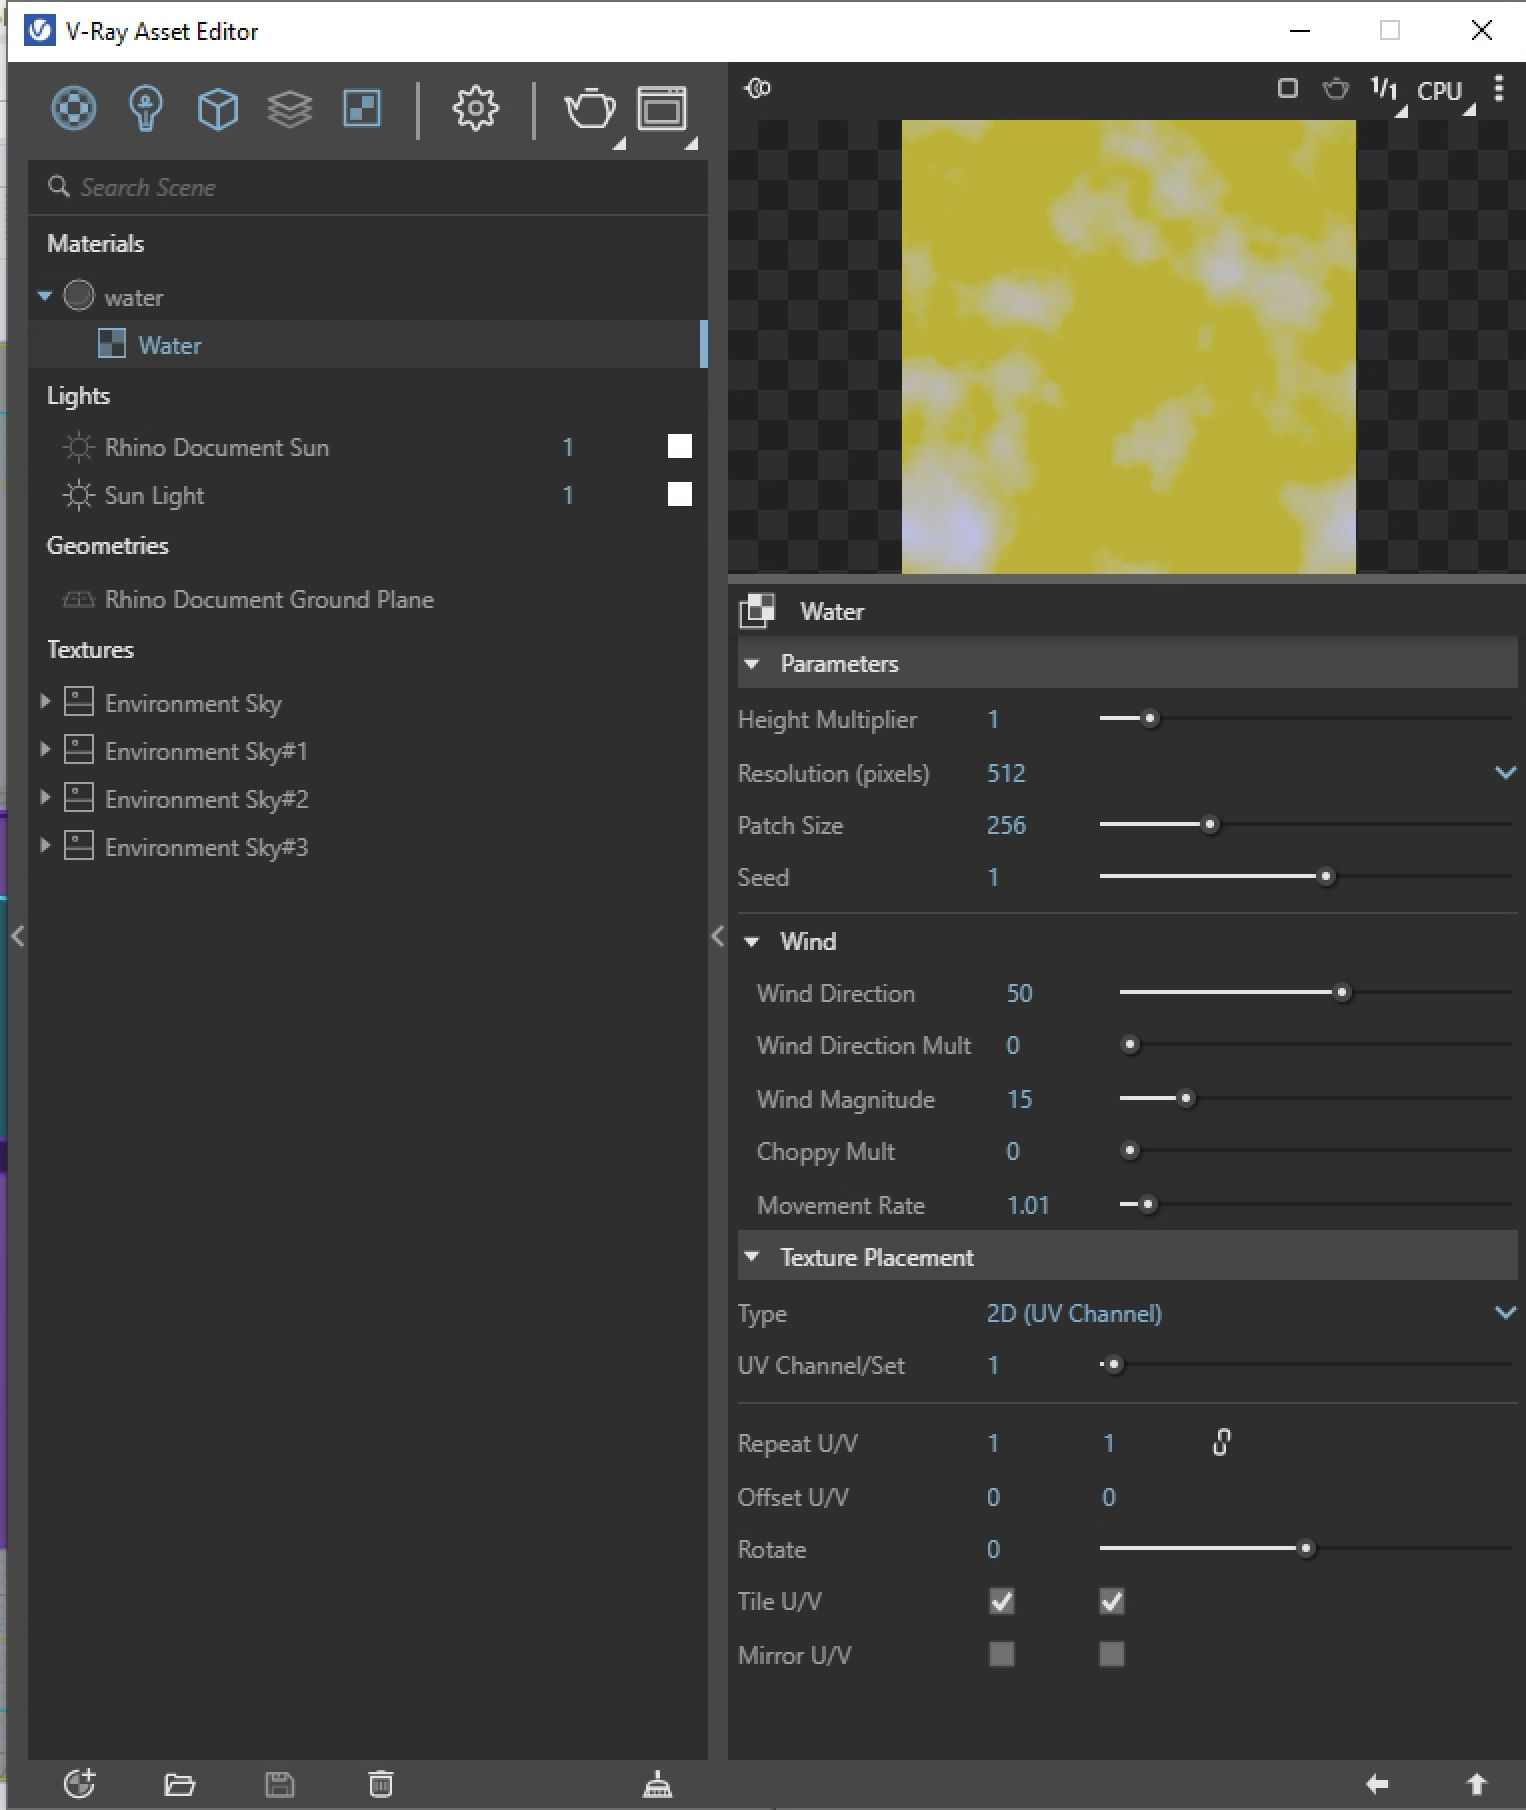 |
Height Multiplier _ Scale Multiplier for Whole Water Texture |
| Resolution _ Level of Detail | |
| Patch Size _ Periodic Wave Size of Water | |
| Seed _ Starting Point for Random Wave Generator | |
| Wind Direction _ Wind Direction and Thus Direction of Waves | |
| Wind Direction Mult _ Influence of Wind Direction over Wave Direction | |
| Wind Magnitute _ Strength of Wind | |
| Chopiness Mult_ Sharpness of Waves | |
| Movement Rate_Slows or Speeds Up Wave Movement | |
| Repeat UV_ How Many Times Wave is Repeated in Surface | |
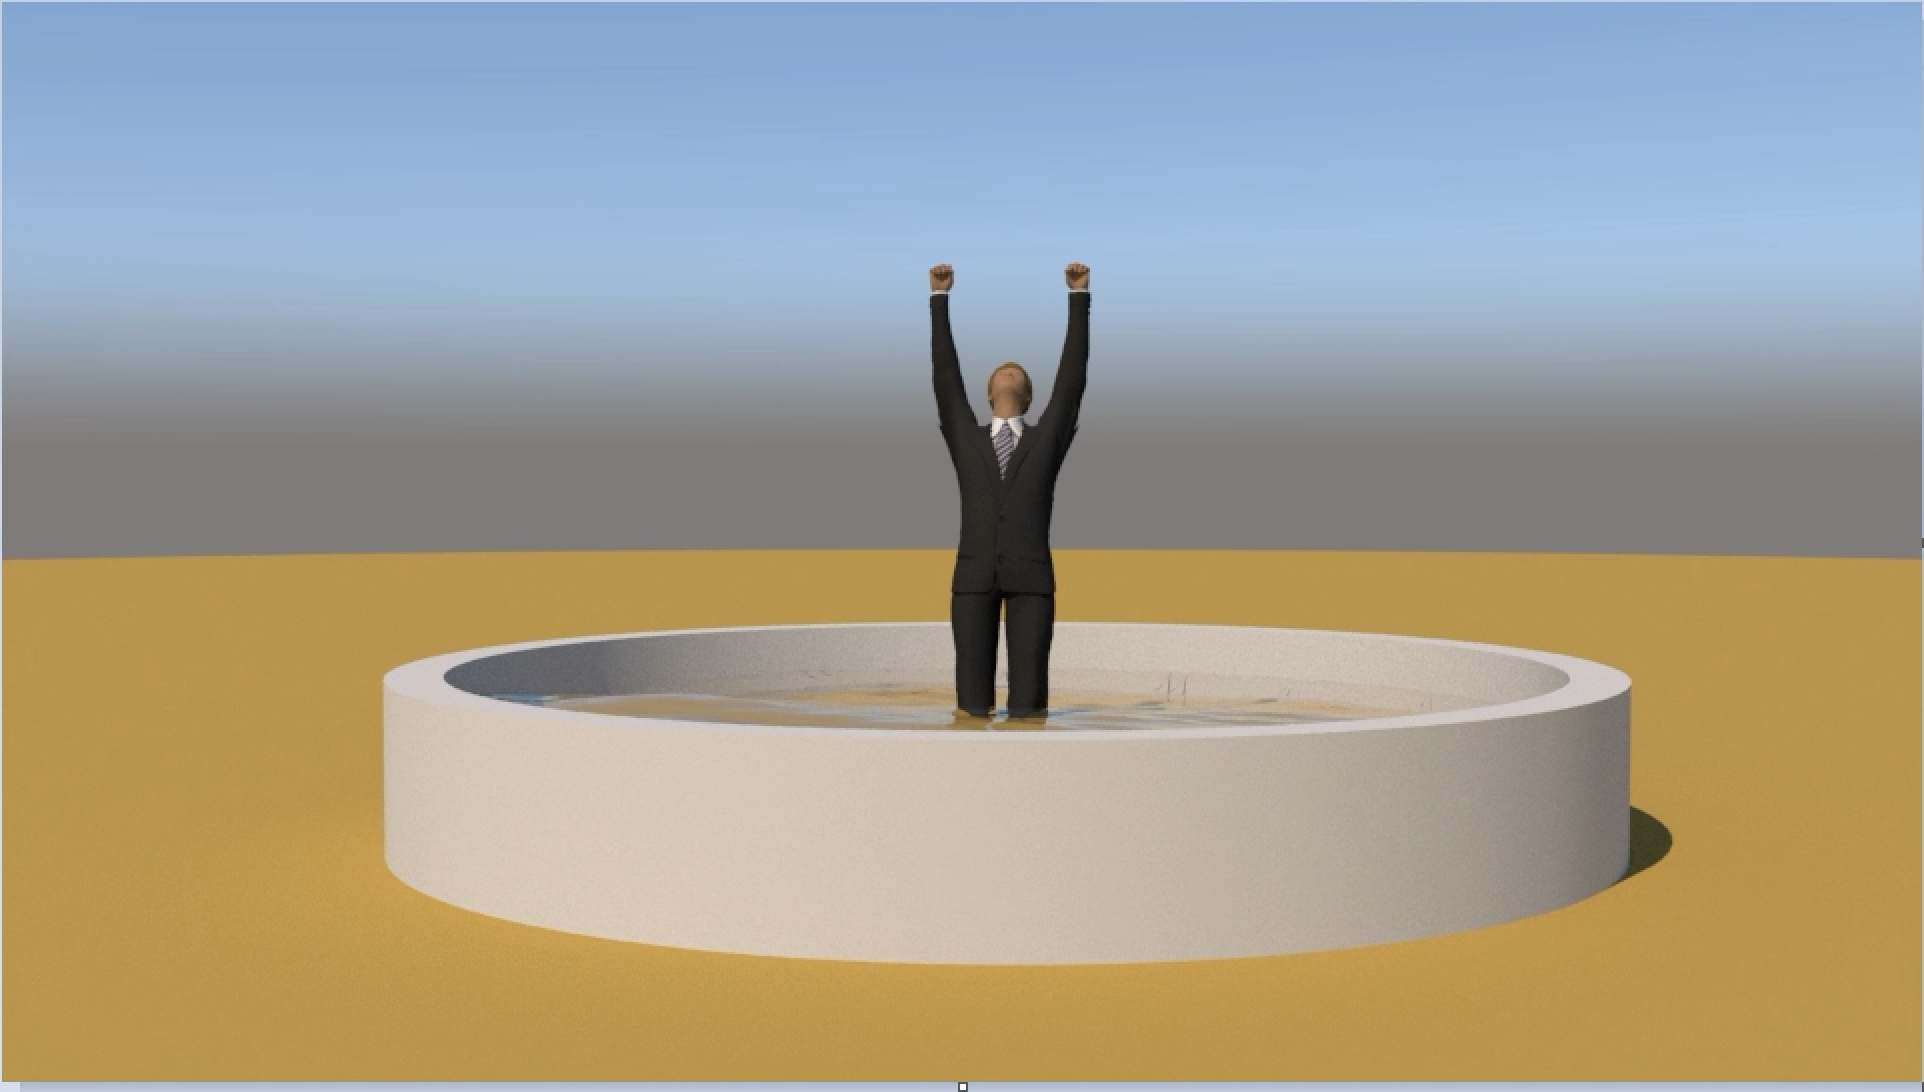
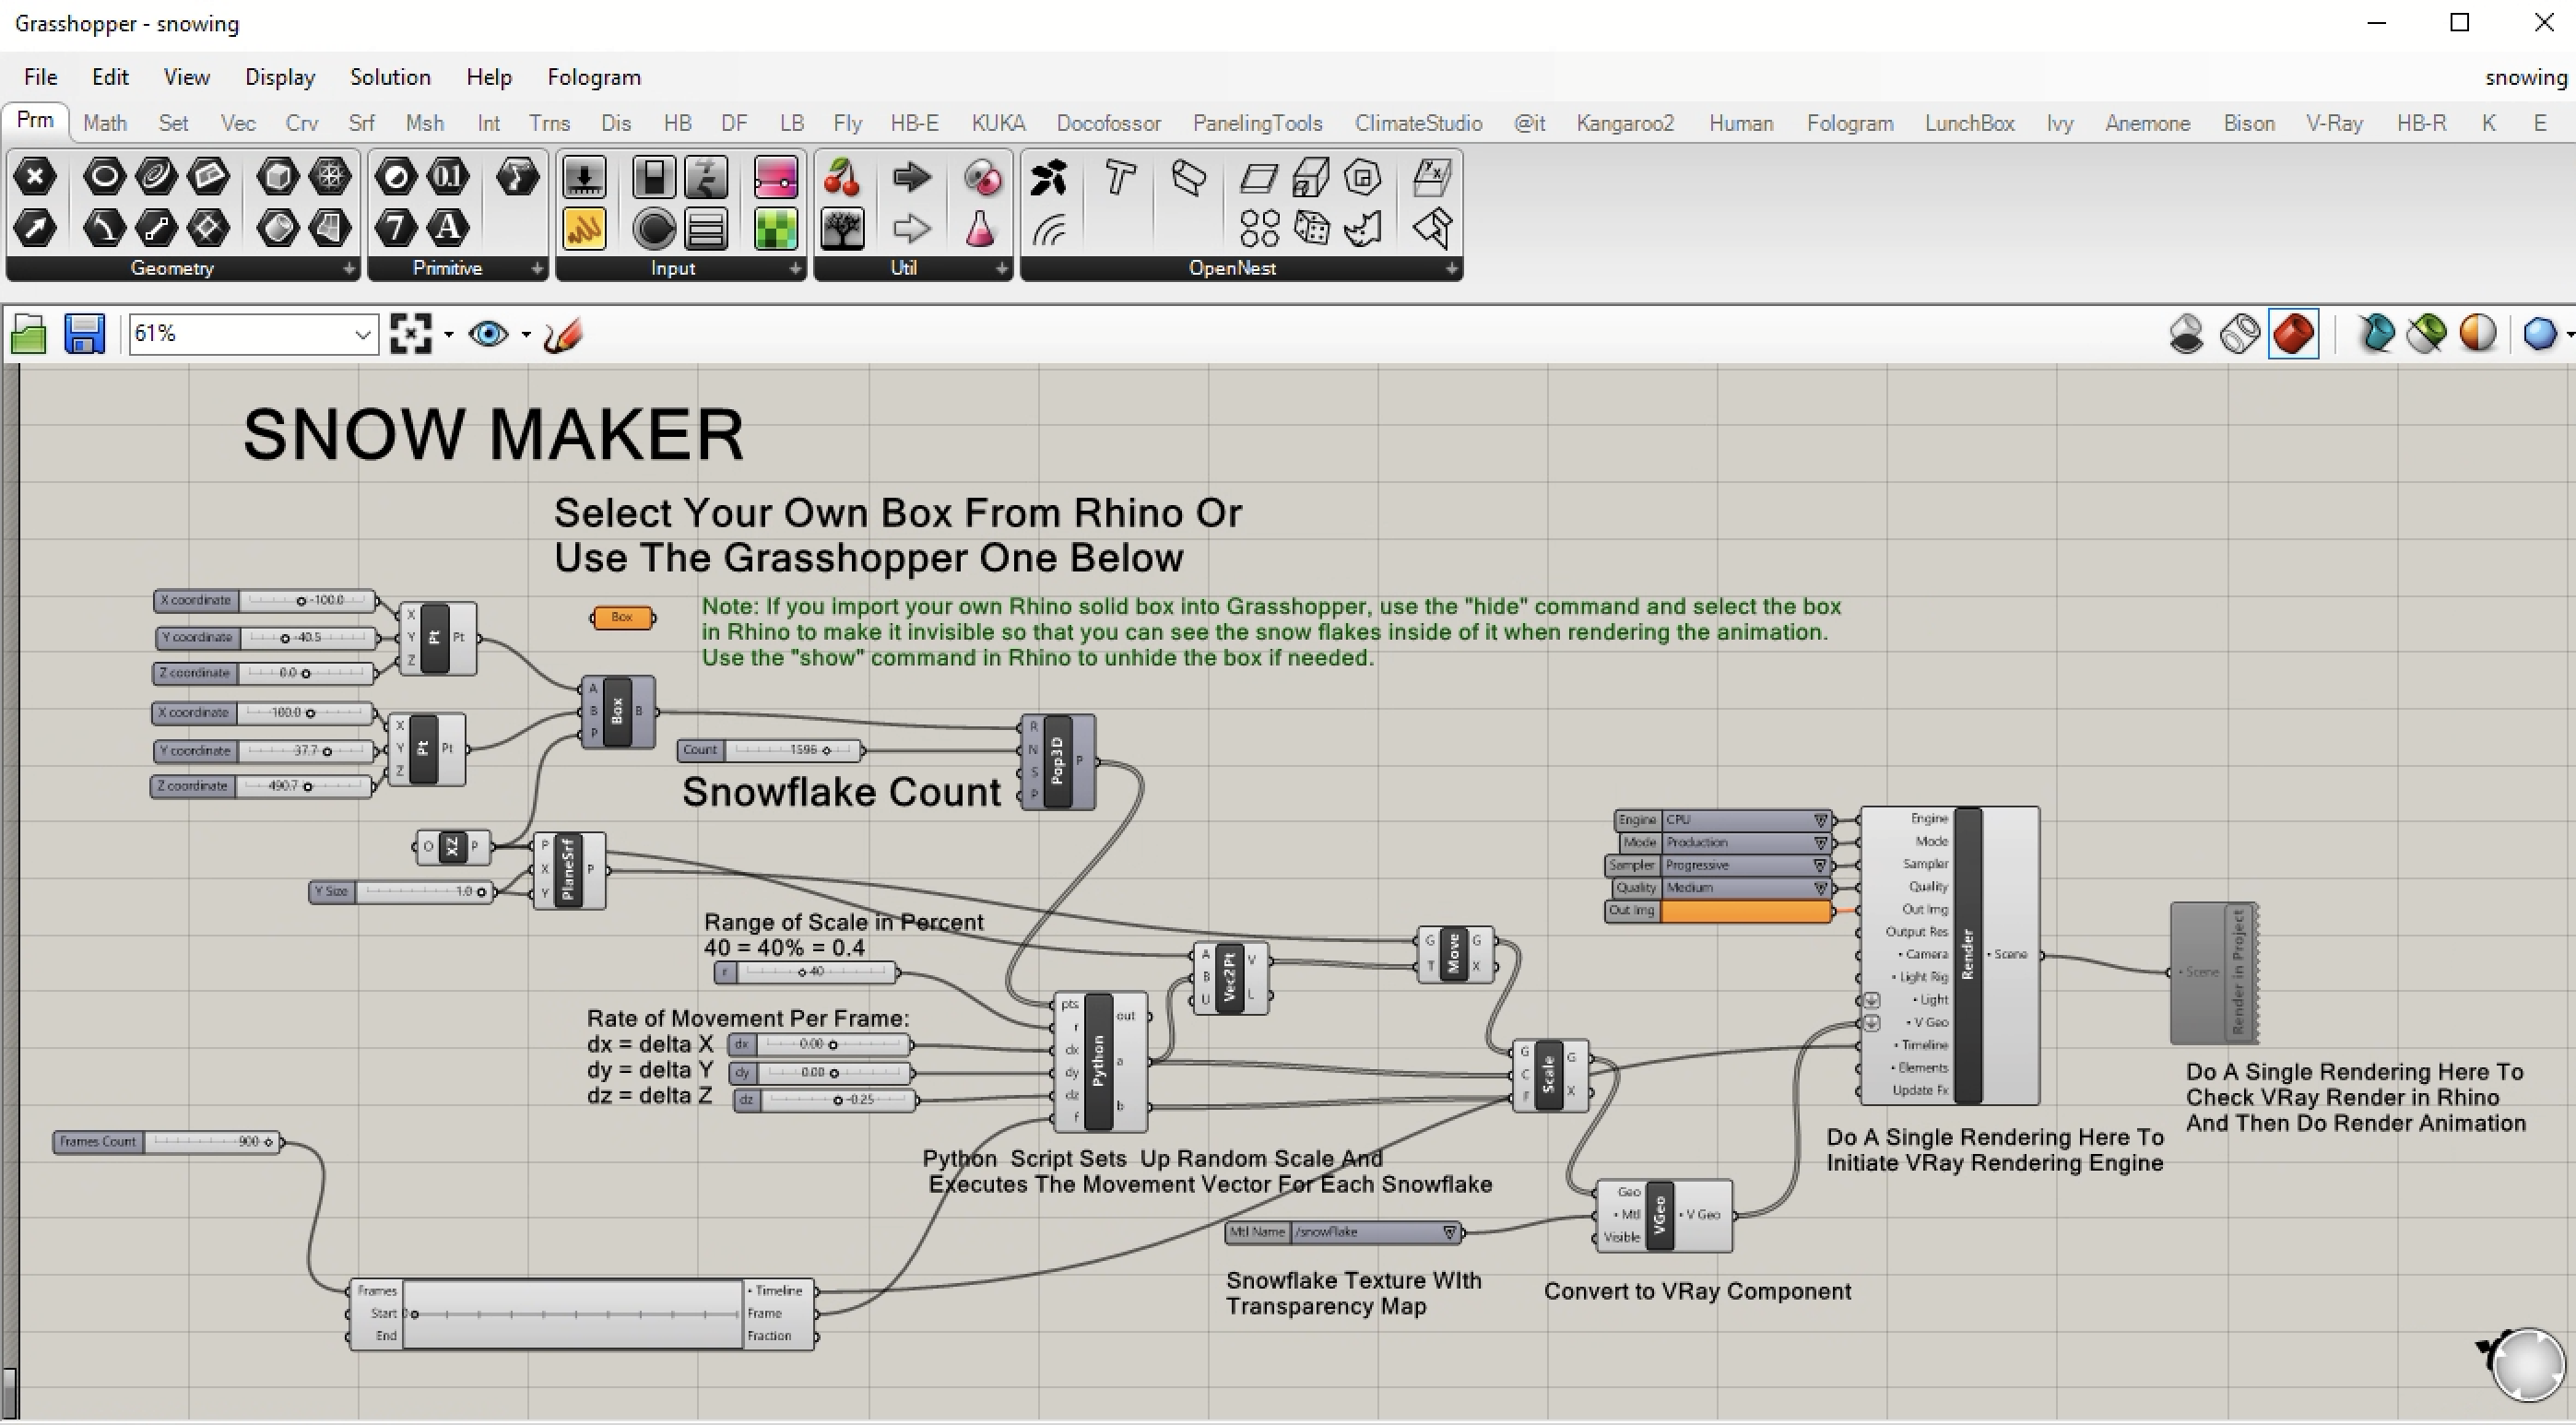
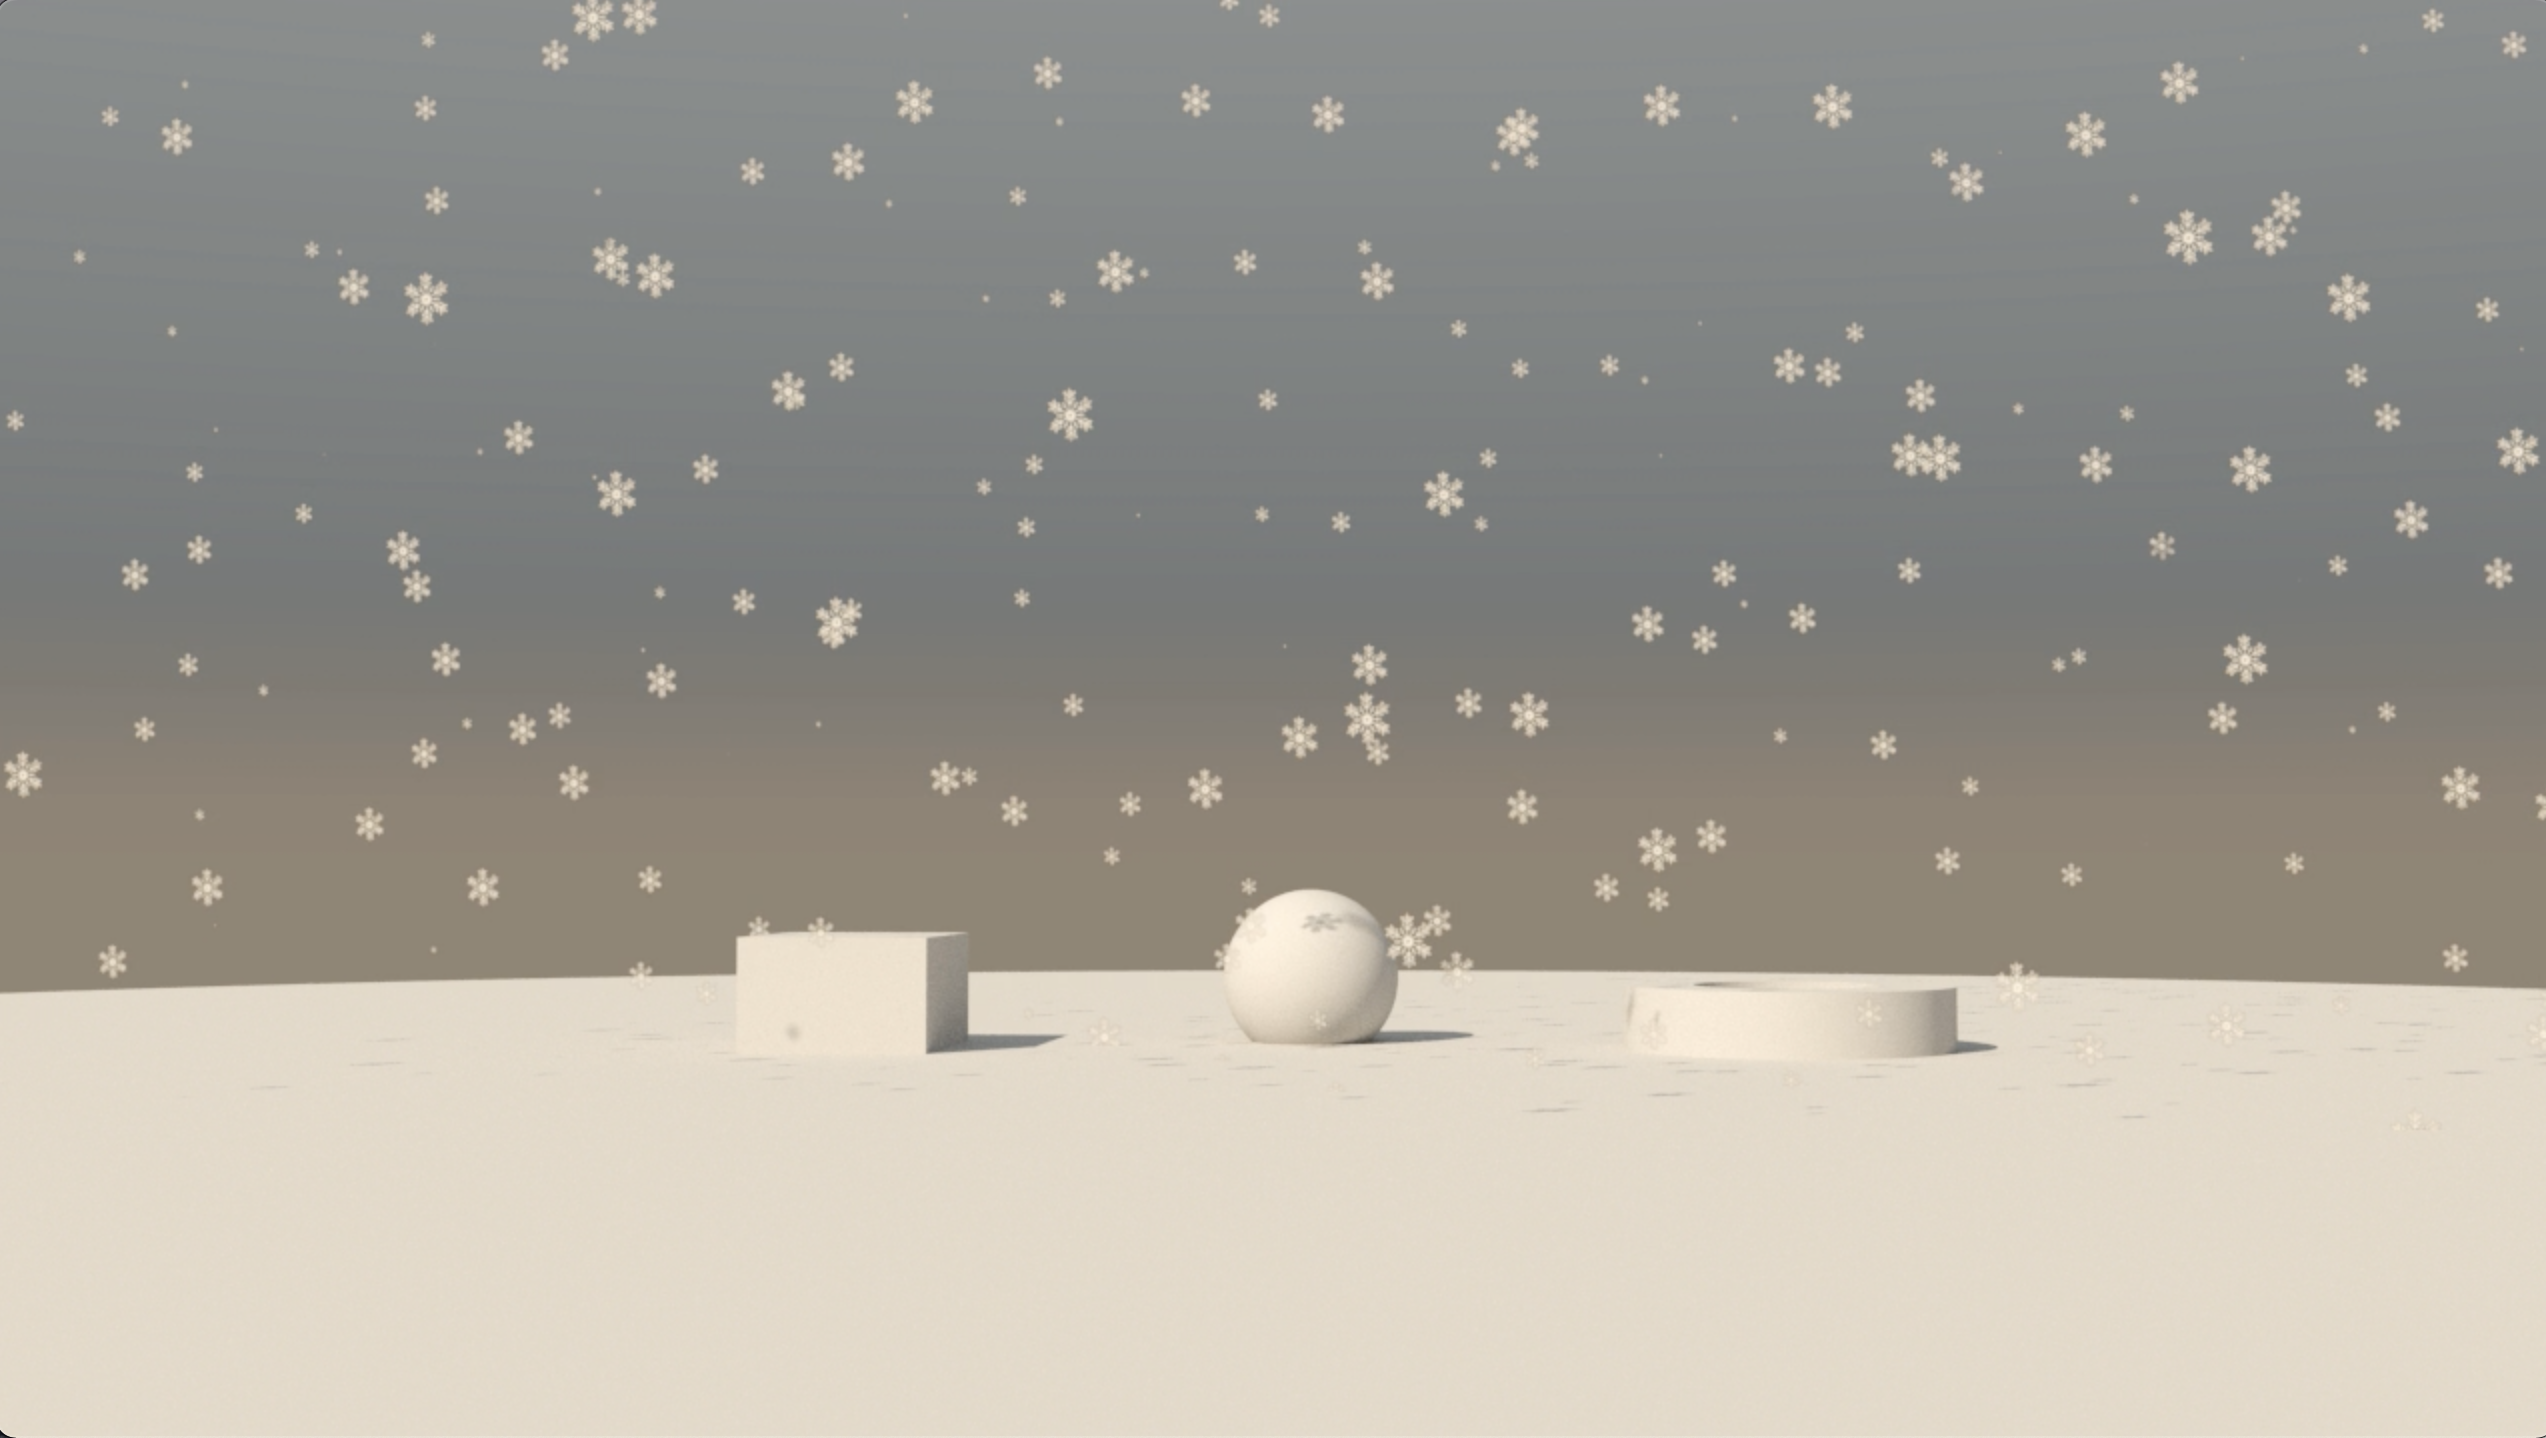
C_snow
THe Grasshopper script in this example uses a default "Box" determined by a lower left corner point and an upper right corner point. In the example below, the lower left-hand point is determined by the slider input values of x = -100, y = - 40.5 and z = 0.0. The upper right-hand point is determined by the slider input values pf x = 100, y = 37.5 and z = 490.7. This box is input into the pop3D component which is populated with randomly distributed points. In the case below, 1595 points are specified for the box. The points are replaced with snowflakes later in the Grasshopper script procedure.
Alternatively, it may be easier to create a solid box directly in Rhino and select it to become linked to the "Box" component with the orange color in the Grasshopper script below. If you choose to connect the "Box" component in Grasshopper with a solid box in Rhino, then you will need to use the Rhino "hide" command inside Rhino on the box to make it invisible. This will allow the snowflakes inside the box to be visible when you run the "Render in Project" component on the far right-hand side of the Grasshopper script. You can use the Rhino "show" command to unhide the solid box if needed.
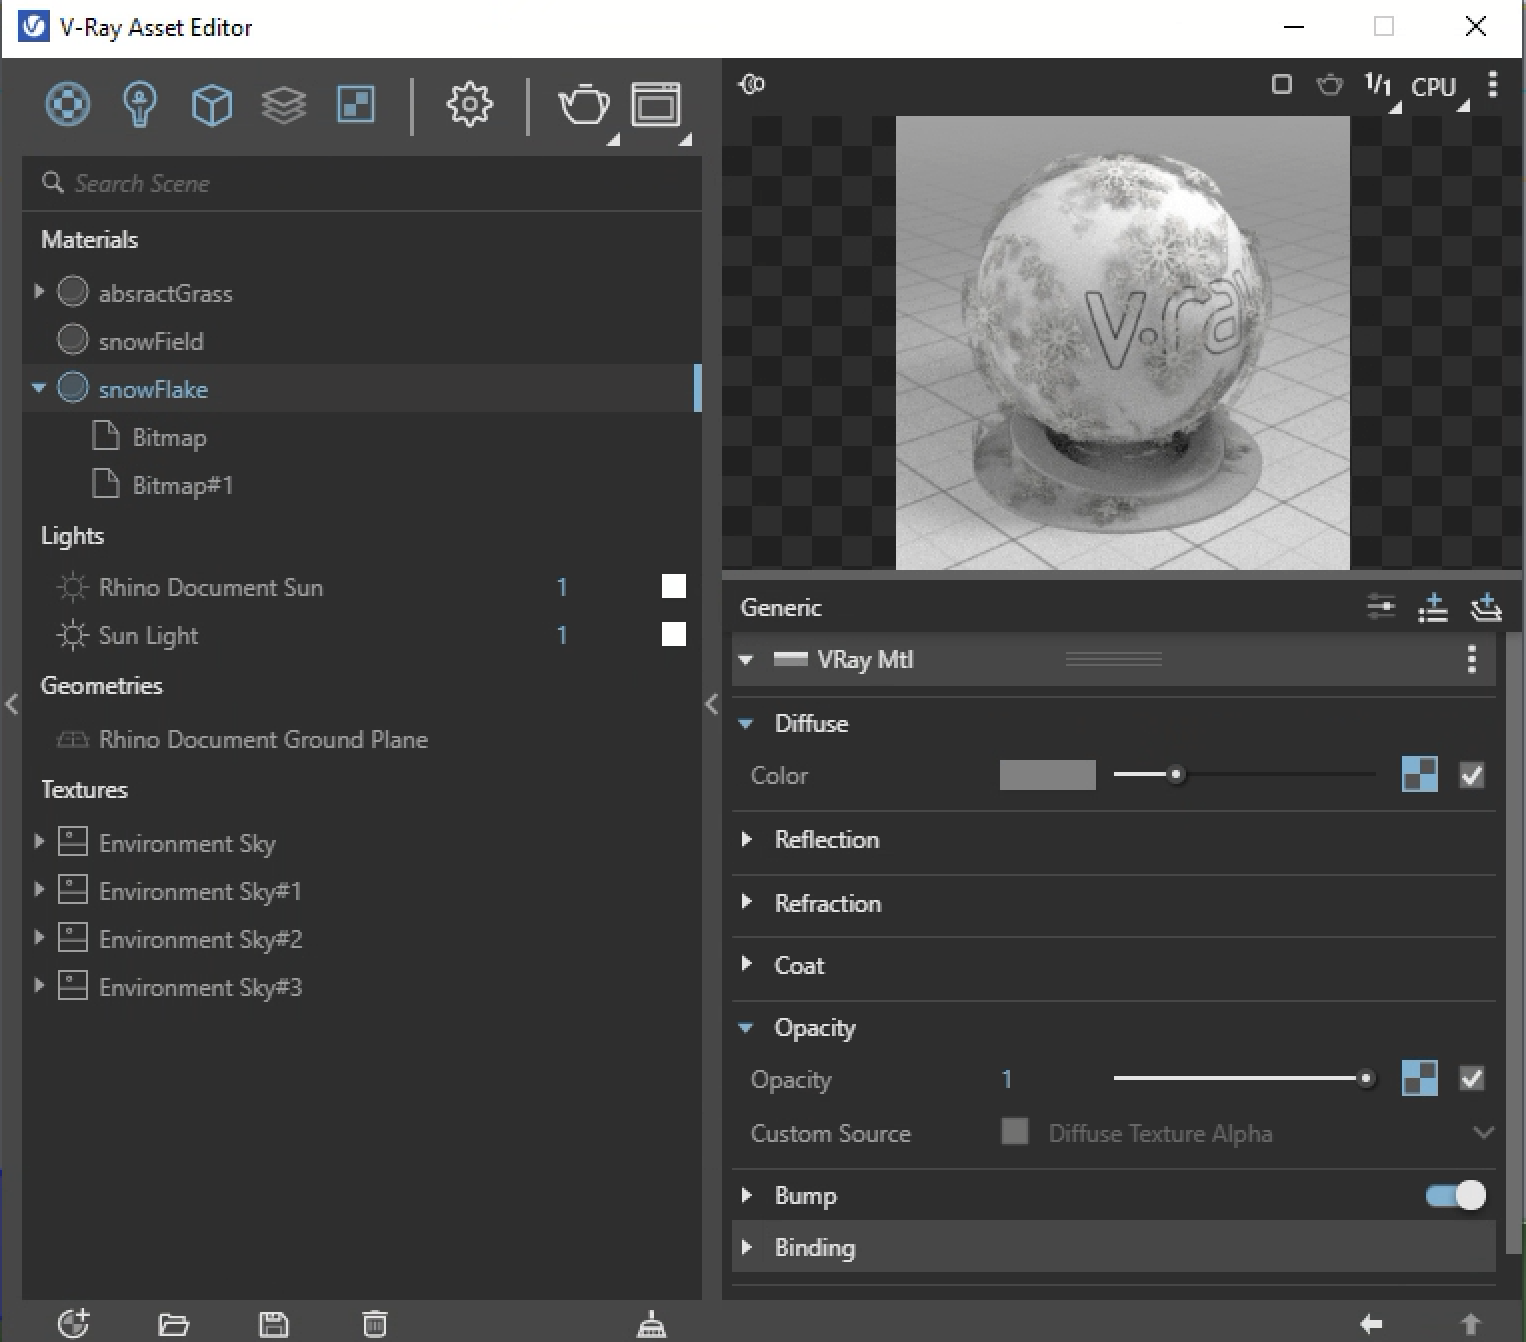
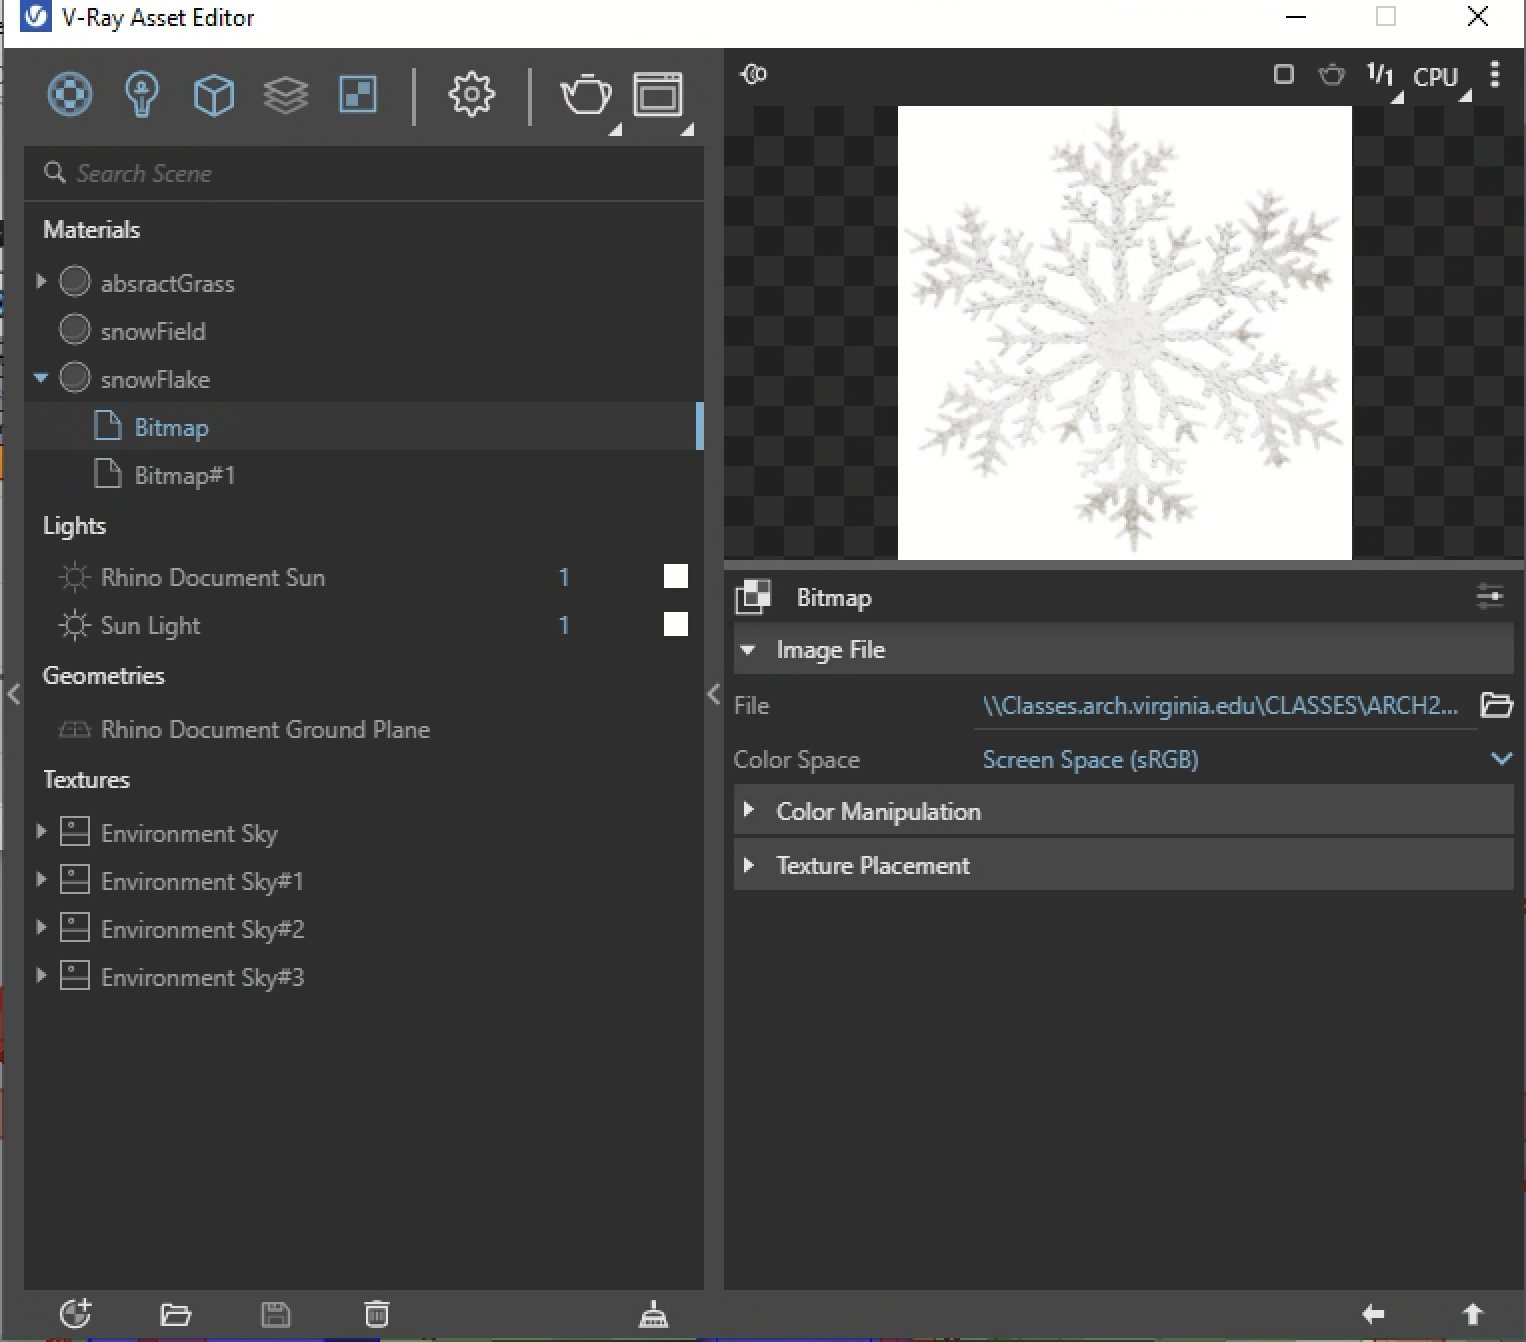
To make the snow appear more realistic, use a lower value than 40 for the input to "r" in the Python component inside the Grasshopper script shown below. This will make the snow flakes more realistically smaller. The value for "r" determines the random range of the sizes of the individual snow flakes. A lower value for "r" means that the random range scale will be lower. In the V-Ray Asset editor, view how the snow material is defined directly. You will discover that it is based upon a texture map of a snow flake and also a transparency map of the same snow flake. It is developed according to the same method used to make the materials of the tree, bicyclist and pededestian at the end of workshop notes 10. In the table below the snowFlake texture and transparency maps use in the file are shown.
| V-Ray Material | Texture Map | Transparency Map |
 |
 |
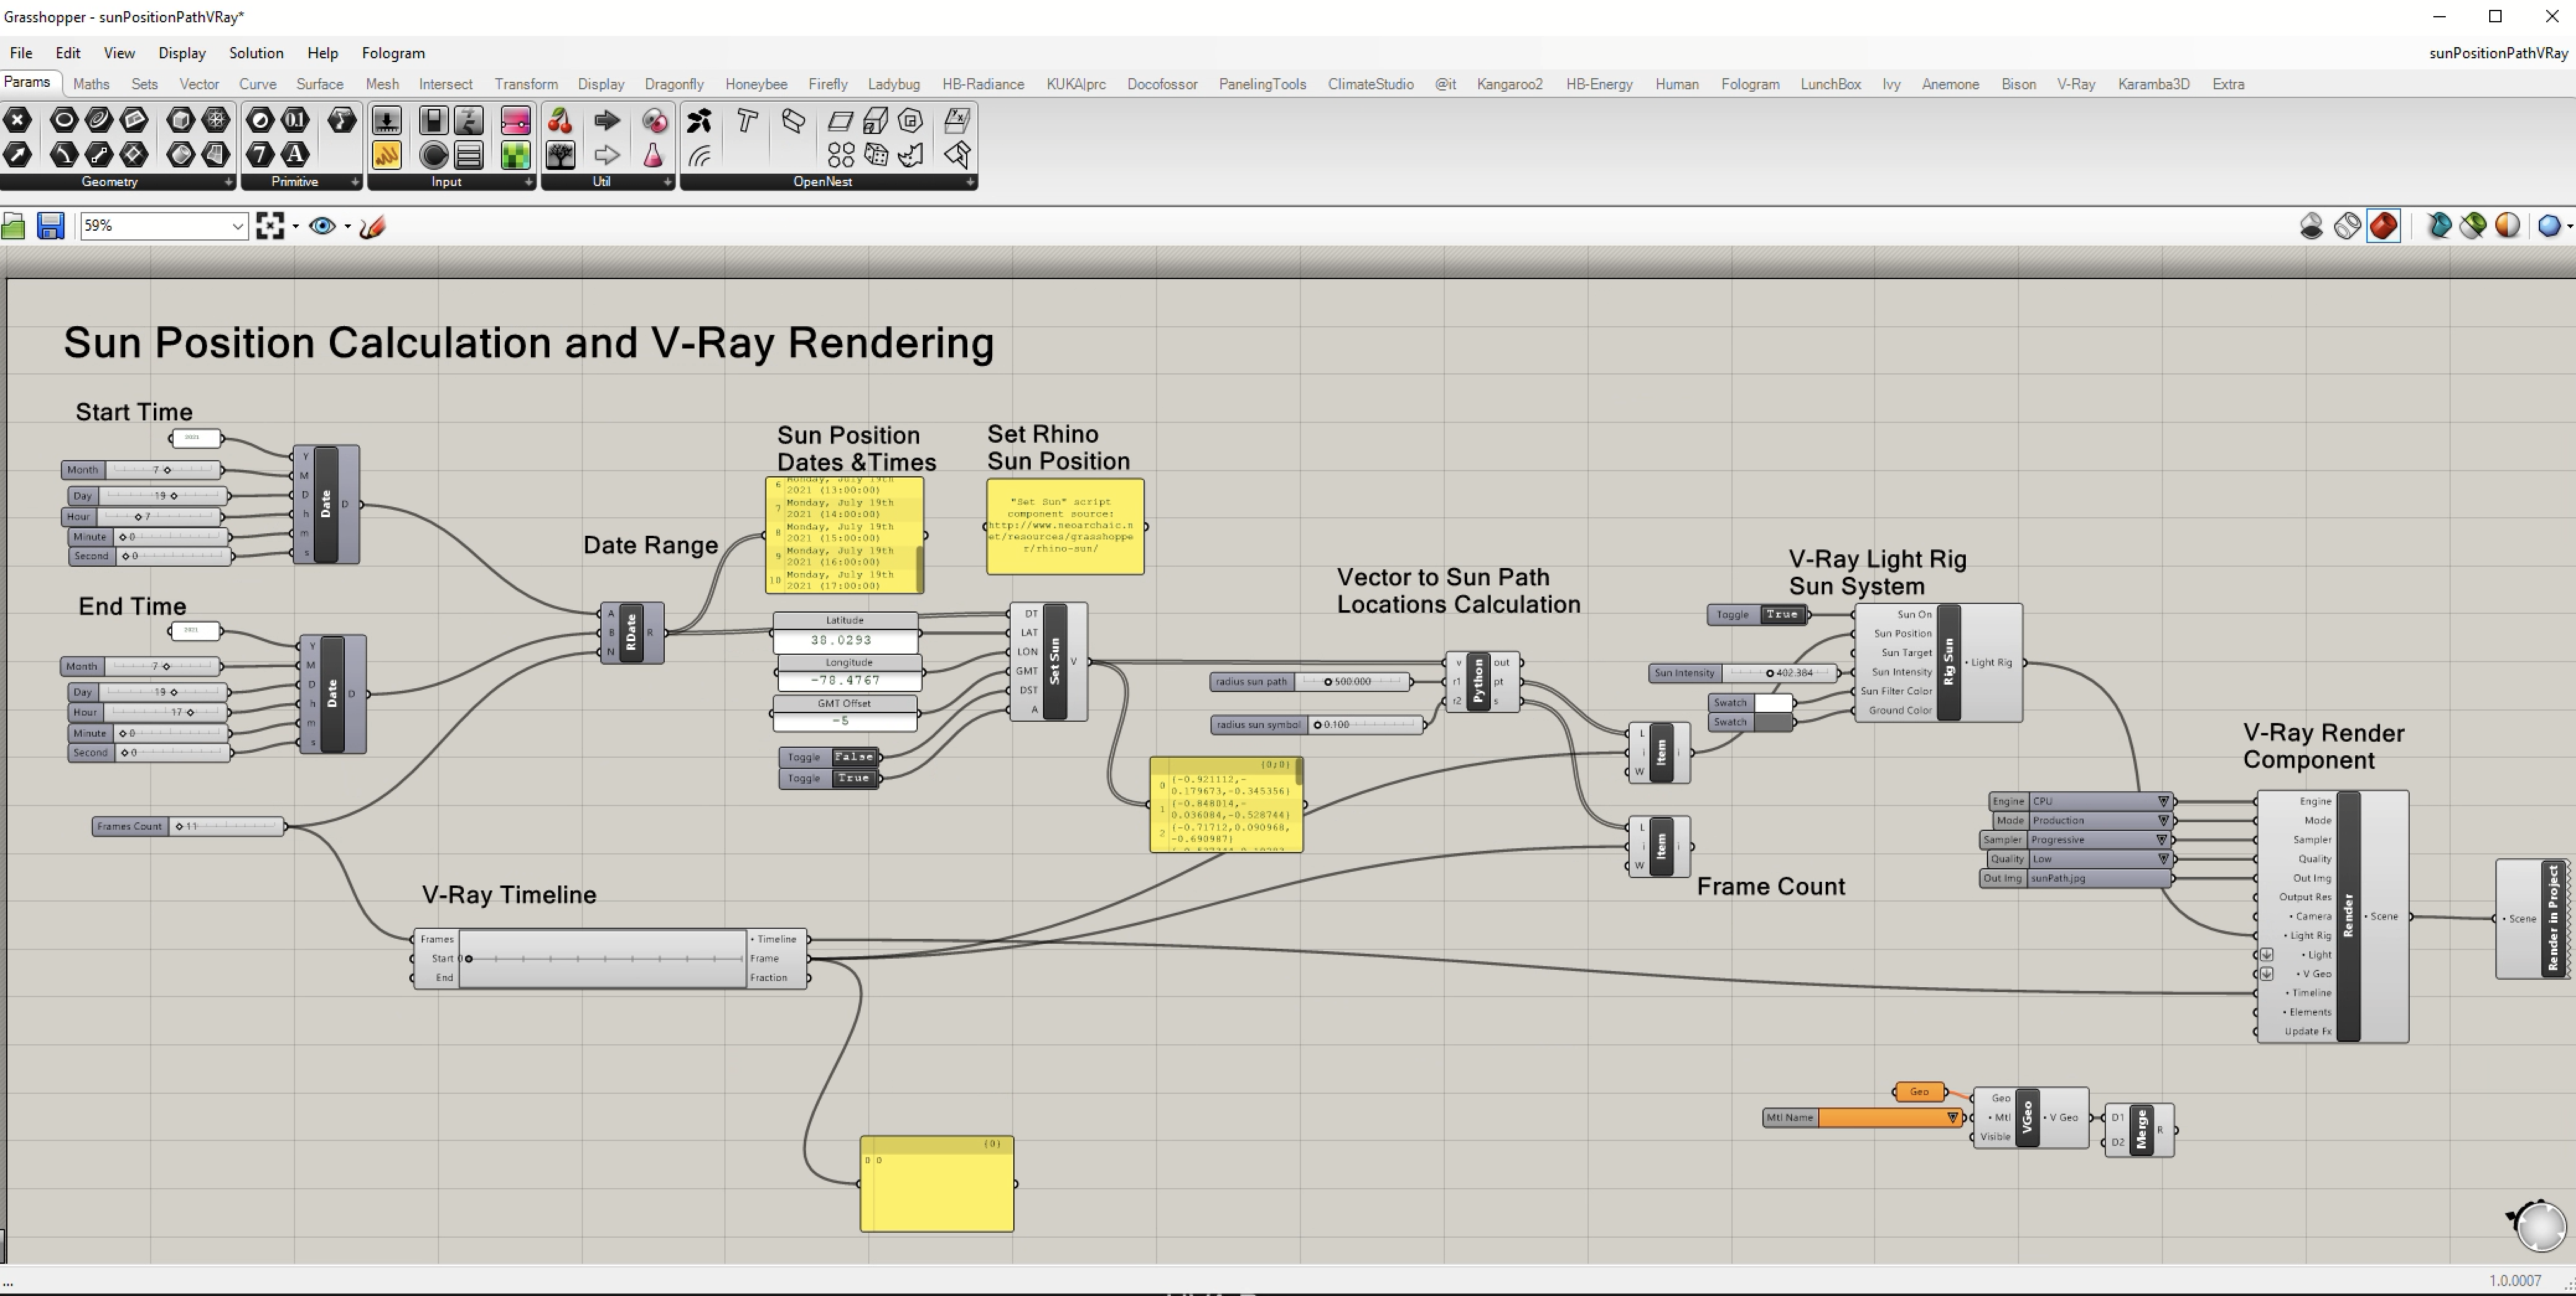
D_sunPath
This is the same strategy as developed in workshop 14. Note that the Rhino Render Sun rather than the V Ray sun is the basis for the animation. Display the Rhino Sun pan by selecting sun with eye shades icon in the Render Tools tabl. It's necessay to turn off any V Ray Sun and, as captured in the image below, to ensure the Rhino Sun is checked to "On" and that Manual Control is not checked to "On".
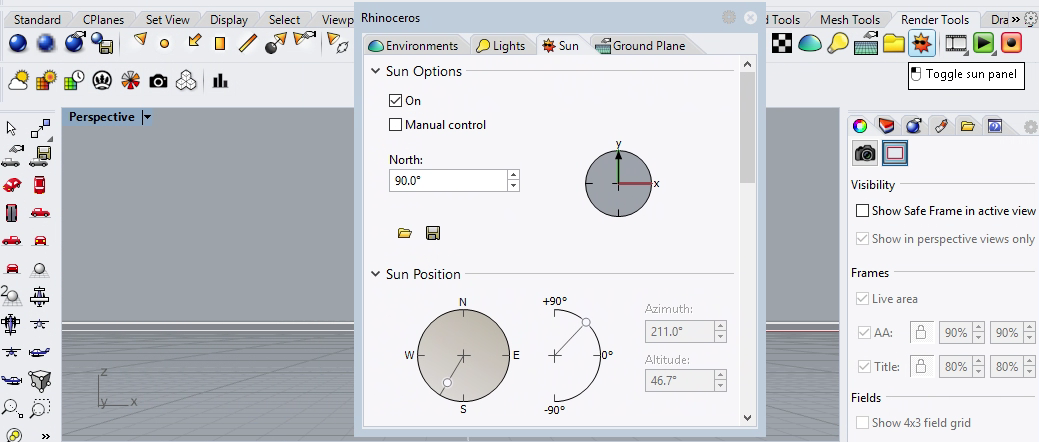
The V-Ray Sun is not needed at all for this script.

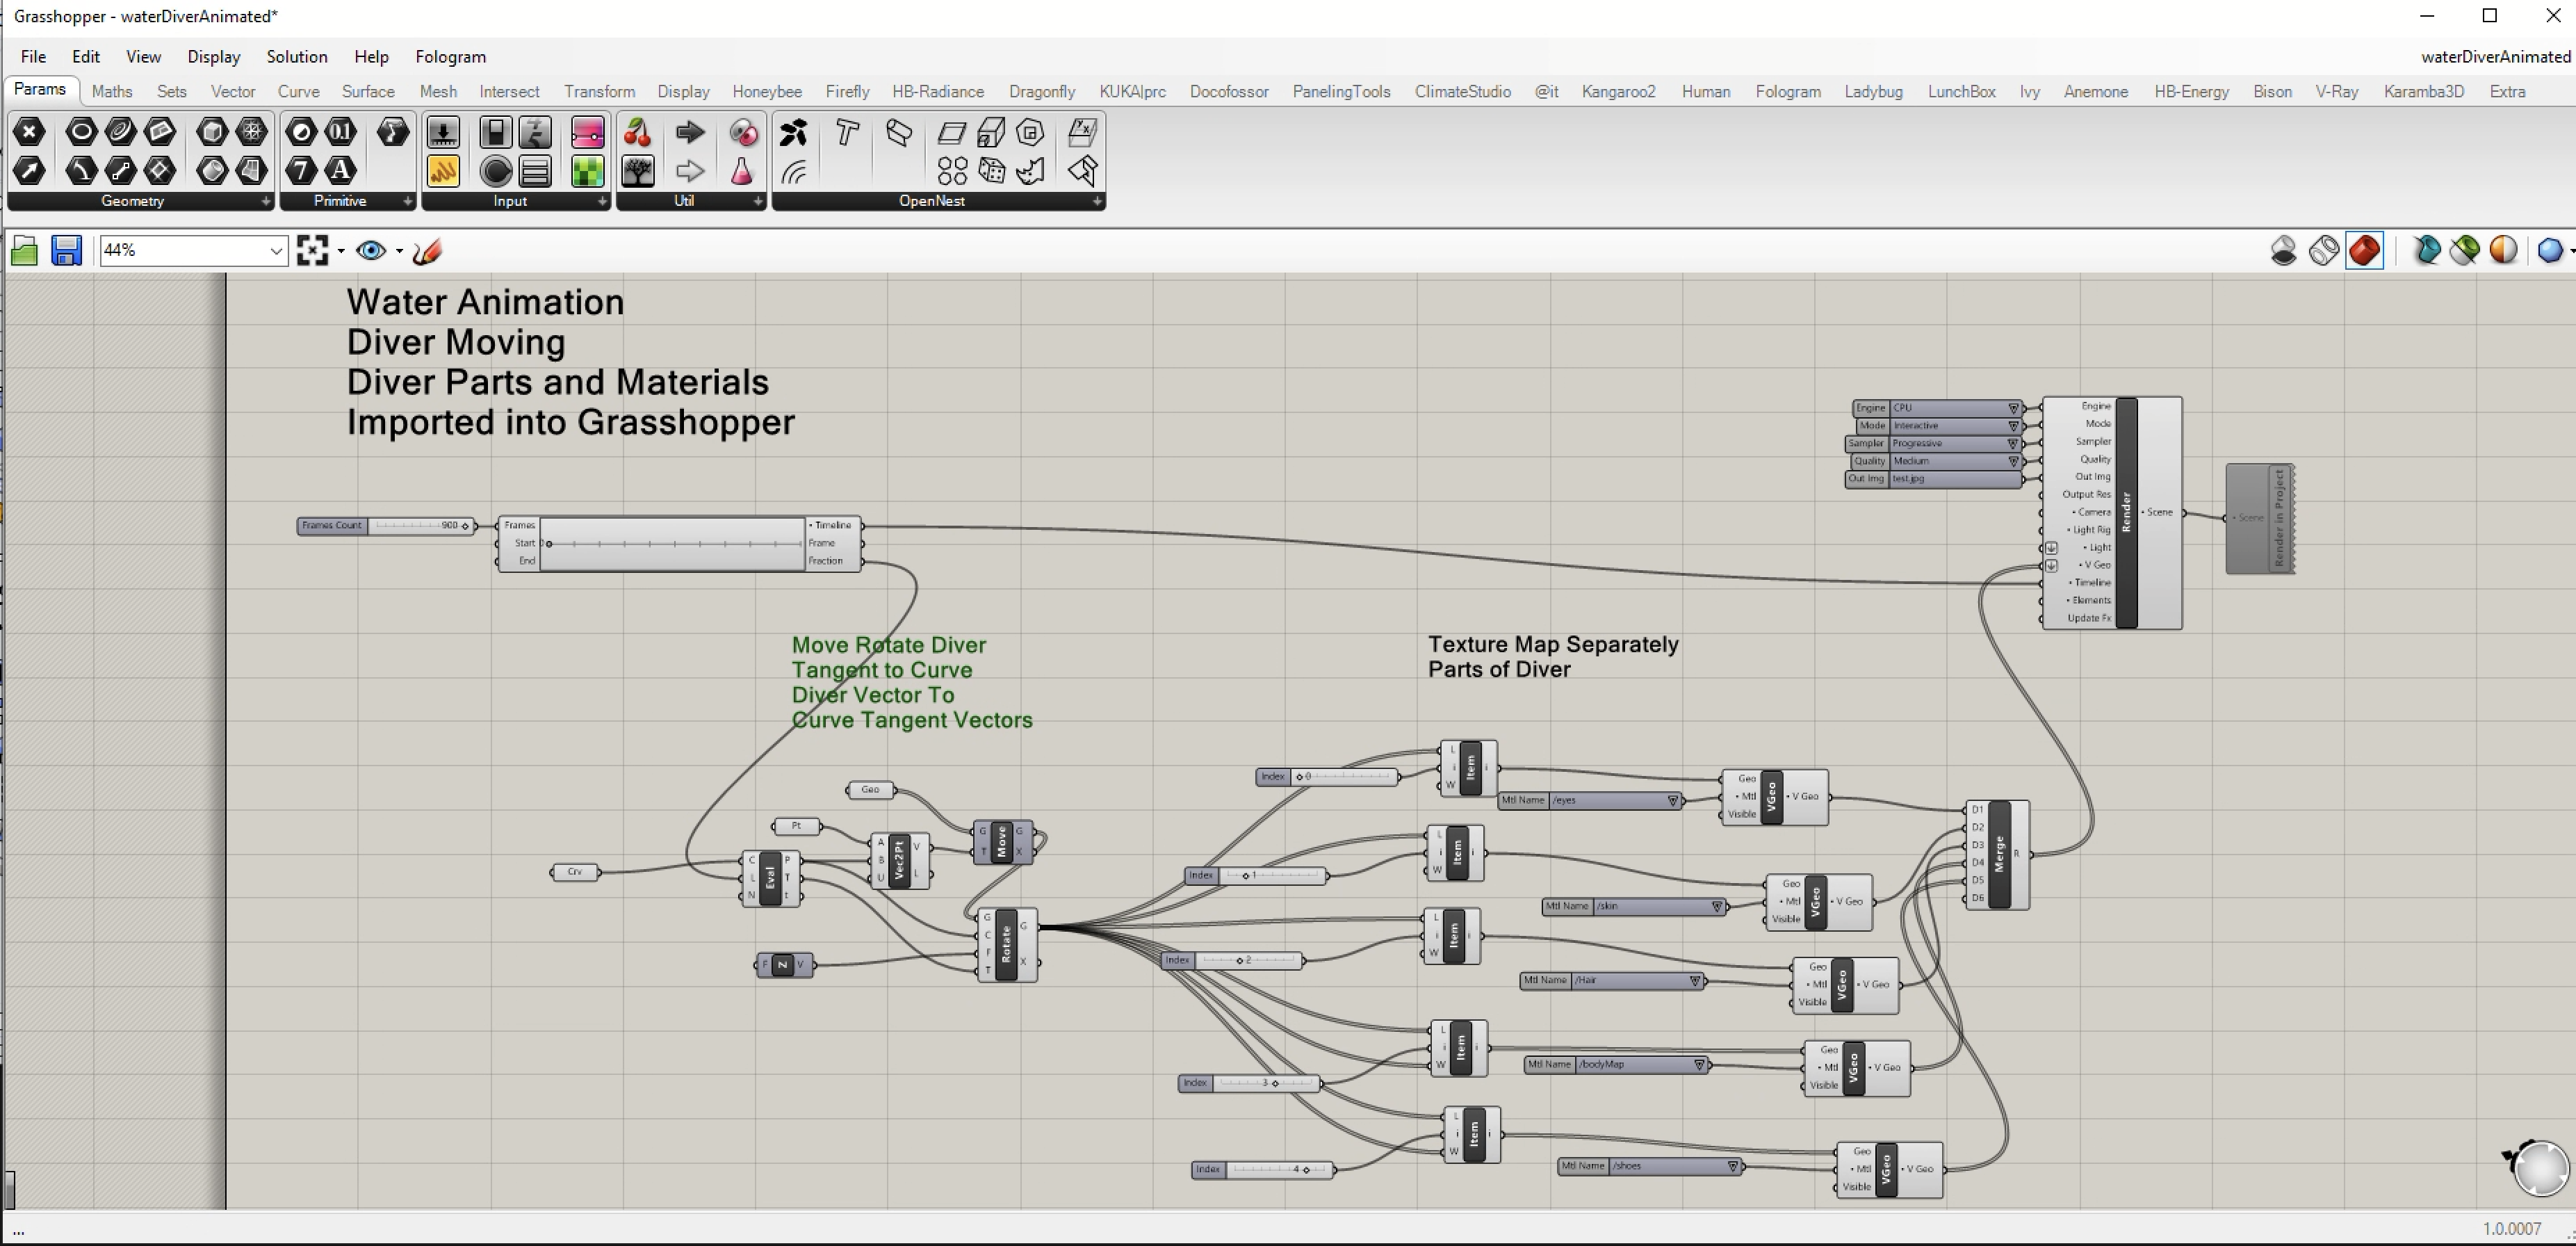
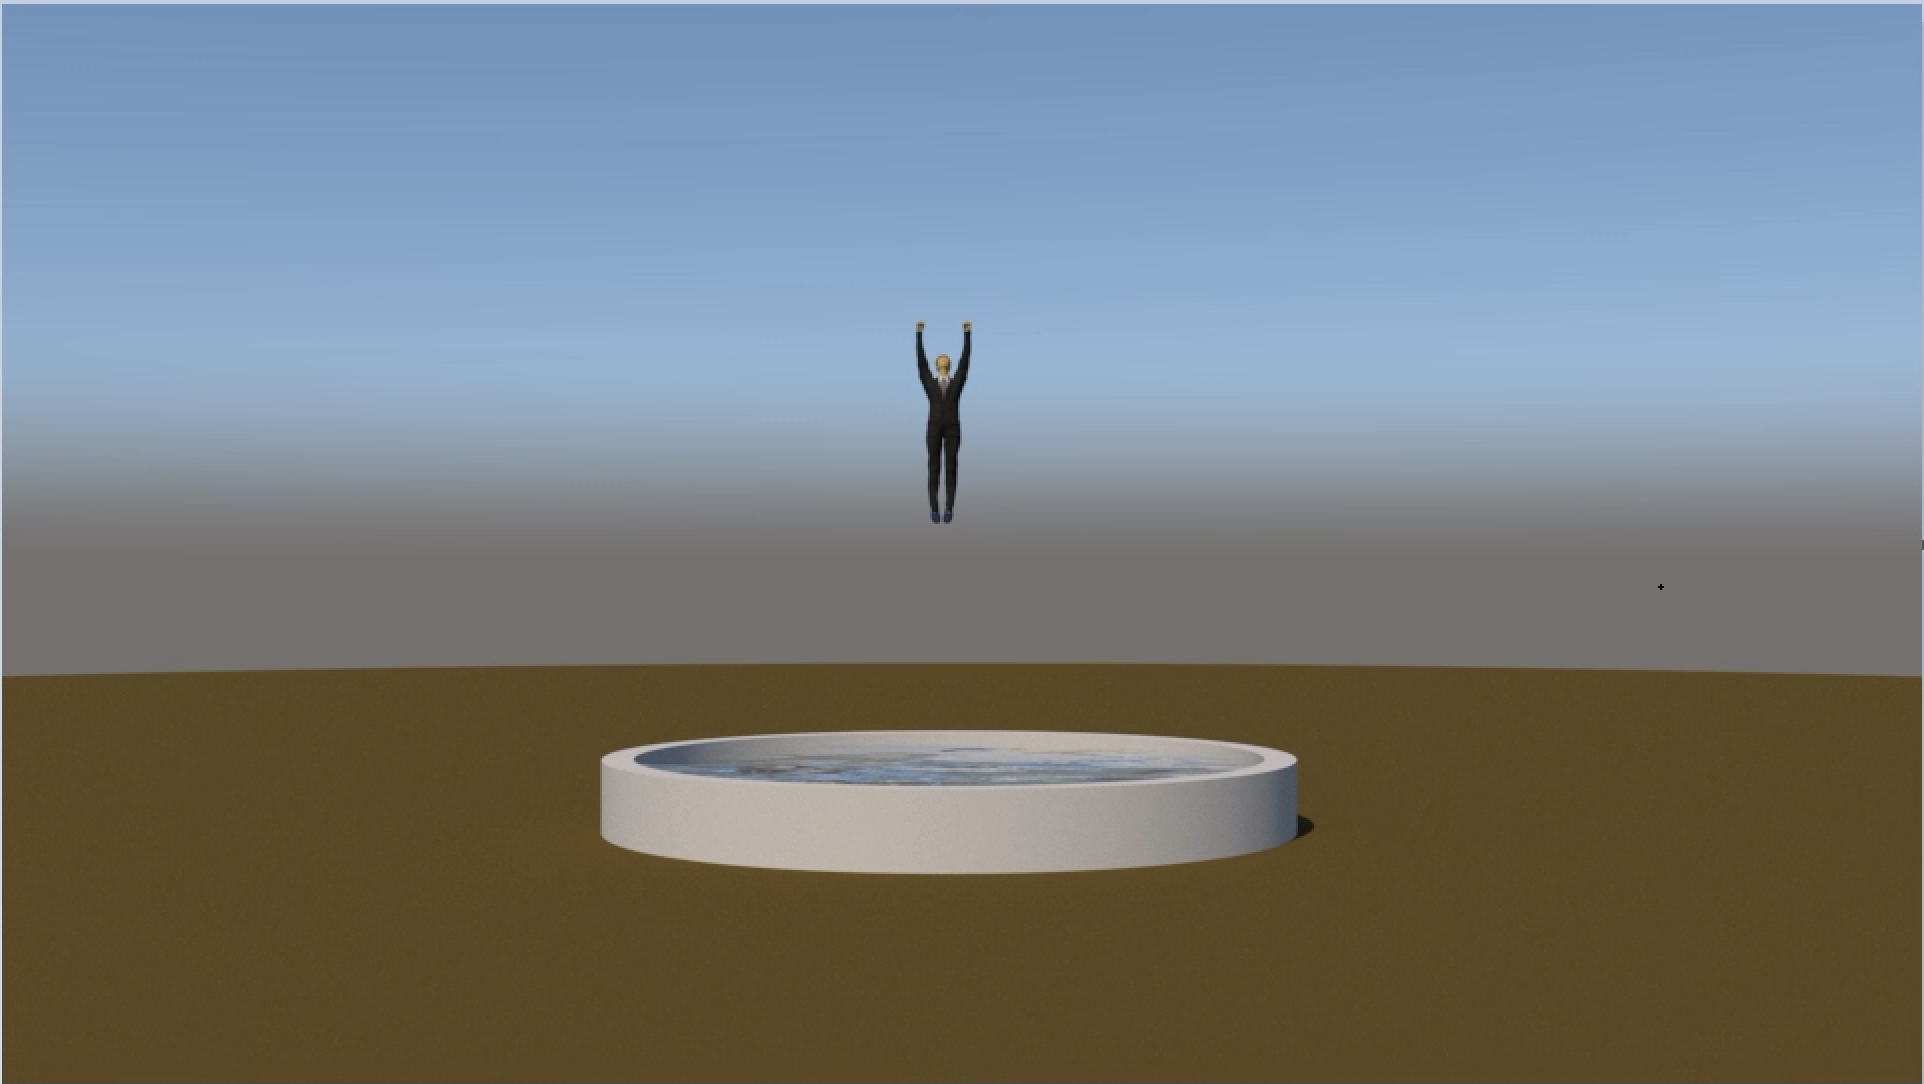
E_waterDiverMoving
This script involves moving an object along a curve through a translation vector. It also involves rotating the object at an angular difference between a vector aligned with the initial direction of the object to the tangent vector to each point along the curve where it moves. We did not review this example in detail in the class discussion session workshops and so it is relatively extracurricular.