COMPUTER
AIDED
ARCHITECTURAL DESIGN
Workshop 19 Notes,
Week of November 14, 2024
NOTE: This set of workshop notes implements a sunlight study directly in Rhino without the use of Grasshopper. It handles sun animation setup by drawing upon tools already provided for basic Rhino rendering. It uses the VRay Asset Editor and VRay Frame Buffer to adapt those animation tools to the use of VRay. These tools can be used to animate sunlight movement, and to animate so-called flythroughs, path or turn-table animations. With any of these types of animations, you can also concurrently animate a water suface and cloud movement.
The built-in Rhino tool can be used to determine the Sun Poistion based upon Latitude, Longitude, Day and Time. At the end of these notes is a technique to generate 30 rendered frames to create a 30 second animation at 1 frame per second and also a much smoother 30 second one at 30 frames per second.
Here we examine in greater detail the case of sunlight animation. The methods of building such geometry and materials have already been covered in previous workshops notes. This explanation just focuses on what is needed to facilitate the animation.
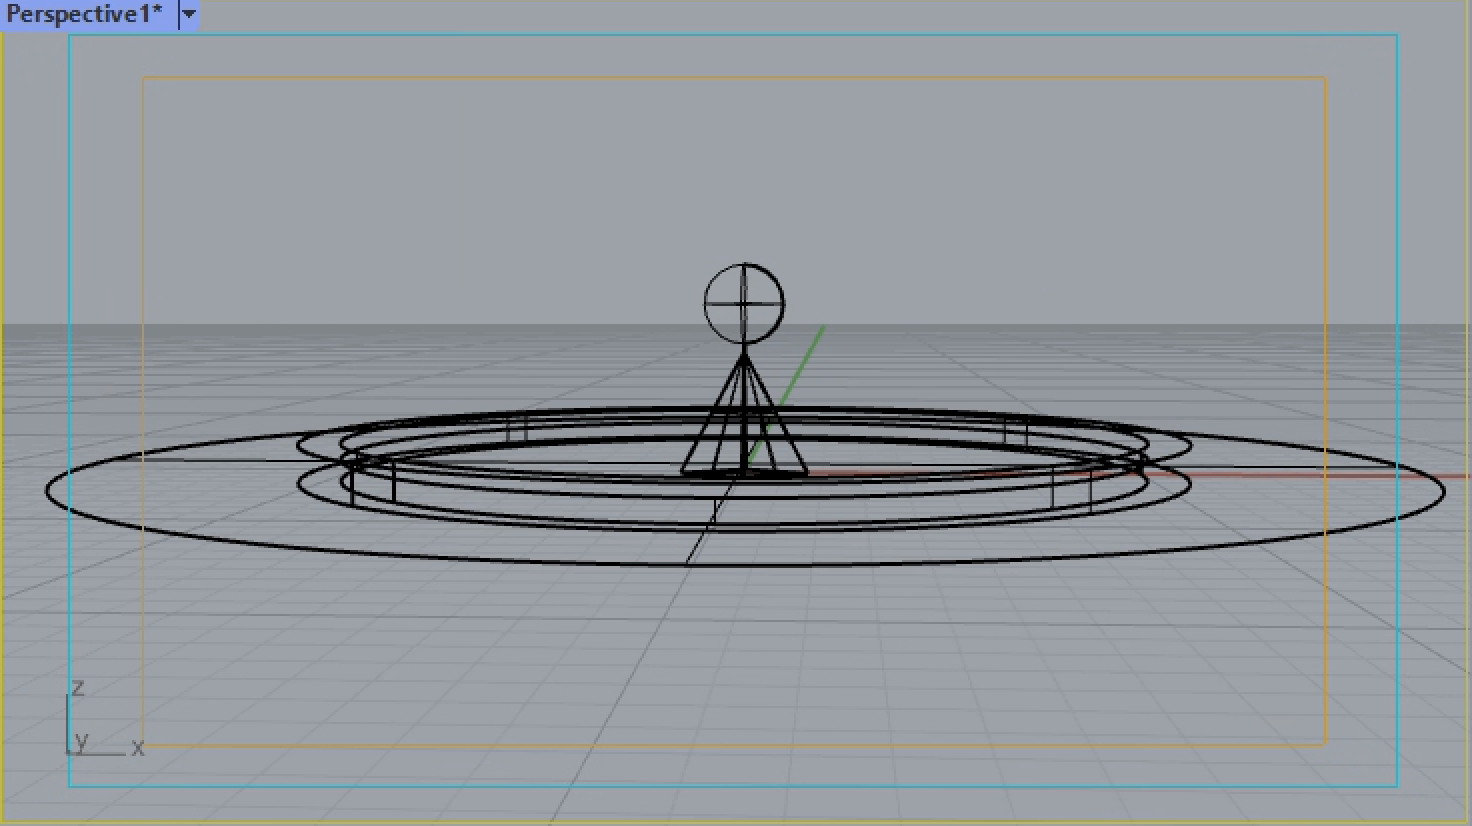
This example is also also posted to the Classes Server site in the examples folder under a sub-folder named "sunStudyWithoutGH".1. Open the Rhino file sunStudyWithoutGH.3dm and then open the perspective view.
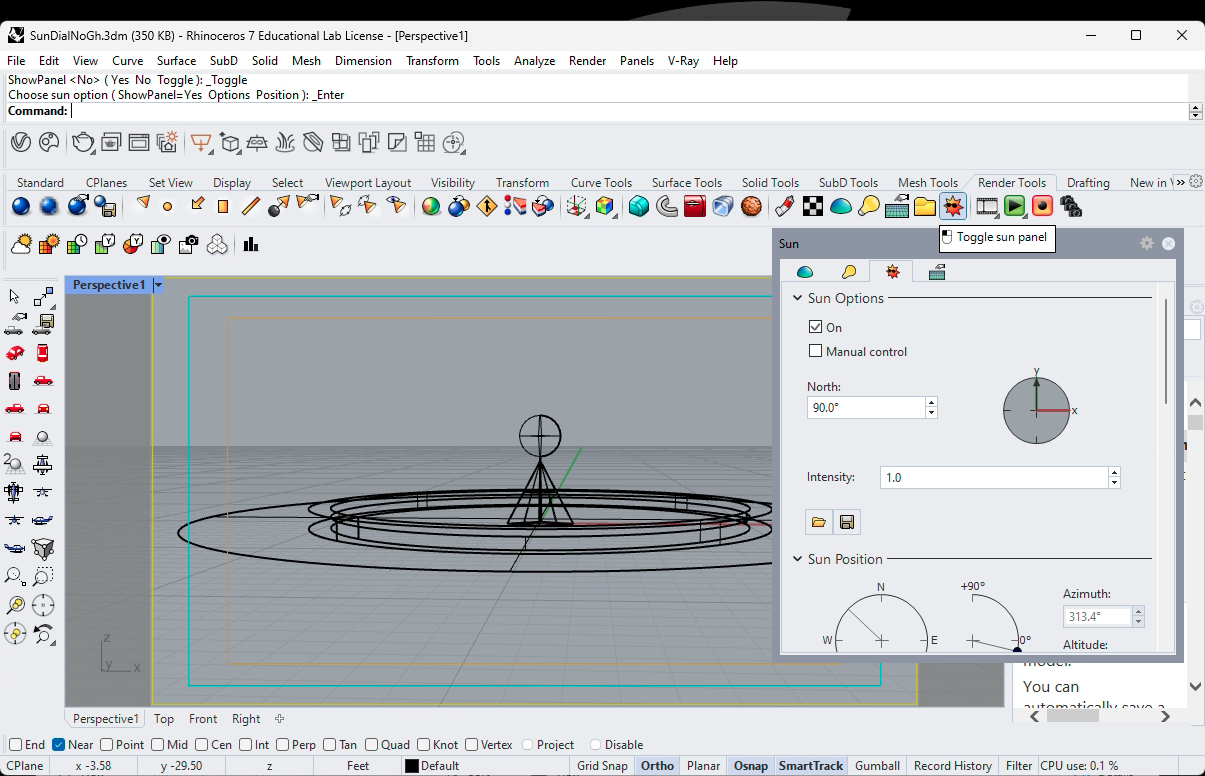
2. Open up the Rhino Sun tool and ensure that it is turned on as shown in the image below.
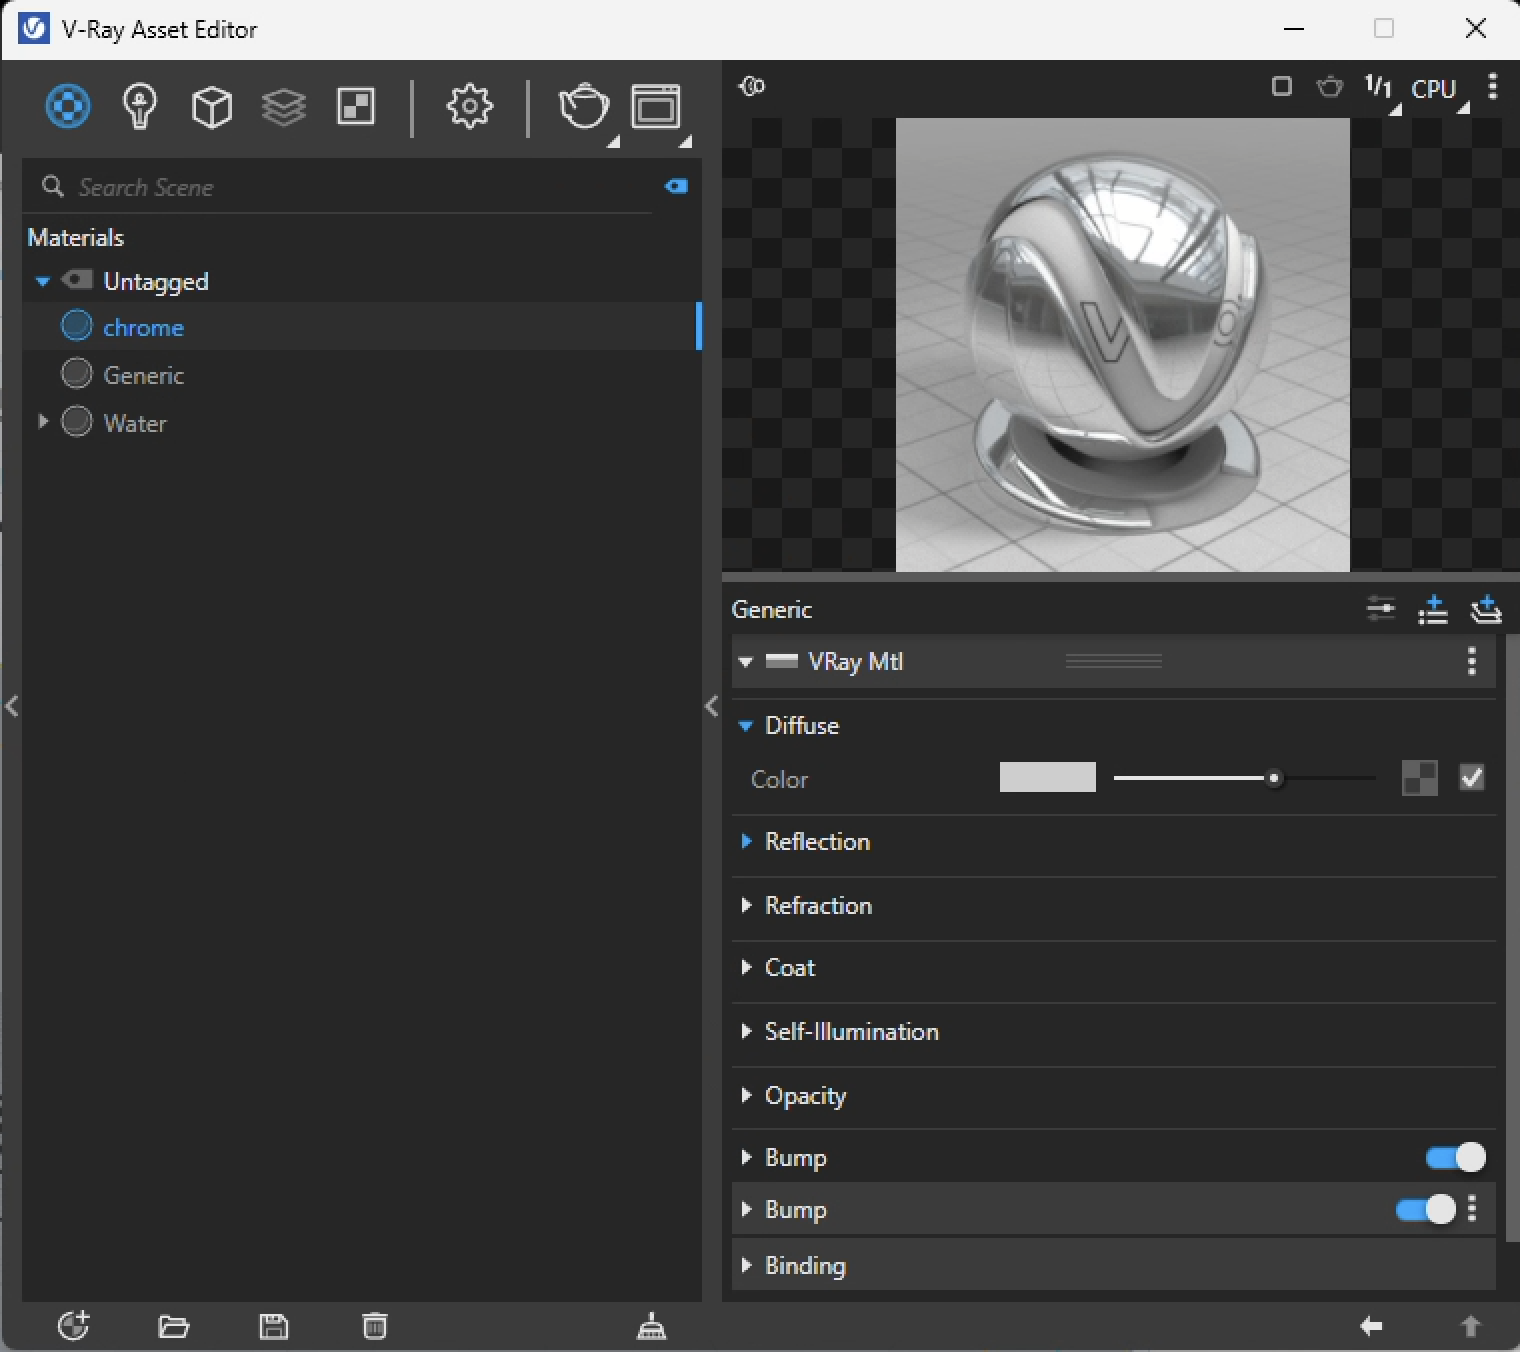
3. Open the V-Ray Asset Editor window and note the V-Ray materials that have been pre-assigned to the objects in the Rhino file. This includes chrome, a generic surface, and water material (uses an animated water displacement texture). These materials are standard V-Ray materials.
PART II. Setup Sun Animation With Rhino Render Components
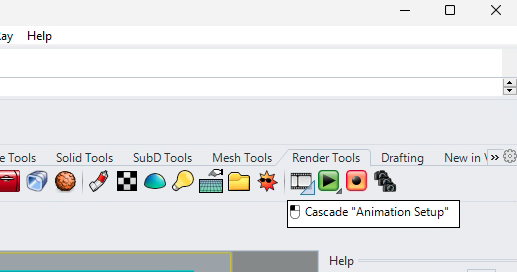
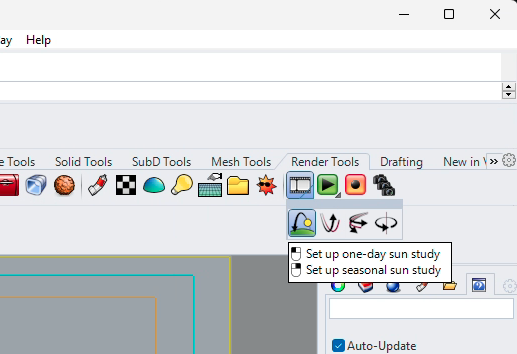
1. Go to the Render Tools tab and select the animation Icon that looks like a celluloid strip.
2. In the pulldown menu to the lower right of the culluloid strip icon, select the sun-path icon for a one day sun study.
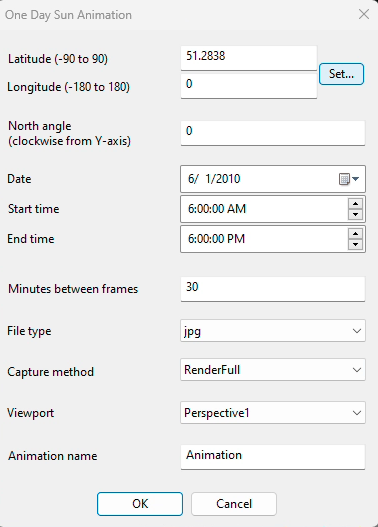
3. Within the dialog box that follows, select the Latitude and Longitude by typing in the values direclty, or by selecing the "Set" button to find the location on the map of the earth.
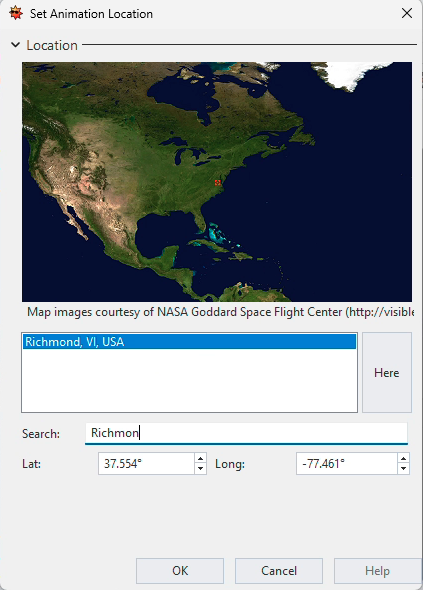
4. Within the dialog showing the map of the earth, you can also type in the name of a city, such as Richmond, VA, to determine it's latitude and longitude, and then select "OK" at the bottom of the dialog box.
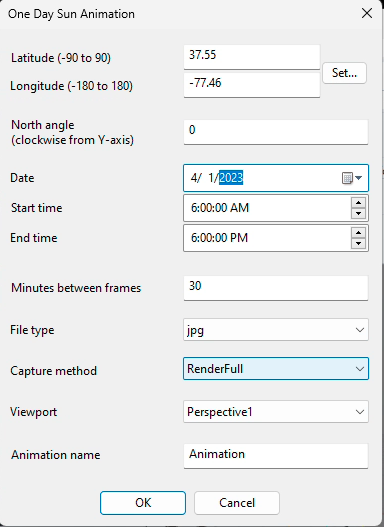
5. Returning to the earlier dialog box, specify the hours of the day, the number minutes between each frame of sunlight (every 30 minutes in the image below), the type rendering ( "RenderFull" activates VRay) desired.
PART III. Set Assets to Read In The Animation Data
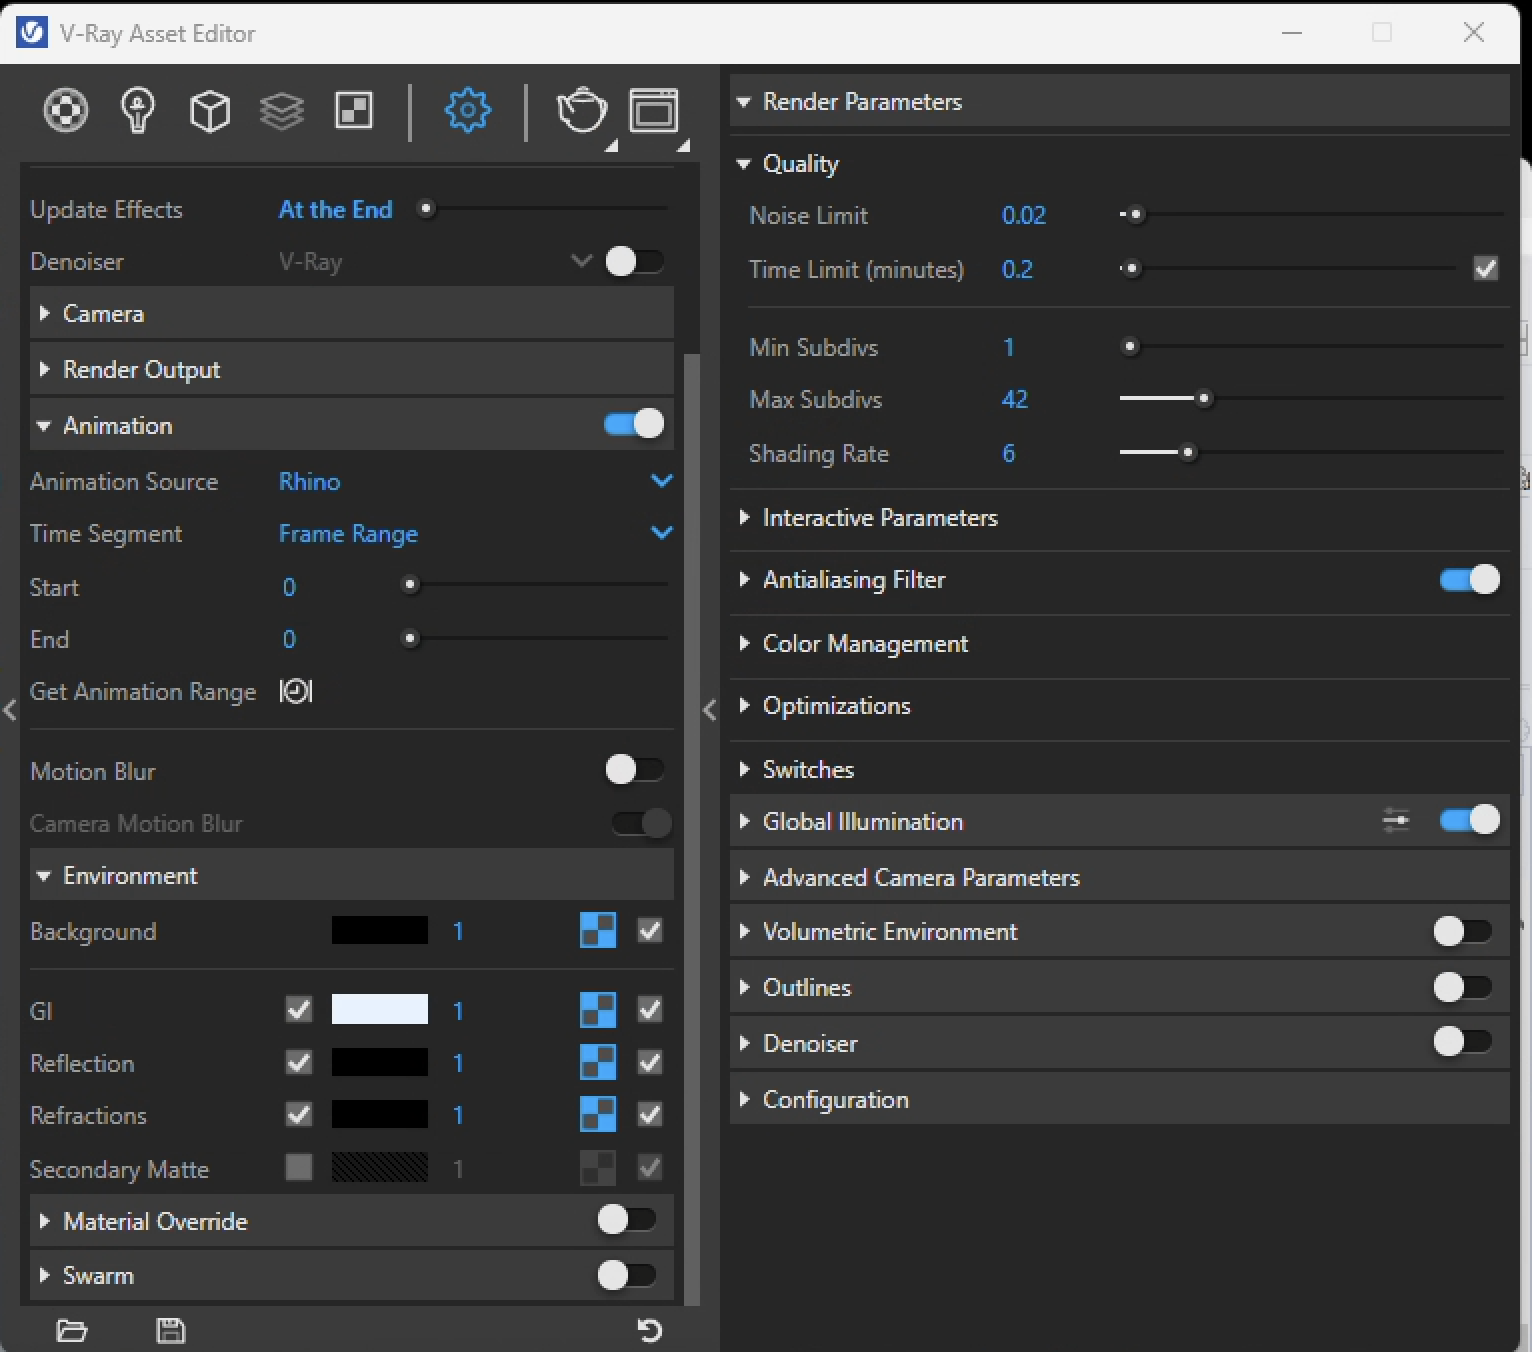
1. Create a folder such as one named "frames" for storing the rendered animation frames on the desktop or in a sub-folder of your classes submit folder. Open up the "V-Ray Asset Editor" and make sure that the "Interactive" render option is turned off as shown in the image below. Also within the "V-Ray Asset Editor", open up "Render Output" tab and switch on the "Save Image" button. Next, select the icon for the "File Path" and ensure that the file type is "jpg".
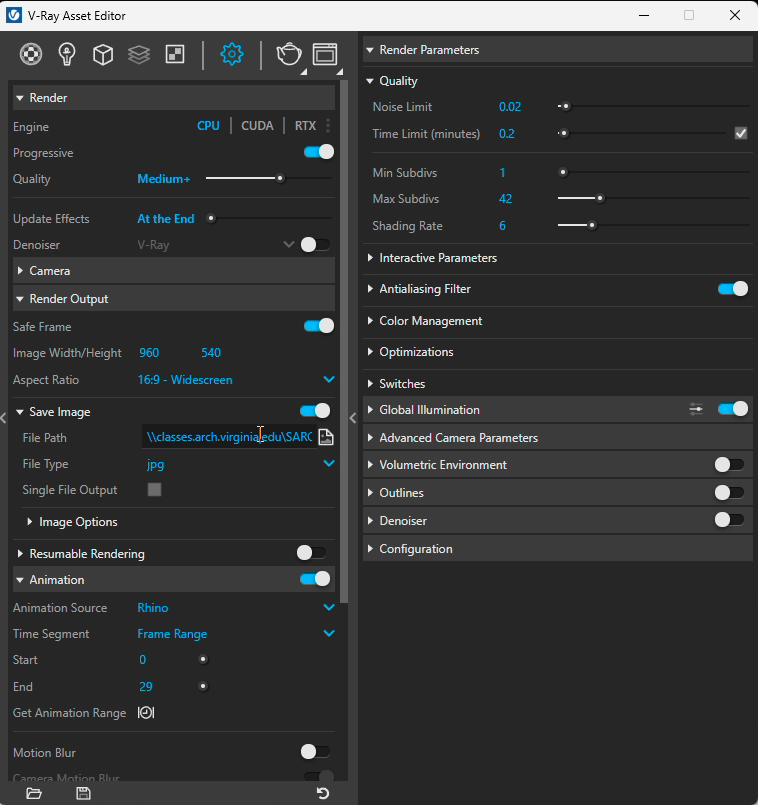
2. Note that as part of this "Save Image" dialog you should take care to specify that the file type is a "jpg" file.

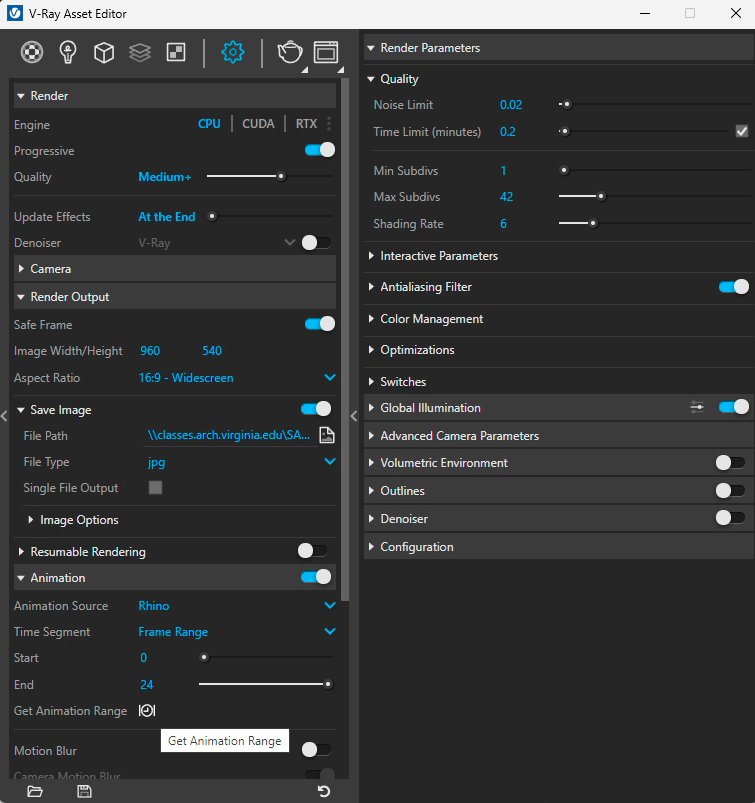
2. Next, for the Animation tab, turn animation switch setting to on. Open up the "Animation" tab for the "V-Ray Asset Editor", set the "Animation Source" to "Rhino", set the "Time Segment" to "Frame Range", left-button-mouse click on the "Get Animation Range" clock icon and it will read in the 25 frames associated with the 25 sun positions. Since there are 25 frames, the frames are numbered 0 to 24 below in this example. For an initial test rendering, if you had setup for smaller number of frames, such as 5 frames, then the frame range would have been 0 to 4.
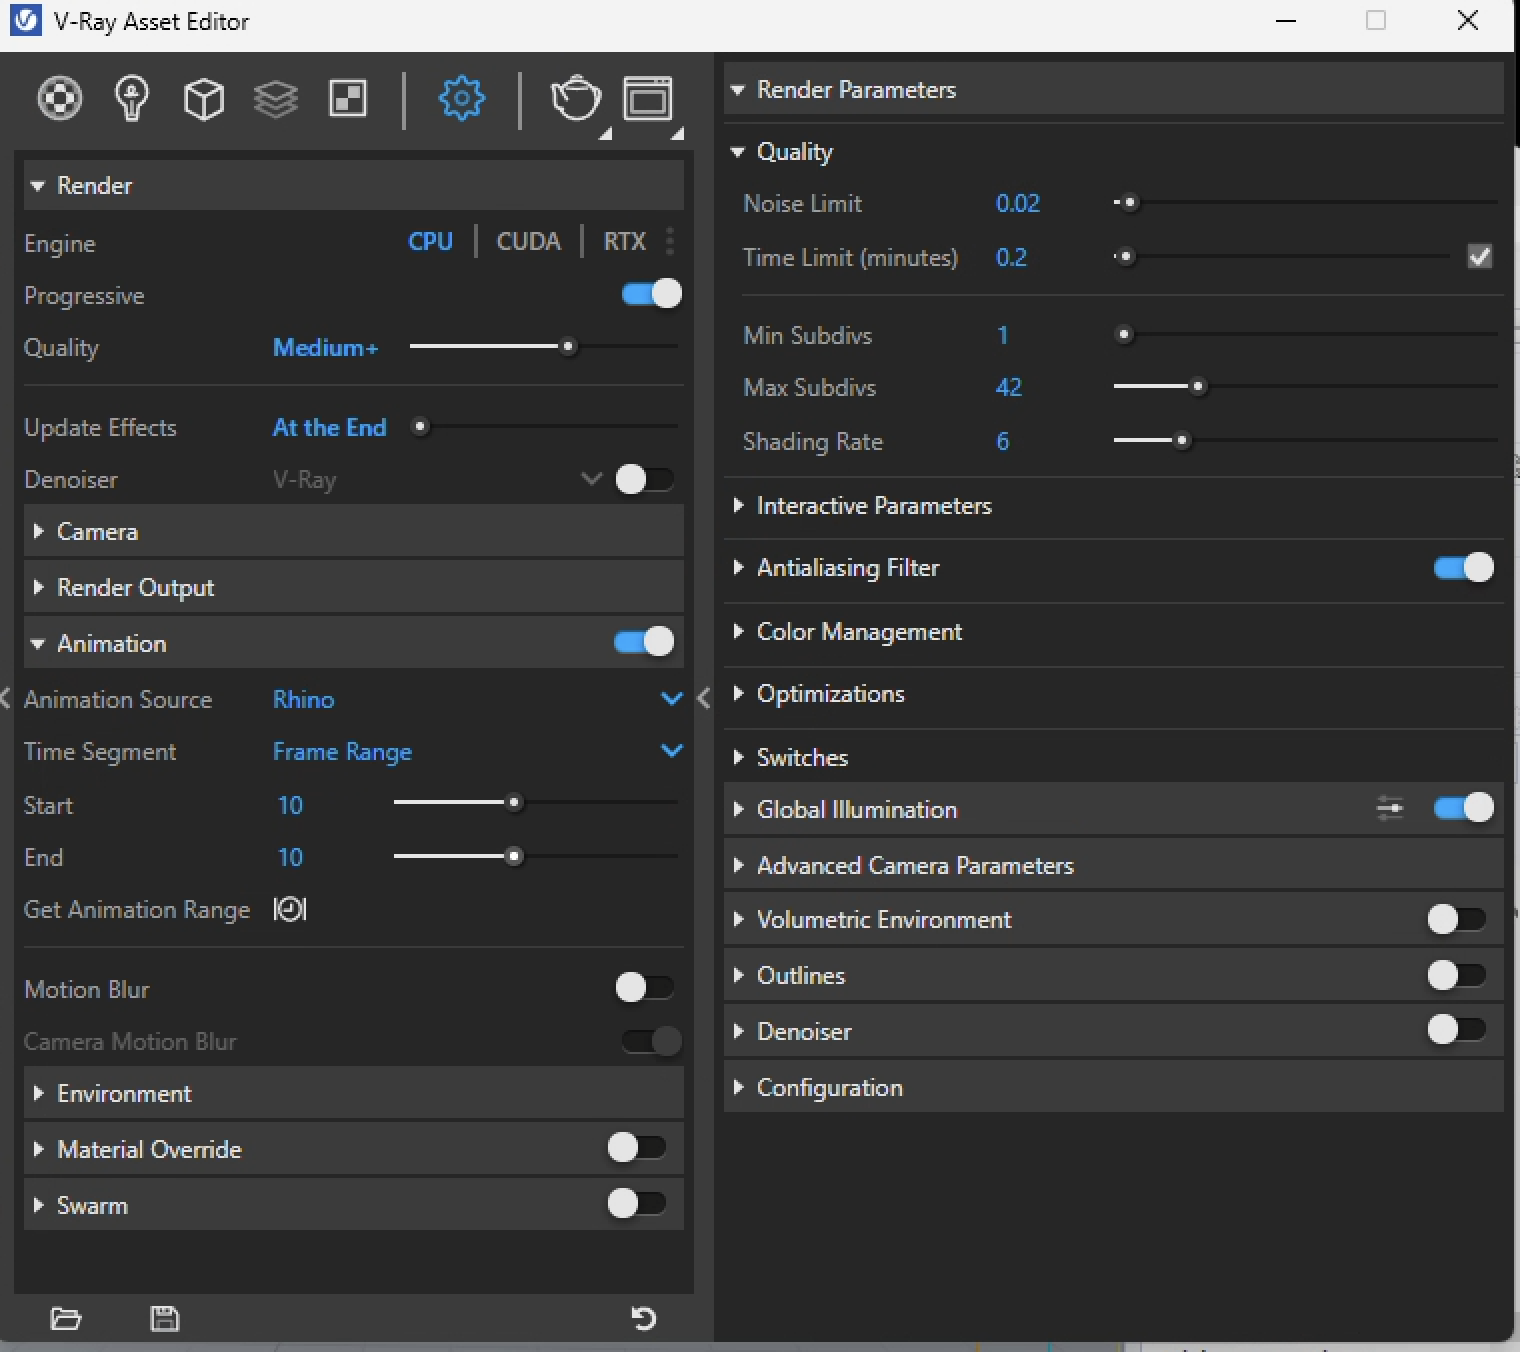
3. Continuing with the asset editor, set both "Start" frame and "End" frame to 12 for midday. In this example the Start and End frame at 12 are halfway throught the sunrise to sunset period. Also on the upper right hand side, not that the "Time Limit has been set to 0.2 minutes or 12 seconds. This will limit rendering time to a bar minimum. If the quality of the rending is consquently poor. then raising the time limit would likely help to improve the quality of the rendering.
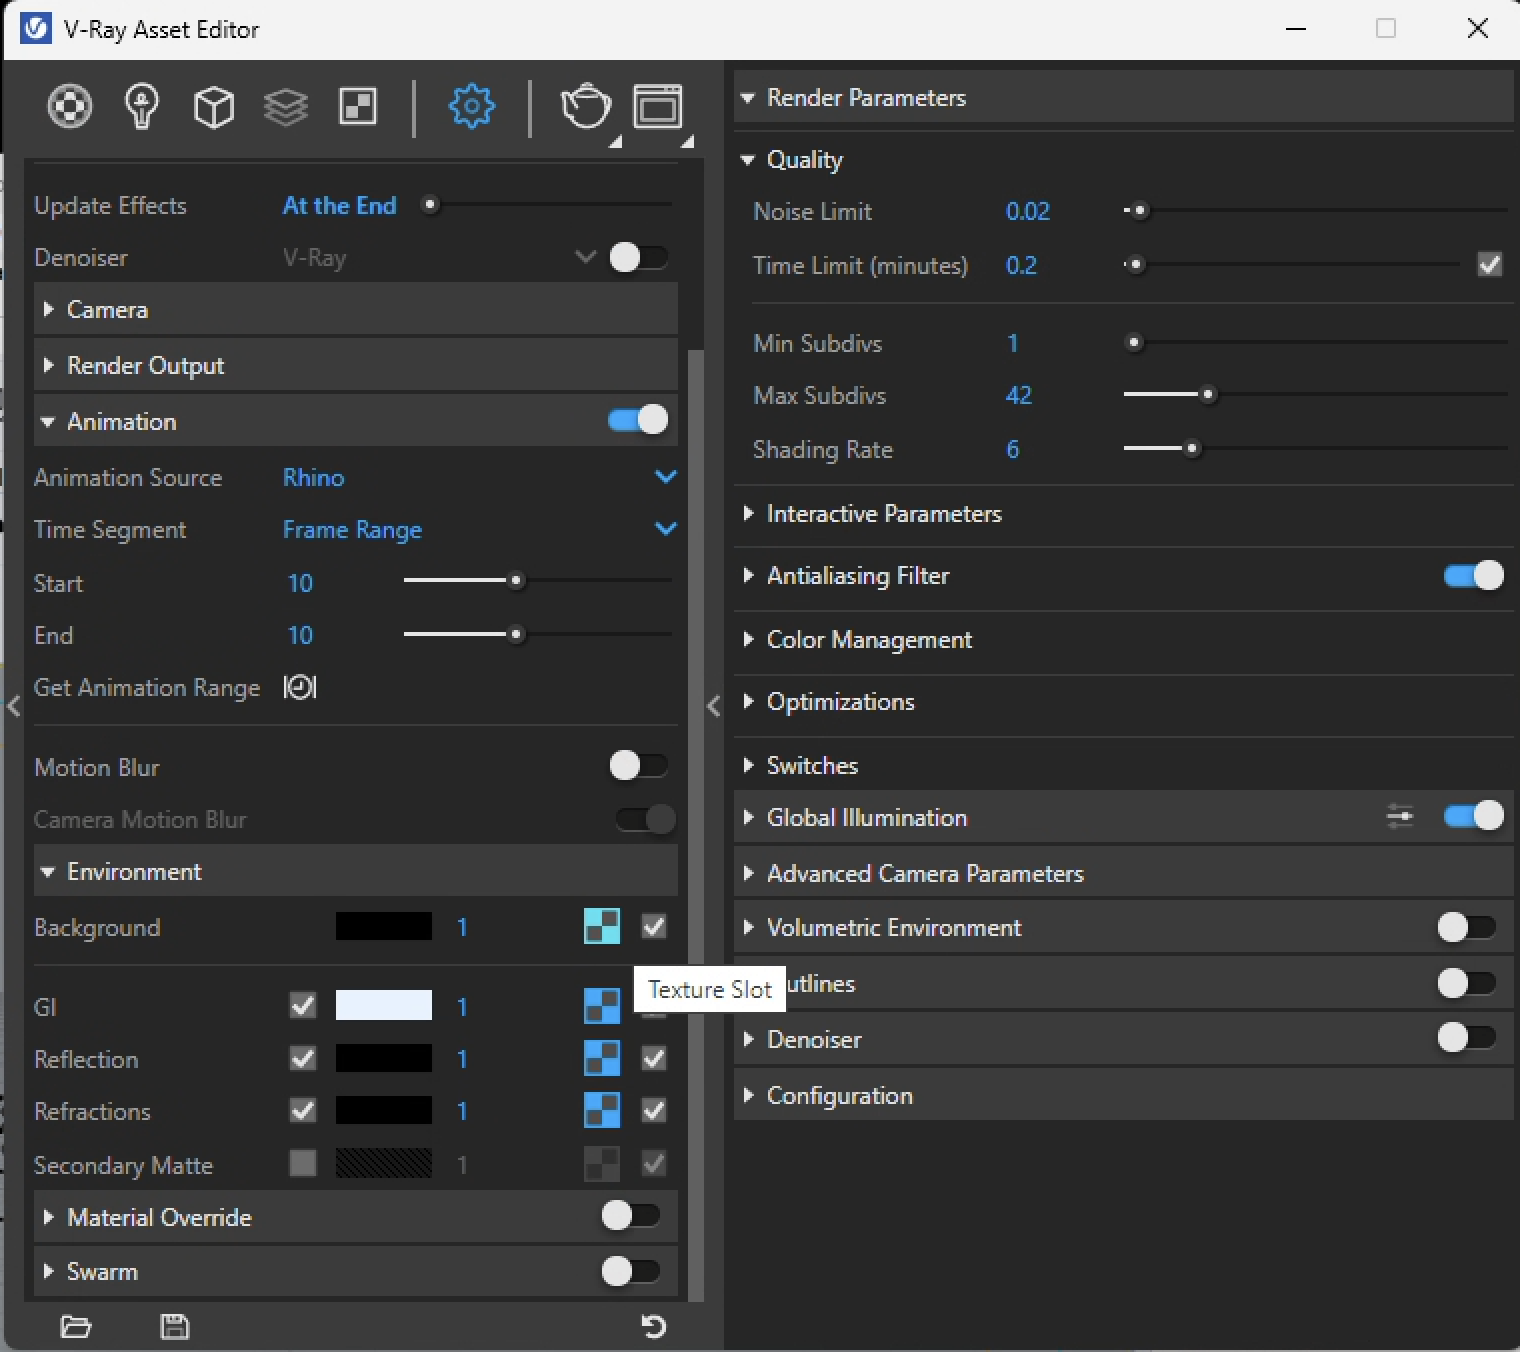
4. Next, use the environment settings to setup a background sky texture map as we've done in previous workshops.
Begin with selecting the Texture Slot as indicated in the screen capture below.
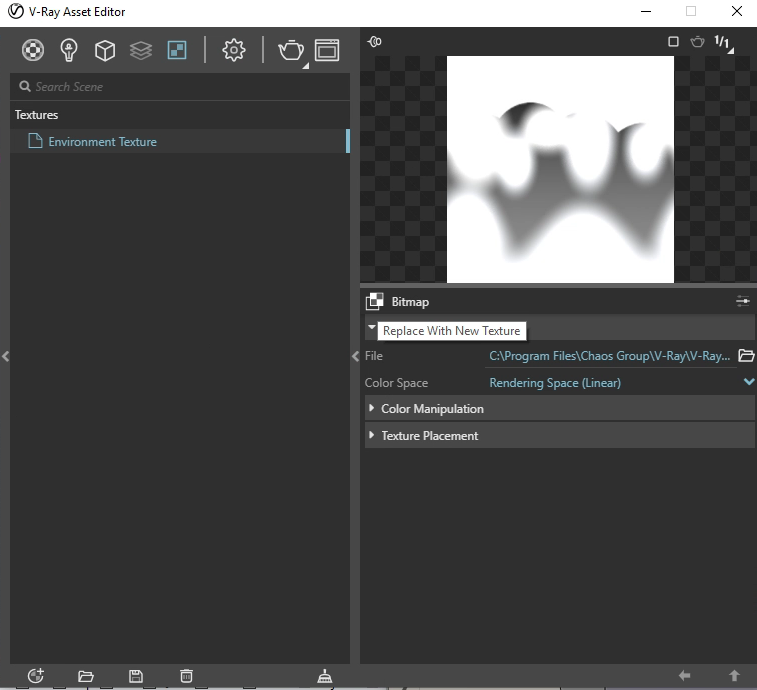
5. Next, slelect the "Bitmap" icon on the right-hand side of the V-Ray Asset Editor and choose the "Replace with New Texture" option as shown in the screen capture below.
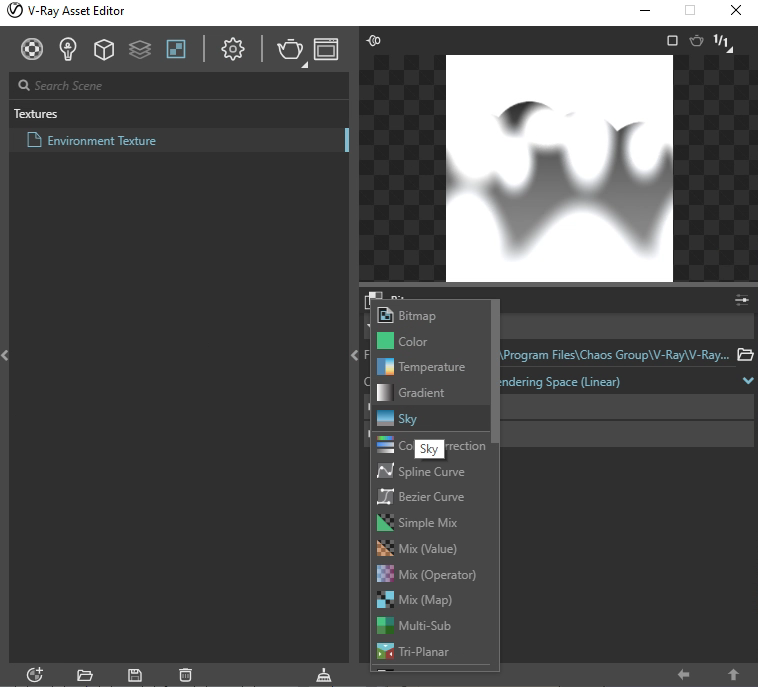
6. To complete this step select the V-Ray Sky texture map.
7. This last step will ensure that a Rhino Document Sun goes is selected for each of the four Texture slots "Background", "GI", "Reflection" and "Refractions"
Note: it will also be associated with the Rhino Render Sun rather than a V-Ray sun component.

9. Once the asset editor has been setup, open the V-Ray Frame Buffer and do a single Rendering.
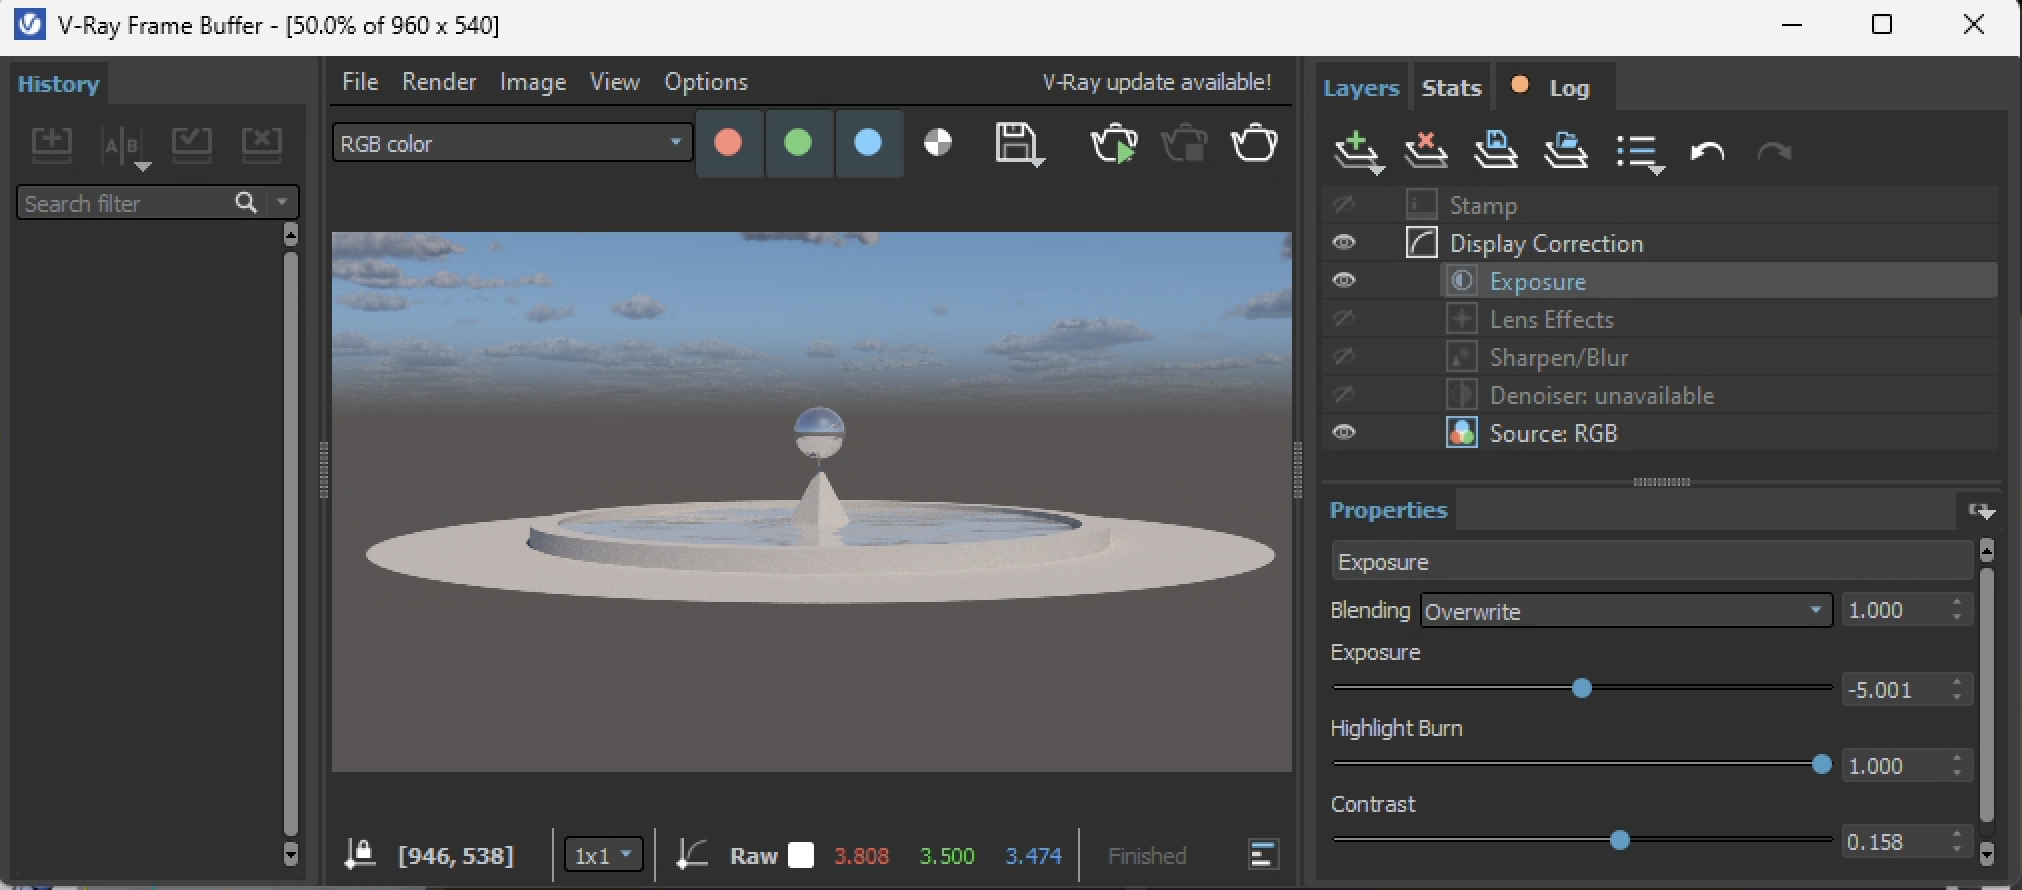
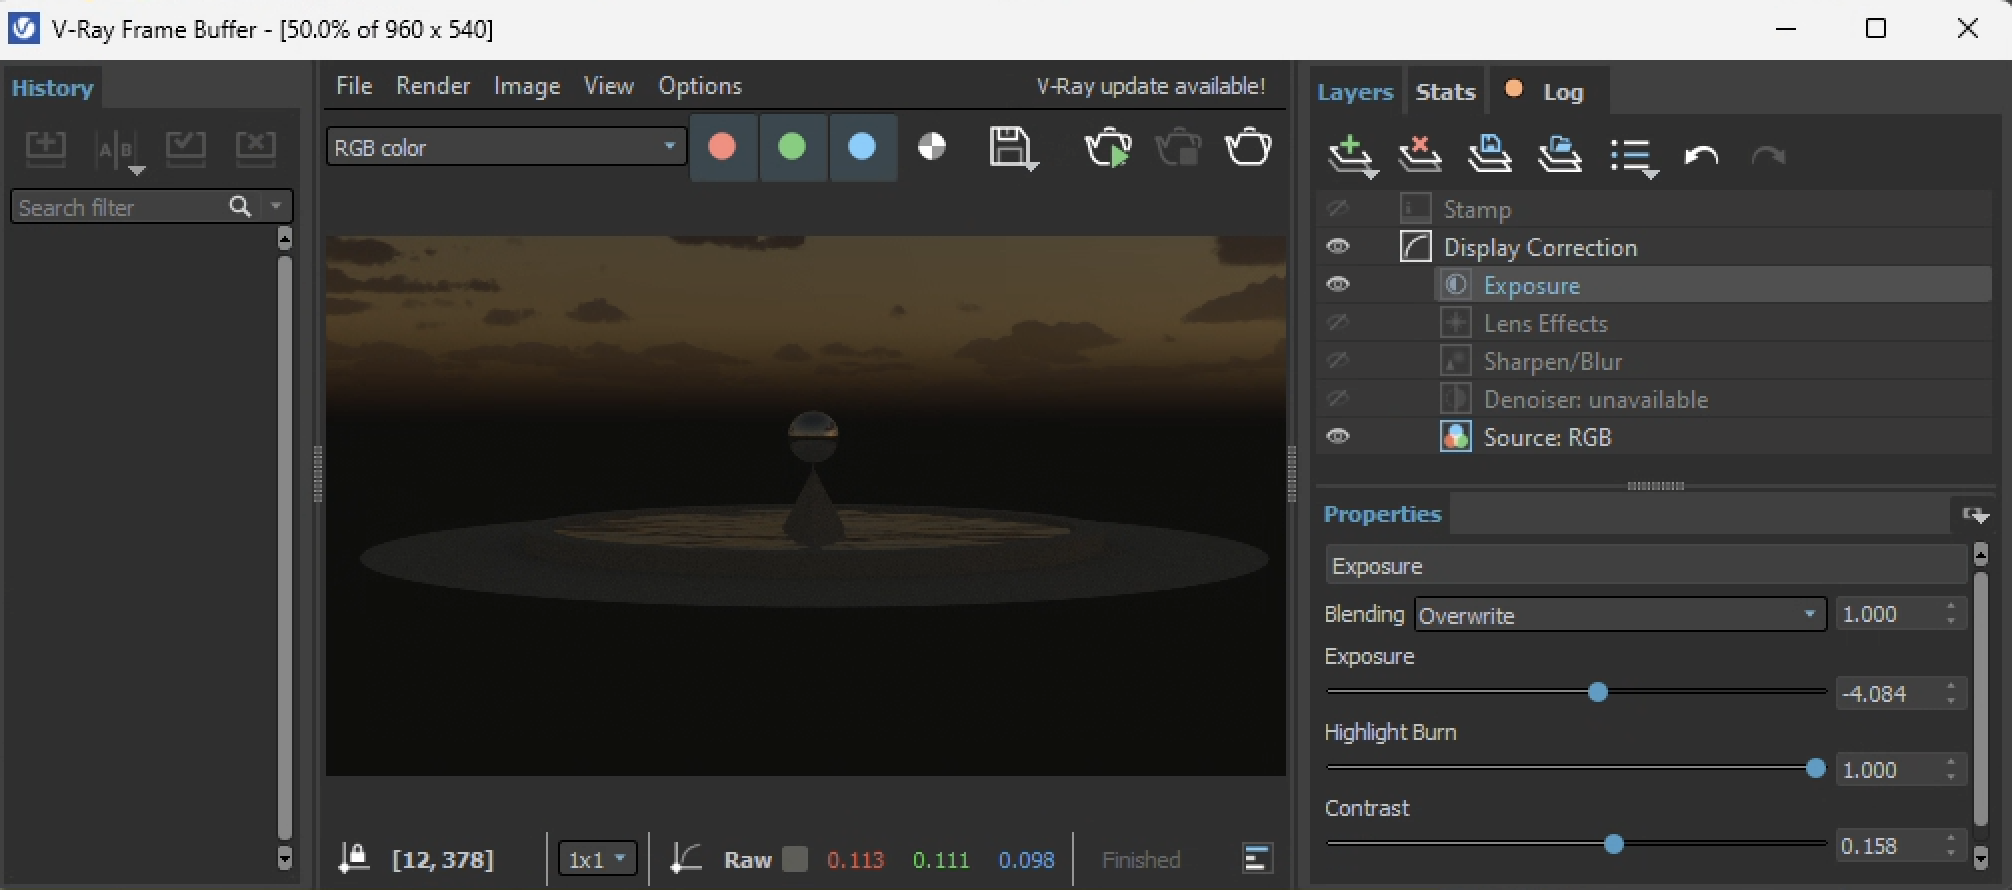
9 .Open up the light "Exposure" panel in the "V-Ray Frame Buffer" window and adjust the exposure and contrast settings as done in previous workshops. Note that a midday sun may be set to be a little over exposed so that an early morning sunlight condition may be more visible. It's important to set the light level once for the entire animation so the the intensity of the light coherently rises from morning to mid-day and then discreases coherently towards the end of the end. Use the Exposure layer rather than Levels layer to do this (the image below will be replaced by one based upon the use of the explosure level, such as we've used in previous workshops).
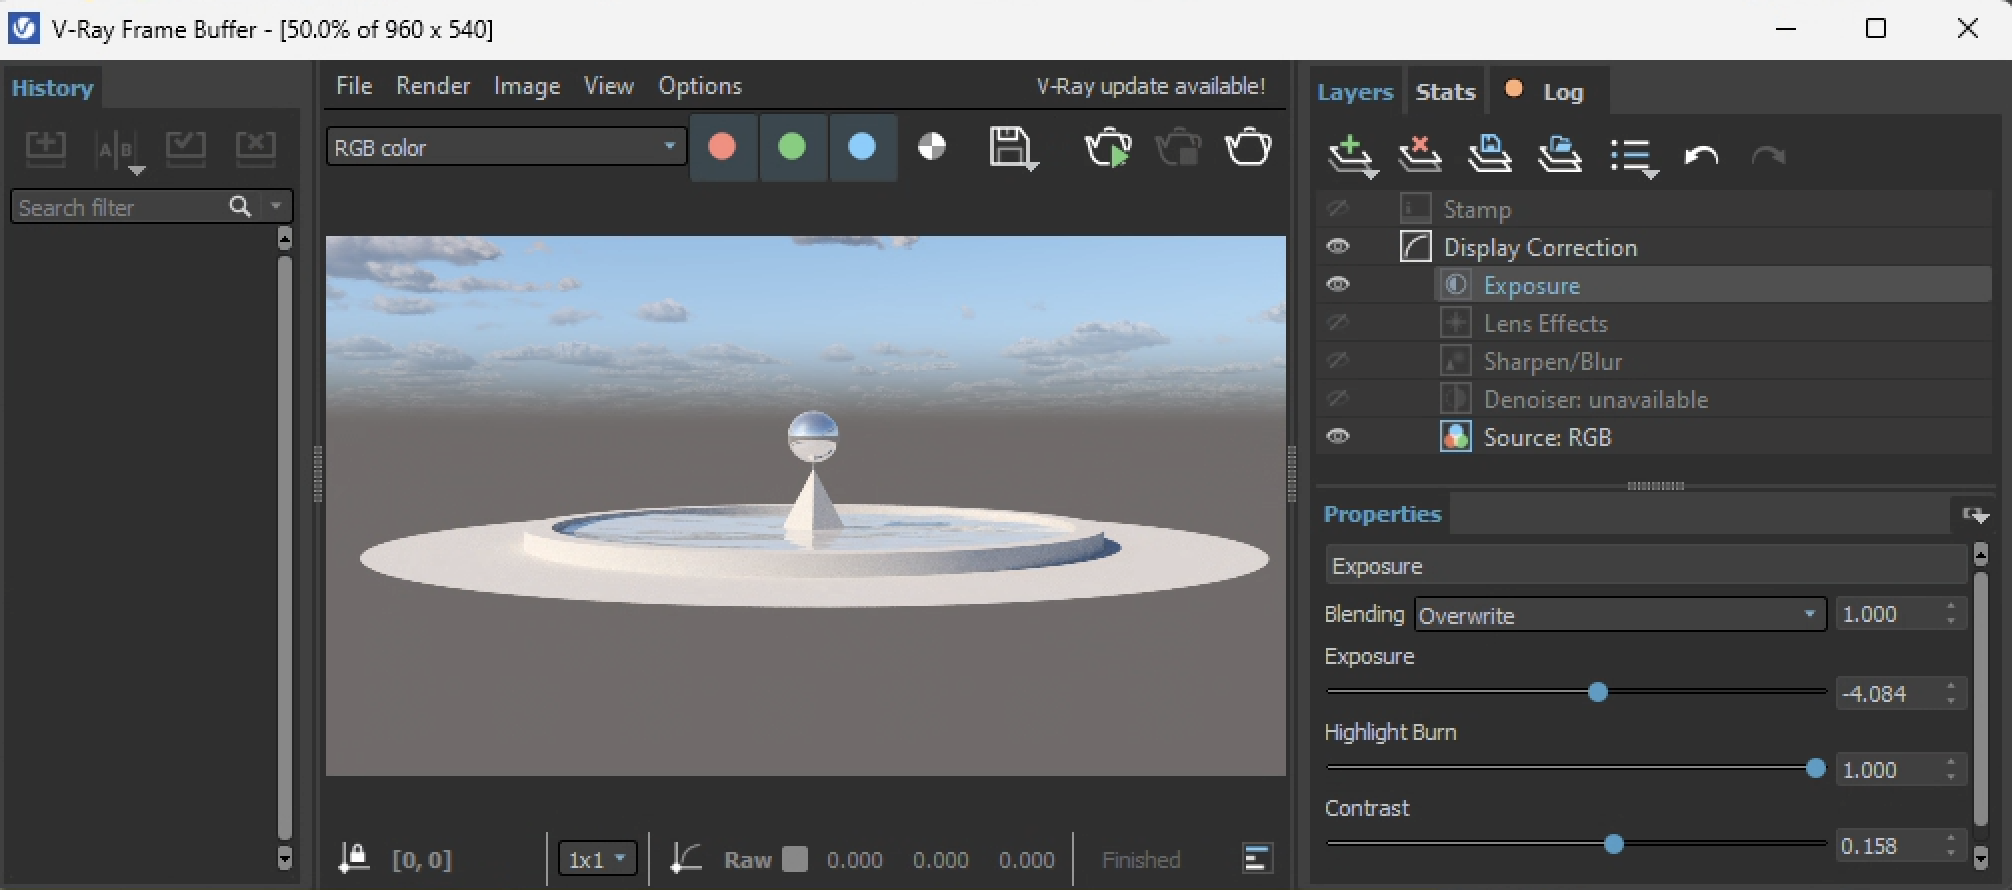
10. Similarly repeat steps 7 through 9 for a morning light to see if the light levels are adequate. Here, the frame range is set from 0 to 0 for early morning.
Use the Exposure layer rather than Levels layer to do this (the image below will be replaced by one based upon the use of the explosure level, such as we've used in previous workshops).
A test for mid afternoon (frame range 25 to 25 in this illustration) may also be helpful so as to check on shadow quality.
When the single frame testing is complete and the light levels adjusted, return to the "V-Ray Asset Editor" and restore the frame range back to 0 to 24 or to whatever the maximum range is desired for the full animation.
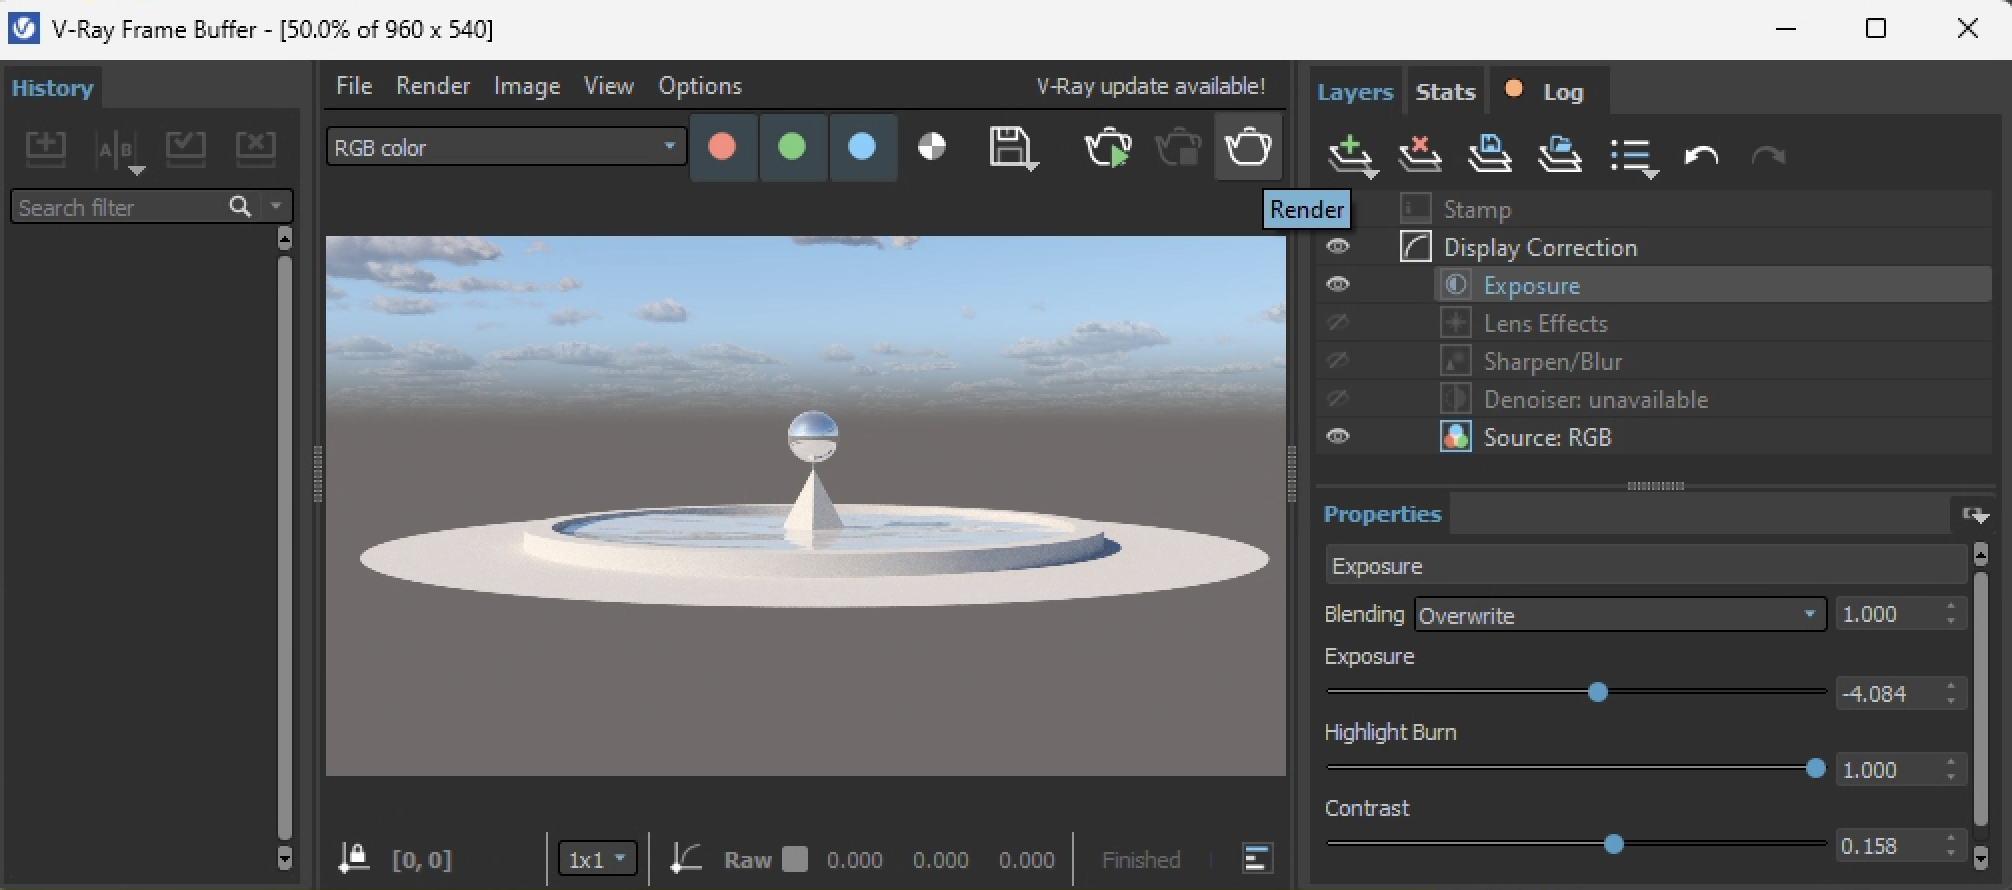
10. Return to the VRay Frame Buffer Window, select the tea kettle icon, and render the animation sequence.
As already stated, the additional animation options (path animation) within Rhino work equally well with VRay under the methods outlined in this set of workshop notes. A concise overview of the methods is posted on this web site: https://docs.mcneel.com/rhino/7/help/en-us/commands/animation.htm. Any of these methods would substitue for Part II above. We will compile the rendered frames in Part IV.
For a different view of this methodology with VRay, the following video produced by Chaos is informative:
Futher documentation on Chaos's web site pertaining to this method can be found at https://docs.chaos.com/display/VRHINO/SunLight.
PART IV. Complie the Animation in Chaos Player (UVA Computers Only) at 1 Frame Per Second And Other Frame Rates.
In this example, we set the playback rate to one frame per second.
Method A. Chaos Player.
This first method uses Chaos Player, which is available on computer workstations and the VMWare computers in the School of Archiecture. This may be a better option for quickly compiling animation frame sequences into mp4 files. The mp4 files can be subquentely edited together in the Open Shot video editor. Note that Open Shot may at times have some drop out of video when compiling V Ray animation frame sequences. Choas Player is a commercial system that can be used to overcome this difficulty.
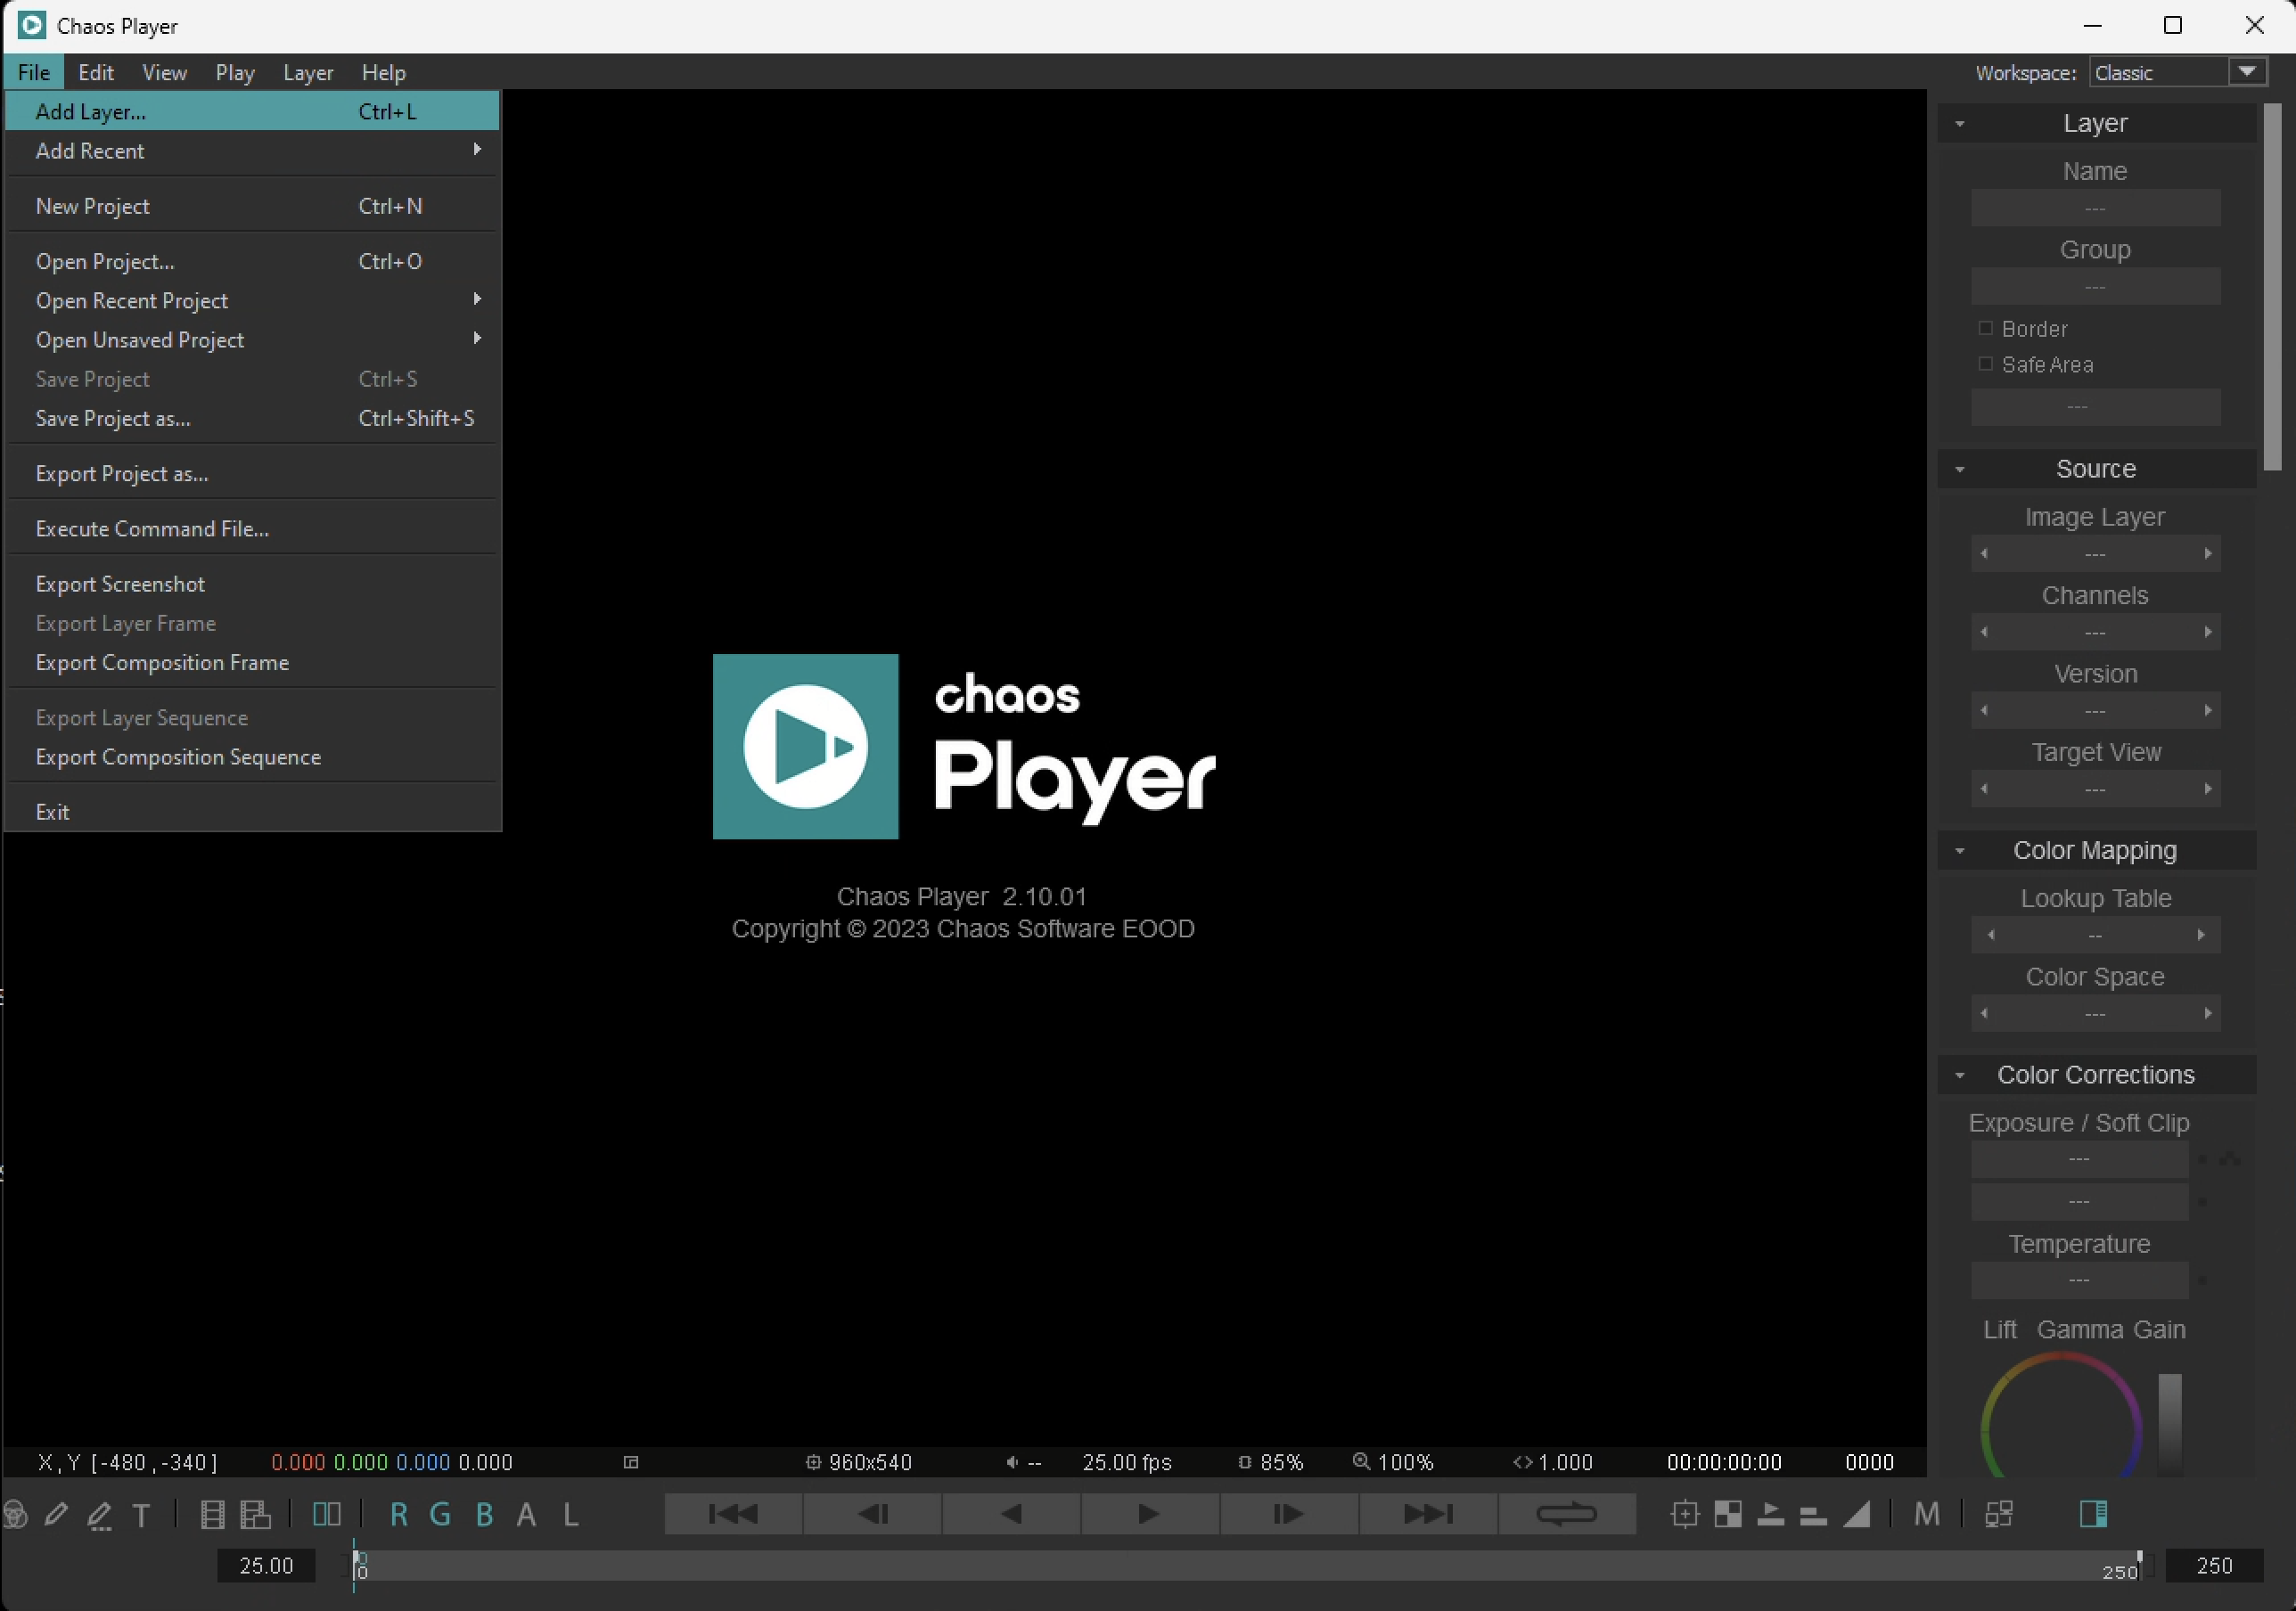
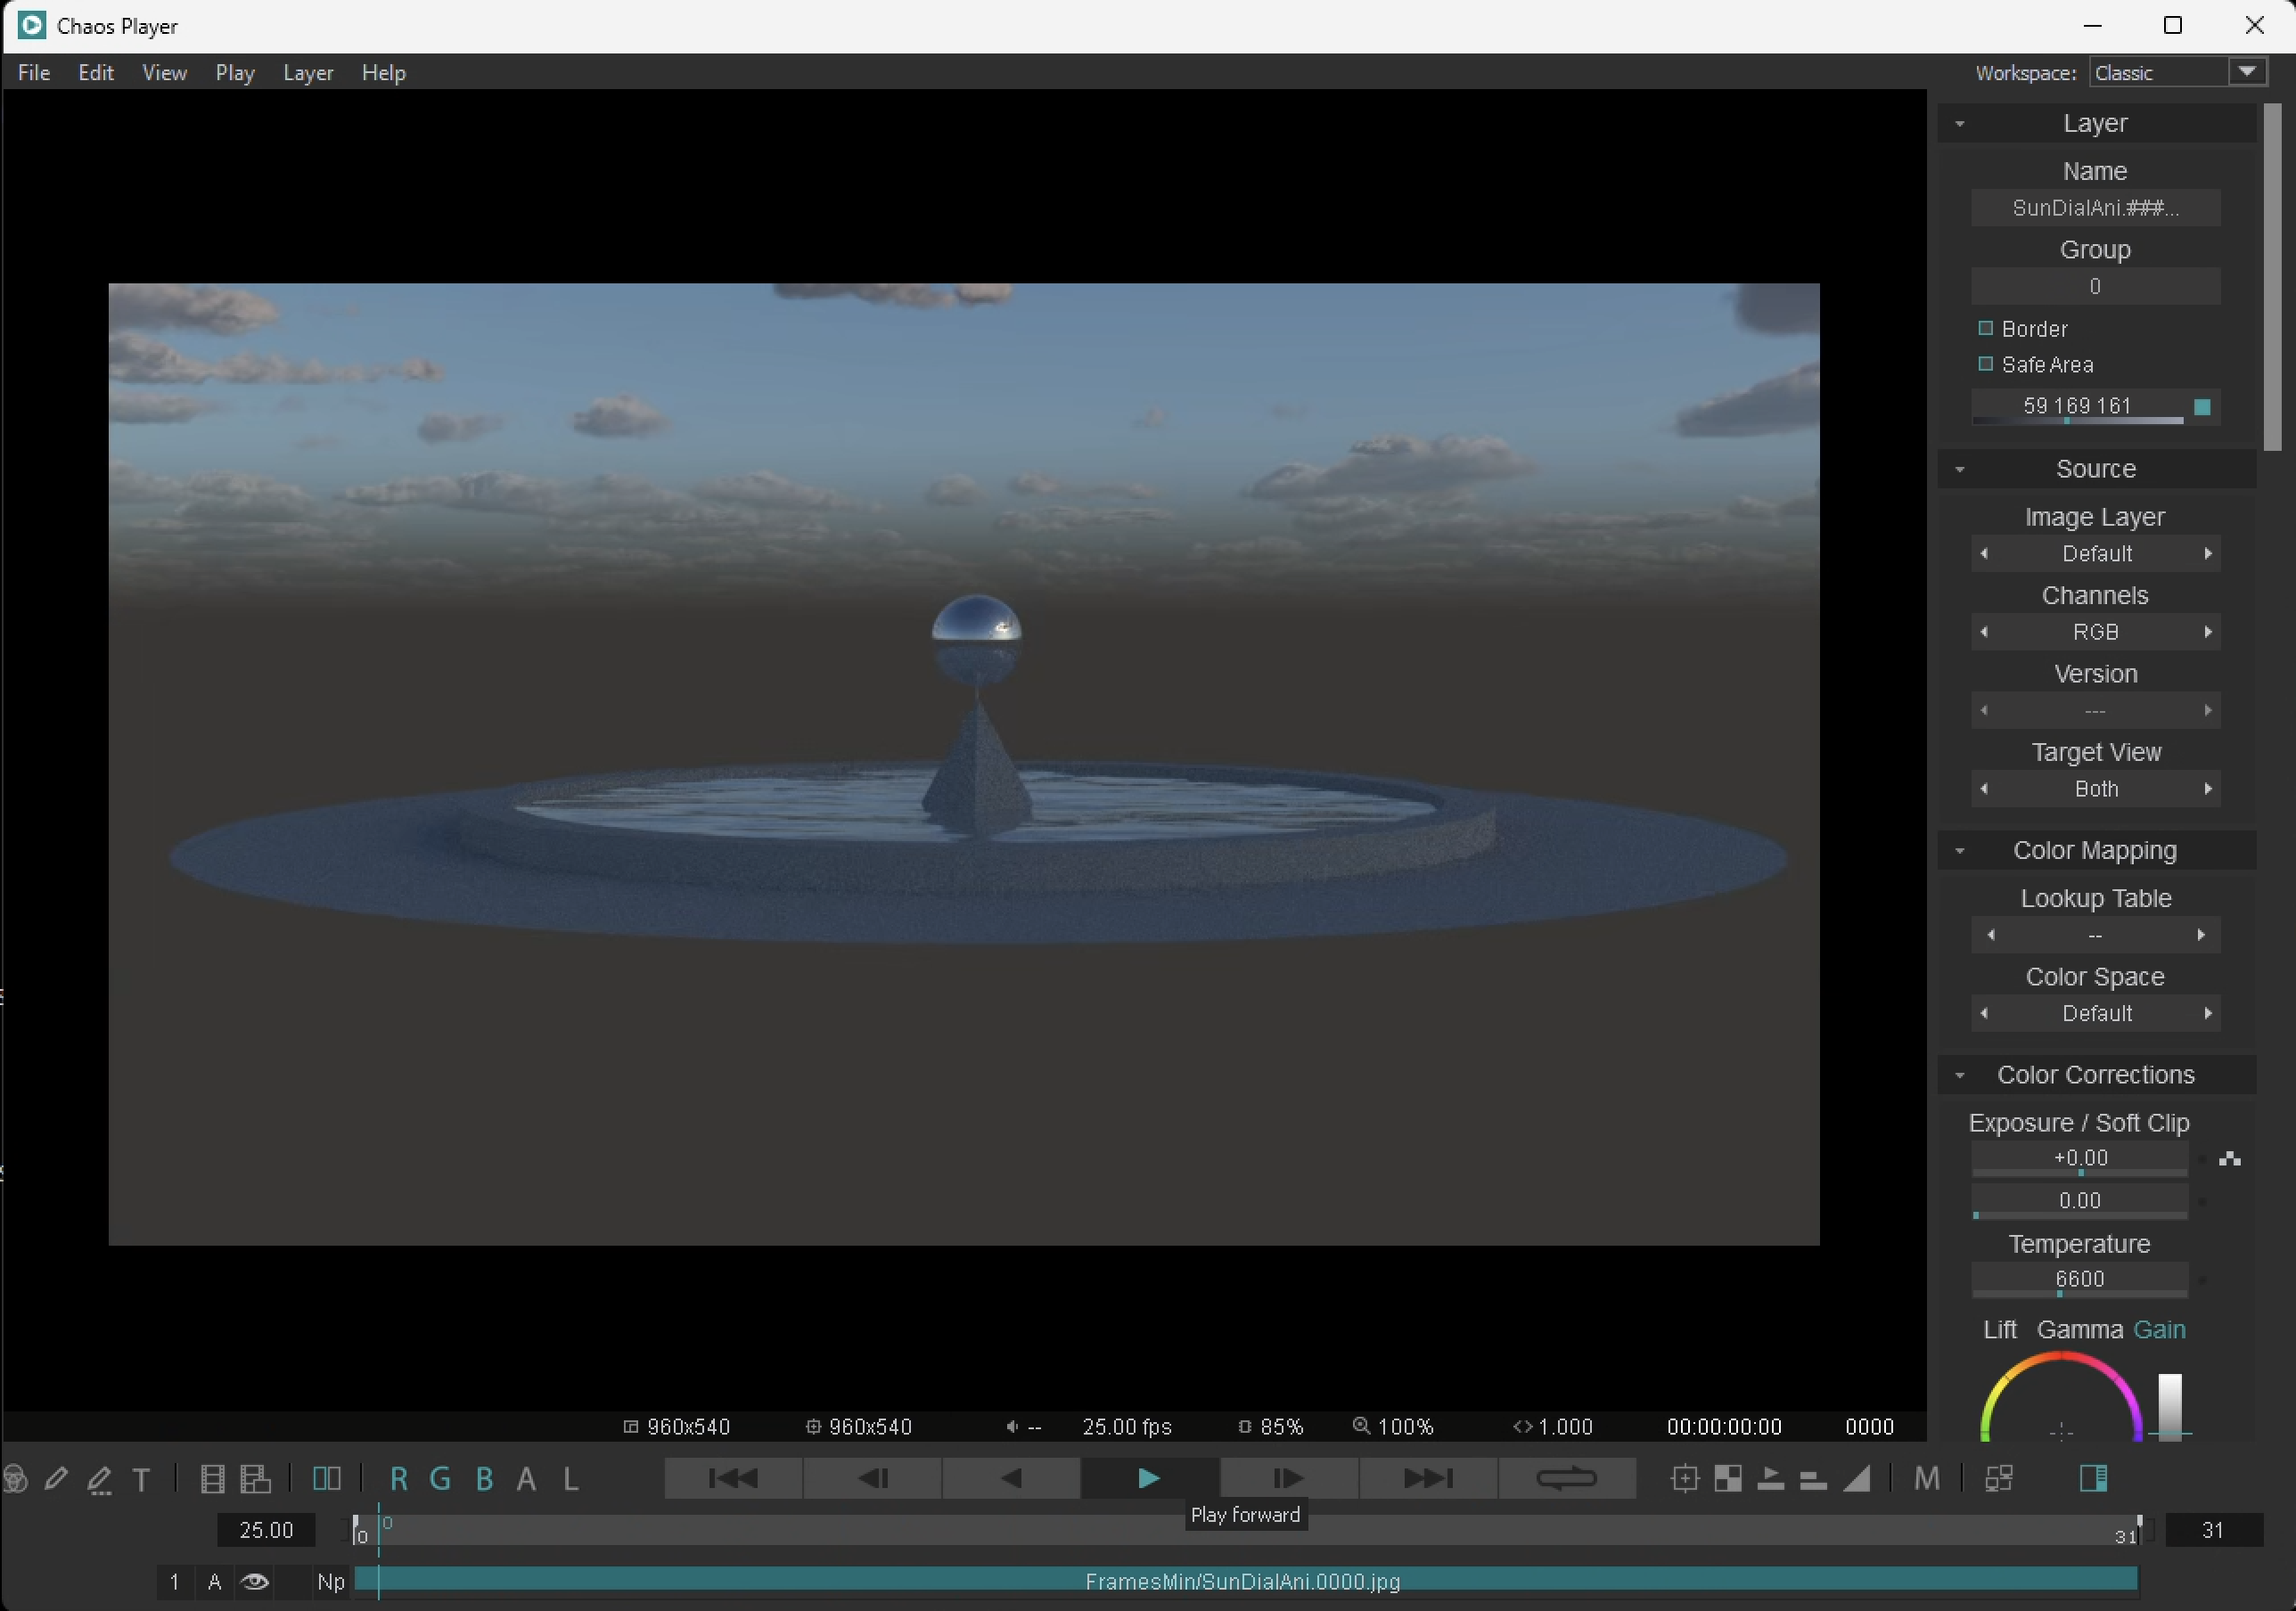
1. Type "Chaos Player" in the Windows search textbox are at the bottom of screen to launch Chaos Player. Once it is open, go to the File > Add Layer menu item to read in the frame sequence.
2. Once opened, use the playback arrow to see the animation.
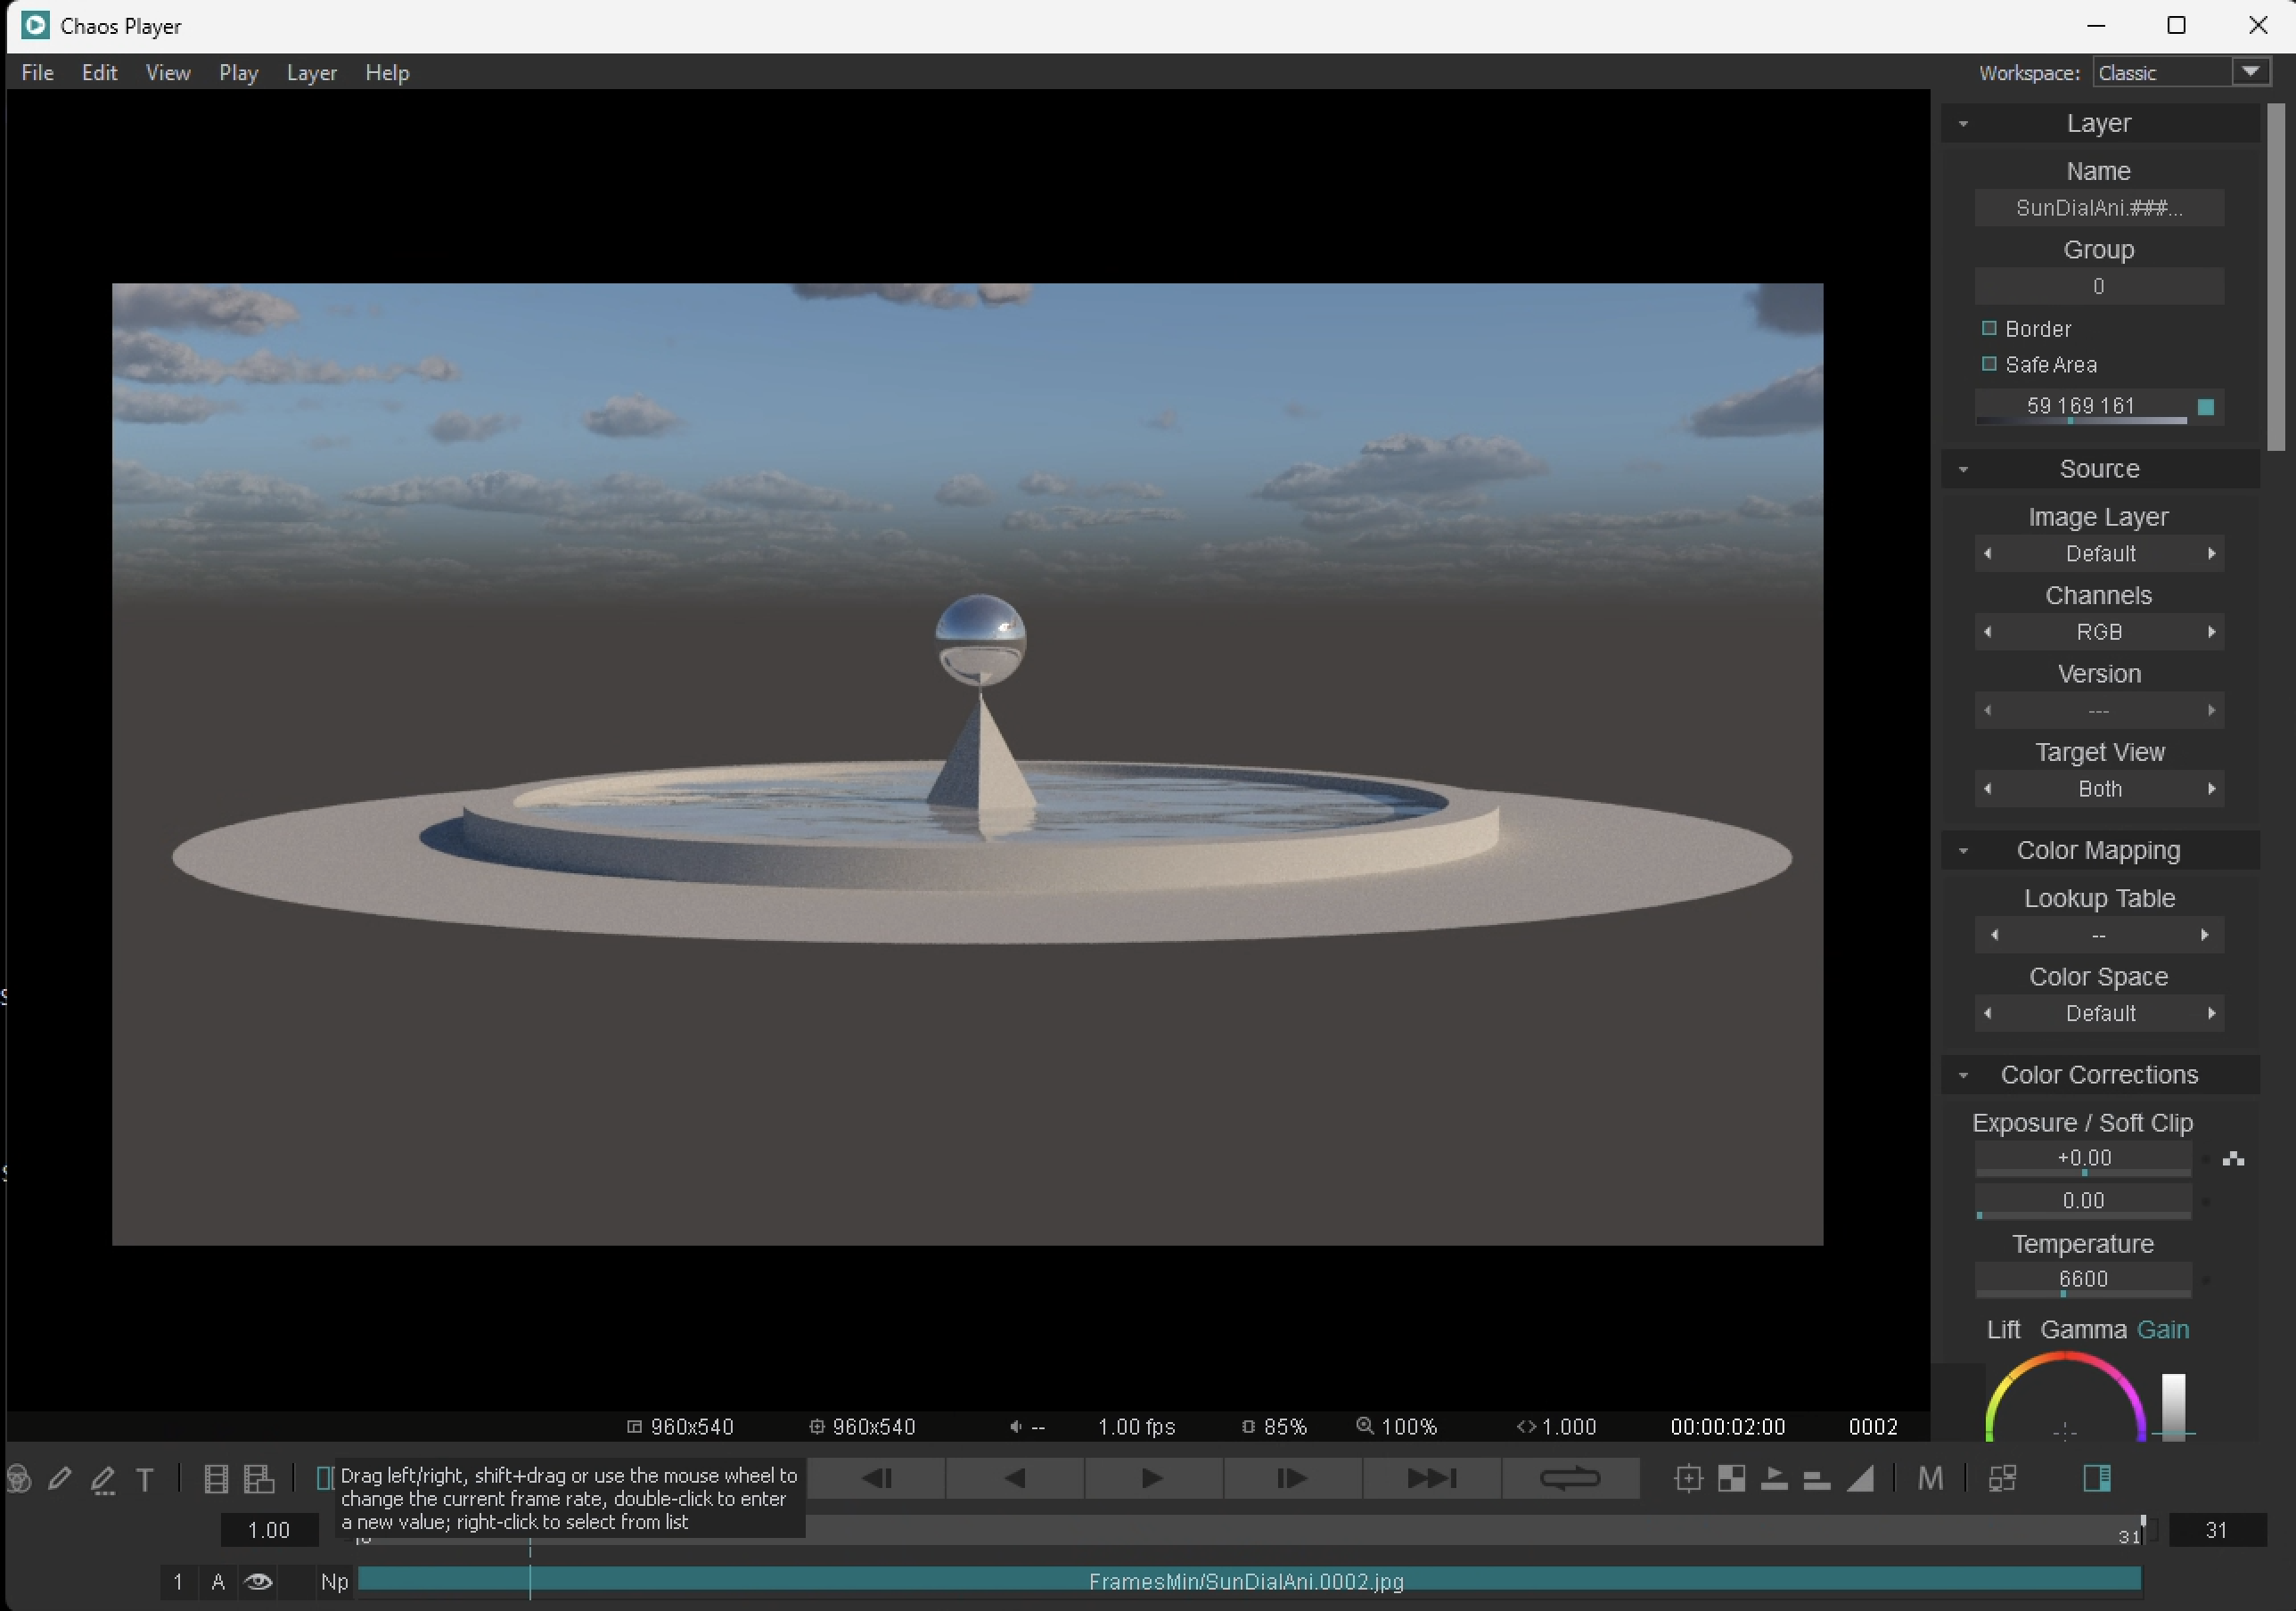
3. In this example note that the playback rate on the lower-left side of the above image above iindicates that it is set to 25 frames per second. To slow it down it can be set to 1 frame per second by changing the number from 25 to 1 as shown on the lower left-hand side in the image below.
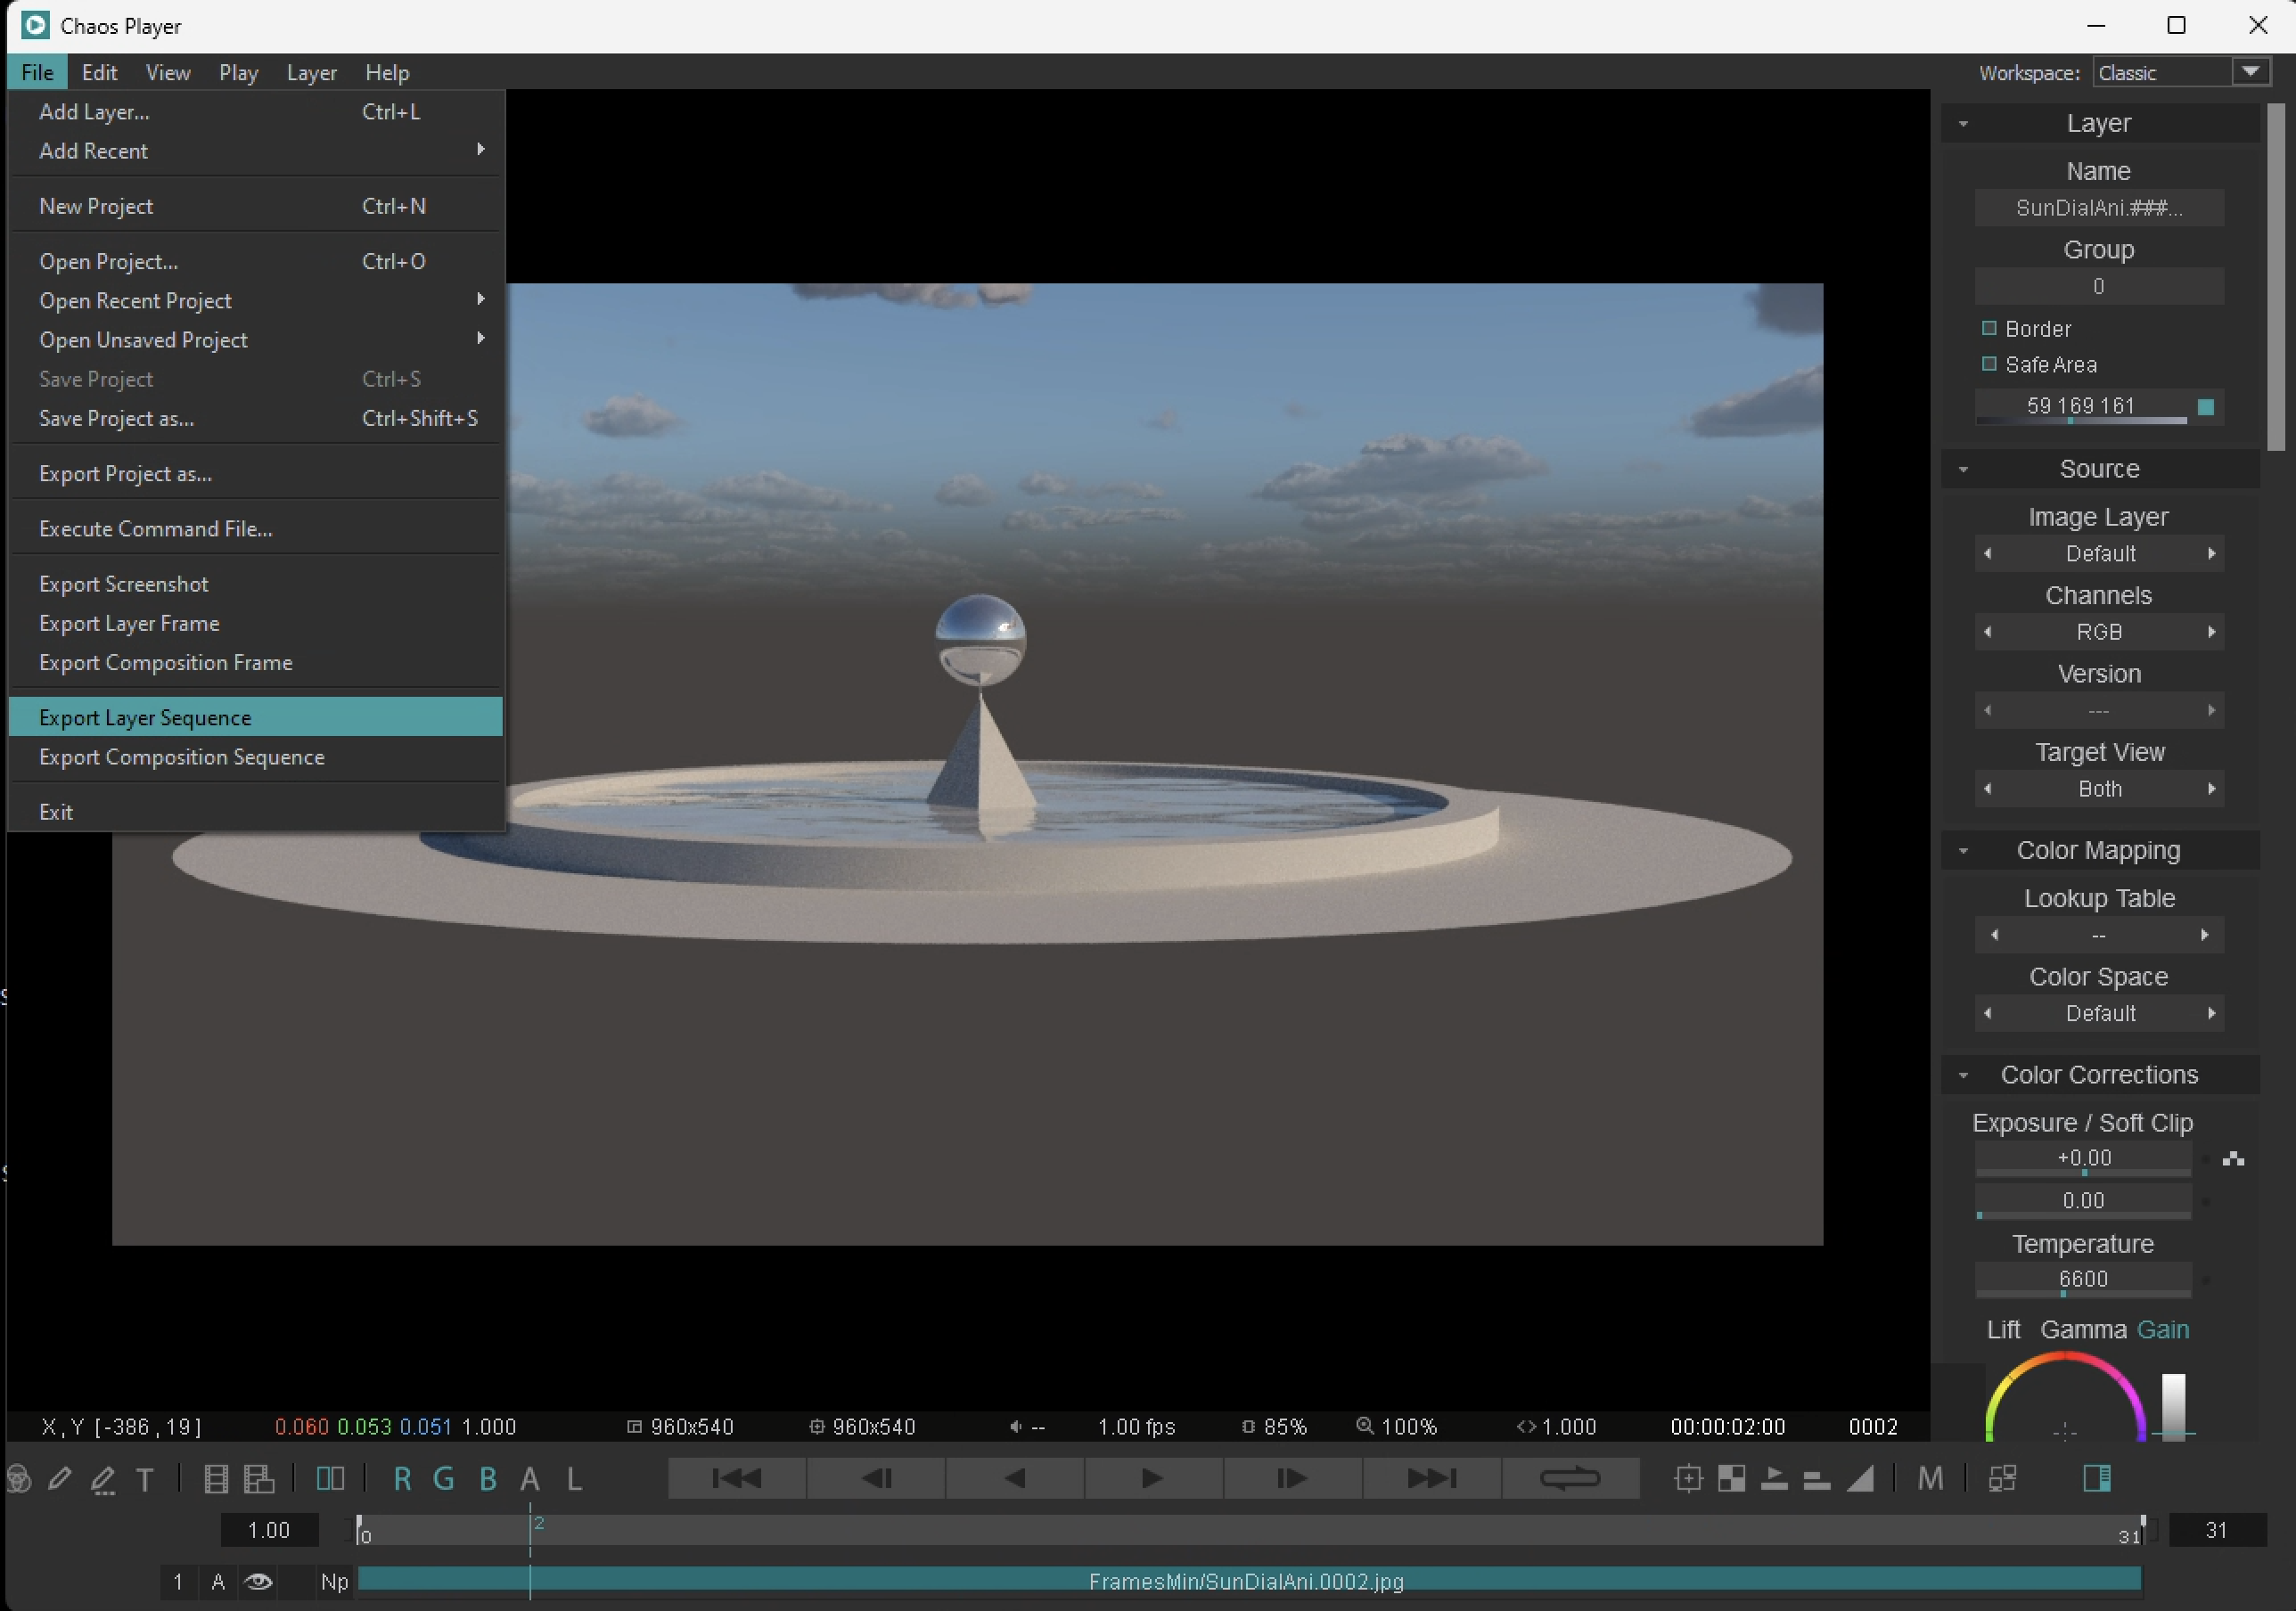
4. Finally, compile the movie into an mp4 movie file by using the menu item "File/SaveLayerSequence".
5. Determine the file name and save location in the dialog that follows.
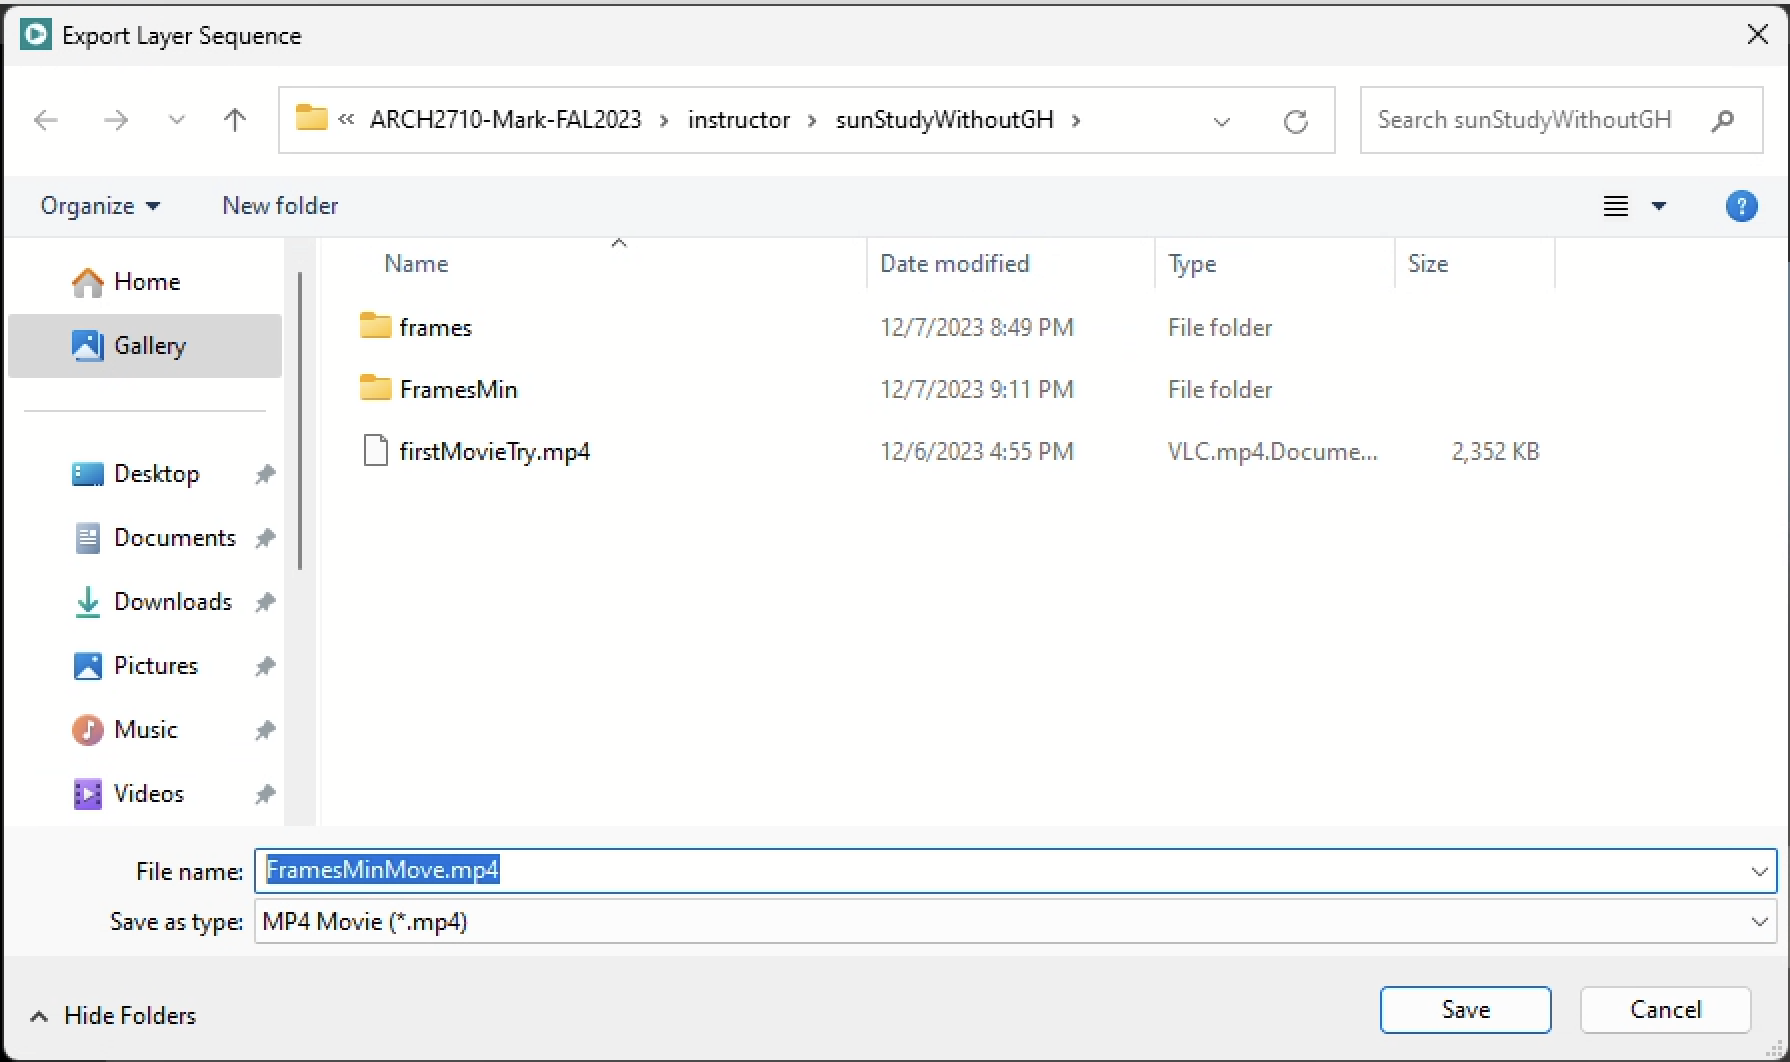
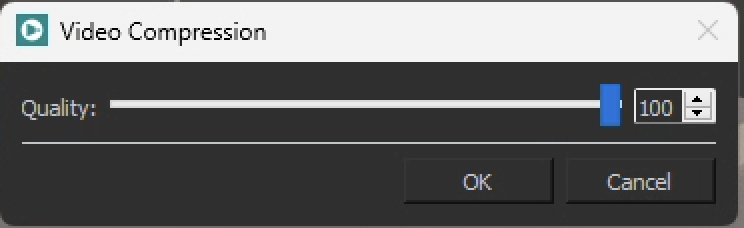
6. Finally, set the video quality and select the OK button.
Method B. Open Shot
1. Launch OpenShot and use the import tool (green cross sympol) to import the animation frames. This has been described previously in earlier workshop notes.

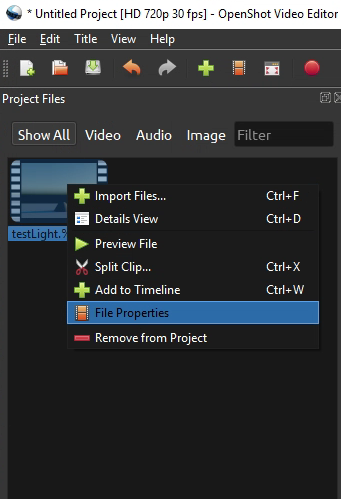
2. Right-mouse-button click on the media image in the "Project Files" area of the OpenShot editor and select "File Properties" to be able to change the frame rate.
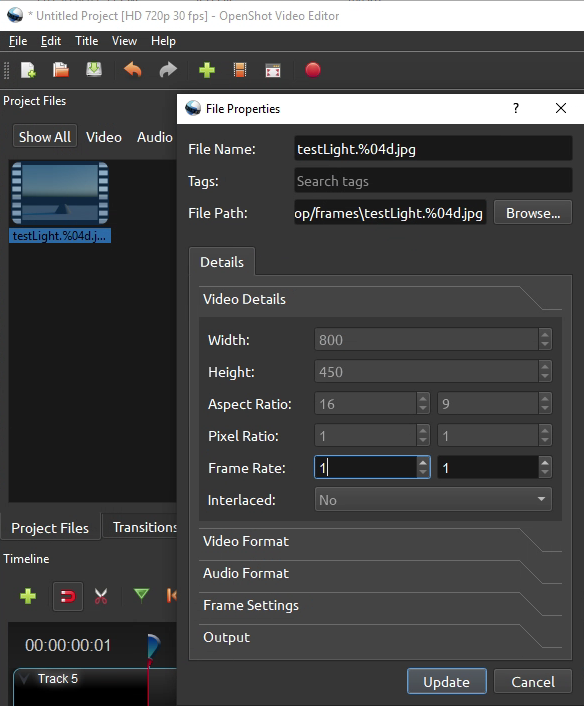
3. In the "File Properties" dialog box select the "Video Details" panel and change the "Frame Rate" to 1. Next, select the "Update Button" to confirm this setting.
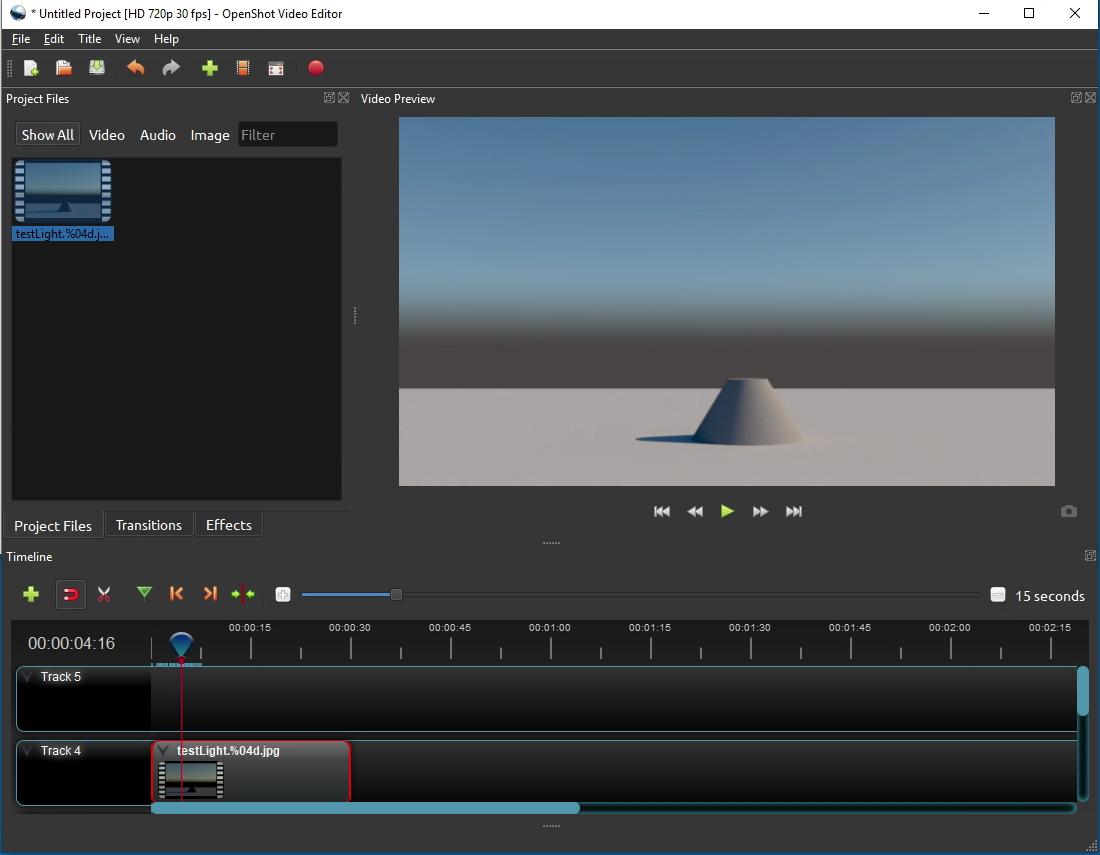
4. Place the updated media on Track 4 in the video editing timeline.
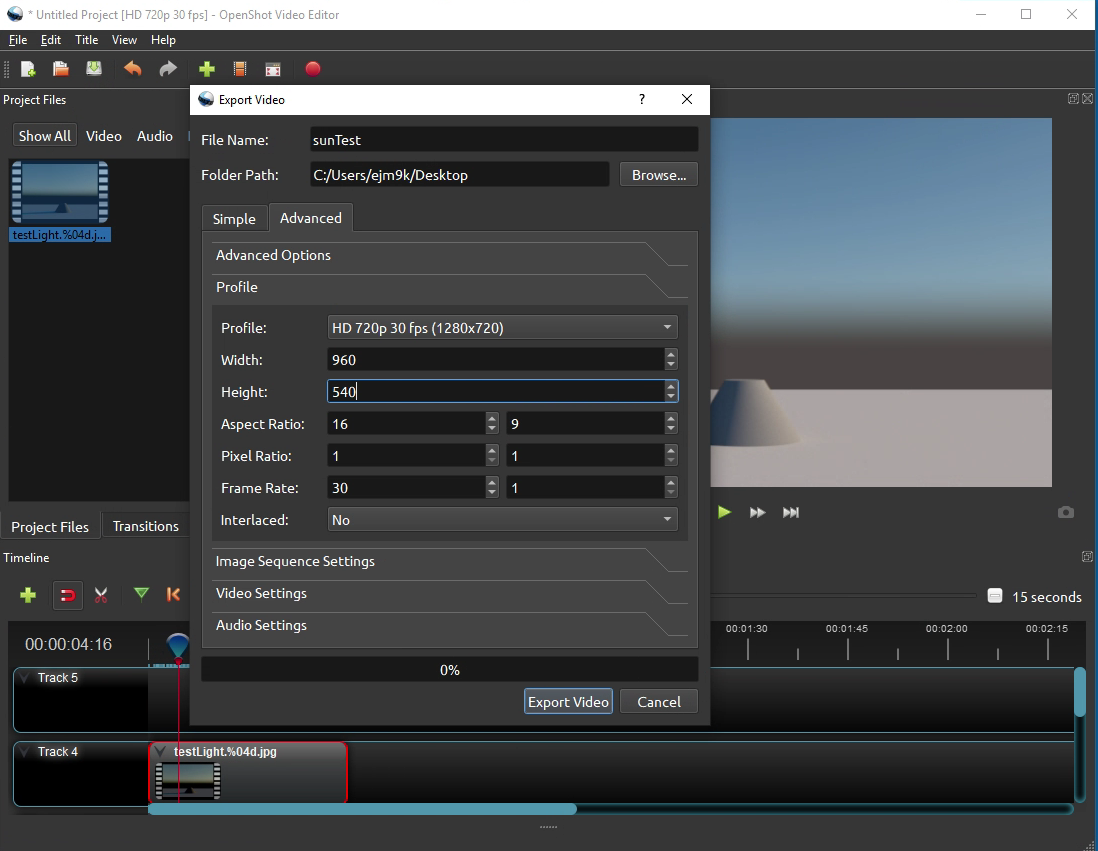
5. Setup the file record options as in earlier workshop notes. In this case we set into place the folder location for the exported mp4 movie file to be the the folder named "Frames" on the desktop . We set the image resolution in the "Advanced" tab and "Profile" sub-tab to be at 960 x 540 pixels. As you may recall from earlier workshops 960 x 540 pixels is the default original resolution of the "V-Ray Render" component.
The first animation below results from the sunlight moving at 1 frame per second for a total of roughly 30 frames =~ 30 seconds.
The second animation results from the sunlight moving at roughly 25 frames per second for a total of 900 frames =~ 36 seconds. The shadow and light movement is more continuous; however, it takes about 30 times longer to render!