Workshop 10 > THINKING IN 3-D _ MANIPULATING SOLIDS & TEXTURES, POST - PROCESSING IMAGES
Workshop 10 notes, Week of October
31, 2006
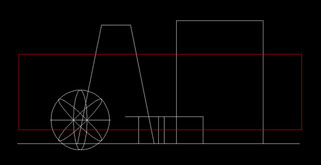
1. BUILD OVERLAPPING FORMS
- Draw a series of overlapping forms on a plane
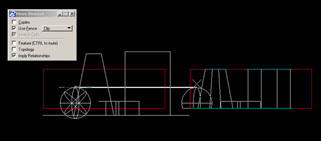
- Draw a FENCE from the front view window (make sure ACS PLANE LOCK is off, FENCE MODE>CLIP). This is isolating what's inside the fence from the outside.
- Select the MOVE TOOL and under the MOVE ELEMENTS DIALOGUE BOX turn on the option to use fence. Use your mouse to move the geometry within the fence.
- This is a quick boolean operations. What are it's architectural possibilities?
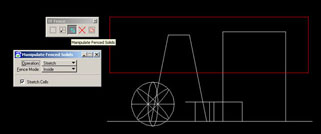
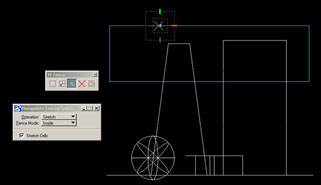
2. STRETCH FENCE
- <EDIT/UNDO>, Use the FENCE TOOL again, changing the fence mode to INSIDE, drawing a fence that encompasses the top edge of two of the elements.
- In the fence tool dialogue box, pull out the MANIPULATE FACE SELECTION. Change the operation to STRETCH, go to front plane, and pull with your mouse.
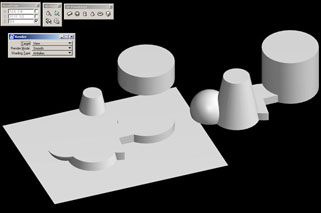
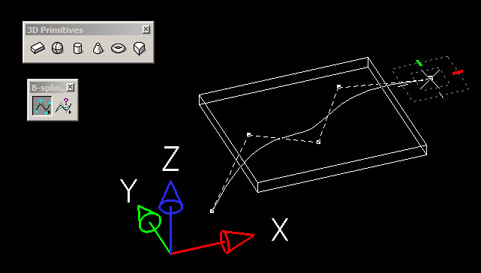
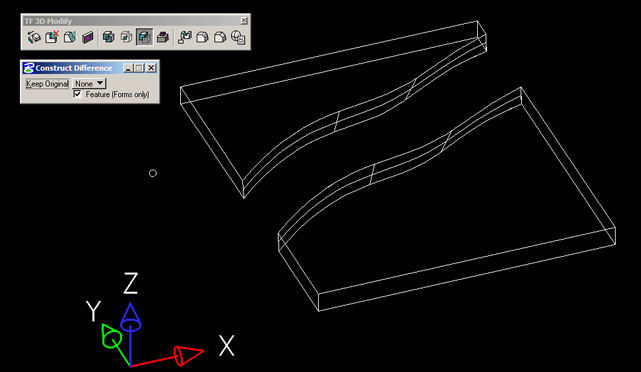
3. SUBDIVIDING SOLID WITH SURFACE
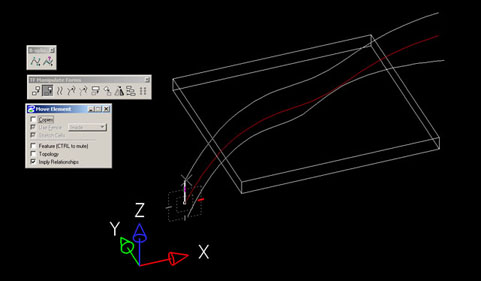
- Build a simple slab. Go to TOOLS MENU, select BSPLINE CRV MENU, place Bspline so that it goes through the base of the slab. Draw another Bspline near it and move it up in the air above the slab.
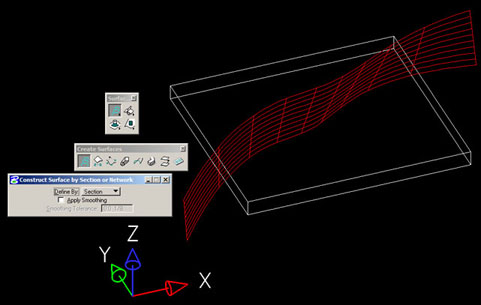
- Construct a SURFACE by section (first button on TOOLS>SURFACE MODELING>CREATE SURFACES)
- Now, using the Boolean operator (TOOLS>3DMAIN>3DMODIFY) select the DIFFERENCE operator. First, select slab, then the surface then click away to confirm. The difference operation has generated a subdivision.
3. GO TO PHOTOSHOP
- Create simple image file of 400x400 pixels with white background Add pattern by drawing in black simple lines with the paintbrush tool and/or adding noise by selecting filter>noise>add noise) save file as a jpg image. Enter microstation. Create Table, Palette and Material File making sure to save each one. In the new material, click on the top right checkered box to assign the photoshop image as a bump map (next to the word bumpy). In the dialog box, find the .jpg saved earlier. In the dialog box for the bump map, choose “invert” if you wish to switch the valleys and hills created by the black and white. The slider in the material box controls the intensity of the bump map from smooth to bumpy. Assign the material to an object and render. Raytracing with antialias is better to see the full effect than phong. To save the rendering, go to utilities>image>save. Name the file, make sure the correct view is selected and click ok.
- To view an image/rendering in microstation, go to utilites>image>display.