November 29, 2012
Workshop
19
Notes
COMPOSITE
EDITING
PART
I: Initiate the animation in Maya by
using render layers. Note: this first part repeats the same sequence in
workshop 16.
- Within Maya 2011, go to the
Surfaces module and create an plane
surface for
the ground and cone.
- Add a spot light, go to the
shadows Tab and
turn on Raytrace
Shadow Attributes.
- Go to the Dynamics module
and under the Effects menu, create a
“Fireworks” effect
placing the emitter above the cone.
- Go to the Channel Box/Layer
Editor (upper right hand corner),
select the Render tab,
and create two render layers. Using the standard technique, place the
light, cone and
plane on the first layer, and place the emitter on the second one.
- Turn on the first render
layer only.
- Go to the Render Settings
Window and setup a Maya Software
rendering. Batch render
30 frames. Using QuickTime Pro, compile the movie file as
“baselayer.mov”.
- Turn on the second render
layer only.
Go to the Render Settings Window and setup a Maya MentalRay rendering.
Batch
render 30 frames.Using Quicktime Pro, compile the movie file as
“fireworkslayer.mov”.
PART II: Combine the two
animations in Composite 2012.
- Open Composite 2012. Select
File/New and and initiate a new
composition file
on a local temp drive on a Windows Computer under a folder created with
your name
(t:) or an Apple Computer (temp).

- Use the create button to
build the project file.
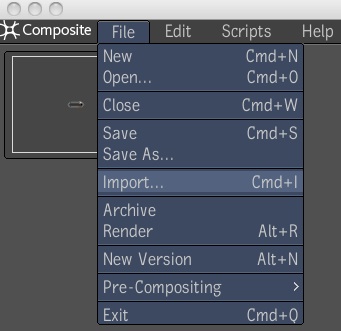
- Go to the File import tool
and import the movie files for the
first and second render
layers, “baselayer.mov” and
“fireworkslayer.mov”.
- In the dialog box, find the
directory where the files are
located, select and import them
into the Composition window.
- Select the Output icon and
the icons for the imported files, and
select the “L” key to
organize them within the window.
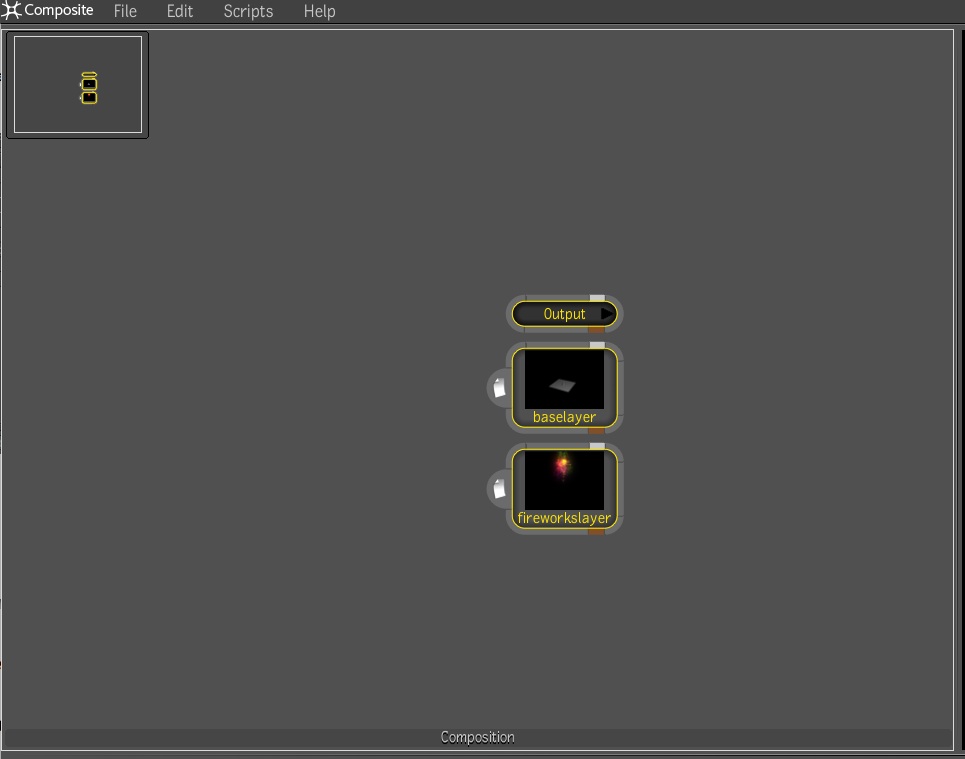
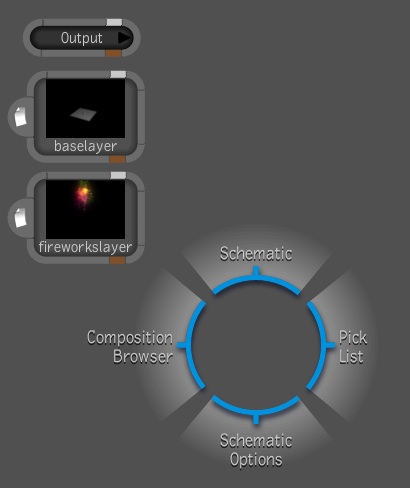
- Within the Composition
Window, hold down the middle-mouse button
to launch the gate
menu and select the “Pick List” through the east
gate.
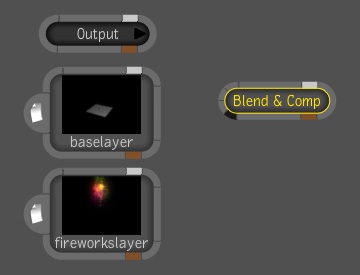
- On the far right-hand side
of the screen, go to the
“Composition” category and then drag
the “Blend & Comp” tool on the bottom of
the dialog box
to the Composition Window.
- Re-arrange the icons and
move the Blend & Comp icon to the
right of the baseLayer
icon, and draw a connection arrow to the “Back”
input
channel.
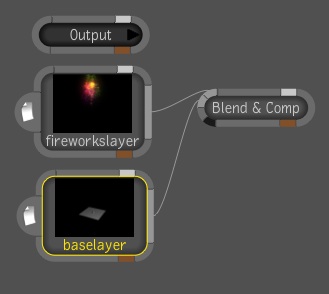
- Similarly, draw aconnection
arrow from the fireworkslayer icon to
the “Front” input channel.
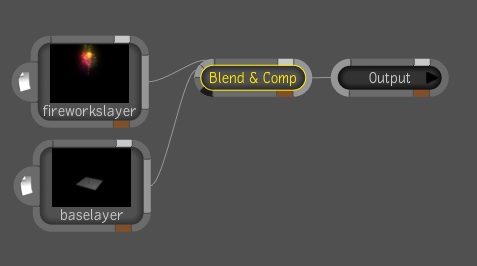
- Next, draw a connection from
the Blend & Comp icon to the
Output icon, and note that
the fireworks only will be visible in the output image screen on the
right hand side.
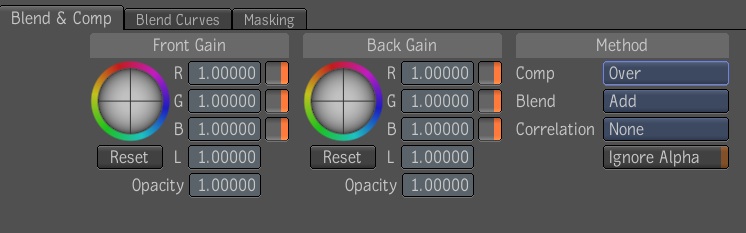
- Select the Blend &
Comp icon, and in the lower-left hand
dialog box also select the
“Blend & Comp” tab. Go to the
“Method” area
on the right-hand side and change the
Blend” type to “Add” and the
“Comp” type
to “Over”.
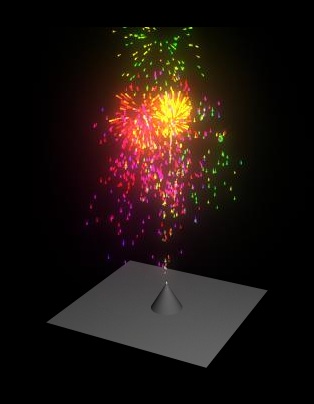
- Note that the Composition
Output window now depicts the fireworks
over the ground
plane and cone.
- Now select the Output icon,
and in the lower dialog box go to the
Output tab, and select
the desired format (try NTSC for practice).
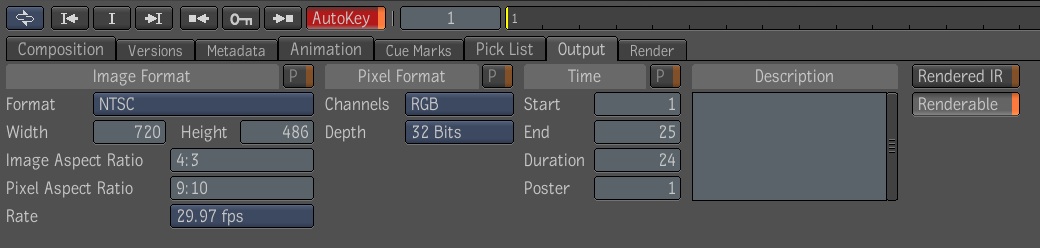
- Next select the Render tab
in the same dialog box, and through
the “File Name” option
determine the pathway to the render output files. Also, change the File
Format to “png”.

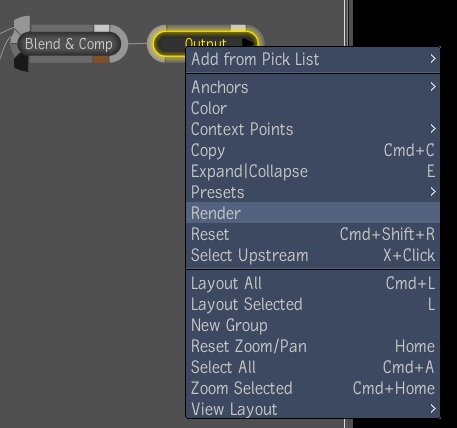
- Finally, right-click on the
Output icon and choose the
“render” option, and then the
“Start” button to generate the
“png” files.
- Finally, open QuickTime Pro
and compile the PNG files into a
single QuickTime movie.