November 27, 2012
Workshop 20
Notes
Blend Shapes, Set Driven Keys, and nParticles
PART
I: Blend Shapes
Part 1 of this workshop is developed after the on-line tutorials provided in the Robinson Text. For a more complete treatment from within UVA, go directly to the on-line reader and review pages on the Bend Deformer beginning at page 321.
- Goto to the
Surfaces module and create a sphere.
- Make a copy of the second sphere. From the " Edit Menu>Delete
By
Type" option, select and delete the history of second copy of the
original sphere. Make some changes to the shape of the thirds sphere.
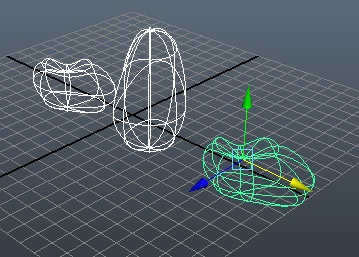
- Go to the Animation Module, select the second sphere, shift-select the third sphere,
shift-select the first sphere , and then to the menu item "Create Deformers>Blend Shape"
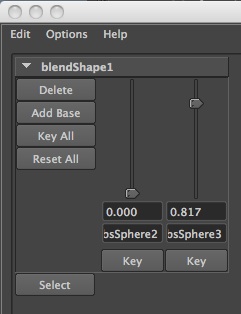
- Choose Window > Animation Editors > Blend Shape.
Go to the blend shape you want to animate, move the target
slider, adjusting the weight of each blend shape to create the
transformation desired in the first shape.
Note that the original shape is deformed accordingly.
- Use the "Key" button to set the added shapes with the
desired weight at specified frames with the animation.
- Place the second and third shape on separate layer and turn it
off.
- Playback the animation.
PART II: Use of set Driven Keys
- Create a sphere and a cone.
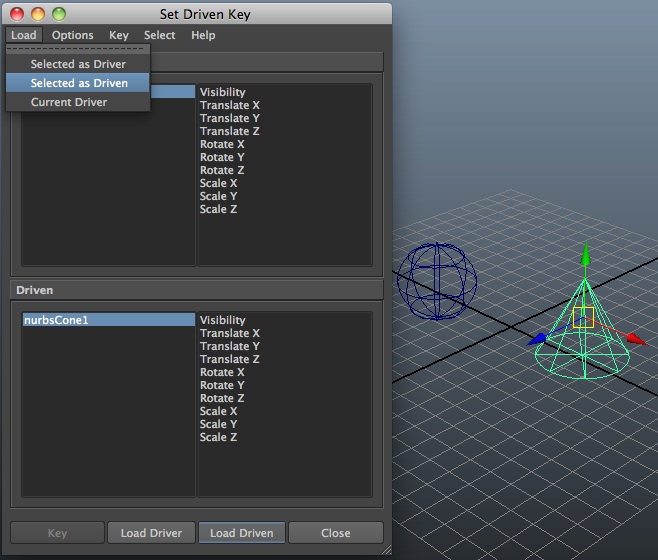
- In the Animation module, go to the menu sequence Animate
> Set Driven Key > Set
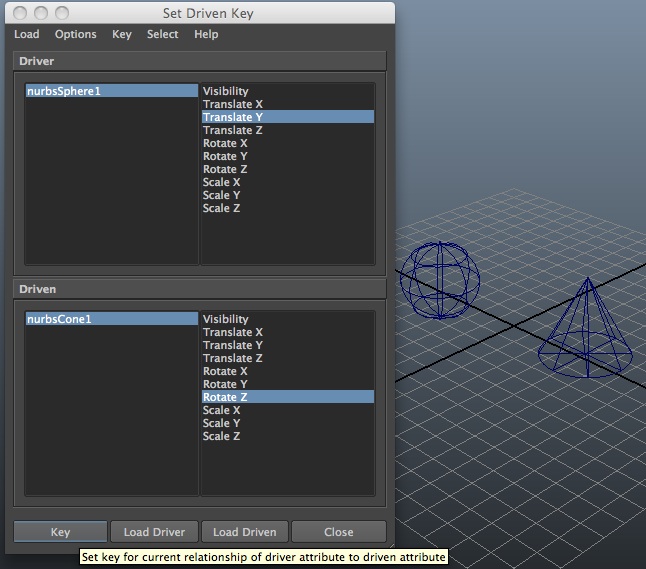
- Select the sphere, and in the "Set Driven Key" dialog box, go to
Load>Select as Driver.
- Select the Cone, and in the "Set Driven Key" dialog box, go to
Load>Select as Driven.
- Now, connect parts of Drive list with parts of the Driven list.
For example, select the "Translate Y" attribute of the sphere with the
"Rotate X" attribute of the cone, and set the "key" for each one.

- Move the sphere up and rotate the cone around the Z axis, and set
the key again.
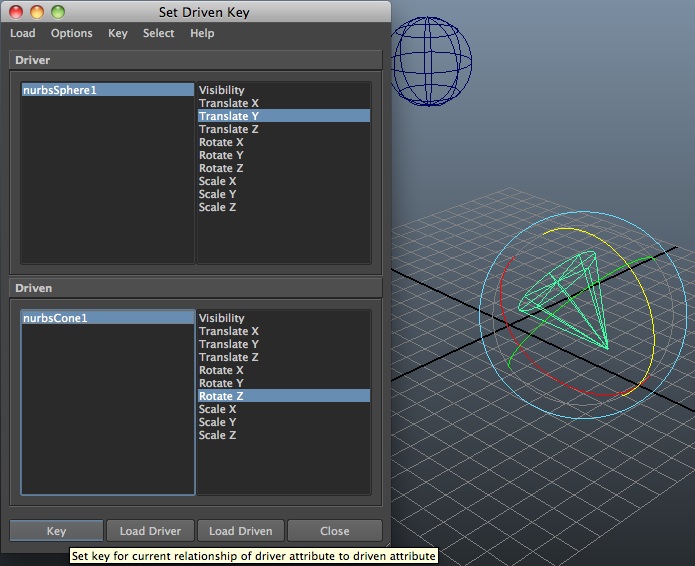
- Now, move the sphere up and down and the cone is adjusted
accordingly.
- Finally, key frame the sphere at frame 1, frame 12, and frame 14
and three different positions along the Y axis from its first location
in step 5 to its final location in step 6, and playback the animation.
Note that the cone is animated as well.
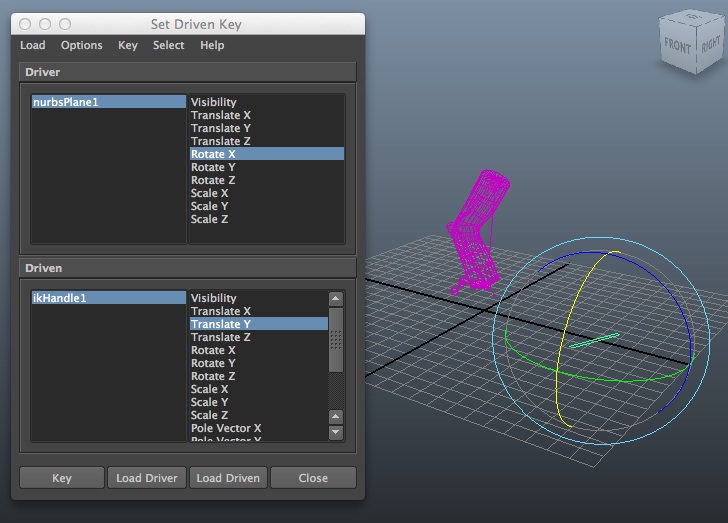
- Similarly, one can rig a character using the same technique. Using the same methods, the illustration below is developed a with horizontal surface plane rotating around the "X" axis as a driver, and the IK handle on the leg of a skeleton moving up and down along the "Y" axis as the driven. Thus, rotating the horizontal plan drives the up and down motion of the leg.
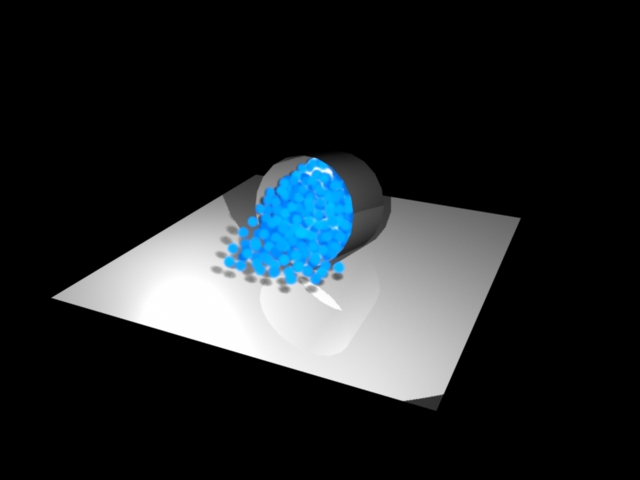
PART III: nParticles.
nParticles are capable of self-colision, and therefore can simulate
liquid bodies.
- Make a polygon object that looks like a cup or pail, such as by
starting with a polygon cylinder and removing the faces on the top
surface of the cylinder.
- Go to the nDynamics module.
- Go to menu item nParticles>Create nPartices > Create Emitter
- Move the emitter so that it is inside the cup and above the cups
bottom surface.
- Select the cup's geometry, and got to menu item nMesh>Create
Passive Colider
- Select the particles, and go to the menu item Fields>Gravity
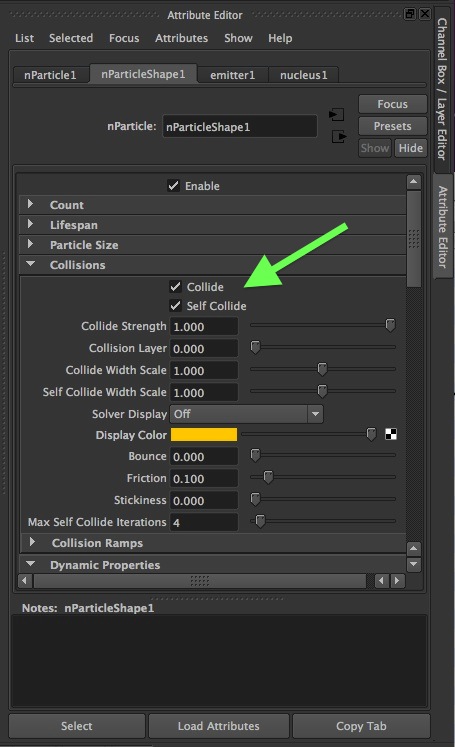
- Select a particle, go the the attributes editor icon, open the
nParticleShape1 tab, go to the "Collisions" section, and turn on the
check-box for "self-Collide.
- Go the particle size tab, and adjust the radius.
- Play the animation for 500 frames and see what happens.
- Place a polygon plane below the cylinder and make it into a
passive collider.
- Finally, key frame the cylinder spilling over, and see what
happens to the particles.