September 27, 2012 Workshop 7 Notes (DRAFT)
MOTION CAPTURE
This set of workshop notes covers steps demonstrated at the Robertson Digital Media Lab. A more extensive set of tutorial materials which go well beyond the scope of the workshop is also available from the animazoo web site at http://www.animazoo.com/downloads/tutorials.
- MOTION BUILDER
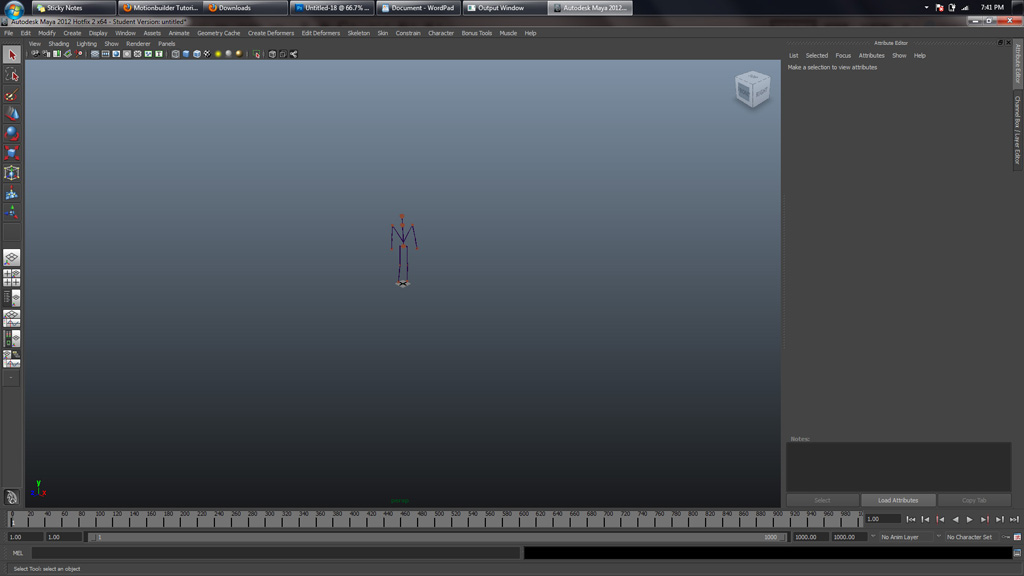
Open Motion Builder
Dock the window at the bottom of the screen by dragging until it snaps.
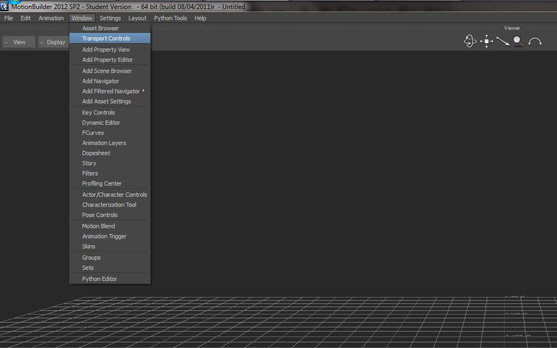
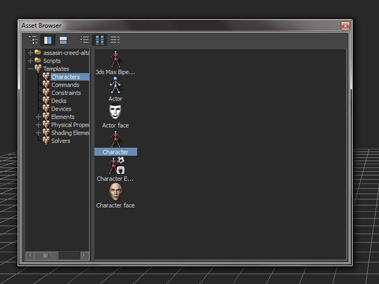
Go to Window -> Asset Browser (see Figure 2) -> Templates -> Characters ->

Choose a character and drop it on the grid [for the moment, you cannot see it, but the data has been inserted into your scene] (see Figure 3)
Close the Asset Browser window
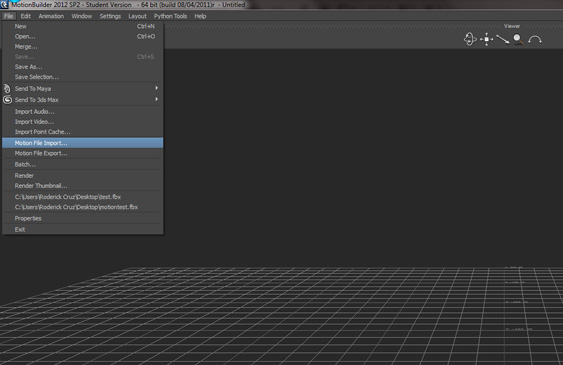
Go to File -> Motion File Import -> Find your .bvh file. Leave import settings at default and then import. (see Figure 4)
Go to Window -> Add Navigator
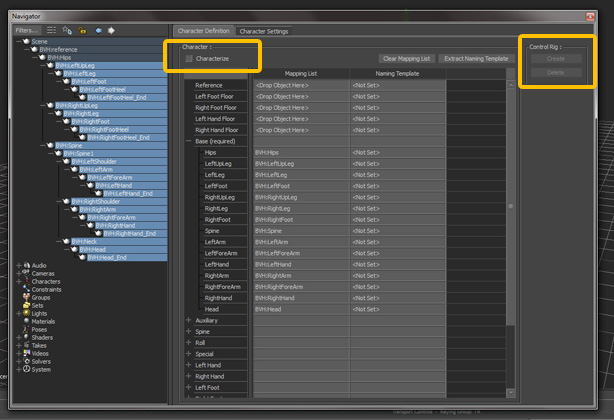
Choose Character Definition (Figure 5)
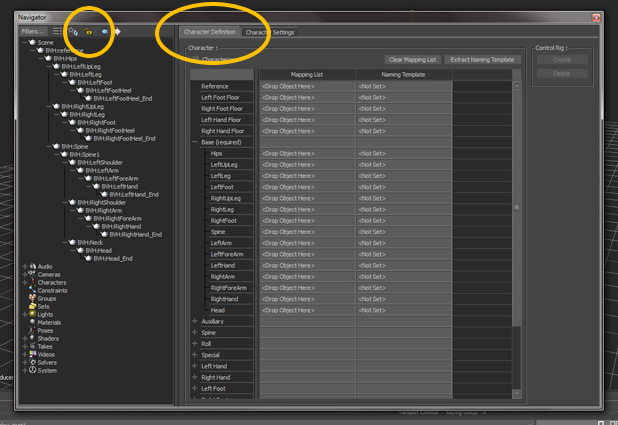
Lock the Character Definition tab (by clicking padlock symbol to the left)
Expand Base Node on the right (Figure 6)
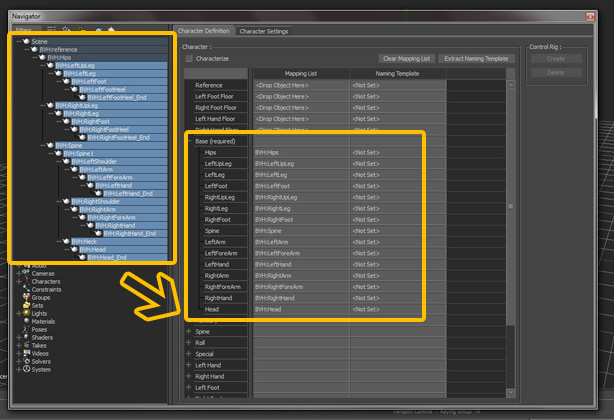
Expand Scene Nodes on left completely
Drag and coordinate the information from the left to the right so all values of the Base Node are not null.
Click Characterize, and in the dialogue box, choose Biped (figure 7)
Under Control Rig, hit create -> Use FK/IK
Now, close the navigator window
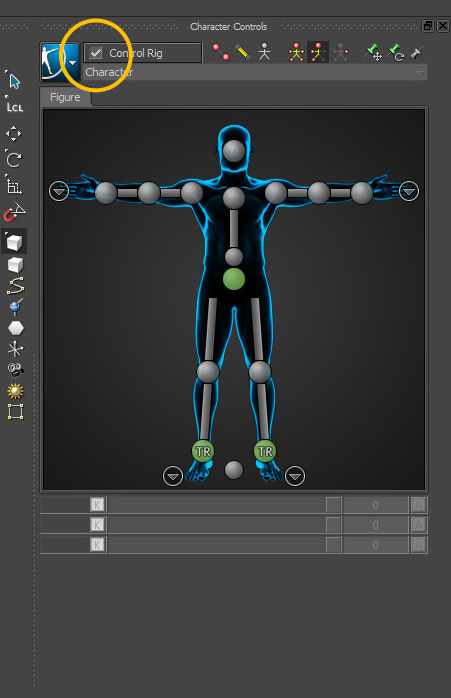
Go to Window -> Actor/Character controls (Figure 8)

-> Dock this to the right side of the screen (drag to the right until it snaps)
-> Turn off the control rig by unchecking it (Figure 9)
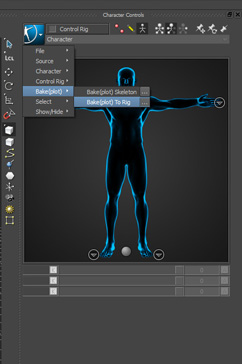
Click a blue-person-icon -> Click Bake (plot) ... Bake to rig. (Figure 10)
Then, file save as, choose an fbx file extension.
- MAYA
File -> Import -> Your fbx flie
(Probably zoom out to get your rig in perspective) (Figure 11)
Import your character into the scene (i.e., the thing you want to map your captured motion onto)
Set to frame 0 -> should have a 'T-pose' stance
Line up the model with the IK points
Window, Outliner -> Expand all node in FBX Root and Character:Reference
-> Select ALL (Character: Reference, Root and the Thing you're mapping onto) (see Figure 12)
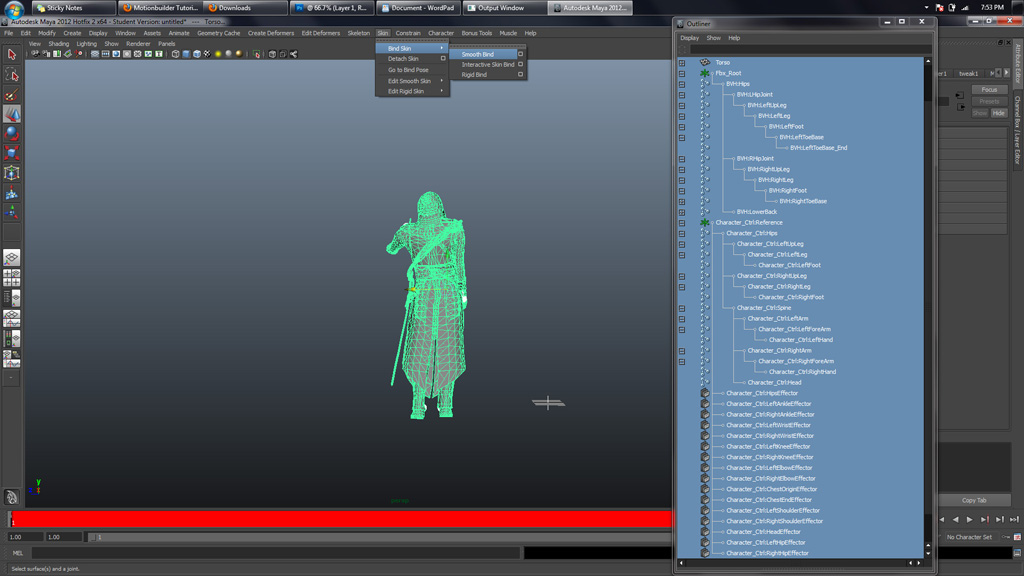
Within the animate module, Select Skin, then click Smooth Bind.
Your Character Should be moving now.