October 23, 2014 Workshop 10 Notes
DYNAMICS, PARTICLES AND COLLISIONS
These
workshop nots were developed after Robinson,
Chapter 18, Dynamics.
1.
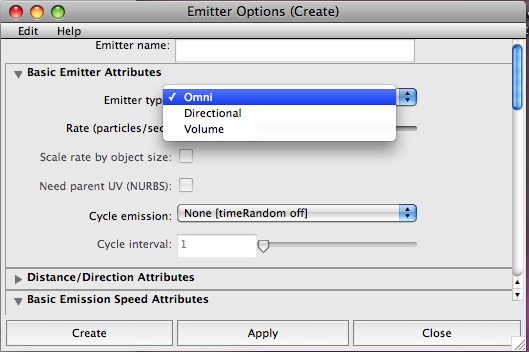
Emitter types: (control in channels box)
Omni – all directions
Directional – one user specified direction
Volume – emitted from a user specified shape
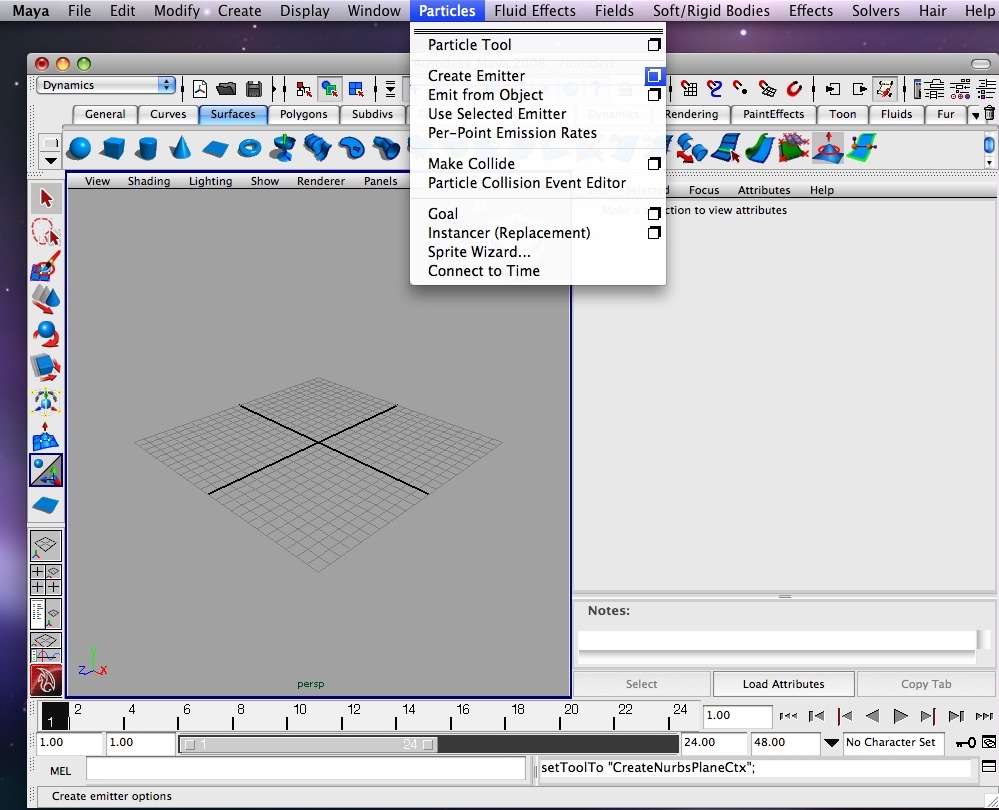
Dynamics: Particles Menu -> Create Emitter (checkbox)
Three types:
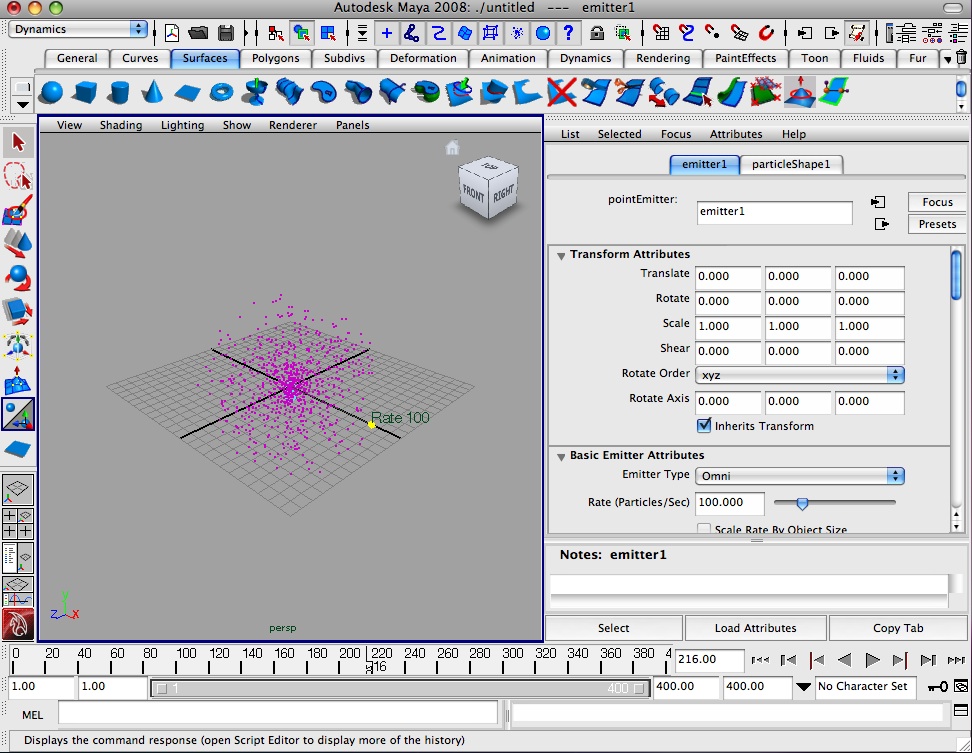
Omni Directional type:
Lifespan mode under particle shape tab: (control in attribute dialog box)
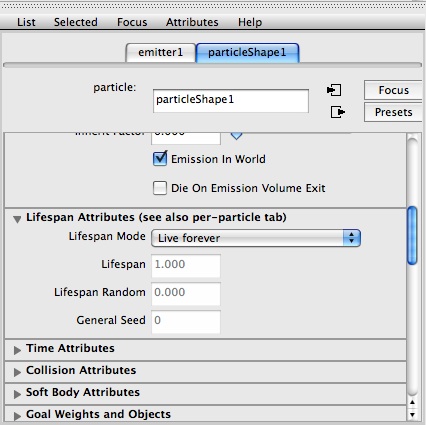
Live forever
Constant (control time length)
Random range (up to time length)
Controlling
rate:
Change to directional type emitter in channels box.
Use show manipulator tools, select yellow square to increase rate(works
with other types as well).
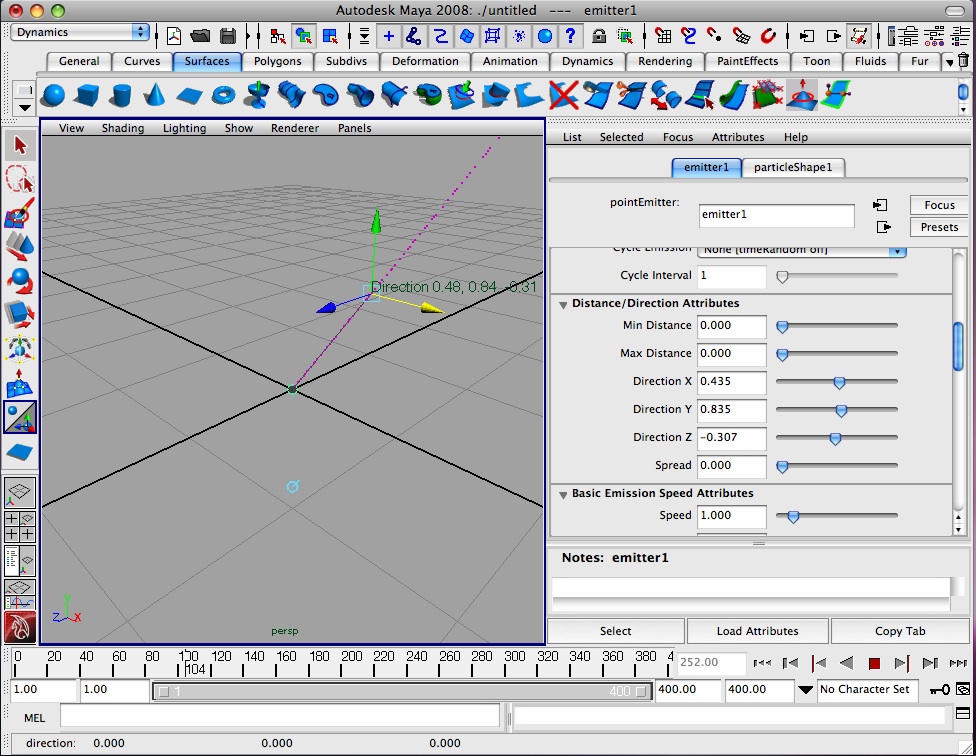
Adjust aim direction by selecting icon of input node ring for direction
and using manipulator tool
Use icon again to adjust speed.
Use icon again to adjust spread
2.
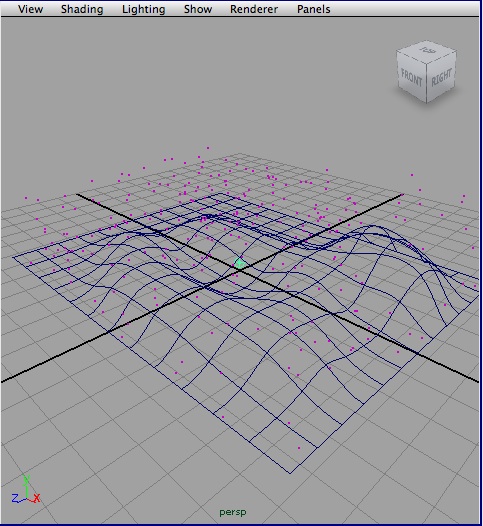
Emitting particles from an object
Make a simple ground plane of varied surface topology (with sculpt tool)
Use emit from object and set type to surface, see emission
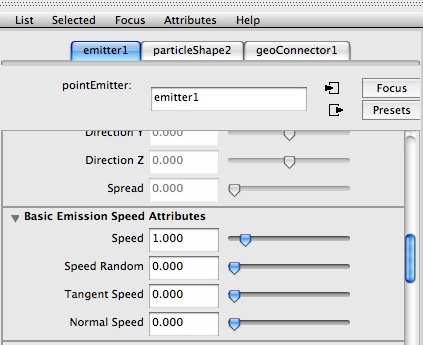
Edit
Basic Emission Speed Attributes of emitter
(select emitter ctrl/ctrl-a), note tangent and normal speeds
Change normal speed to “0” and particles stay on
surface.
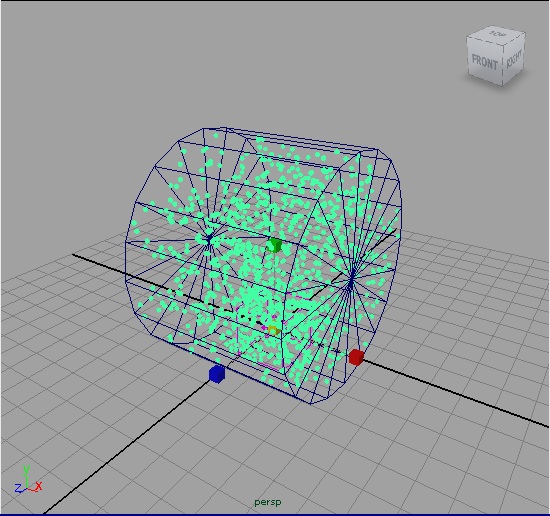
Create cone and instance cone (select cone, select particle, menu particles > instancer replacement)
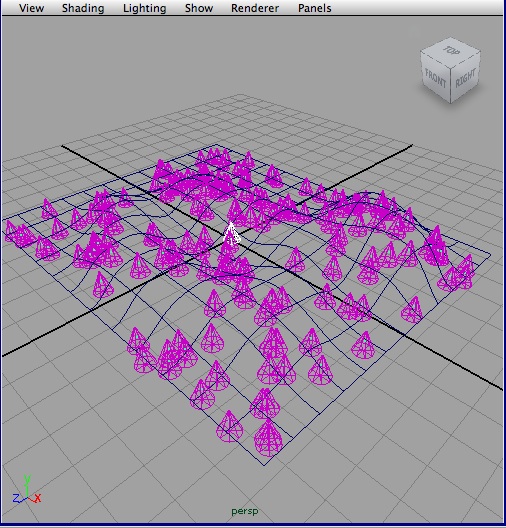
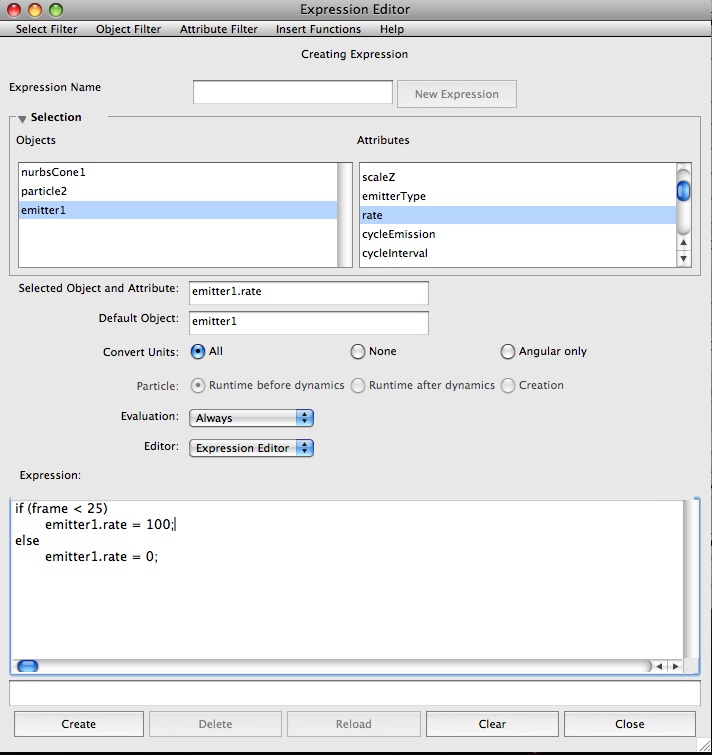
Keyframe
rate to drop off at 0
if (frame < 25)
emtter1.rate = 100;
else
emitter1.rate = 0;
3. render
types
Select a particle type
Open render attributes section for particle shape
Select (s/w) cloud
Select Add Attributes for Current Render
Change radius from 1 to 3
Render the current frame.
Can modify particle cloud color to change rendering of cloud.
4. Hardware render types:
Points, radius adjustable.
Multipoint – radius of points, radius of cluster, multi-count dots per cluster
Streak, adjust size, line width, tail size and tail fade
Multi-streak – like streaks, also adjust cluster multi-radius and multi-count.
Sprite – can have an image texture map assigned to them
Spheres – can assign shaders to a sphere (no transparency)
Numeric – shows numerical values.
5. Software render types
Blobby surface, spheres can melt into one surface, attributes include radius and threshold (how much particles blend together, try 0.99)
Cloud - spheres that become transparent the further you move from their center, render with particle cloud shader, adjust color, density
Tube – cylinders that grow, define expansion limits with radius0 and radius1 limits, size = length (try low different 1 and 2 radius values and long length … get meteor form)
6. Fields (grab particle and apply field (not to emitter but particle)
Air:
three types
Wind: specified direction
Wake: disturbs particles and moves them along
Fan:
45 degree spread simulating a fan
(try
adjusting speed, attenuation, magniture)
Drag: slows down or adds friction. (try + and – values on magnitude)
Gravit:y real world gravity impact
Newton – particle attractor (try + and – values on magnitude)
Radial – attracts or repels particles in radial form.
Turbulance – disrupts position of particles (try magnitude and attenuation)
Uniform – similar to air, pushes particles in a direction
Vortex – spiral force on particles
Volume axis – effects particles within a shape (try magnitude and away from center attributes, move box to new location impacts particles.
General
attributes:
Magnitude – amount of force on the field
Attenuation – dropoff on scale of 0 (none) to numerical value.
Speed attenuation – controls speed impact on particles
Direction – x, y, z direction of force
Use Max Distance – sets max distance of force impact
6. Collisions
Create emitter and apply air field. Create nurbs plane with U and V set to 10 and place below emitter (polygon surfaces not effective for collisions). Select particle and ground plane and under particles menu choose make collide (particles are pushed along the surface by the air field)
7. Collisions & Rigid bodies:
Create
sphere and convert to active rigid body
subject to air field in negative z direction.
Create plane and convert to passive right body below sphere.
Adjust values of rigid body mass and bounciness and see what happens.
8. Soft-body Dynamics
Soft
bodies settle into shapes especially as defined
by target objects.
Create NURBS sphere, keyframe it a frame 1 and then goto frame 40 and
locate it negative -10 in y. for a second keyframe.
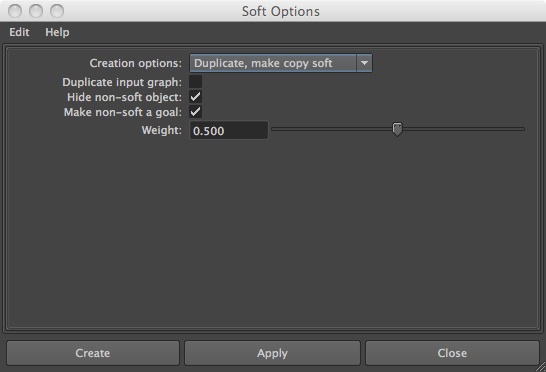
Go to menu item Soft/Ridid Bodies/Create Soft Body to create a soft
body from the sphere and set the options box. Within the
dialog box that follows:
* duplicate
make copy soft with hide non-soft object
* make non-soft a goal
Play and notice minor wiggle.
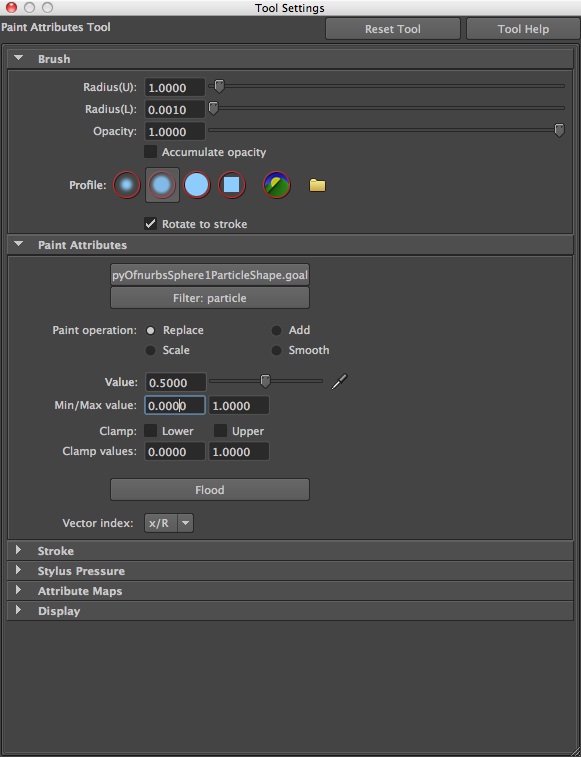
Next, also within the same menu item Soft/Ridid Bodies, select the
Paint Soft Body Weights Tool setting the value to 0.5 and
paint the top of the sphere. Note the differential wiggle.
9. nParticles
Create a
new scene file of 2000 frames.
Go to the nDynamics module.
Create a polygon cylinder centered at the origin of model space.
Move the cylinder so that it sits below the origin where an nParticle
emitter will be placed.
Right-mousebutton-click on the cylinder, select "Face" and delete all
the upper faces.
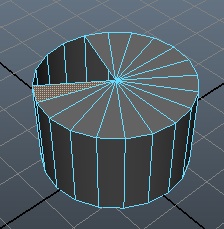
Right-mousebutton-click on the cylinder and select "Object Mode".
With the cylinder selected, select menu item"nMesh/Create Passive
Collider".
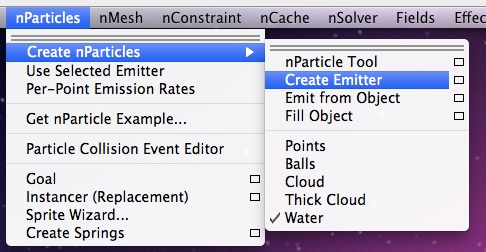
Select menu item "nParticles/CreateEmitter/Water":
Move the
cylinder so that it sits below the nParticle
emitter.
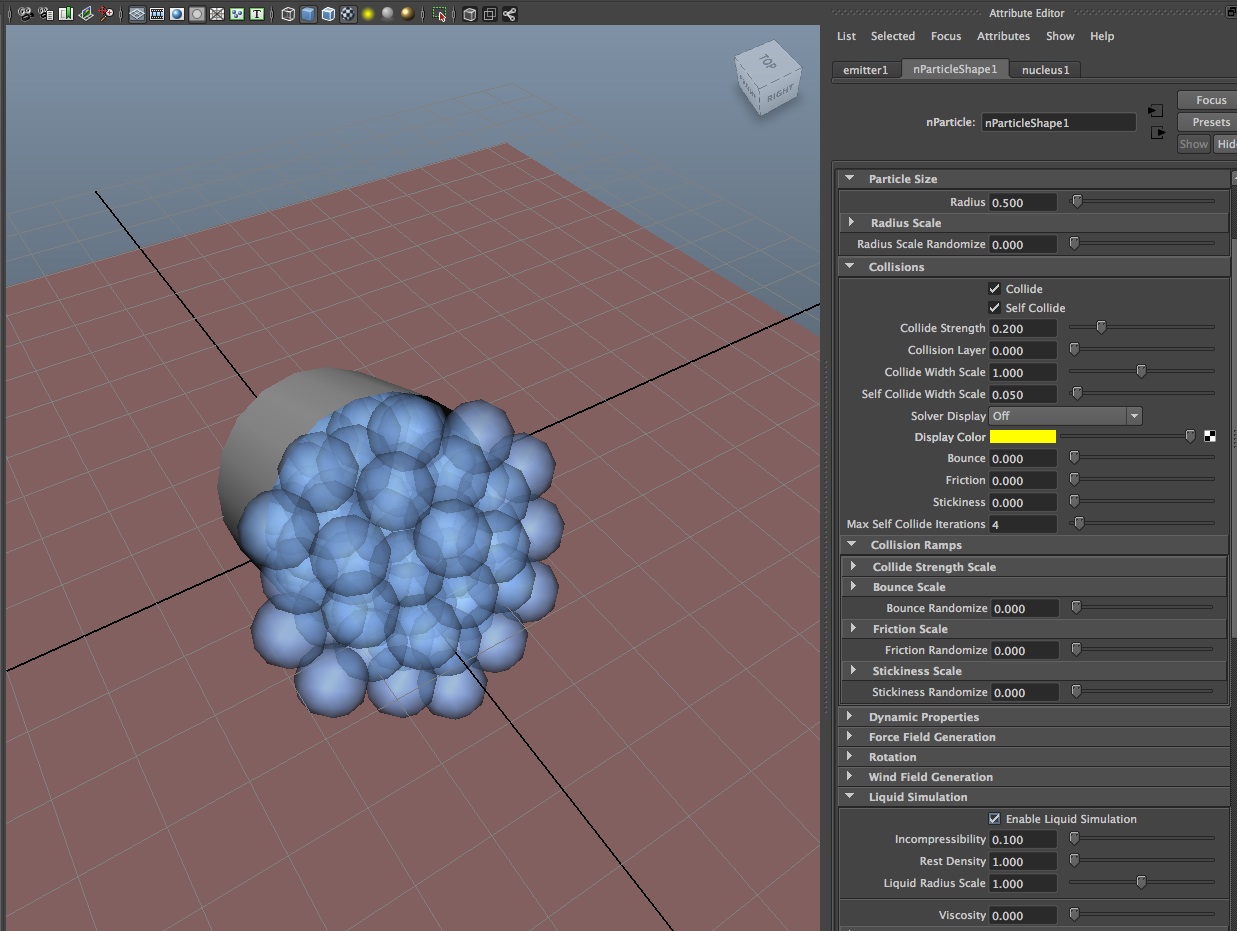
In the attribute editor for the nParticle emitter, go to the
nParticleShape1 tab and put into effect the following settings:
Under the
"Particle Size" tab:
set "Radius" to 0.5.
Under the
"Collisions" tab:
select the checkbox for
"Self Colide" to on.
set "Collide Strength" to
0.2
set "Collide Width Scale"
to 1.
set "Self Collide Width
Scale" to 0.5
set "Bounce" to
0.0.
set "Friction to 0.0.
Under the
"LIquid Simulation" tab:
set
"Incompressibilty" to 0.2.
set "Viscosity" to 0.0.
Further
below, under the "Shading" tab (not shown in
next figure):
Set "Particle Render Type" to "Blobby
Surface
(s/w).
Set "Threshold" to 0.6.
Keyframe
the cylinder to spill out onto a flat
polygon surface. Select the flat polygon surface and select menu item
"nMesh/Select Passive Collider" similar to the cylinder.
Add lights and materials, and render in Mental Ray with
appropriate quality settings for about 800 frames.
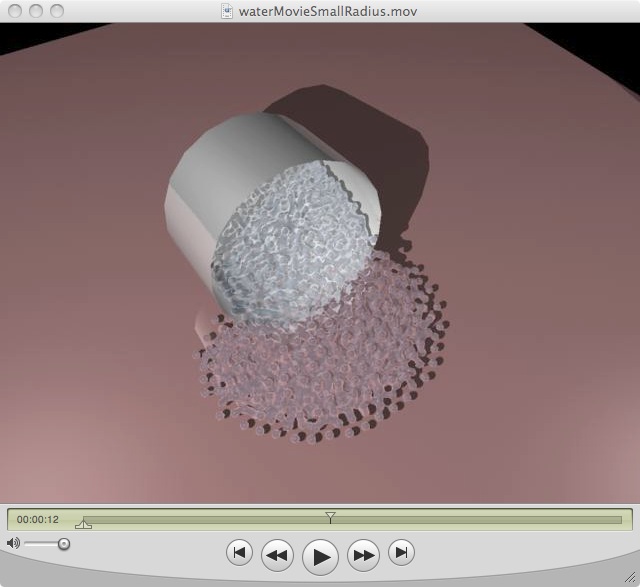
Note: these settings will depict exadderated water droplet sizes at a
quicker rendering time. For
more realistic results at much greater rendering times, scale the
droplets to 0.2 and the other values accordingly.

A radius 0.2 particle with a higher emitter rate would render as follows:
9. Dynamics module / Effects (extra)
Fire (can be from an emitter, or a surface, curve, or directional point, and subject to a field.)
Smoke: uses sprint images(must supply), control life span, direction, spread and speed. (SKIP this one)
Lighting – makes an electric bolt between two or more objects, can control thickness, spread, jagged sections, glow and light intensity (on creation wit options box)
Shatter – breaks object in specified number of pieces by types of shatter (surface, solid and crack, on creation, computationally intensive, may want to do this separately, try on simple surface unsubdivided with extrusion at 9 shards, make each shard into active regid body, add air and Newton field, seed value introduces randomness; add lighting effect between segments
Surface Flow – creates manipulators causing particles to flow along a surface (try on surface plane, explore radius and threshold on particle shape
Curve Flow – creates flow of particles along a curve path, (use cloud).