November 12, 2015 Workshop 16 Notes
UNDERWATER CAUSTICS, FLUID DYNAMIC EFFECTS AND MENTAL RAY
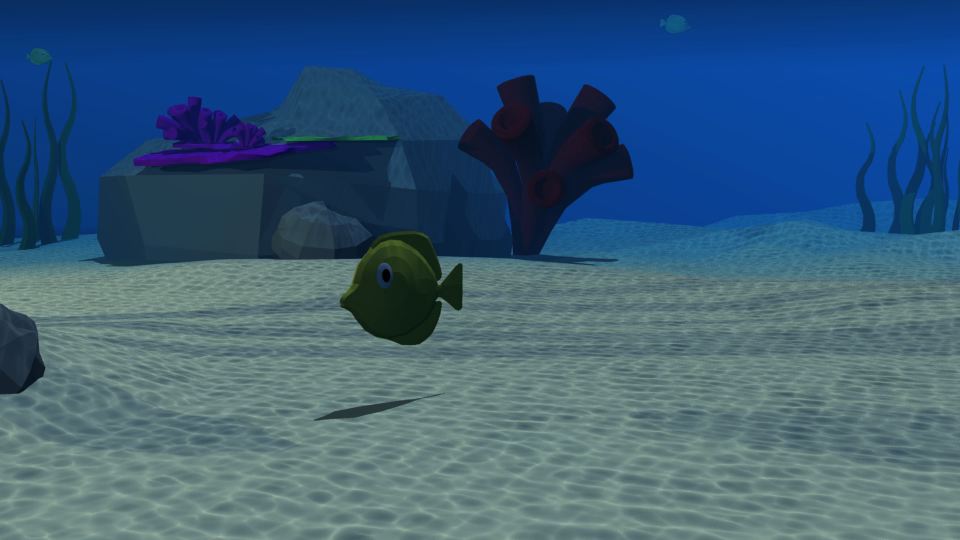
Still image from Katie Banach's final project - Treasure Hunt (Katie Banach)
Creating an Underwater Caustics Scene (notes on her final project created by Katie Banach)
1. Import an underwater scene from the Maya Visor. Open the visor by going to Windows > General Editors > Visor.
Open the Ocean Examples. Right click on the UnderwaterCaustics example and Import the Maya File.
2. Create an ocean floor.
Create a polygon plane. Give it 15 x 15 subdivisions.
Add some bumps to the plane and then move it up slightly above the ground plane.
Give the plane a sand color.
3. Create a polygon sphere. Use the scale tool to create an oval, fish-like shape.
Give the "fish" a bright color.
4. Edit the ocean settings.
Open the Windows > Outliner. Open the Attributes Editor for directionalLight1.
Under the Shadows tab, turn off the Depth Map Shadow and turn on the Ray Trace Shadows instead.
Go to the ocean1 tab. Change the Scale to 2.
Right-click on Time > Edit Expression. Change the time expression to ocean1.time = 0.25 * time;
Change the Num Frequencies to 3.
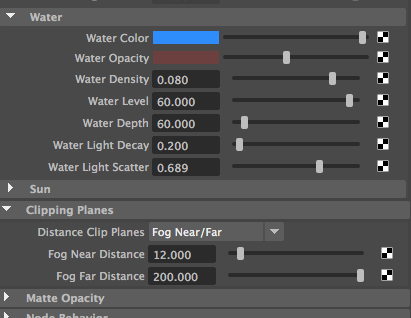
5. Edit the physical fog and water settings.
Open Windows > Rendering Editors > Hypershade
Click on the envFogMaterial to open it's attributes. Play around with these values until you get the desired look.
Under Physical Fog > Water
Change Water Level and Water Depth to 60
Change Water Density to 0.080
Change Water Light Decay to 0.200
This is also where you can change the water color and opacity.
Under Clipping Planes
Change Fog Near Distance to 12
Change Fog Far Distance to 200
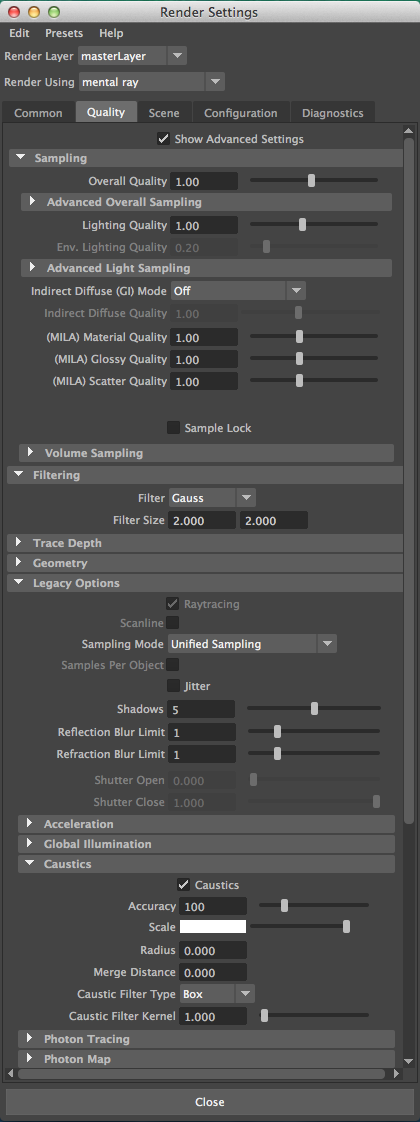
6. Change the Render Settings
Select the render using "mental ray" option. (use Maya software for quicker testing of general lighting conditions).
Under the Common tab.
Set file name prefix to "underwater"
Set Frame/Animation ext to "name#.jpg"
Set image format to "jpg"
Setup Start frame to 0 and End frame to 200.
Set image size to HD 540.
Select the rendering camera.
Under the Quality tab.
Select Show Advanced Settings
Change the Overall Quality to 1
Under Legacy Options > Caustics, turn on Caustics.
7. Batch render to see the caustic effects
8. Boat moving on water
Set the number of frames to 200. Enter the FX module, and create an ocean under Fluids > Ocean. Our objective is to reproduce the following movie (select image below to see 11 MB QT file).

Select image to see movie (note large 11 MB file size)
9. Select the oceanShader tab automatically created for the ocean and modify the following attributes:
Graphically change wave peaking by adding points and manipulating the wave profile.
Change foam emission to add more foam, such as setting it to 0.8
Change foam threshold to increase the relative appearance of foam, setting it to 0.525
Under specular shading, increase specularity to 0.75
Under specular shading, set eccentricity to 0.306.
Change reflectivity to 0.7
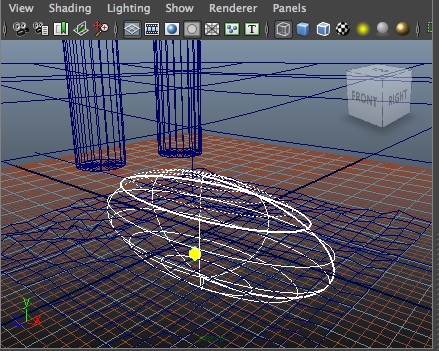
10. Add a Spot light to the model in the positive +x, +y, -z area.
Under the mental ray tab, turn on emit photons.
Change photon intensity to 5400.
Set the cone angle property to a wide angle, such as 145 degrees.
Under Ray Trace Shadow Attributes, turn on "Use Ray Trace Shadows".
11. Add a point source light to the model.
Under the mental ray tab, turn on emit photons.
Change photon intensity to 2700 to balance Spot light and fill in middle grey values.
Do not turn on "Use Ray Trace Shadows".
Optionally add an ambient light to the model at low intensity without emitting photons (we didn't do this in the workshop).
12. Add two polygon cylinders to the model in position to appear as posts in the water and add a wake.
Create a reflective phong shader and assign to each cylinder.
13. Create a sphere, select the Attribute Editor, and create the following expression for the translate y value:
"nurbsSphere2.translateY = sin(deg_to_rad(frame * 5)) * 10;"
Select the sphere and select Fluid Effects > Create Wake.
Select the OceanWakeEmitter1 associated with the sphere. Open the Fluid Emission Turbulance Tab. Set the value of Turbulance to 10.0.
Place the sphere on a new layer "mywake" and turn off the visibility of the layer.
14. Add a simple boat to the model such as from an inverted polygon cone or sphere and place it adjacent to the cylinders.
For example, create an abstract boat by making a sphere, elong it (scale it) on the positive x axis, and then slice off the upper half. Apply a bump map to give the surface of the boat some sense of materiality. The example boat in the rendering above was imported from a sample obtained from highend3d.com. However, the technique below is easily use to obtain a boat-like geometry.
Assign a shader to the boat.
Select the boat and Select Fluids > Create Boat > Make Motor Boat.
Under the locator shape tab for the boat, under extra attributes:
Select the boat and the select Fluids > Create Wake.
Select the OceanWakeEmitter2 associated with the boat. Open the Fluid Emission Turbulance Tab. Set the value of Turbulance to 10.0.
15. Select the "Render Settings" icon .
Select the render using "mental ray" option. (use Maya software for quicker testing of general lighting conditions).
Under the Quality tab.
Select "Show Advanced Settings", then turn on Caustics in Legacy Options > Caustics
Under the raytracing tab select "raytracing".
Under the common tab.
Set ocean prefix to "ocean"
Set Frame/Animation ext to "name#.jpg"
Set image format to "jpg"
Setup Start frame to 0 and End frame to 200.
Set image size to 640x480.
Select the rendering camera.
Use the "Render View" tool to test the current settings
16 . Click on persp in the Windows > Outliner menu and open the perspective camera attributes (or add another camera and set attributes on it)
Open the Environment Tab
Select the "Create" button.
Change image type to "texture", click on the checker box next to "Texture" and choose "Env Sky"
Under the "Env Sky" properties:
Under Floor Attributes, turn off "Has Floor".
Increase modestly Sun Brightness and set Total Brightness to 1.0
Under Sun Attributes, Explore "Azimuth and Elevation" until visible in Texture Sampe (note "Has Floor" needs to be off).
Returning to the "View/Camera Attribute Editor", open the tab for "Film Back" and set the "Fit Resolution Gate" to "Fill" so that the sky environmental texture fills the rendered image frame.
17. Use the "Render View" tool to test render and adjust lighting, textures and other values.
19. Batch render the animation.