October 11, 2018 Workshop 8 Notes
MOTION CAPTURE CHARACTER RIGGING
This workshop focuses on rigging a motion capture skeleton produced in Animazoo and pairing it up with a predefined skeleton and smooth skin character in Maya. This is a new method based upon updated features in MotionBuilder. Note that MotionBuilder is only available on the Windows Platform. A third party Python script is availble for Mac and Windows, but was found to be only partially successful. See notes below.
I. MOTION CAPTURE
The live motion capture body suit session to create the data is documented separately in MoCap Instructionsdeveloped for the Animazoo system that former TAs and I created in partnership with the Robertson Digital Media Lab. Parts 1 to 5 of the instructions are still valid. However, part 6, the MotionBuilder sequence, is now supplanted by a simpler procedure described in steps II and III below.
II. CONVERTING ANIMAZOO MOTION CAPTURE BVH FILE TO FBX FILE
Within Autodesk MotionBuilder, change the file format from BVH to FBX:
Open up MotionBuilder
Click “Motion File Import” the BVH character created with Animazoo
Navigate to your file and open it
"Export" to FBX which Maya can read
(do NOT use the Save As option)
A scripting alternative is also available developed by Jeroen Hoolmans on GitHUB and that allows you to skip MotionBuilder altogether. The Python script developed by Hoomans in 2012 can be run inside of Maya on the Mac or Windows operating systems. (This technique was tested a number of times and was less complete in terms of the skeleton generated and led to some problems in full rigging in Maya. However, it was partially effective and may be a quick alternative.
Some alternative sources of BVH files include http://mocapdata.com
III. PAIRING UP MOTION CAPTURE CHARACTER WITH PREDEFINED CHARACTER IN RHINO
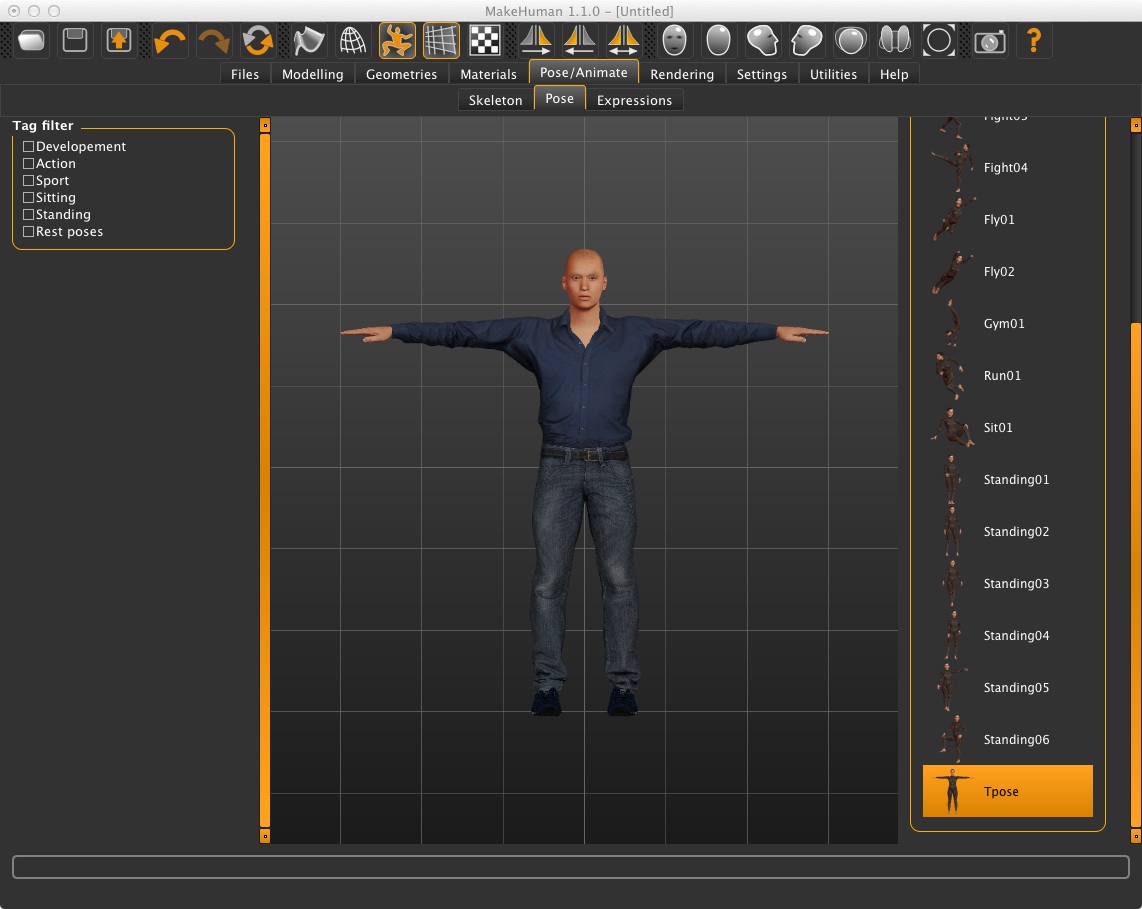
1) Create a MakeHuman FBX explort file. Use the "pose" tab to produce output in the TPose position.
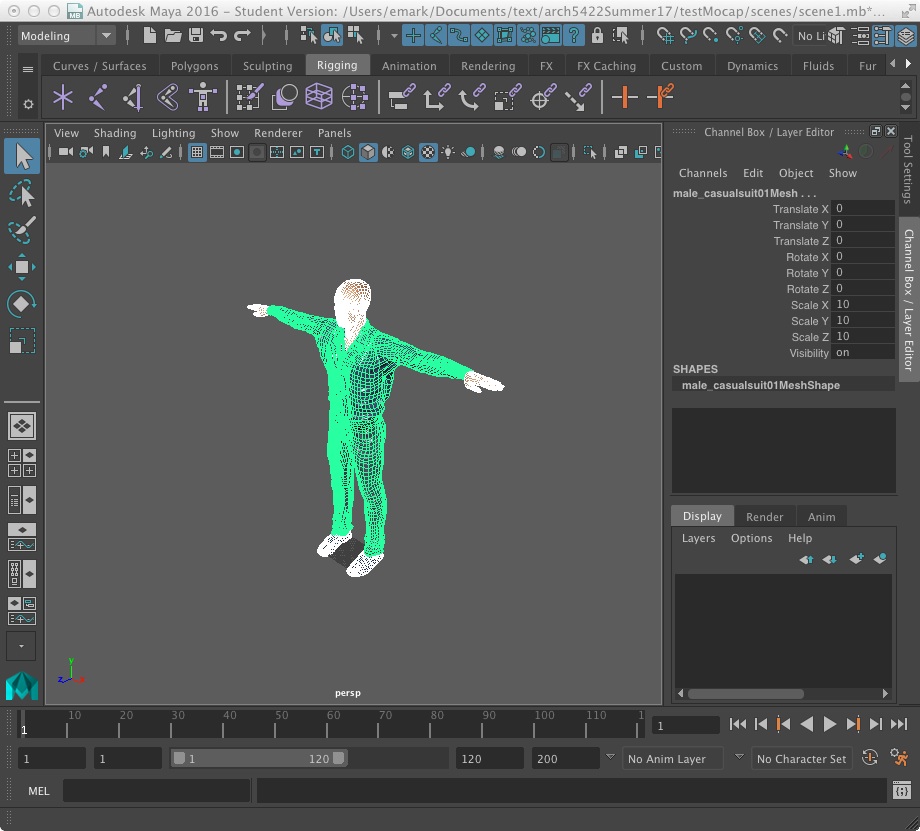
2) Import the MakeHuman FBX file into Maya. Assign any needed texture maps (such as the eyes) not automatically translated into Maya.
3) Within the Modeling module, select all the polygons associated with the MakeHuman figure and use menu item "Mesh/Combine" to combine them into a single polygon surface.
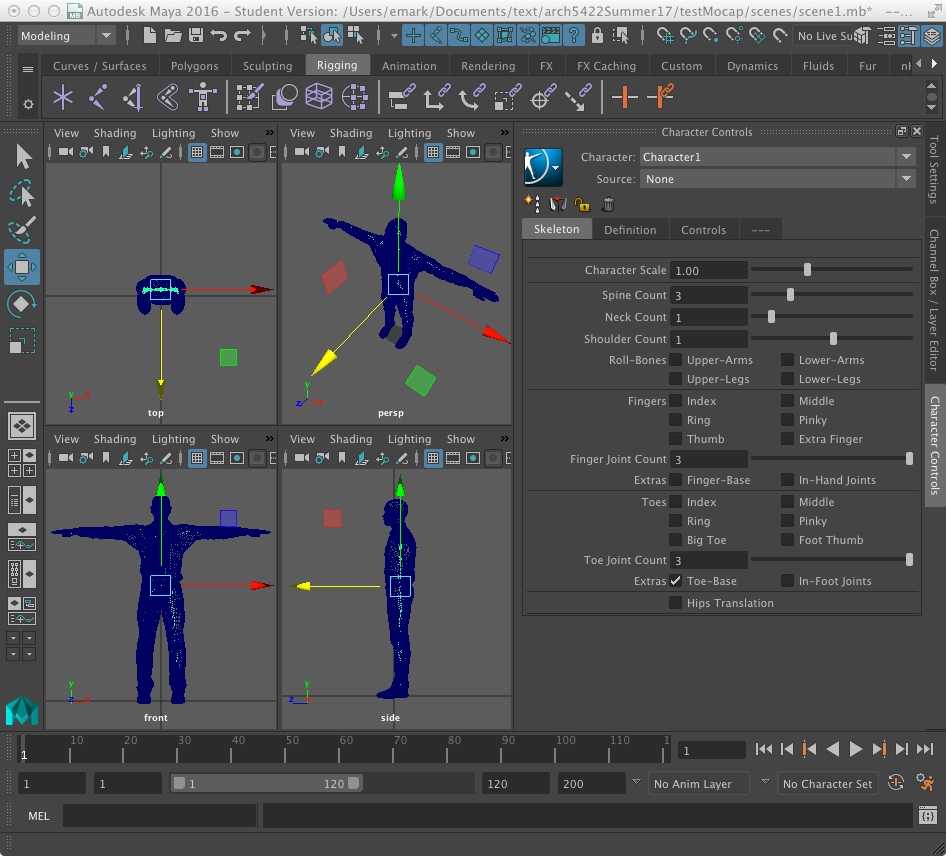
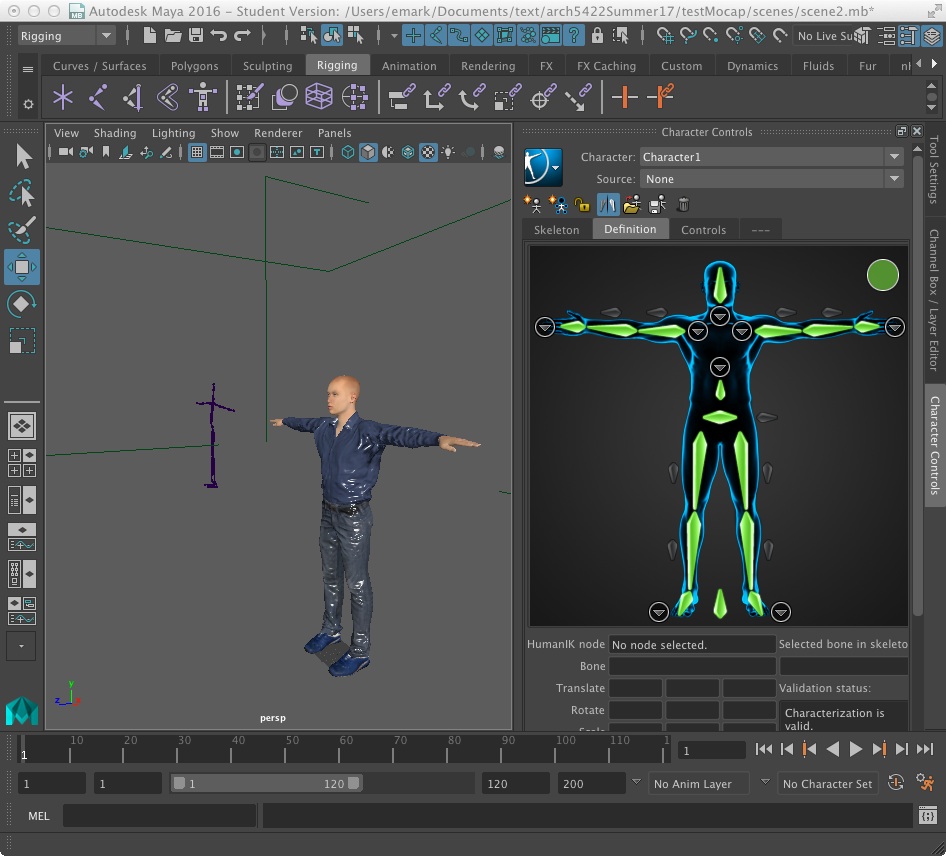
3) Within the Rigging module, go to Skeleton > HumanIK if not already open.. This will likely open up as a tab on the right side. Use the HumanIK automation tool to create a skeleton named Character 1 that is juxaposted with the MakeHuman figure. Make any necessary adjustments to the Skelton joints to closely match the MakeHuman character and ensure that the skeleton finger joints are turned off.
4) Bind the skin to the skeleton.

5) Use the Display/Hide/Hide Selection tool to temporary remove the skeleton and MakeHuman Figure from the view.
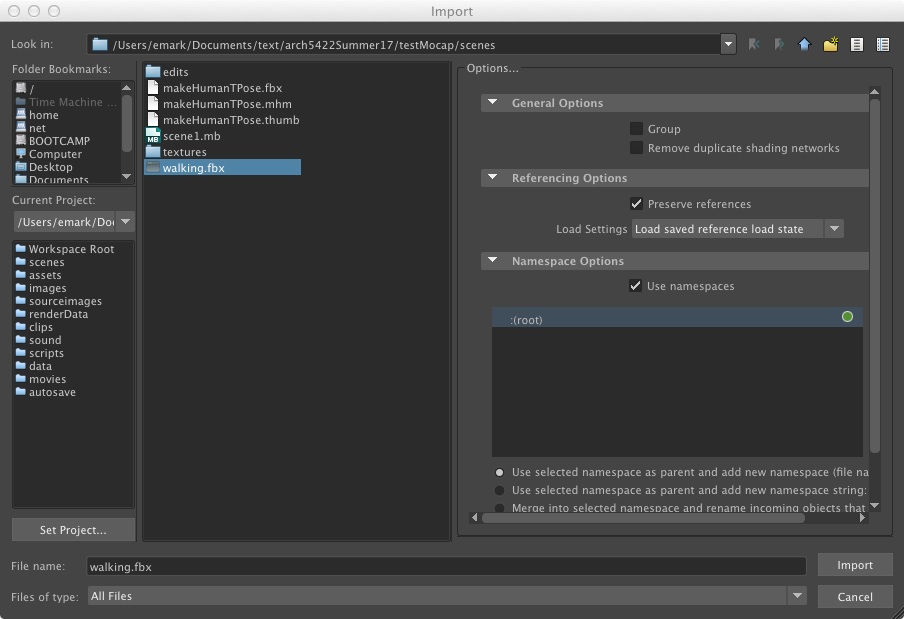
III. Import the motion capture FBX file.
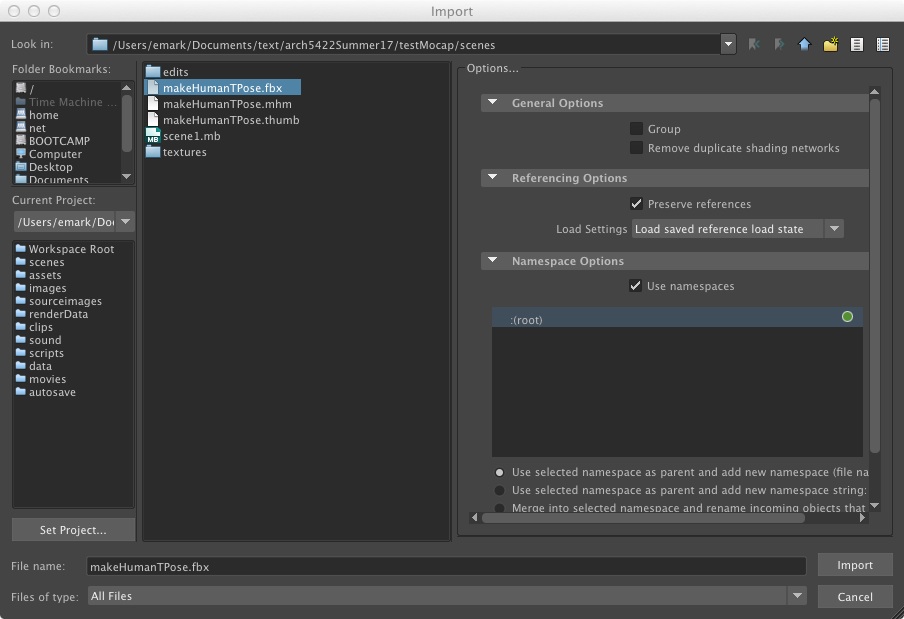
1) In Maya, go to File > Import > Your motion cpature file .fbx file
[Tip] If you don’t see your motion capture skeleton, try zooming out. If the camera plane blanks to grey when you zoom out go to View > Camera Attribute Editor, scroll to “Far Clip Plane”, and add a few 0’s onto the number to increase the depth of the clipping plane.
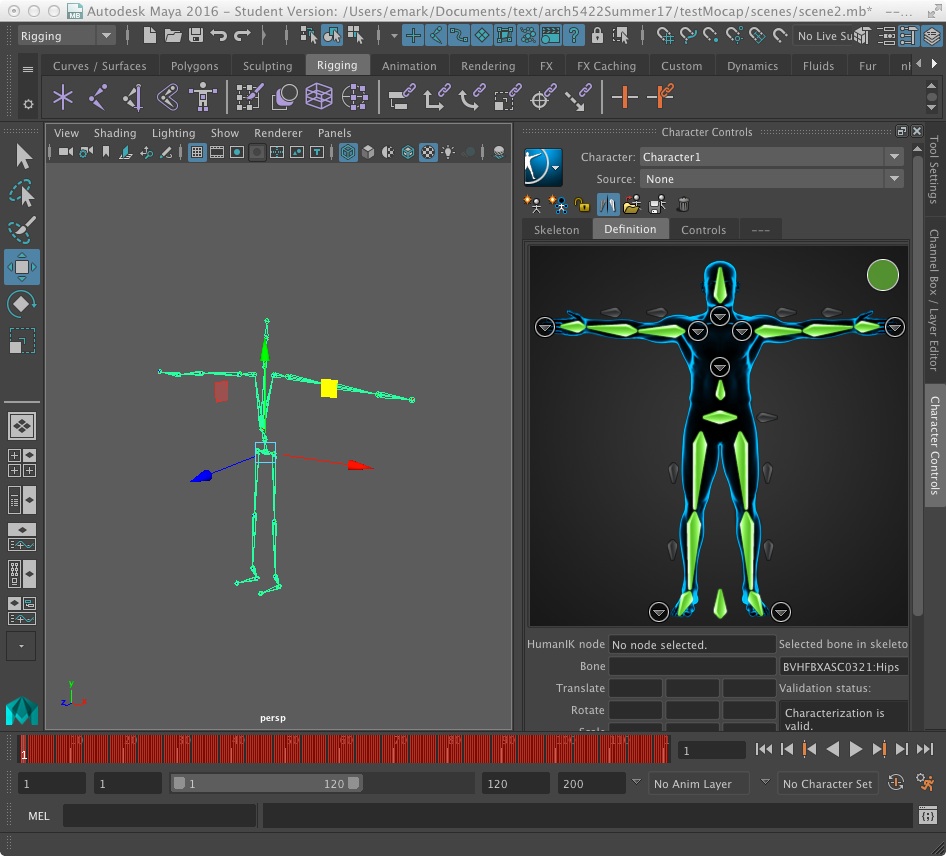
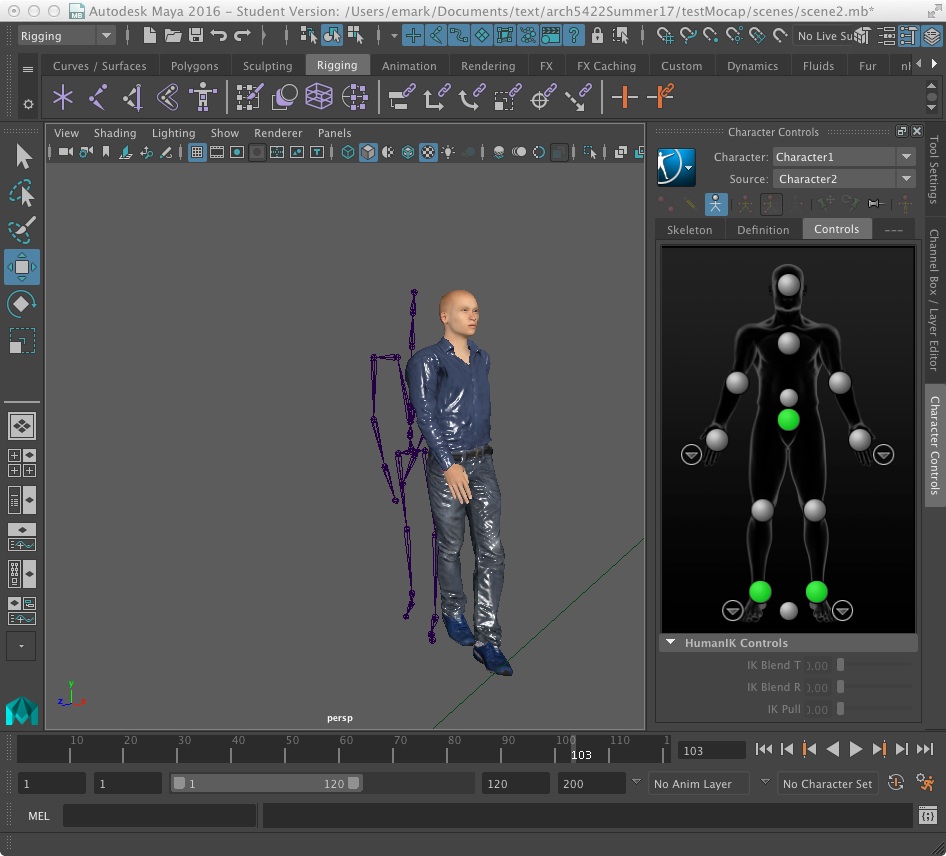
3) To define the motion capture skeleton for control inside Maya, select your Motion Capture FBX skeleton by the hips (entire skeleton should turn green), and click the blue human icon in the Human IK dialog box. Click Define > Skeleton. The dialog box should display“Character 2” in the “Character” pulldown menu, and “None” appearing after “Source”.
4) Next, go through the process of defining the skeleton closeup. Double click on the “head” node in your new character in the Human IK dialog box at right. This will isolate the node you’re assigning. Select the “head bone” on your motion builder skeleton (in green below) and then hold downthe right-mouse-click on the head node in the Human IK dialog and select the "assign selected bone" option to make the connection witth the "head bone" on the motion builder skeleton.

DefineSkeleton Head
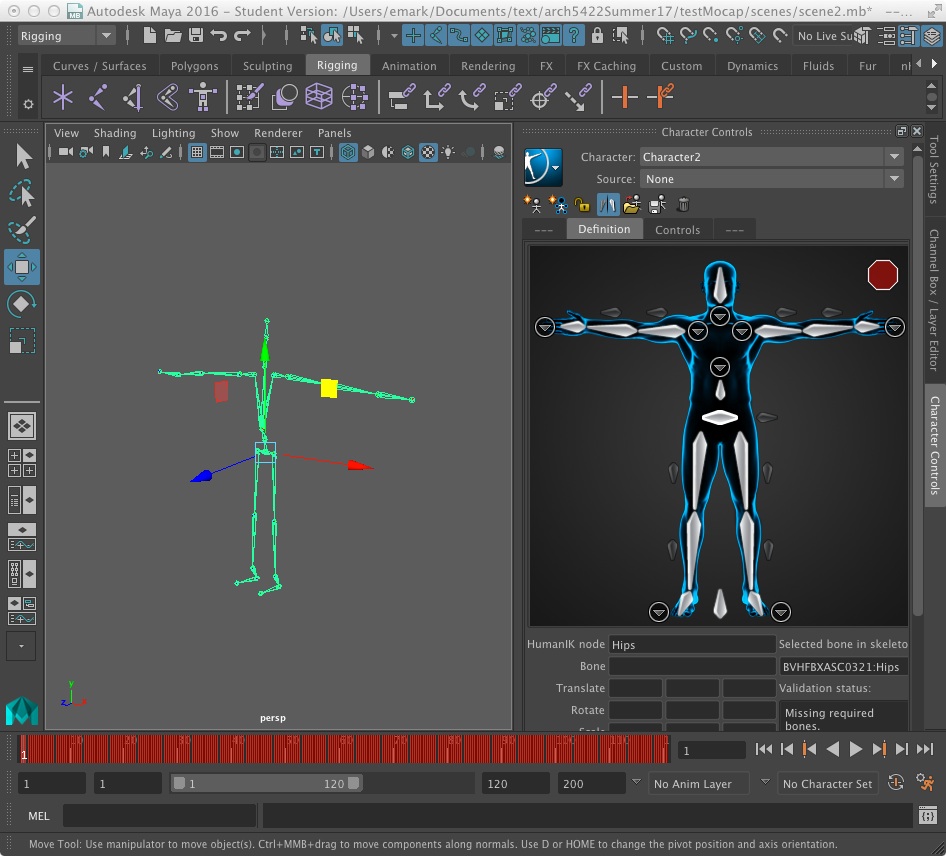
5) Keep assigning the parts of the character to the bones in your skeleton. Check the area highlighted by the large arrow [right] to make sure the bones and character parts match up. It is only necessary to go down one side of the skeleton, as the parts with parallel members on the mirrored side of the skeleton will automatically mirror (arm & leg bones). Ignore the nodes that light up orange. The matchup will still work!
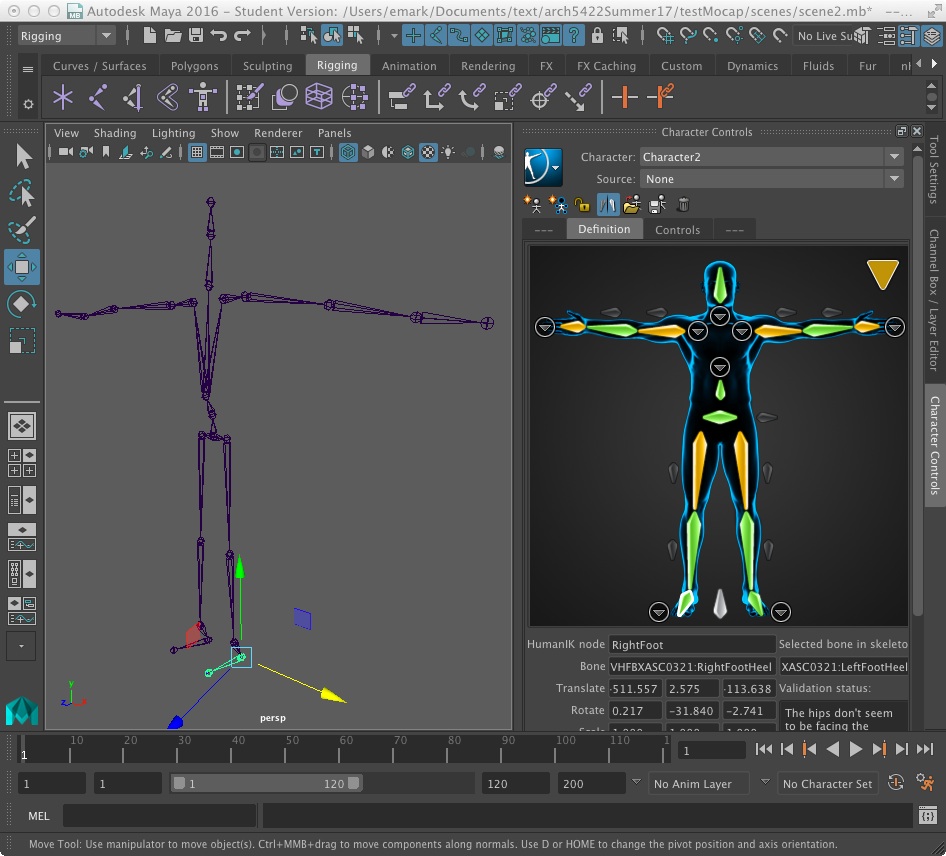
Define Skeleton Foot
7) After you are done with defining the skeleton, your screen should look something like the image abe.. You can add more detail to your rig if you would like by zooming in on the character and correspondingly clicking on the down pointing triangles surrounding by a circle in the "Character Controls" window (there are four located on the chest in the image above) but this is not necessary.
8) Once the motion capture skeleton is defined, go to the menu item "Display> Show>All" menu to restore Character 1 to the view. This mesh should still be in a “T-Pose” stance.
IV. Use Character 2 as the Source for movements of Character 1.
9) Next, to tie your character model with the motion capture character, go back to the Human IK dialog box, and in the top scrolldown menu set the “Character” box to your model character's "Character 1"
Next, change the scrolldown box next to “Source” to your newly defined motion builder character, which here is called Character 2
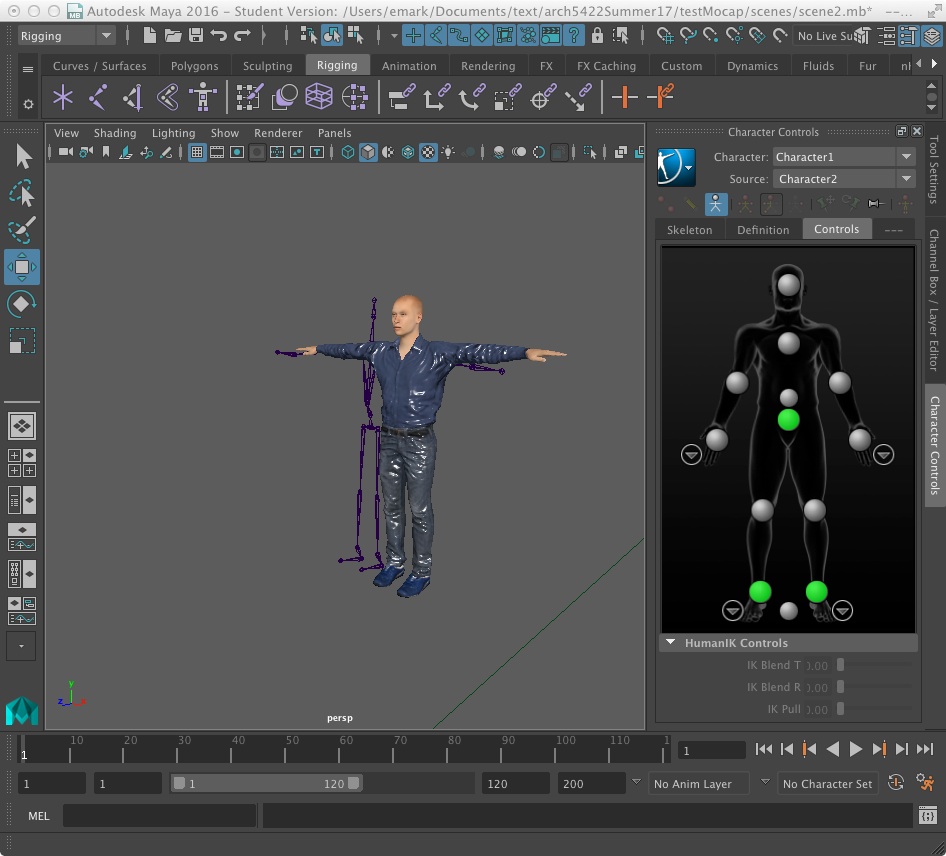
10) Once you change the source of your character, the two bodies should align. Don’t worry if the skeleton and character don’t line up perfectly, the movements should still come out clean. Give the timeline the amount of frames you need and watch your character act out your movements.