November 21, 2019 Workshop 19 Notes
UNDERWATER CAUSTICS, FLUID DYNAMIC EFFECTS
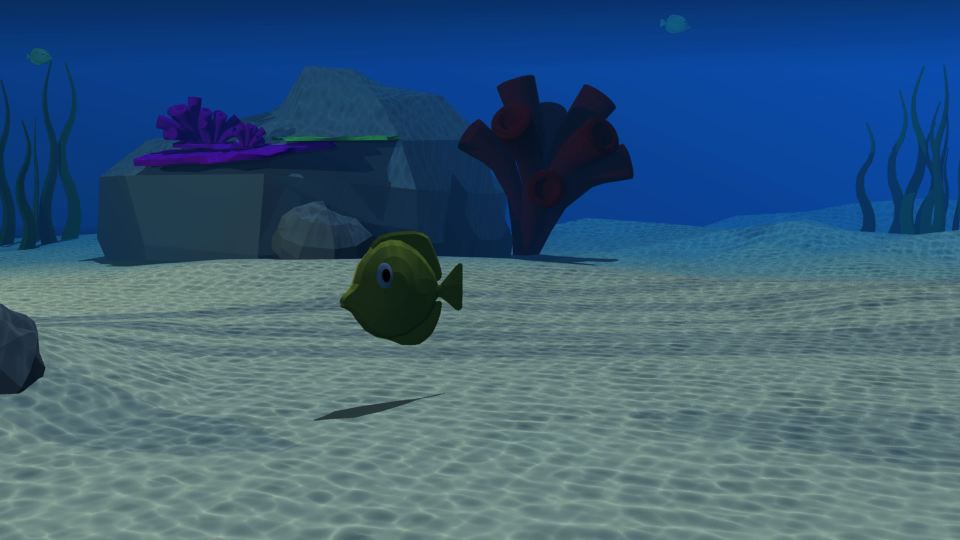
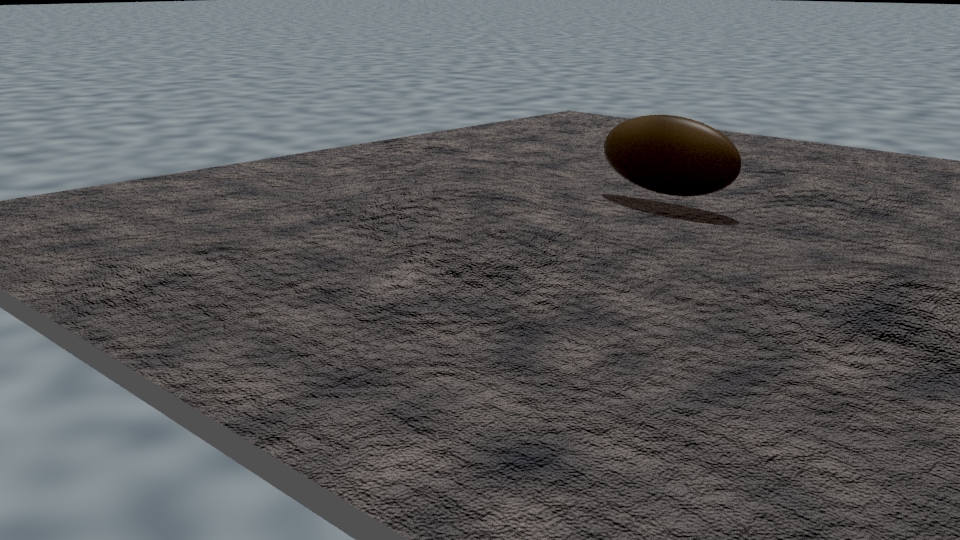
Still image from Katie Banach's final project - Treasure Hunt (Katie Banach)
Part 1. Creating an Underwater Caustics Scene (notes based upon Katie Banach's final project)
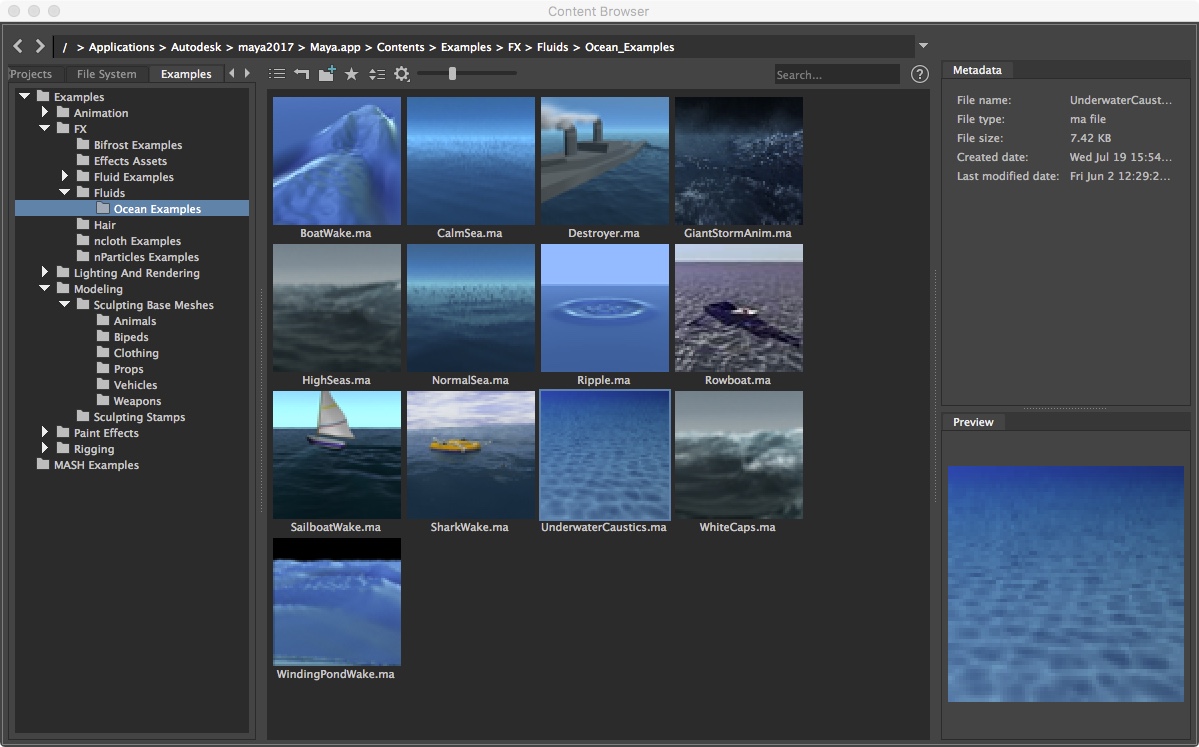
1. Import an underwater scene from the Maya Visor. Open the visor by going to Windows > General Editors > Content Browser.
Open the Examples/FX/Fluids/OceanExamples tab. Right click on the UnderwaterCaustics example and Import the Maya File.
2. Create an ocean floor.
Create a nurbs surface plane. Give it 15 x 15 subdivisions.
Add some vertical deformations to the plane and then move it up slightly above the ground plane.
Create a polygon sphere. Use the scale tool to create an oval, fish-like shape.
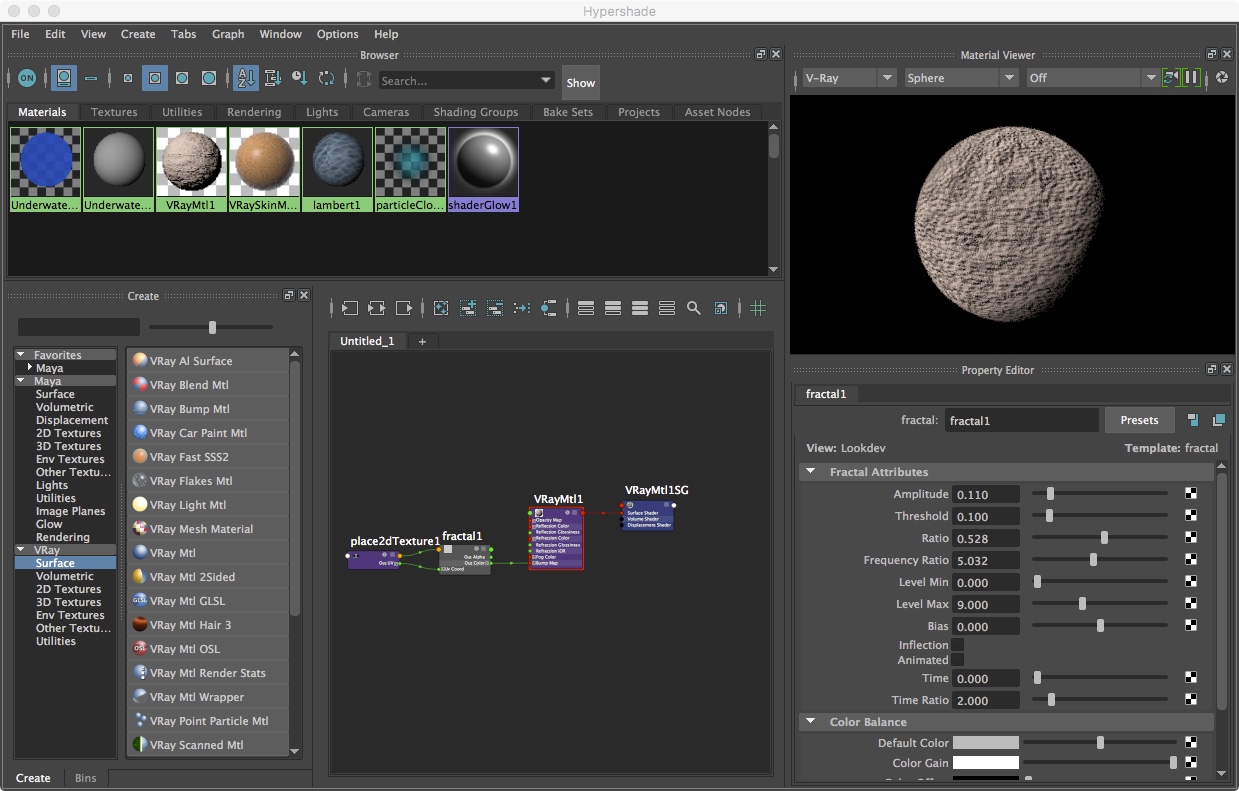
3. Open Windows > Rendering Editors > Hypershade
Within the Hypershade Window, give the "fish" a modified "V-Ray skin" material
For the ground plane material, ensure that the viewer in the Hypershade panel is "V-Ray" and not "Hardware".
For the ground plane create a sand color with a "V-Ray Mtl" colored light beige and a fractal bump map.
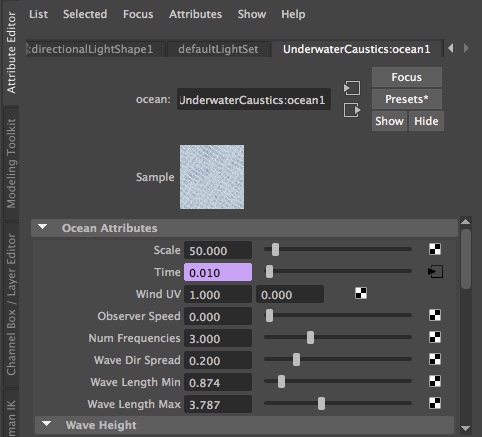
4. Edit the ocean settings.
Open the Windows > Outliner. Open the Attributes Editor for directionalLight1.
Under the Shadows tab, turn off the Depth Map Shadow and turn on the Ray Trace Shadows instead.
Go to the ocean1 tab. Change the Scale to 50.
Right-click on Time > Edit Expression. Change the time expression to ocean1.time = 0.25 * time;
Change the Num Frequencies to 3.
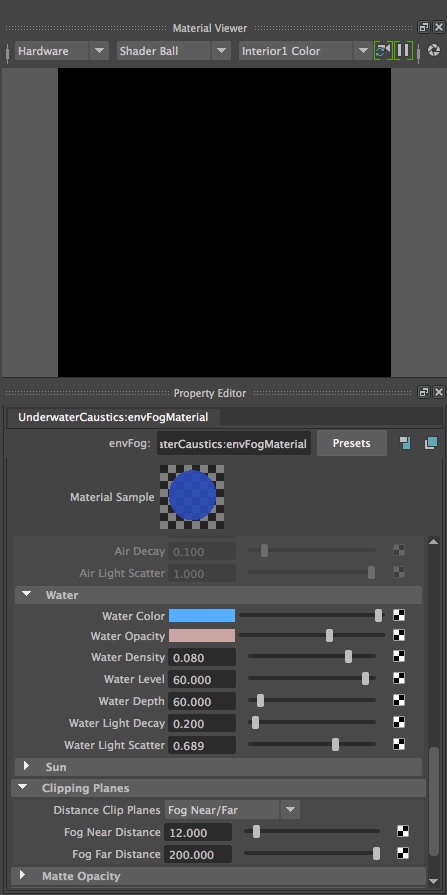
5. Back to the Hypershade pannel, edit the physical fog and water settings.
Open Windows > Rendering Editors > Hypershade
Go to The Materials Tab
Click on the envFogMaterial to open it's attributes. Play around with these values until you get the desired look.
Under Physical Fog > Water
Change Water Level and Water Depth to 60
Change Water Density to 0.080
Change Water Light Decay to 0.200
This is also where you can change the water color and opacity.
Under Clipping Planes
Change Fog Near Distance to 12
Change Fog Far Distance to 200
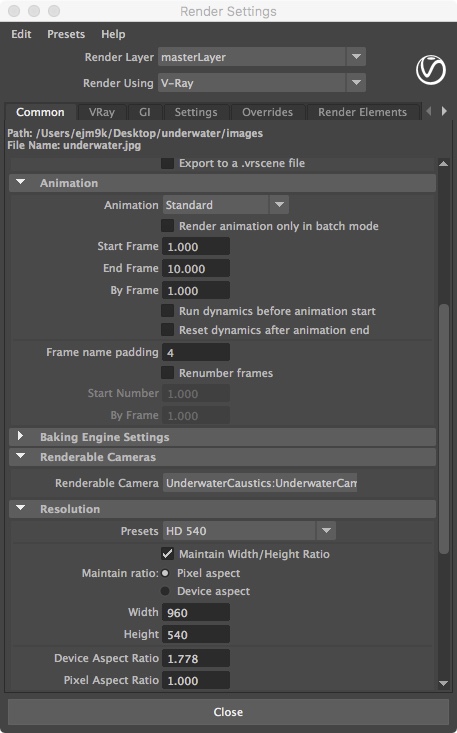
6. Change the Render Settings
Select the render using "V-Ray" option. (use Maya software for quicker testing of general lighting conditions).
Under the Common tab.
Set file name prefix to "underwater"
Set image format to "jpg"
Under the Animation Tab
Set Animation to Standard
Setup Start frame to 0 and End frame to 200.
Set image size to HD 540.
Select the rendering camera to UnderwaterCam
Under the GI tab.
Under Caustics Tab> Caustics, turn on Caustics.
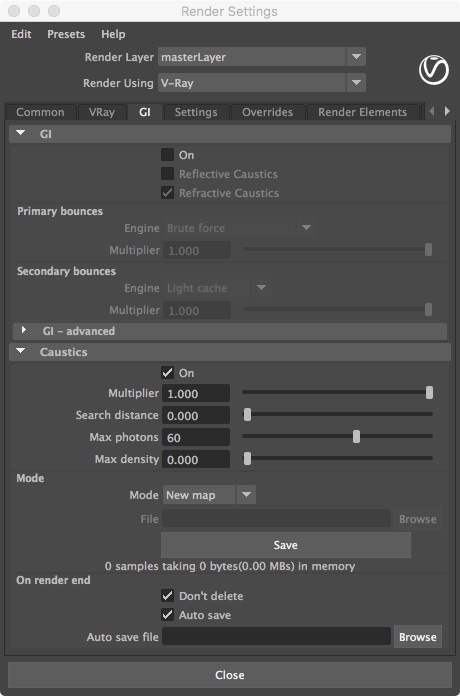
7. Turn down the intensity of the direct light to 0.5 and the ambient light to 0.2,
8. Batch render to see the caustic effects
Part II. Fluid Dyamics with Maya Software (only)
Start a new scene file to create a boat moving on water with Maya Software. In this part II we will be using techniques involving an "Ocean Shader" that is not renderable with V-Ray. In Part III we will look at an alternative technique that is renderable in V-Ray.
Our objective is to reproduce a simple version of the following movie (select image below to see 11 MB QT file) in Maya Software
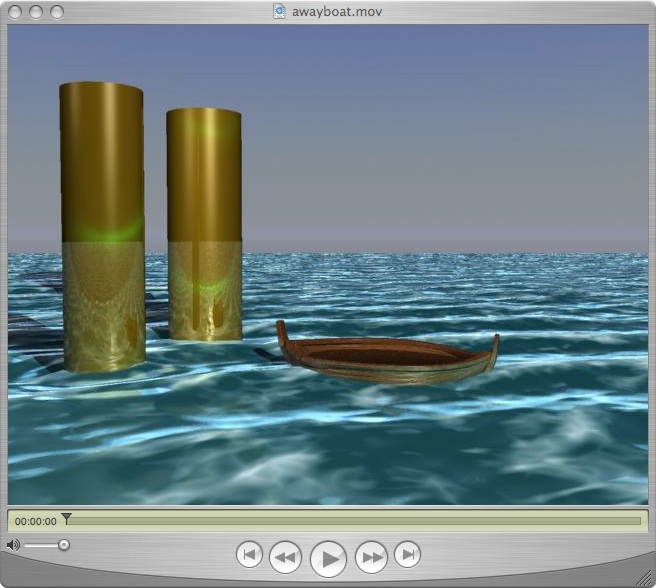
Select image to see
movie (note large 8 MB file size)
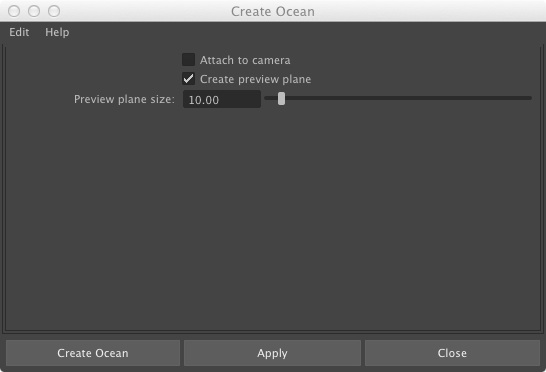
1. Within the new scene file and set the number of frames to 200. Enter the FX module, and create an ocean by selecting the menu item check-box for Fluids > Ocean.
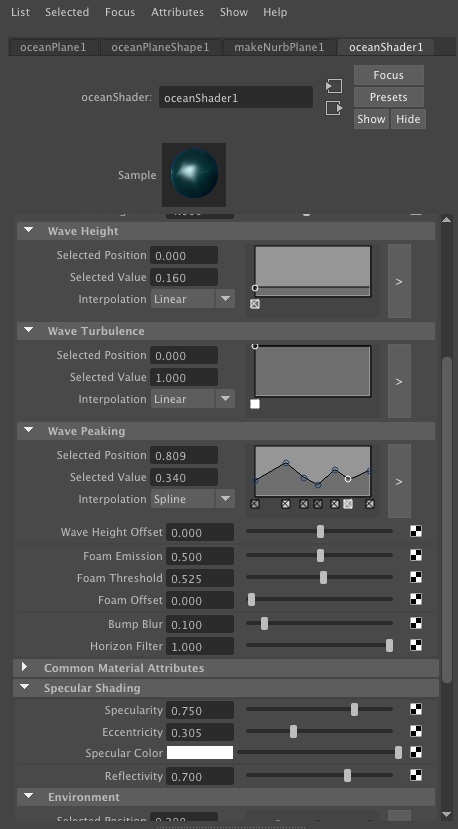
Select the oceanShader tab automatically created for the ocean and modify the following attributes:
Graphically change wave peaking by adding points and manipulating the wave profile.
Change foam emission to add more foam, such as setting it to 0.5
Change foam threshold to increase the relative appearance of foam, setting it to 0.525
Under specular shading, increase specularity to 0.75
Under specular shading, set eccentricity to 0.305.
Change reflectivity to 0.7
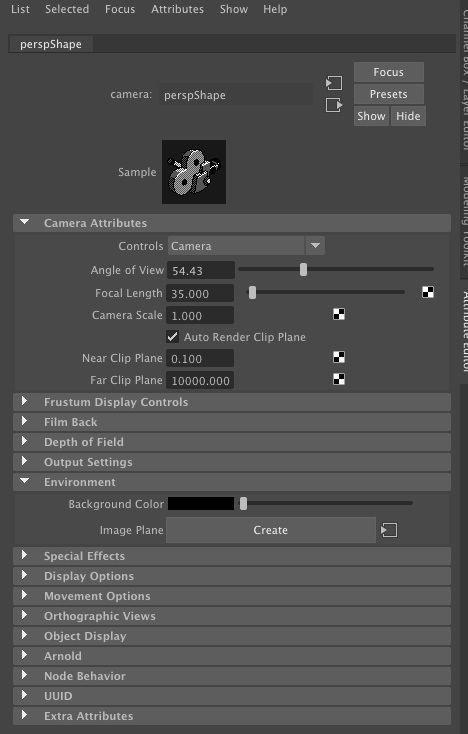
2. Go to the view menu, camera attribute editor, and select the environment tab.
3. Select the "Create" button above, and within the dialog box the follows, choose type "texture".

4. Select the checkered box adjacent to the word "Texture" and then choose a Maya "Env Sky"
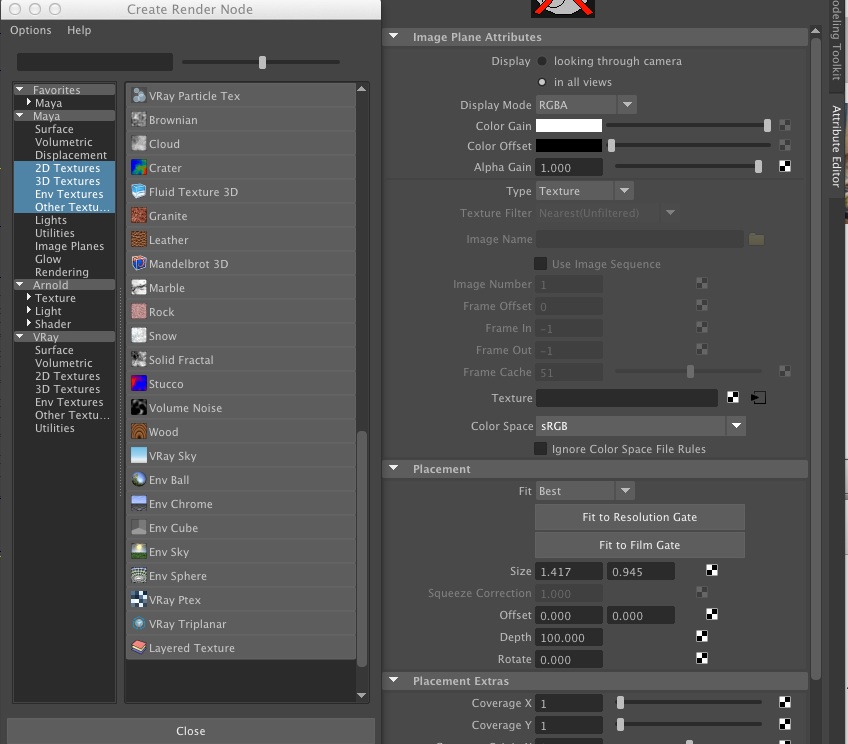
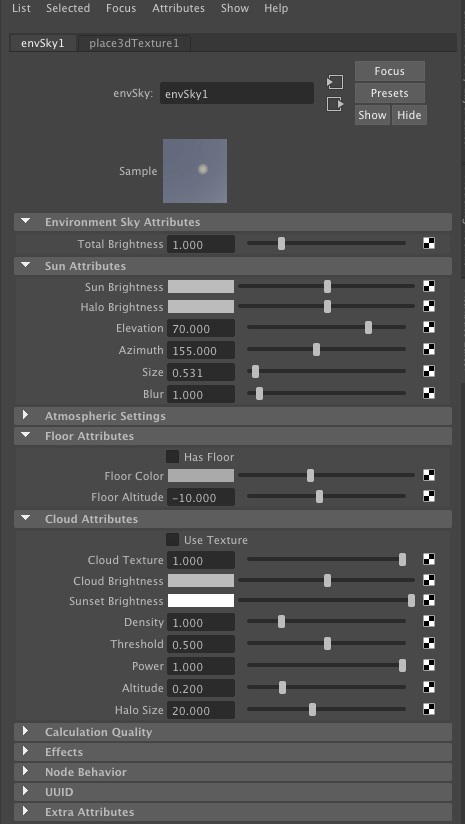
5. With the selection of the "Env Sky", turn off the option to "Use Floor Attributes", and then set the "Elevation" to 70 and the "Azimuth" to 155. Other properties to explore include "Sun Brightness", "Clould Brightness" and "Density.
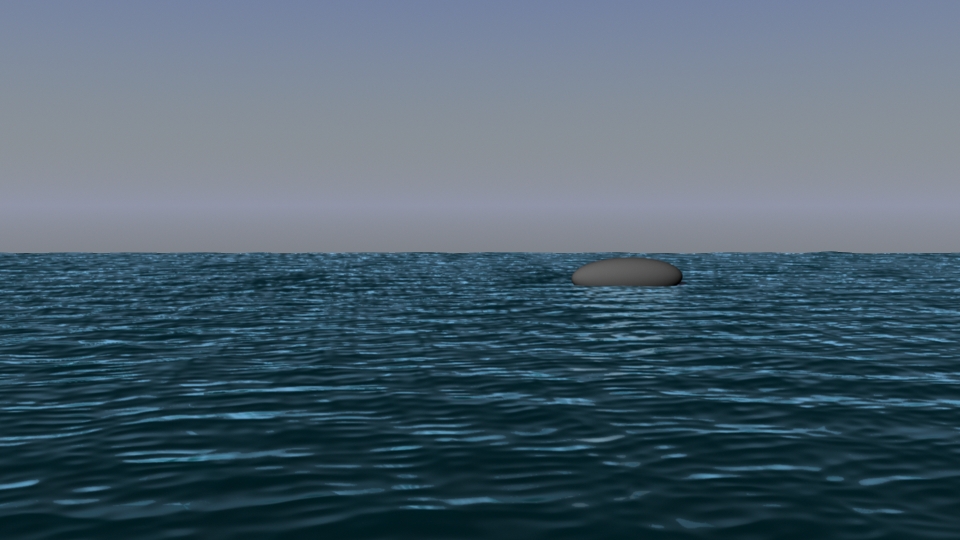
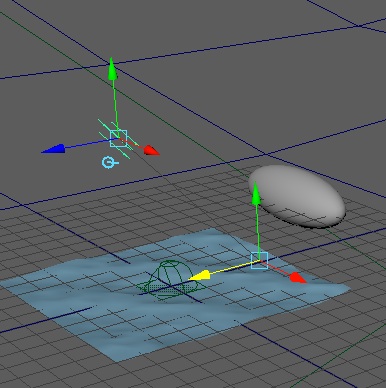
6. Create an ellisoid from a nurb surface sphere and place it on the surface of the ocean.
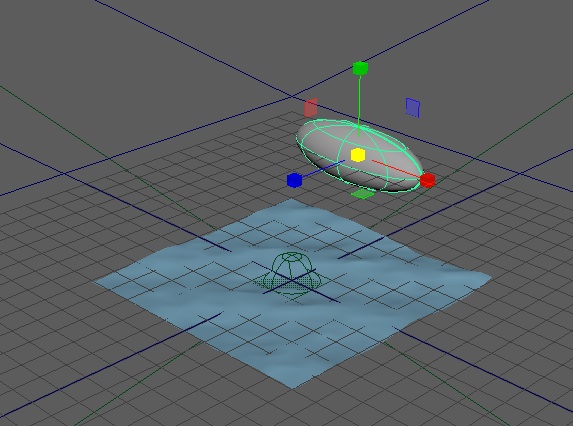
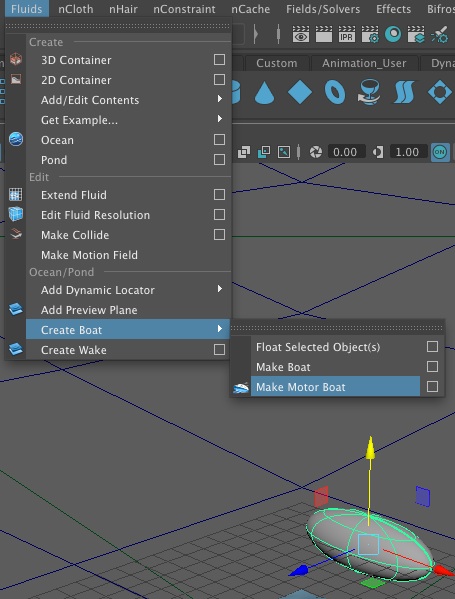
7. Select the ellipsoid, go to Fluids Menu add use the menu sequence "Create Boat/Make Motor Boat" below to create a motor boat.
8. The ocean and motor boat objects are now completed; however, to get the motor boat to move, select the locator object in the window outliner.
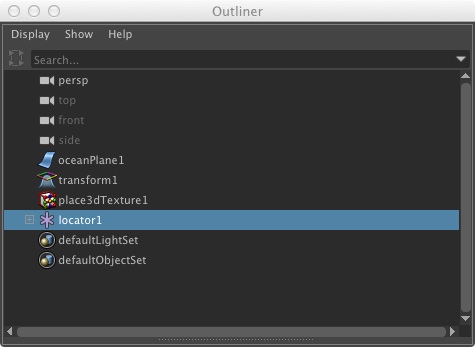
9. Next in the attributes editor for the locator, select the "locatorShape1" tab, expand the "Extra Attributes" tab, and change the "Throttle" (engine power) to 4 and the "Rudder" to 20.

10. Play the animation and let the simulation handle the movement of the boat. Note that "Env Sky" creates the background sky, but lighting is defaulted and is not actually set into place by the specific position of the "Elevation" to 70 and the "Azimuth" to 155.
11. To complete the scene, add a type "directional" light from the "render" tab, which is the second one from the left-hand side.
![]()
18. With the "directional" light selected, go to the menu sequence "Windows/Modifier/ShowManipulatorTool" and adjust both the position of the light and its target to the orientation desired. Note that a direction light provides a kind of distant light source that is approaximated at any one location by sending parallel light rays to the ground such as would be the case with sunlight.
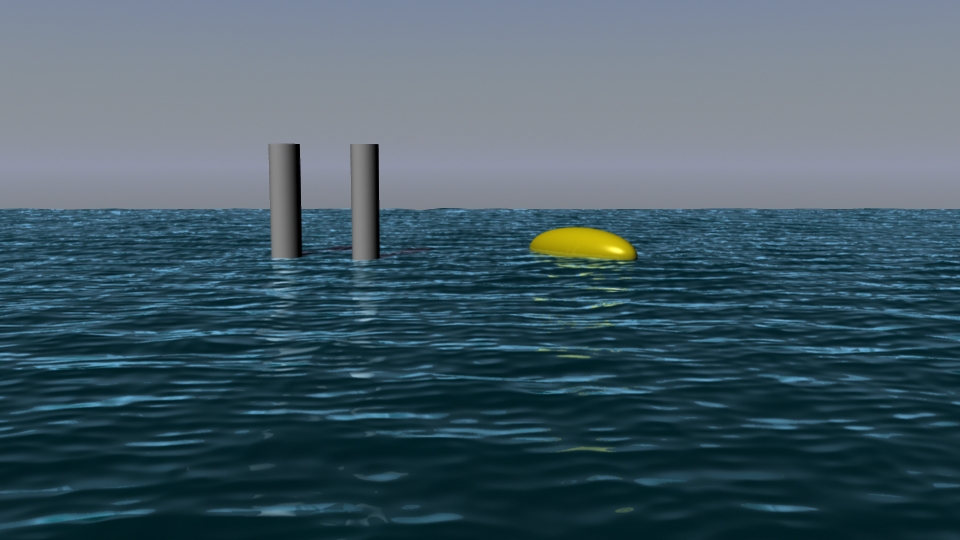
12. Adding some additional objects and Maya Software shaders, we get a dynamic environment similar to the original animation above.
13. One more option to try: Create a wake for the boat.
Select the boat and then select Fluids > Create Wake and choose the check-box open the dialog box.
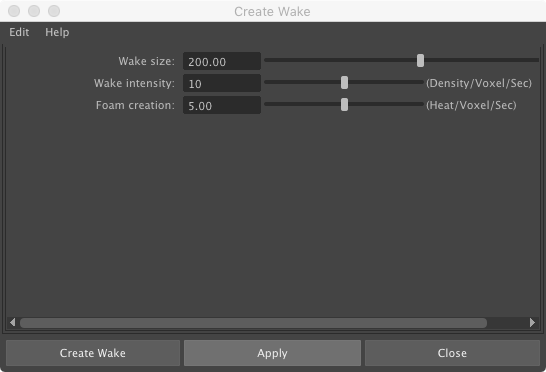
Select the OceanWakeEmitter1 associated with the boat. Open the Fluid Emission Turbulance Tab. Set the value of Wake size to 200 to increase the geographical wake area to where the boat moves, set Wake intensity to 10 to increase the size of the wake, and Foam creation to 5 to create sea foam. Once created, parent the wake to the boat (i.e, select the wake and shift-select the boat and then type the letter "p").