COMPUTER
AIDED
ARCHITECTURAL DESIGN
Workshop 14 Notes,
Week of November 18 , 2019
This set of workshop notes describes a V-Ray Grasshopper based animation of the Sun using the Ladybug (download web site) plugin the Grasshopper. It's a companion to the Honeybee (download web site) ; however, for the present just the Ladybug software is needed. The web sites referenced here for Honeybee and Ladybug contain extensive information about the simulation software that lies at the core of these two plugins. Here, we are examining some relatively straightforward cases of sunlight animation with tools that allow you to determine a specific time internal, latitude and longitude. The intent is not to cover the full setup and scope of these technologies direclty, but to provide a predetemined Grasshopper File into which you you can more easily add geometry and quicly launch the simulation. The setup below in Part I bypasses a deeper explanation of Ladybug. A partial explanation is given in Part I to give some sense of how the components are used.
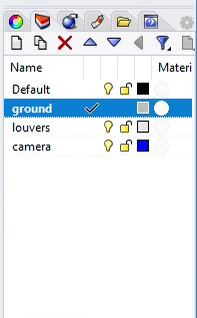
1. Open a Rhino file and create layers for "ground", "louver" and "camera" with colors middle-gray, light-gray, and blue respectively. Also, hange the active "Render' option to V-Ray via the menu sequence "Render/Current Renderer/V-Ray for Rhino".

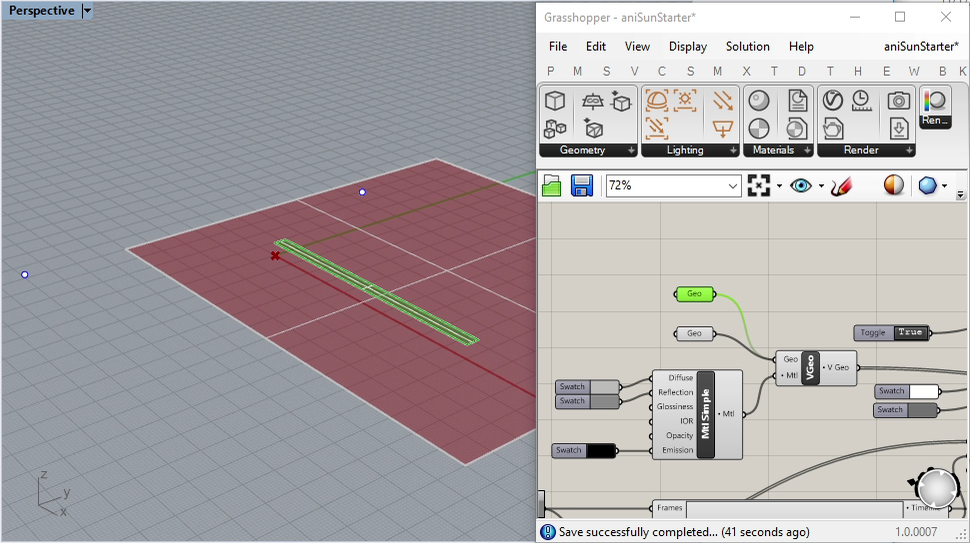
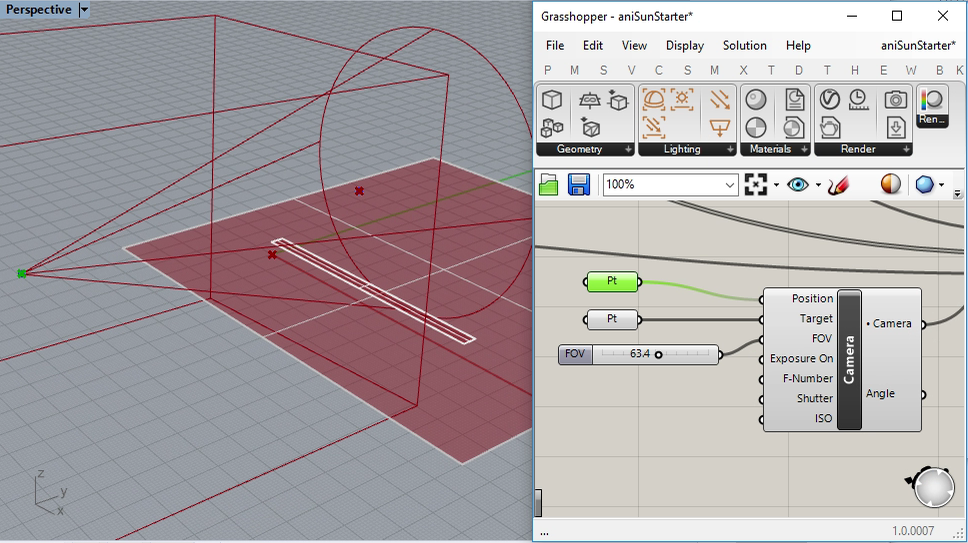
2. Next, create a ground surface, a single horizontal louver (a horizontal rectangular surface sitting above the ground) and two points representing the camera position and the camera target position.
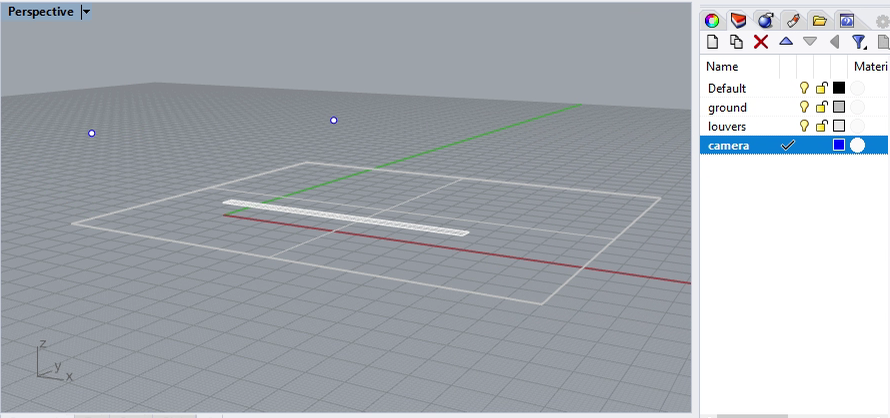
3. We begin with a pre-set setup of Grasshopper Components selected from Ladybug, Honeybee and V-Ray plugins to Grasshopper. Note again that these plugins are arleady installed on the School's computer systems, but need to be installed on personal computers. Here, download the setup file "aniSunStarter.gh" from the "Classes" class server under the subfolder "examples/SunTest/aniSunStarter.gh" and place it on your computer.
4. Launch the Grasshopper plugin to Rhino and load the "aniSunStarter.gh" file. While there are a great number of components here that have been predetermined, we will begin with modifications to just a few of these (double-click on the image below to see all the conponents at high resolution)
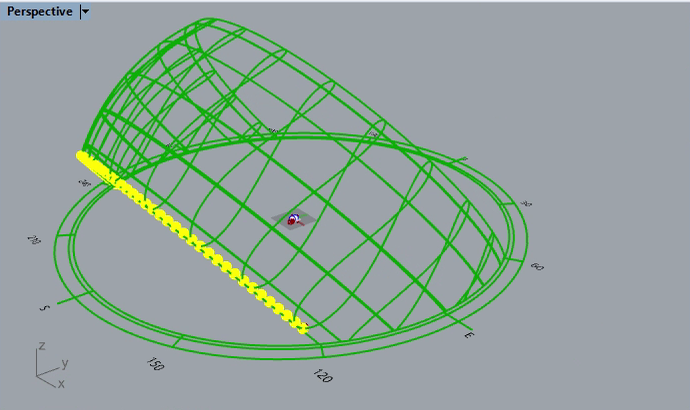
5. Note that the appearance of the Rhino perspective window now shows many of the element we've added, including the Ladybug generates sun path for Charlottesville, Virginia.
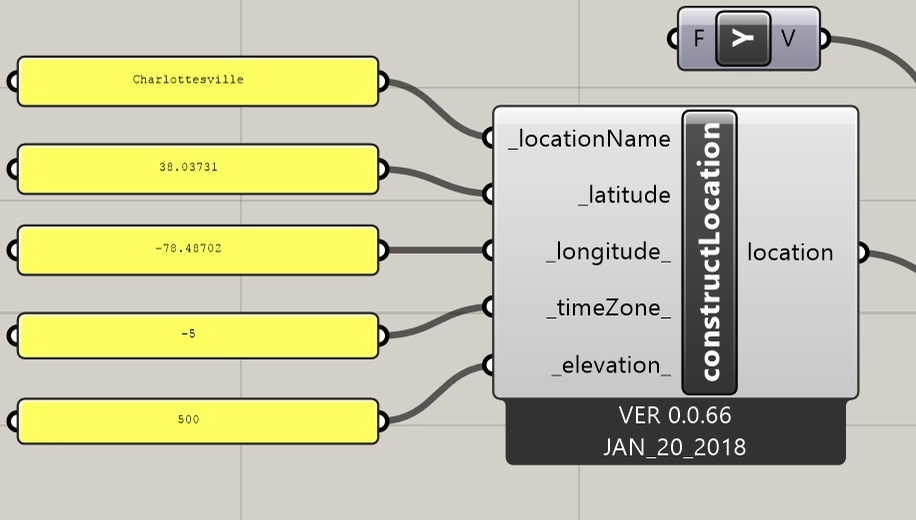
6. Prepositioned within the Grasshopper file on the left-hand side of the canvas window is a "constructLocation component that allows the user to enter data into a text panel to input geographic, GMT time offset, and elevation information. In this example, the data used is for Charlottesville, Virginia at 38.03731 North Latitude, -78.48702 West Latitude, -5 GMT jpir offset, and 500 feet elevation.
7, To the lower left of hte location component in the Grasshoppe canvase window is a default "folderLocation". It's essential to include this component for launching the software behind the sunlight simulation. The details of this component are beyond the scope of this tutorial.
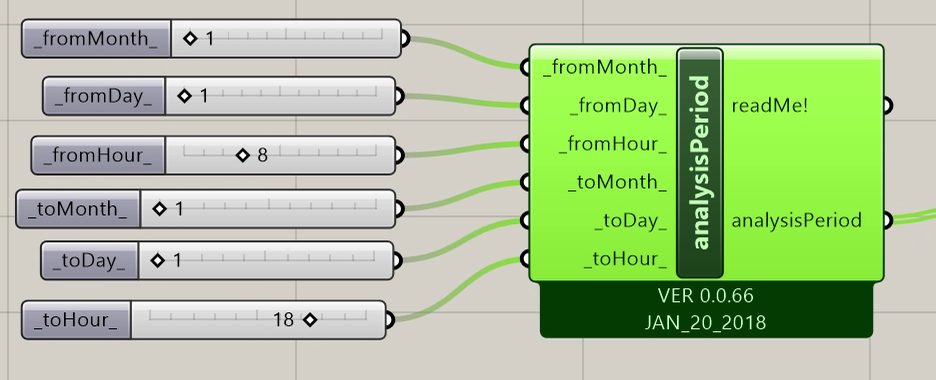
8. Below the location component is the time period specification for the sun study. In this example, the current time frame is from 8 am January 1 to 6 pm January 1 for a single day. The numbers are specified in military time (0 to 24 hours).
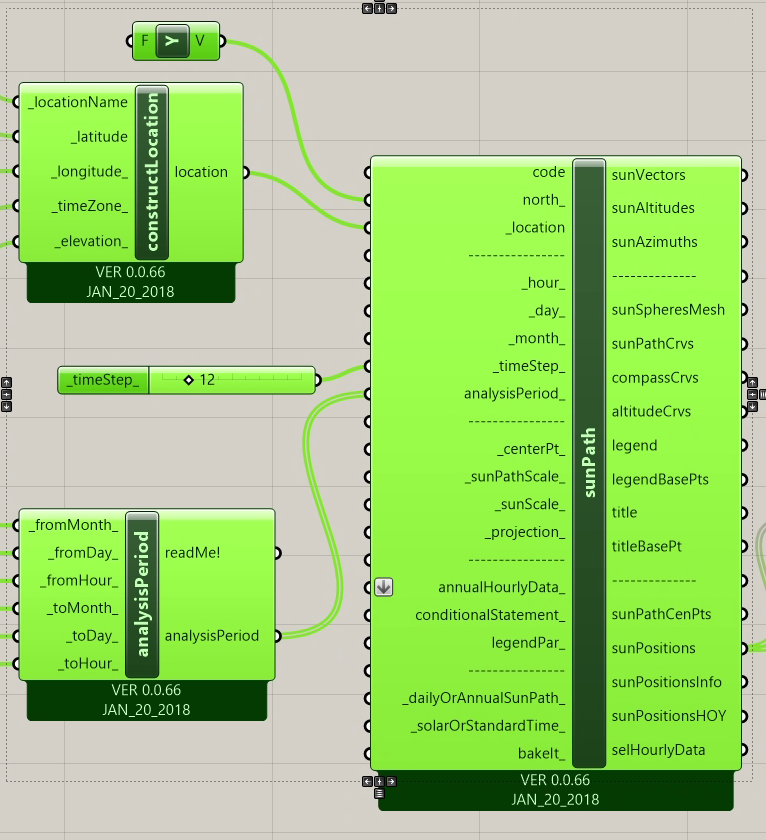
9. The above "constructLocation" and "analysisPeriod" components as well as a '"north_" Unit Y Axis Vector and a "_timeStep_" numerical slider (set to represent 12 animation frames per hour) component in turn comprise the inputs to the sunPath calculator and primary basis for the simulation study.
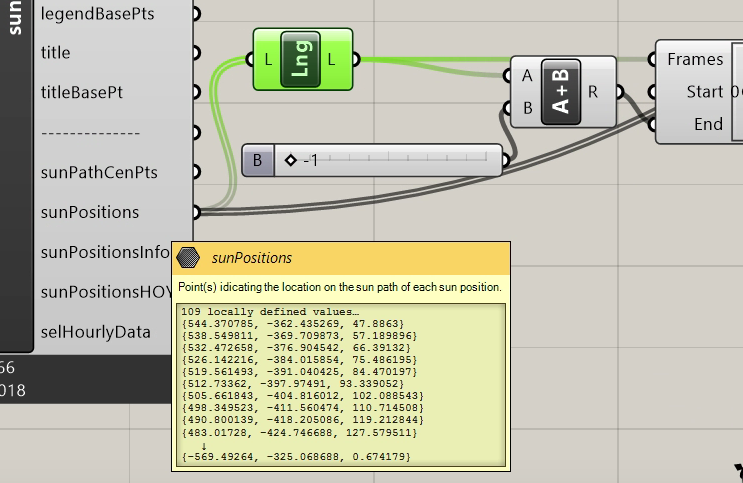
10. The "sunPostions" output port provides a listing of sun 3D point locations in the Rhino model that cover the period of analysis and that are represented by the sun path diagram in the perspective view shown in point 5.0 above.. The sunPostions output port is in turn passed onto to an input list "Lng" component which calculates "L", the length of the list of sunpositions. Thus, value of "L" is also equal to the number of frames needed to capture all the positions the sun movement and therefore it is passed onto the "Frames" niput port of the V-Ray time component. However, the numerical naming of the frames starts at the number 0 rather than the number 1 due to a 0 based naming convention (e.g., testRender.0000.jp, testRender.0001.jpg, ... testRender000n.jpg where n = L - 1) . Thus, the final frame is number is equal to L - 1. Therefore the math component " A + B" is used add L to -1 to to get the end frame number input into the "End" dataport for the frame slider. For example, an animaiton of four frames would be numbered testRender.0000.jpg, testRender.0001.jpg, testRender.0002.jpg, testRender.0003.jpg), and so for an animation of four fames the value of "End" is 3.
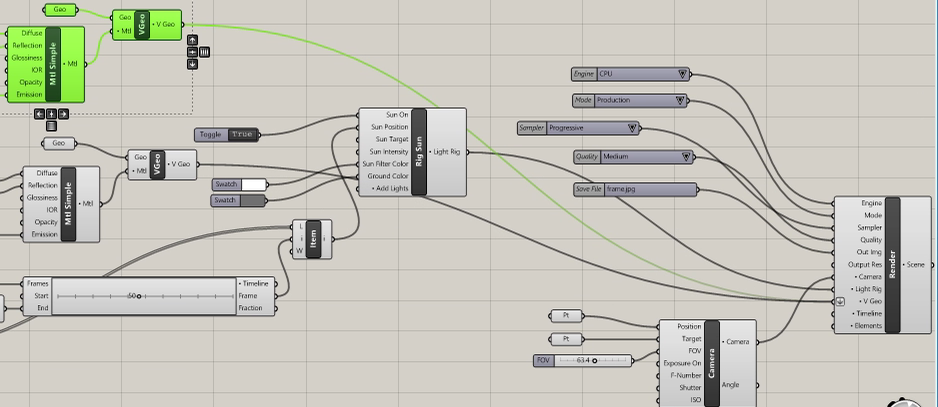
11. In the next part of the Grasshopper sequence, th sun positions are passed one at at time to the V-Ray Rig Sun component. The details of this method are beyond the scope of this tutorial. However, it may be useful to know that the "Item" component in the illustration blow uses the current Frame number to pick one sun position at a time our of listing of sun positions, and then passes each sun position one at atime to the V-Ray Sun Rig component in order to produce an animation frame rendering one at a time.
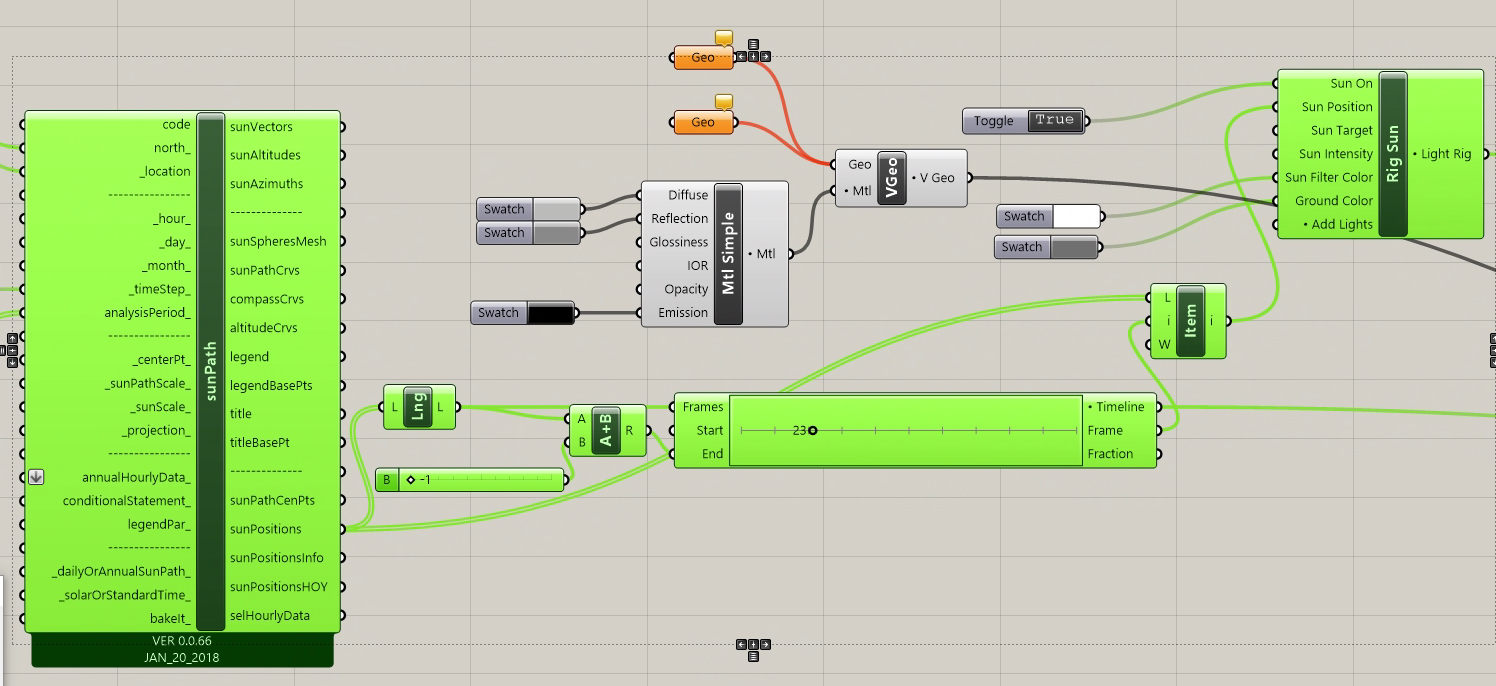
The additional components in the Grasshopper file will be examined below.
1. We begin by connecting the upper Geo grasshopper component in the canvas window to the louver surface and the lower Geo component in the canvass window ground surface in Rhino.
2. Similarly, connect the the upper Pt component to the Camera Postion and the lower Pt component to the Camera Target. It may be necessary to adjust these points in Rhino if the camera view doesn't capture the geometry you are are interested in when rendering the model in V-Ray.
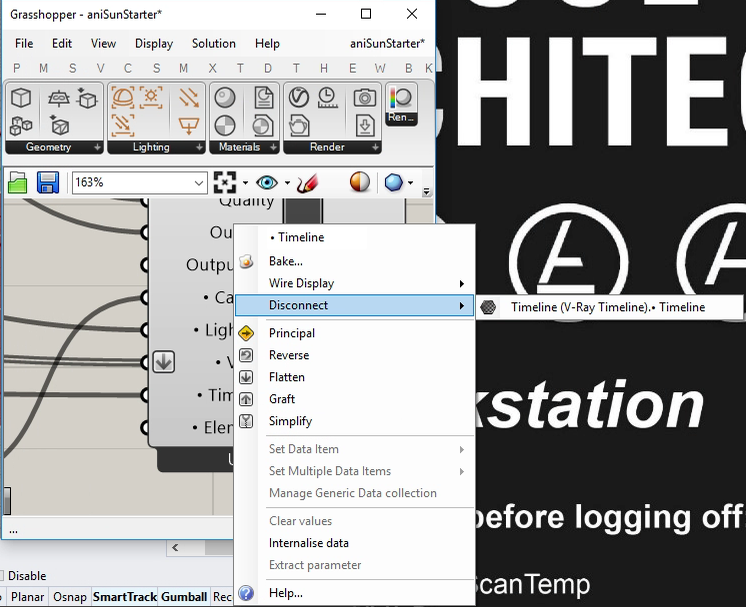
3. Zoom up on the V-Ray rendering component, right-click on the "Timeline" input port and disconnect it so as to render a single frame rather than the full animation.
4. Within the canvas window, adjust the existing V-Ray timeline frame slider about to about half way thorugh the frame number sequence. This will correspond to about mid-way through the sunrise to sunset animnation.

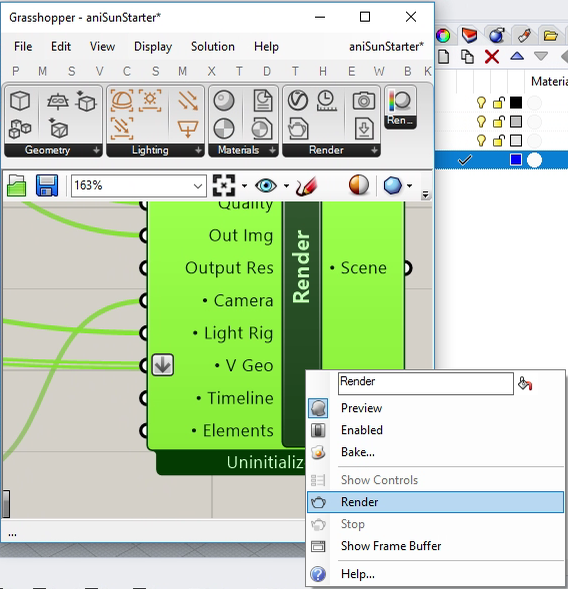
10/ Right-click on the V-Ray rendering component and select the "Render" option.
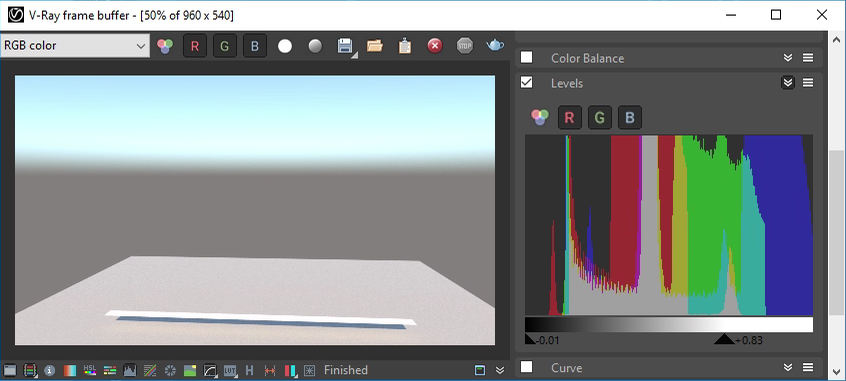
5. Turn on and adjust the "Levels" for the result in the V-Ray frame buffer as done in previous workshops. Note that due to the angle of the sun and position of the louver relative to the camera view, the louver itself may blend into the ground plane surface and only its shadow visible.
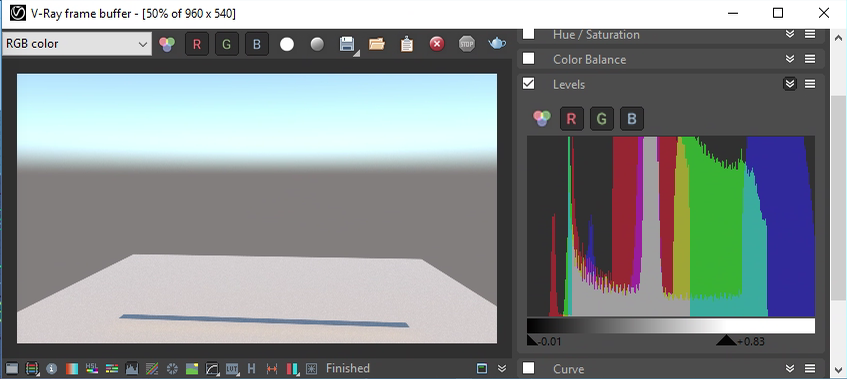
6. This can be corrected by duplicating (copying and pasting) the pre-defined material in the canvas window, changing the duplicate's color to darker shade of gray, and then assigning to a new Grasshopper geometry component for the louvre.
6a Select and copy the components with the "ctrl c" keyboard combination.
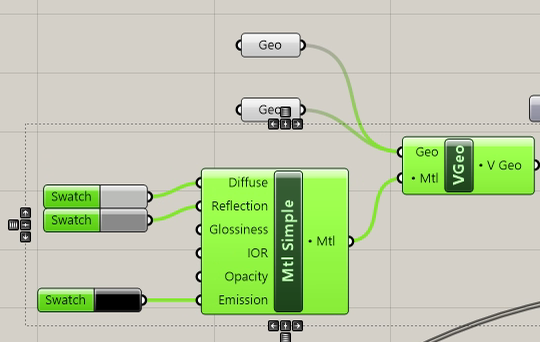
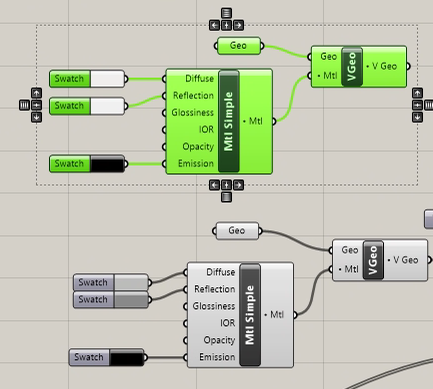
6b Paste the components back into the canvas window with and change the swatch color of the new component to a lighter color value for both the "Diffuse" and "Reflection" color.
 .
.
6c Add the separated VGeo component to the "Geo" imput port of the V-Ray Render component.
6d Re-rendering makes the louver component more visible against its shadow..
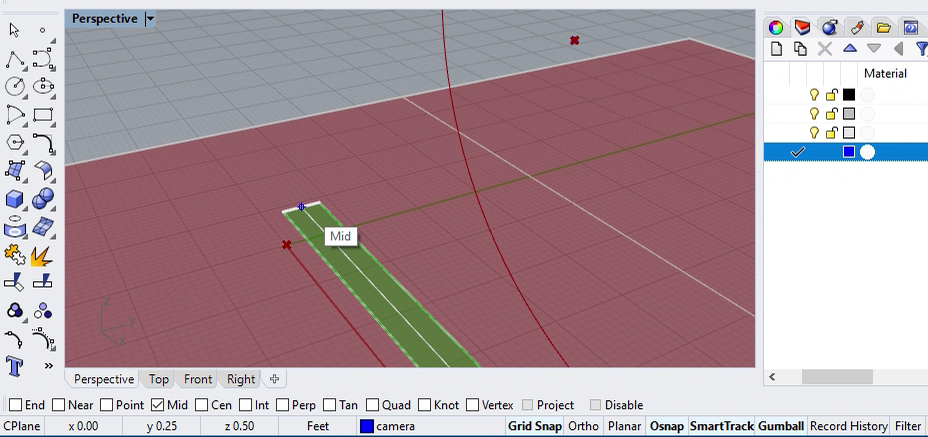
7. Within Rhino add an Point component at the center of the left-hand side of the louver using the "mid" Osnap option . This will server as the louver's origin.
8. Inside Grasshopper, generate a series of louvers 0.5 units apart with the assistance of the "array" component. This involves the addition of a Unit-Z Vector from the Vector tab within Grasshopper, a number slider from 0.0 to 1.0, and math mulitplication component, and the "Linear Array" component from the "Trans" tab within Grasshopper, as used in previous workshops. The components are connected as depicted in the image below, where the "Unit-Z" vector is multipled by by the number slider at the value of "0.5" to produce the vector "0, 0, 0.5" which in turn is connected to the "D" (direction) input port of the "ArrLinear" component. The "Geo" component of the single louver" is connect to the "ArrayLinear" input "G' component'. Note there the number "N" of copies in the array is set to it's dafault value of "10" (the port "N" is not connected to an alternative number. Also note that the louver origin point we added in the previous step is not yet used at this stage.
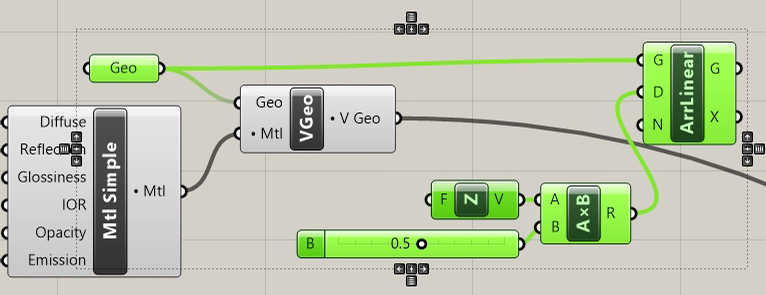
9. Rearrange and reconnect the louver related components so that the output port "G" of the "AriLinear" component replaces the original single louver in the "Geo" input port of the"VGeo" component. In the image below, the sequential logic of connections is more clearly visible.

10. Render in V-Ray and note that the 10 louvers and their shadows are now visible.
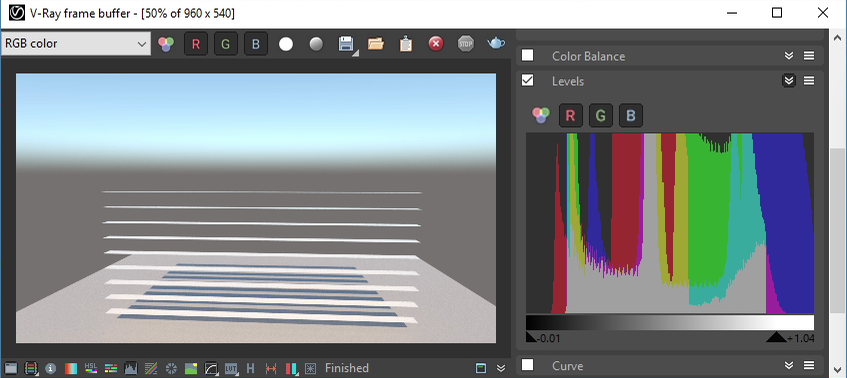
11. Reposition the Camera position and target points inside Rhino so that the louvers and their shadows are visible from the side.
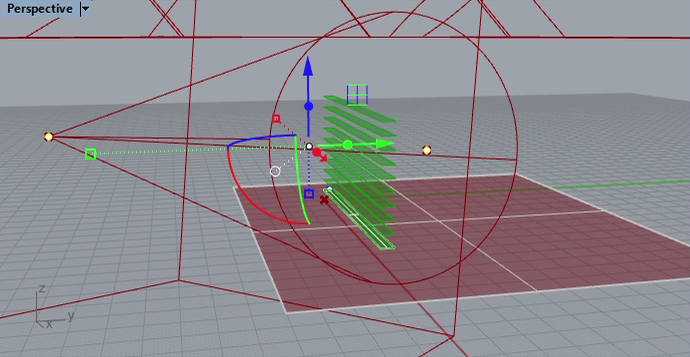
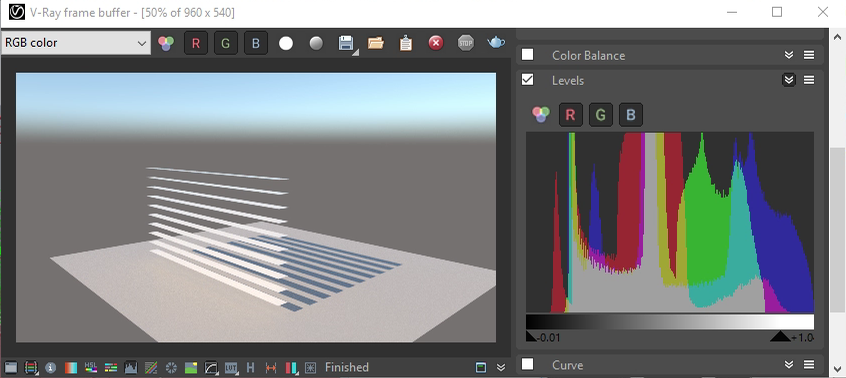
12. Render the view to check on the result of the new camera position.
13, Reconnect the timeline to the V-Ray Render Component.
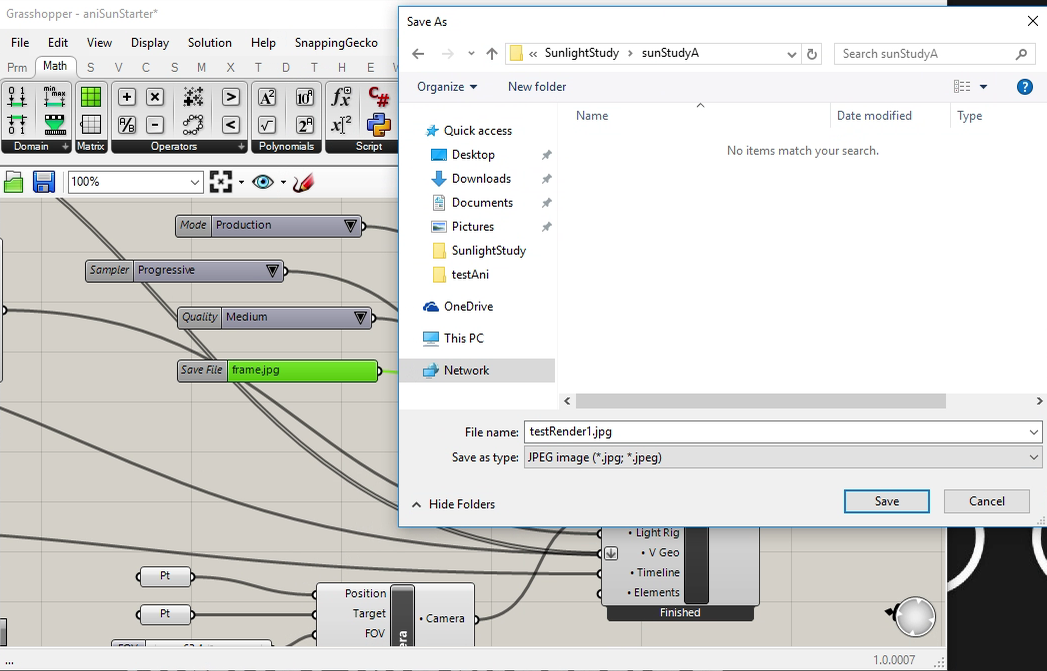
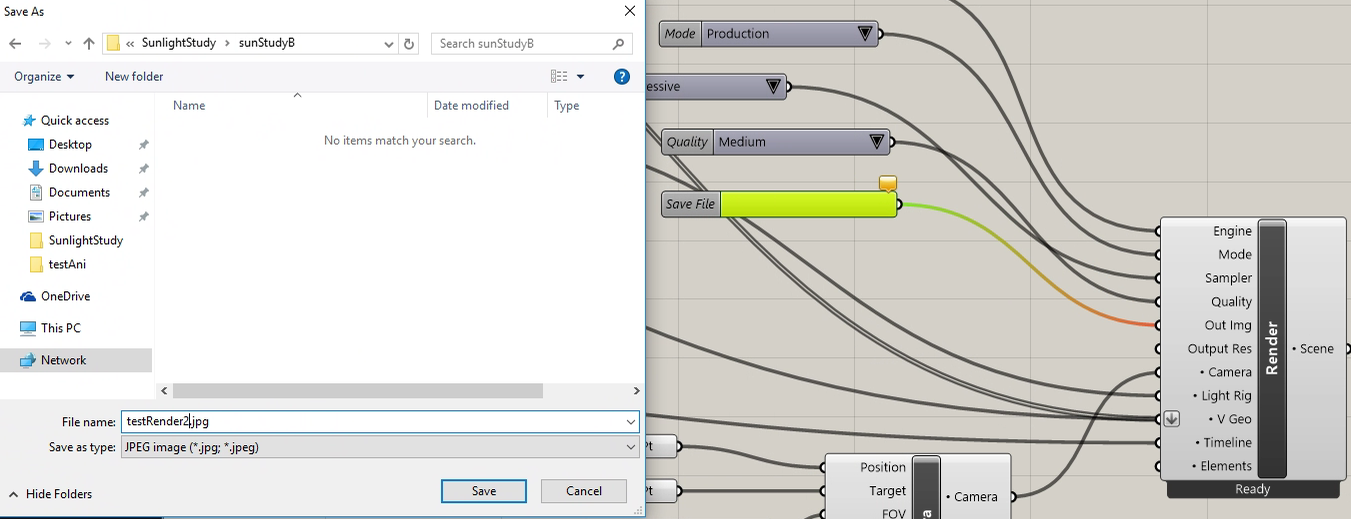
14. Double-click on the "Save File" input port to th V-Ray rendering componet, and establish file folder for recording the animation frames and then the place a "jpg" file type rendered series of frames inside the folder as was done in the previous workshop.
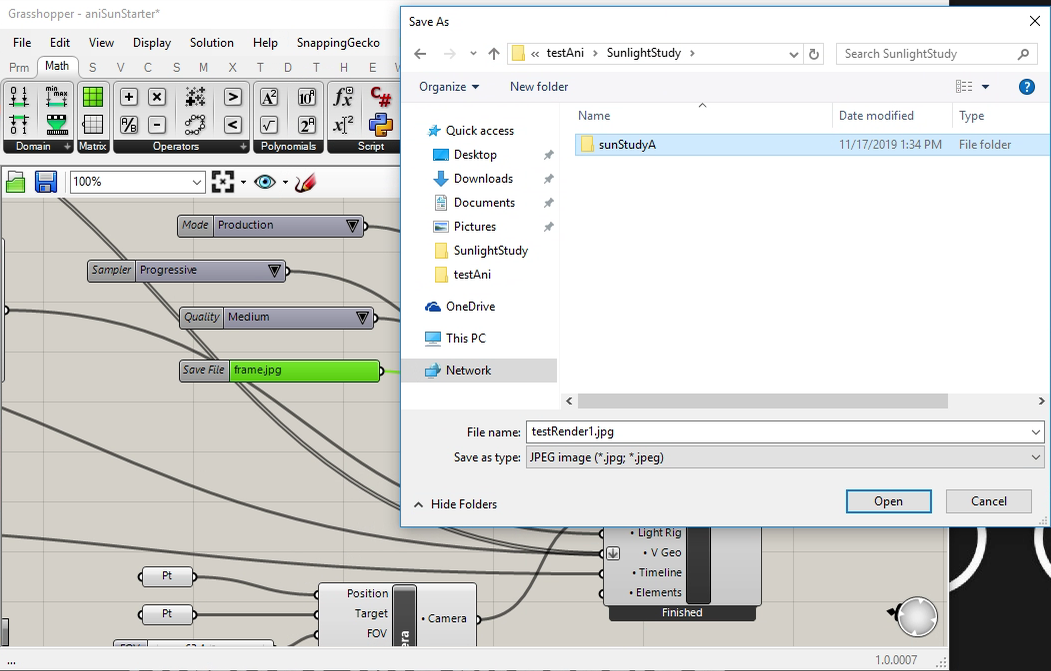
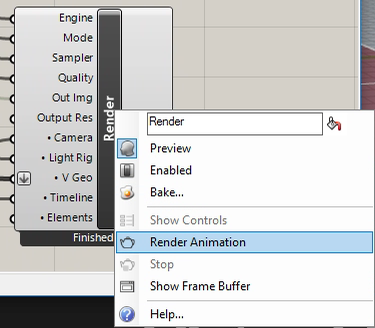
15, Right-click on the V-Ray Render componet and render the full sun aimation sequence.
16, The animation results in the sunlight moving and shadows changing accordingly.
In this variation of the sun study, the sun position is set to mid-day and the louvers do not move.
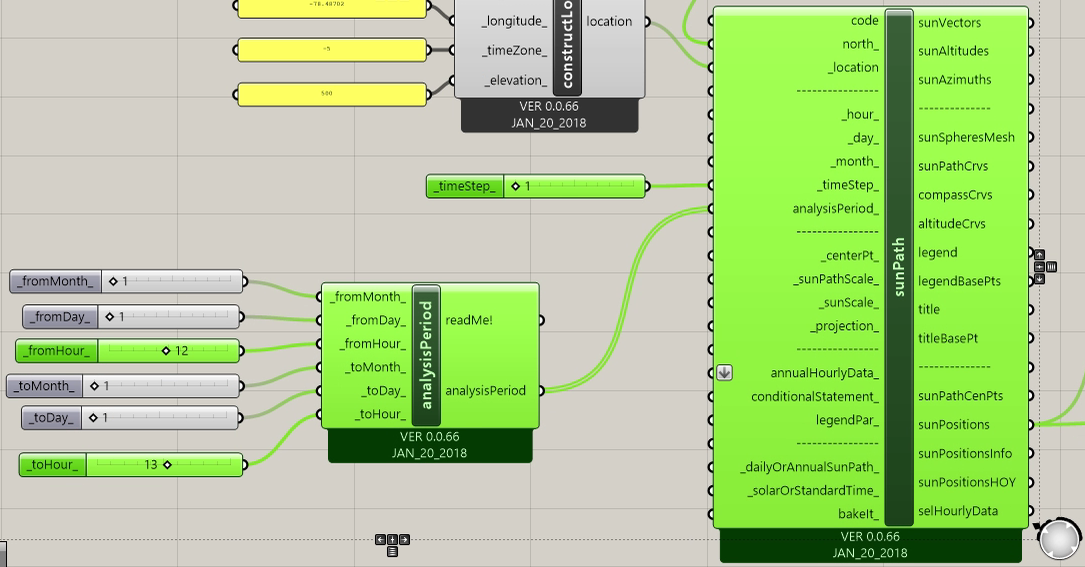
1. In the inputs to the Ladybug SunPath component, set the "_fromHour_" to 12, the "_toHour_" to 13, and the "_timeStep_" to 1.
2. Add a Grasshopper "Pnt" component adjacent to the "Geo" component for the single louver and connected it to the louvre origin created in part II.

3. Next from the Vector tab or Grasshopper, add a Unit-X Vector component to the canvas window to determine the axis of rotation for the louver.

4. From the grasshopper "Trns" tab, add a Rotate around center point and axis vector component to the right of Geo, Pt, and Unit X Vector components,
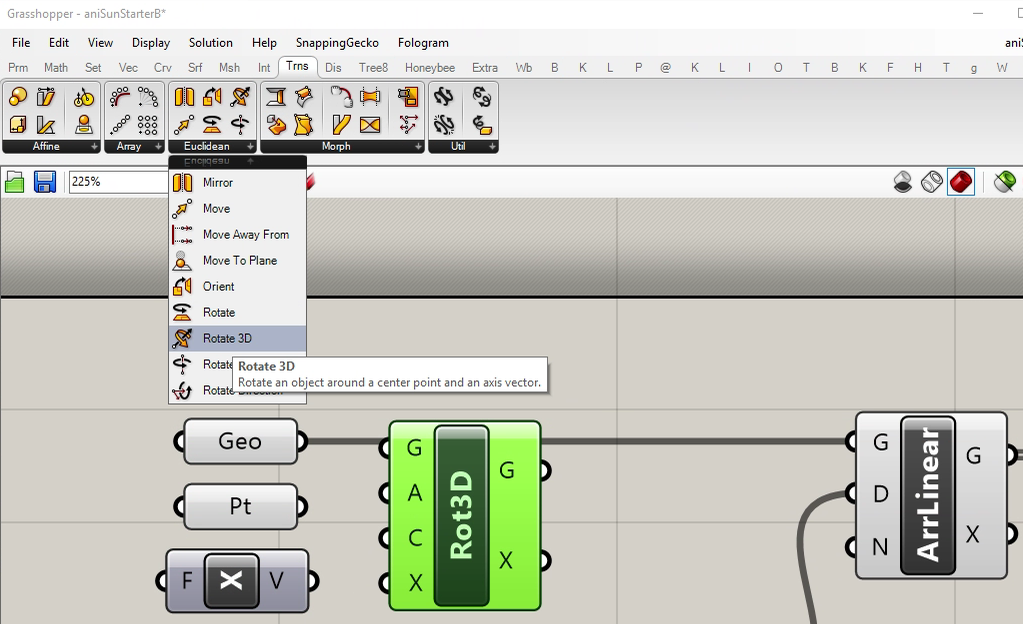
4. Reconstruct this part of the Grasshopper canvase window such that the Geo component output port is connected to the "G" input component of the Rot3D component, the "G" output component of the Rot3D component is connected to the "G" input component of the ArrLinear component, the Pt output component is connected to the "C" input component of the Rot3D component, and the "V" ouput port of the Unit X Vector component is connected to the "X" inport component of the Rot3D component. This leaves open the "A" (angle of rotation) input compenent of the "Rot3d" component. However, the default value of "A" is "0.5 * Pi and the louvers are rotated 90 degrees.

5. The fraction output port of the V-Ray timeline component goes from 0.0 to 1.0 corresponding to corresponding the progress through the animation sequence. Therefore, to rotate the louvers from 0 to 360 degrees, it's possible mulitply the fraction output by Pi. First, from the Grasshopper Math tab add a scripting component to the right of the V-Ray timline component.
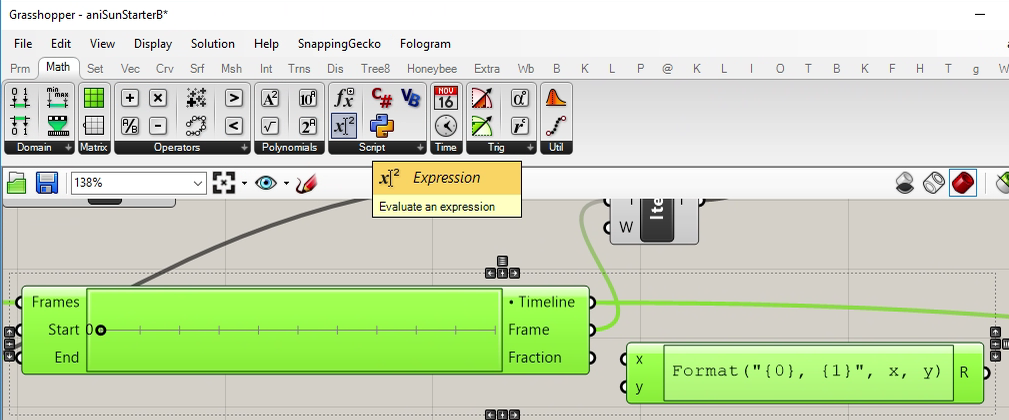
6. Remove the variable "y" from the scripting component and add change the name variable "x" to the name of "fraction". Next. Connect the output "Fraction" of the timeline to the input variable "Fraction" of the scripting component.

7. Double-click on the script component to edit it and remove the expression inside, and then select the Pi symbol from the set of constat symbols availble in the script editor.
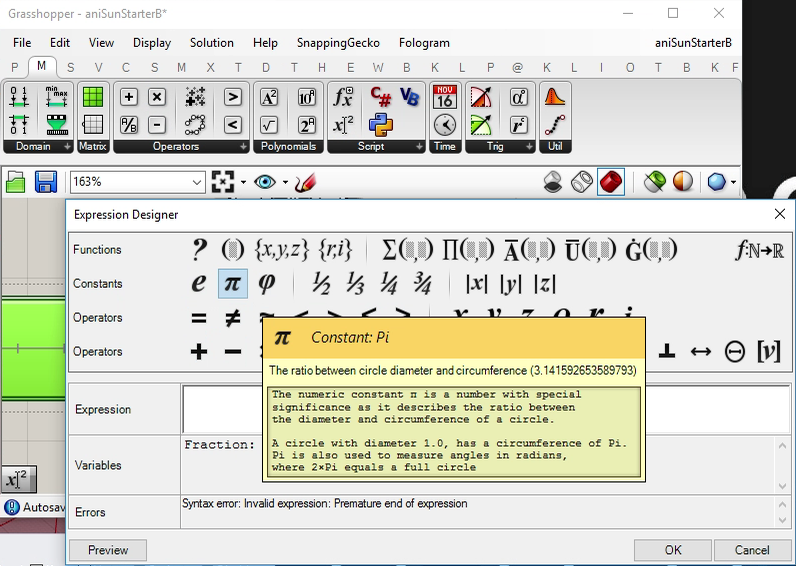
8. Change the expression in the script editor to muliply Fraction by Pi.
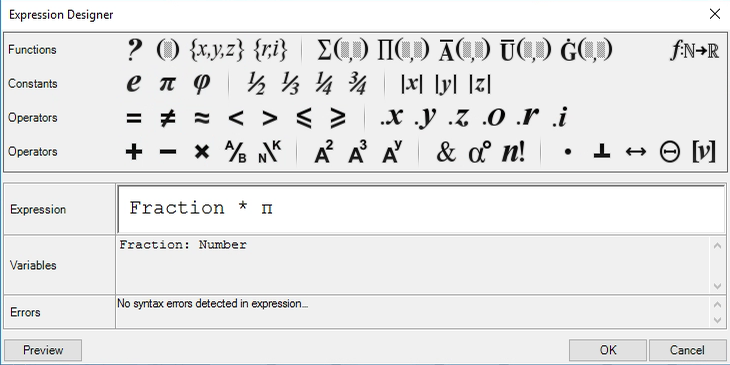
9. Connect the output of the script editor and connect it to the "A" input port of the Rot3D component.
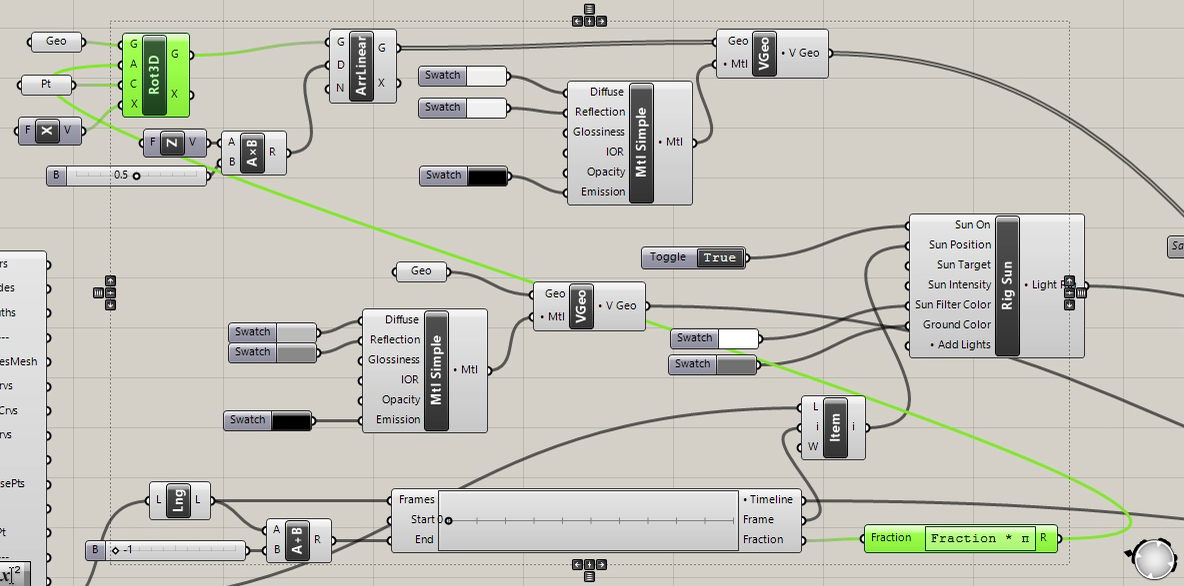
10. Since the timeline is down to a single moment, the Frame count in the time line has been been reduced to a single frame. Therefore, we now need to replace the Frames input with asuficient number of frames to give the louvre a change to rotate. In this case, we replace the existing ouput for the "Lgh" component (lengh of list) input to "Frames" with the numerical slider that goes from 0 to 180.

11. Return to the V-Ray Render component, change the file folder for compiling the frames and rename the file prefix name.
12. Render the animation and review the result. 16, The animation results in the sunlight remaing still and the louvers in rotation.